Release Notes
Installation
Install on Linux
Install on Kubernetes
Pluggable Components
Upgrade
Third-Party Tools
Authentication Integration
Cluster Operations
Quick Start
DevOps
User Guide
Configration Center
Logging
Developer Guide
API Documentation
Troubleshooting
FAQ
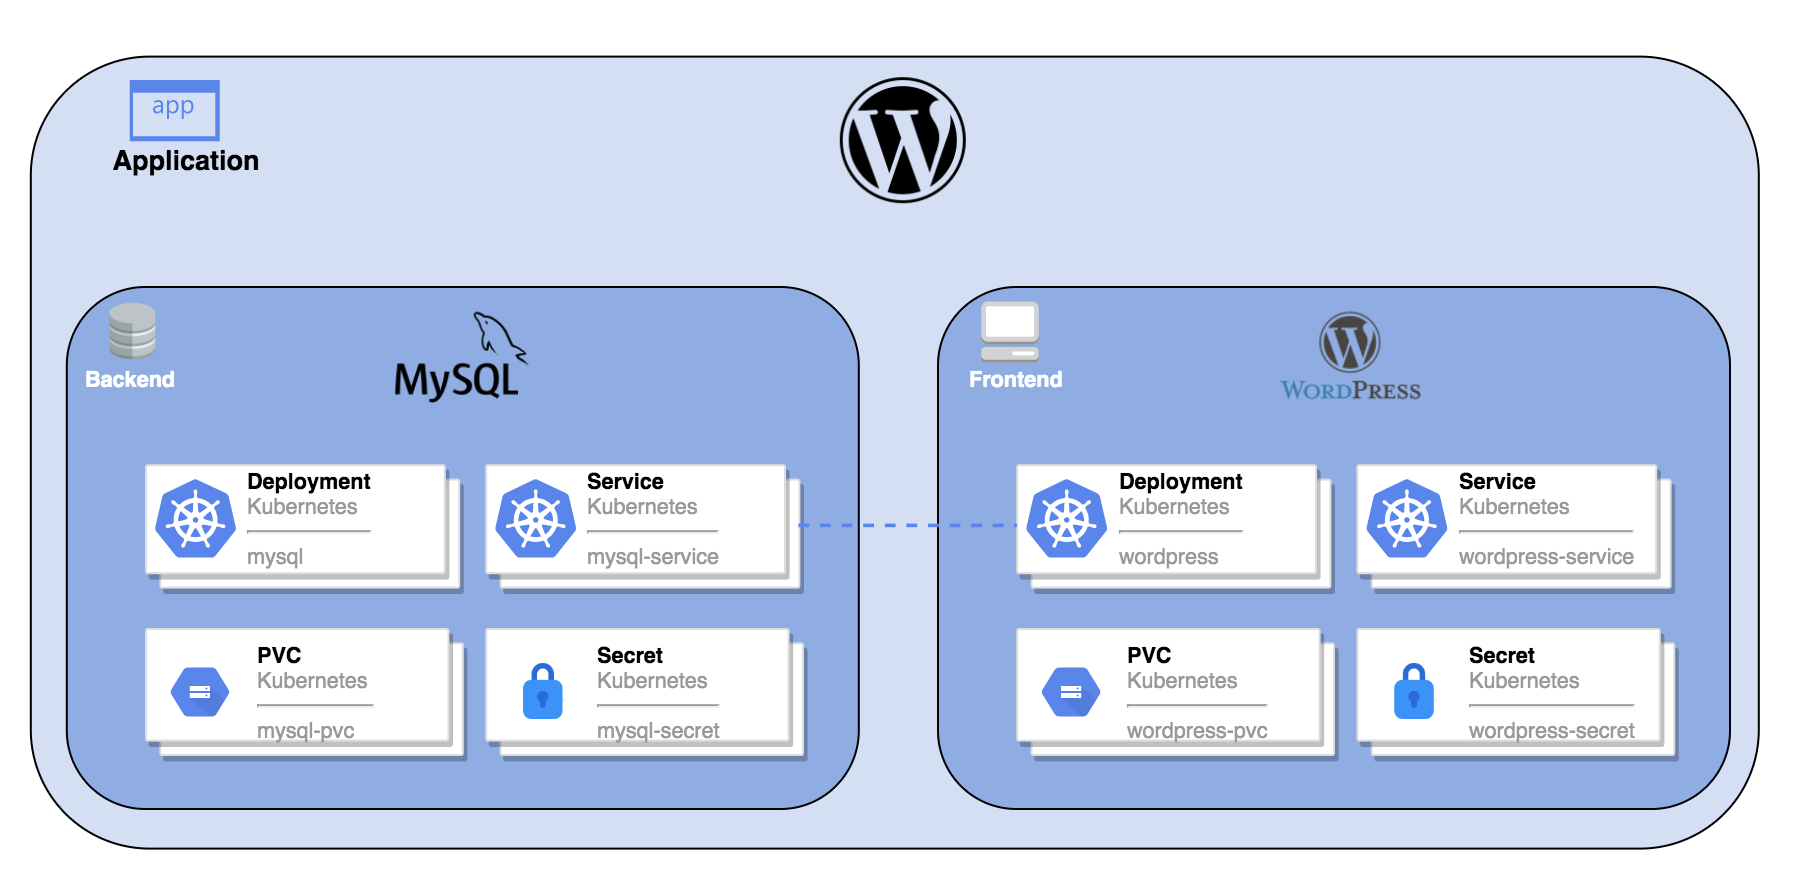
Publish WordPress App to Kubernetes
EditWordPress Introduction
WordPress is an online, open source website creation tool written in PHP, with a back-end MySQL database and a front-end component. We can deploy WordPress to Kubernetes using Kubernetes object resources.
Objective
In this tutorial we will create a WordPress application as an example, demonstrating how to deploy application with multiple components to Kubernetes through KubeSphere console.
Estimated Time
About 15 minutes
Hands-on Lab
Step 1: Create Secrets
Create a MySQL Secret
The environment variable WORDPRESS_DB_PASSWORD is the password to connect the database in WordPress. In this step, we create a ConfigMap to store the environment variable that is used in MySQL Pod template.
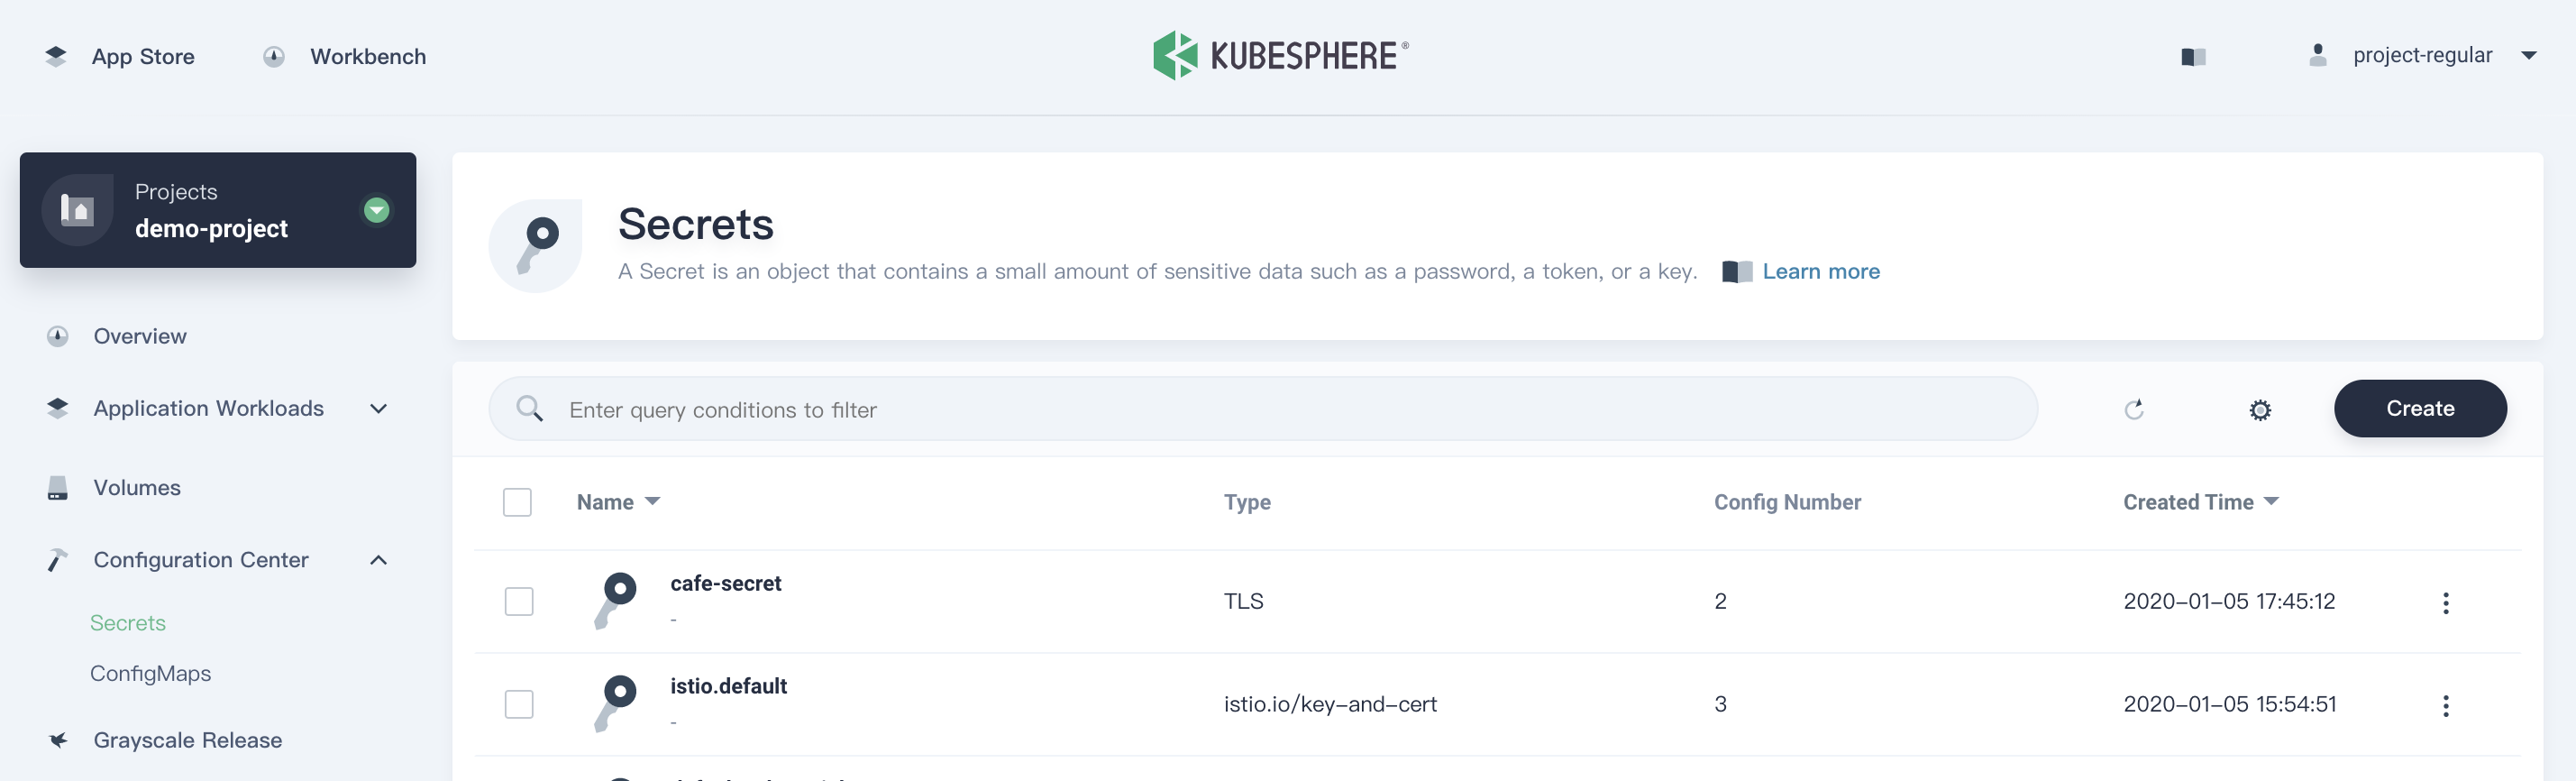
1.1 Log in KubeSphere console using the account project-regular. Enter demo-project, navigate to Configuration Center → Secrets, then click Create.
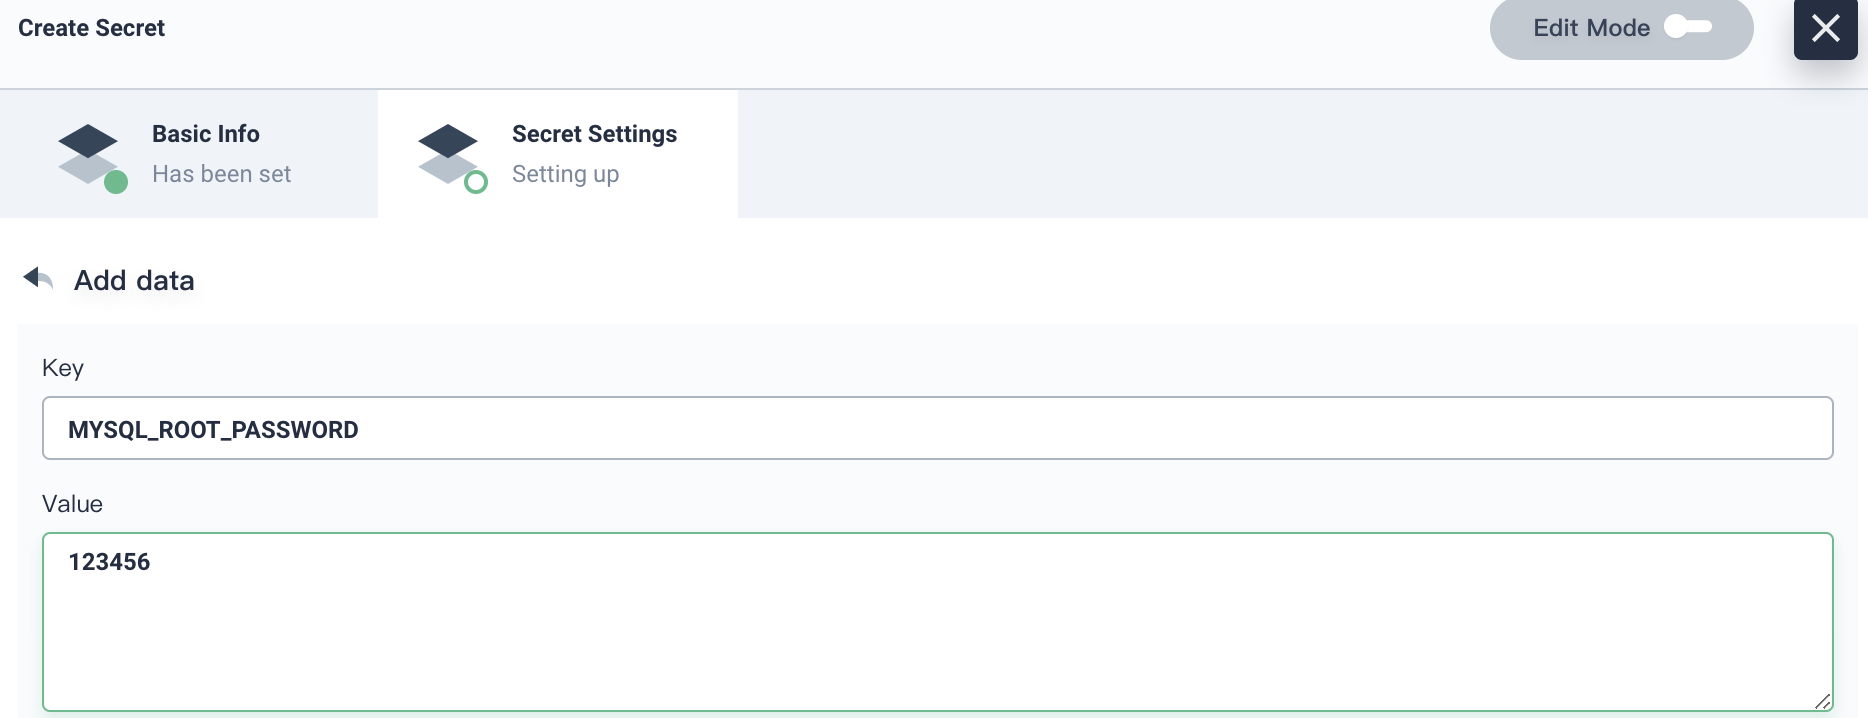
1.2. Fill in the basic information, e.g. name it mysql-secret, then click Next. Click Add data and fill in the secret settings as shown in the following screenshot, save it and click Create.
- Key:
MYSQL_ROOT_PASSWORD - Value:
123456
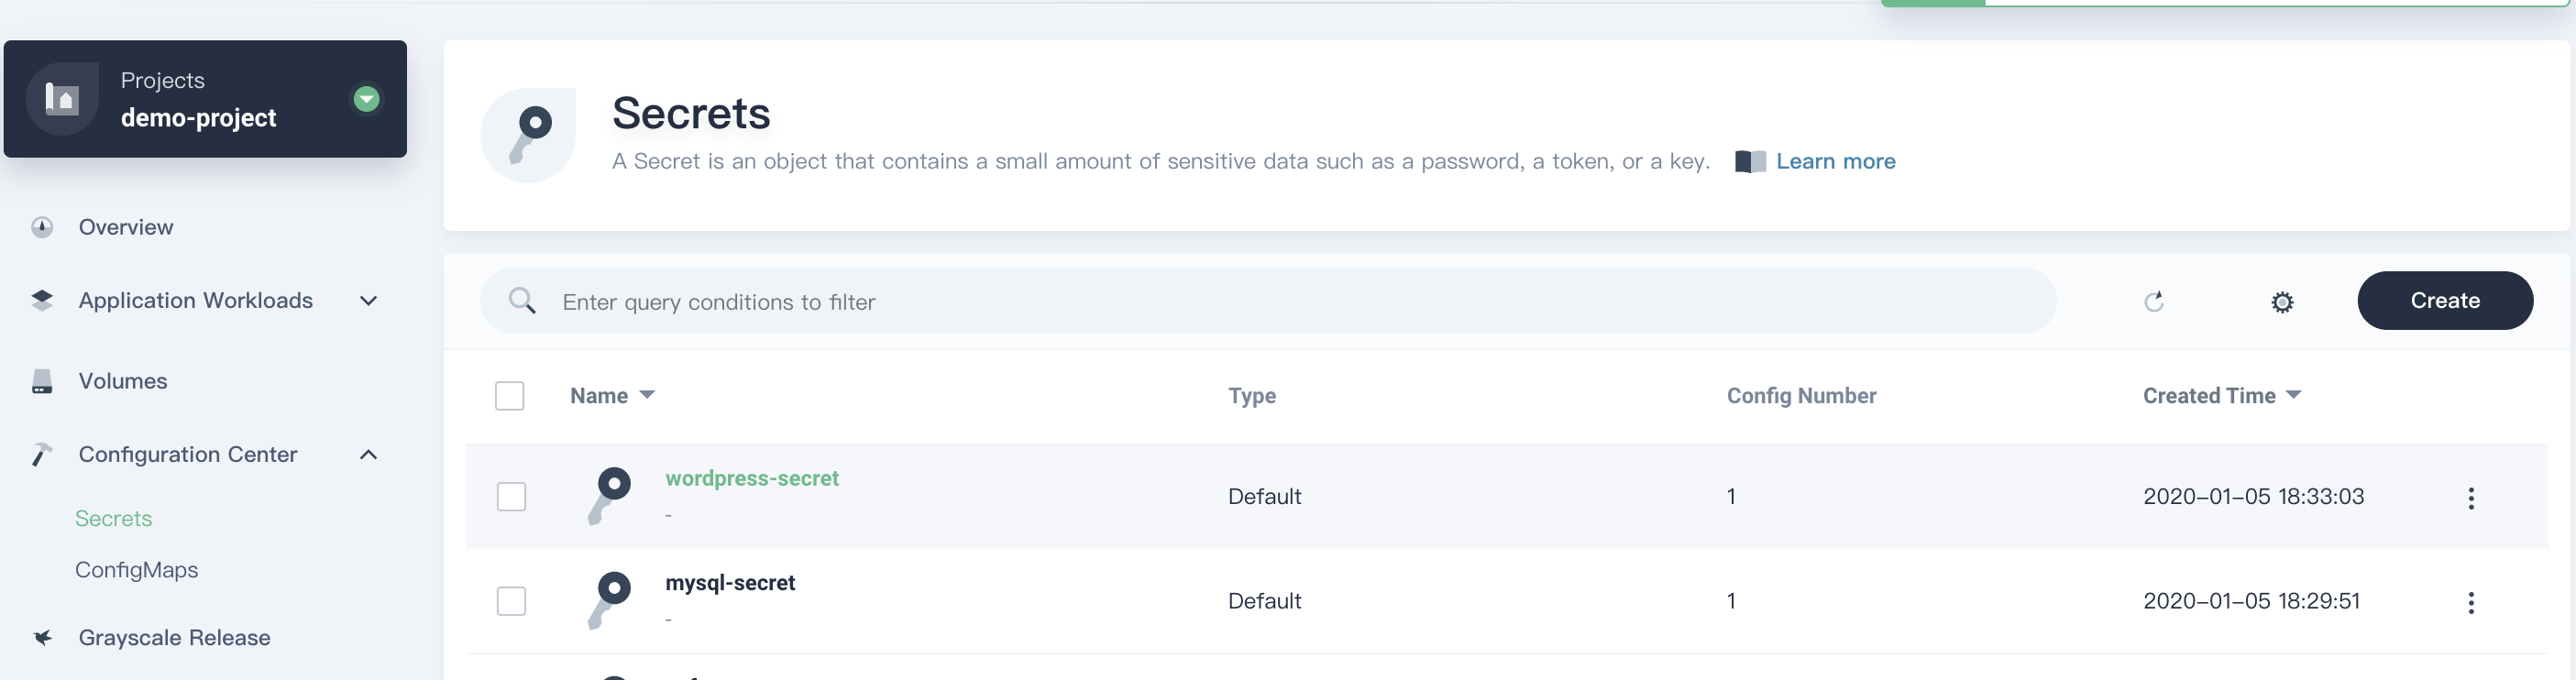
Create a WordPress Secret
Same steps as above, create a WordPress secret wordpress-secret with Key WORDPRESS_DB_PASSWORD and Data 123456.
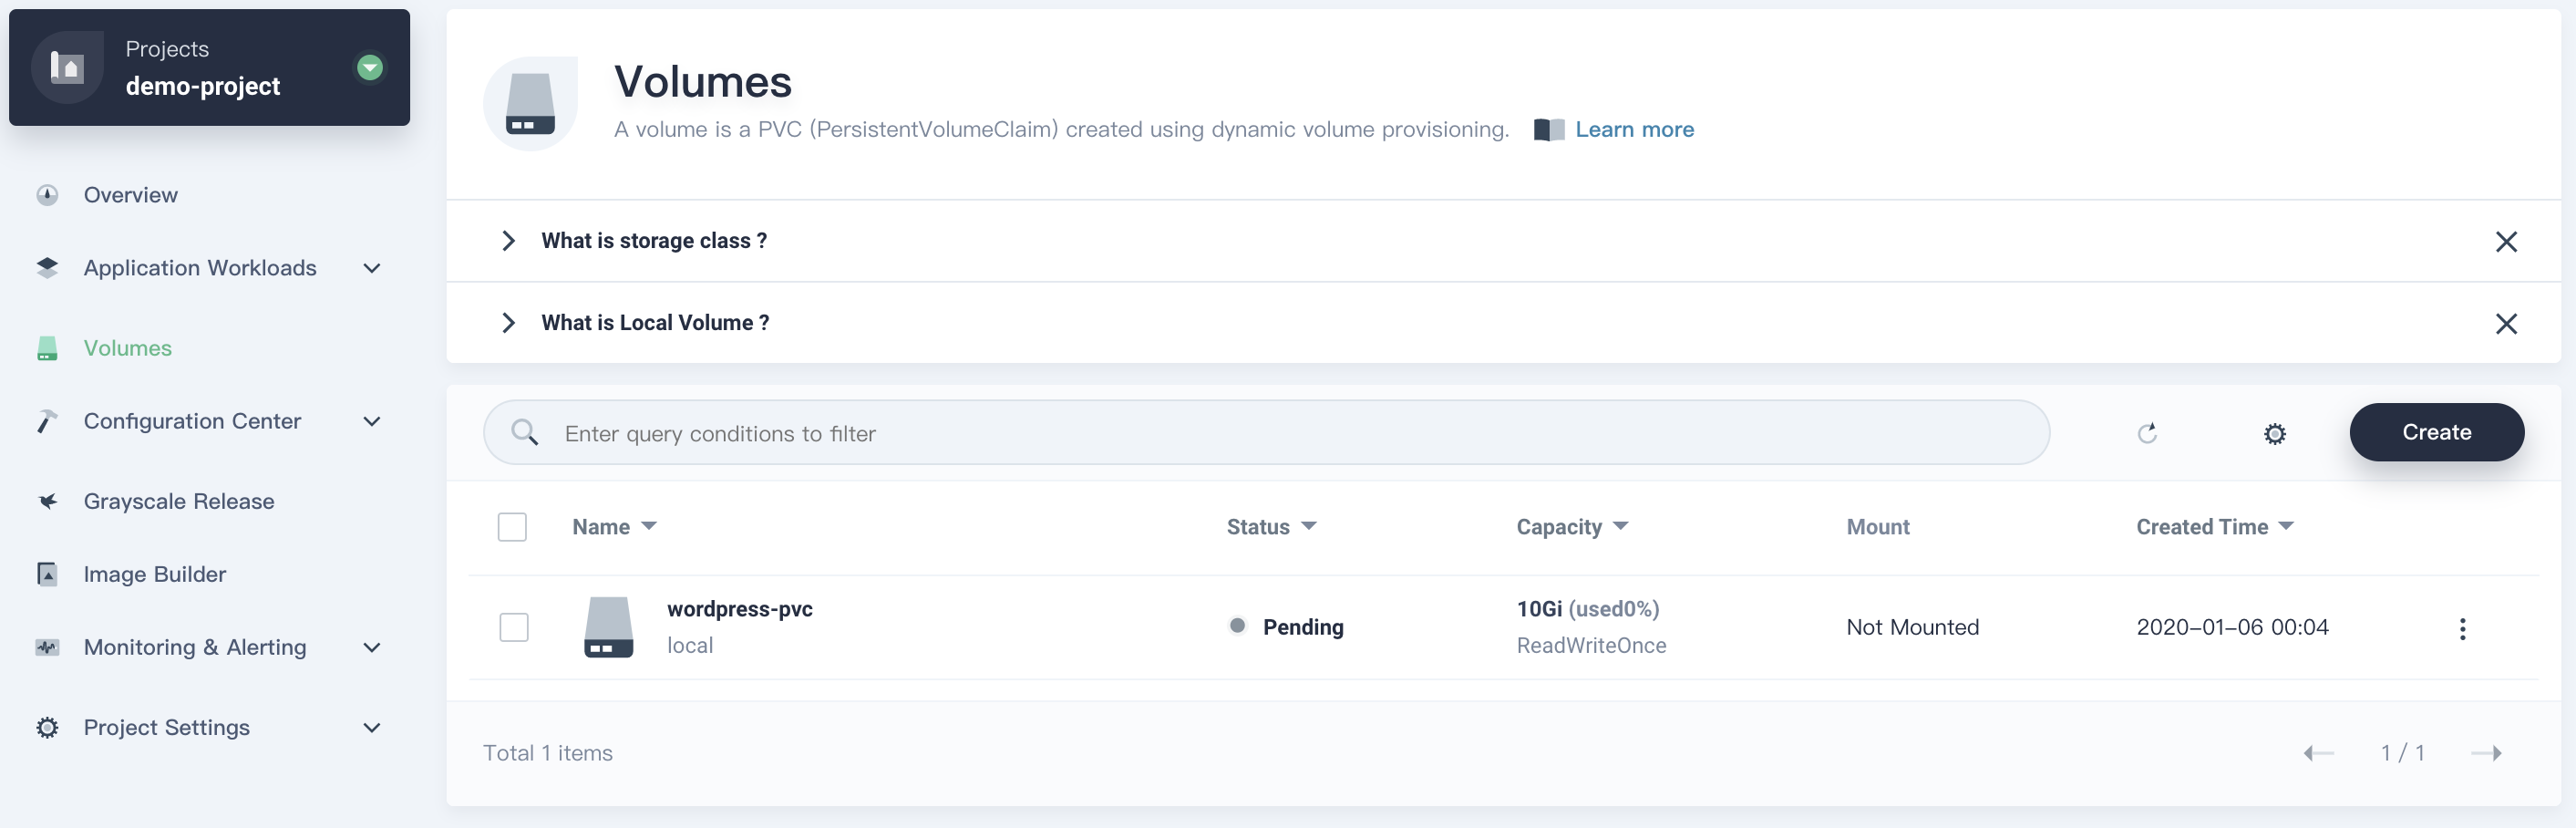
Step 2: Create a Volume
Choose Volumes and click Create, name it wordpress-pvc, click Next to Volume Settings where you need to choose an available Storage Class, ReadWriteOnce of access mode and 10G of storage size. Click Next to Advanced Settings. No configuration is for this page, so click Create to finish volume creation.
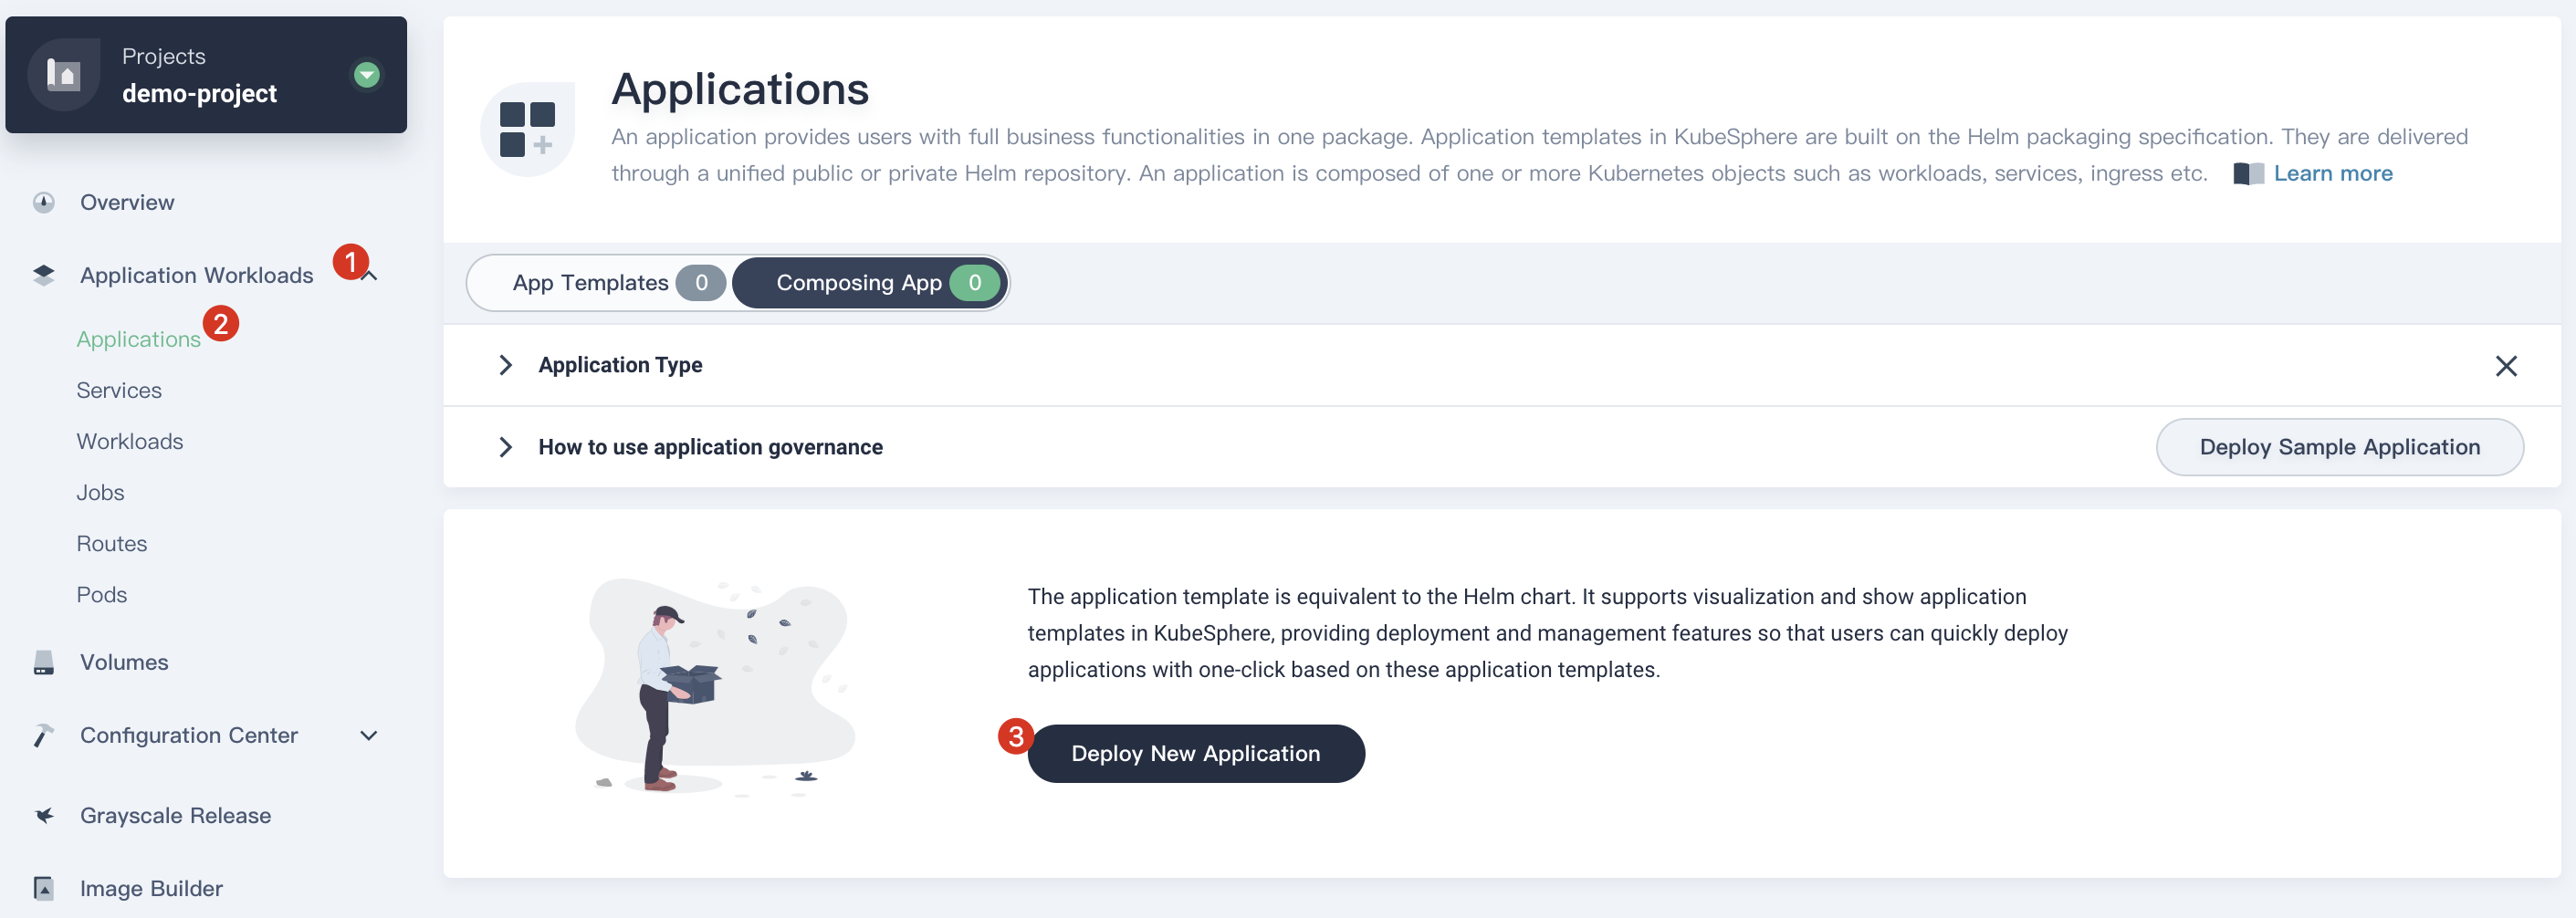
Step 3: Create an Application
Add MySQL back-end component
In this step, we will choose the way of composing app to create a complete microservice app.
3.1. Select Application Workloads → Applications → Deploy New Application, and choose Composing App.
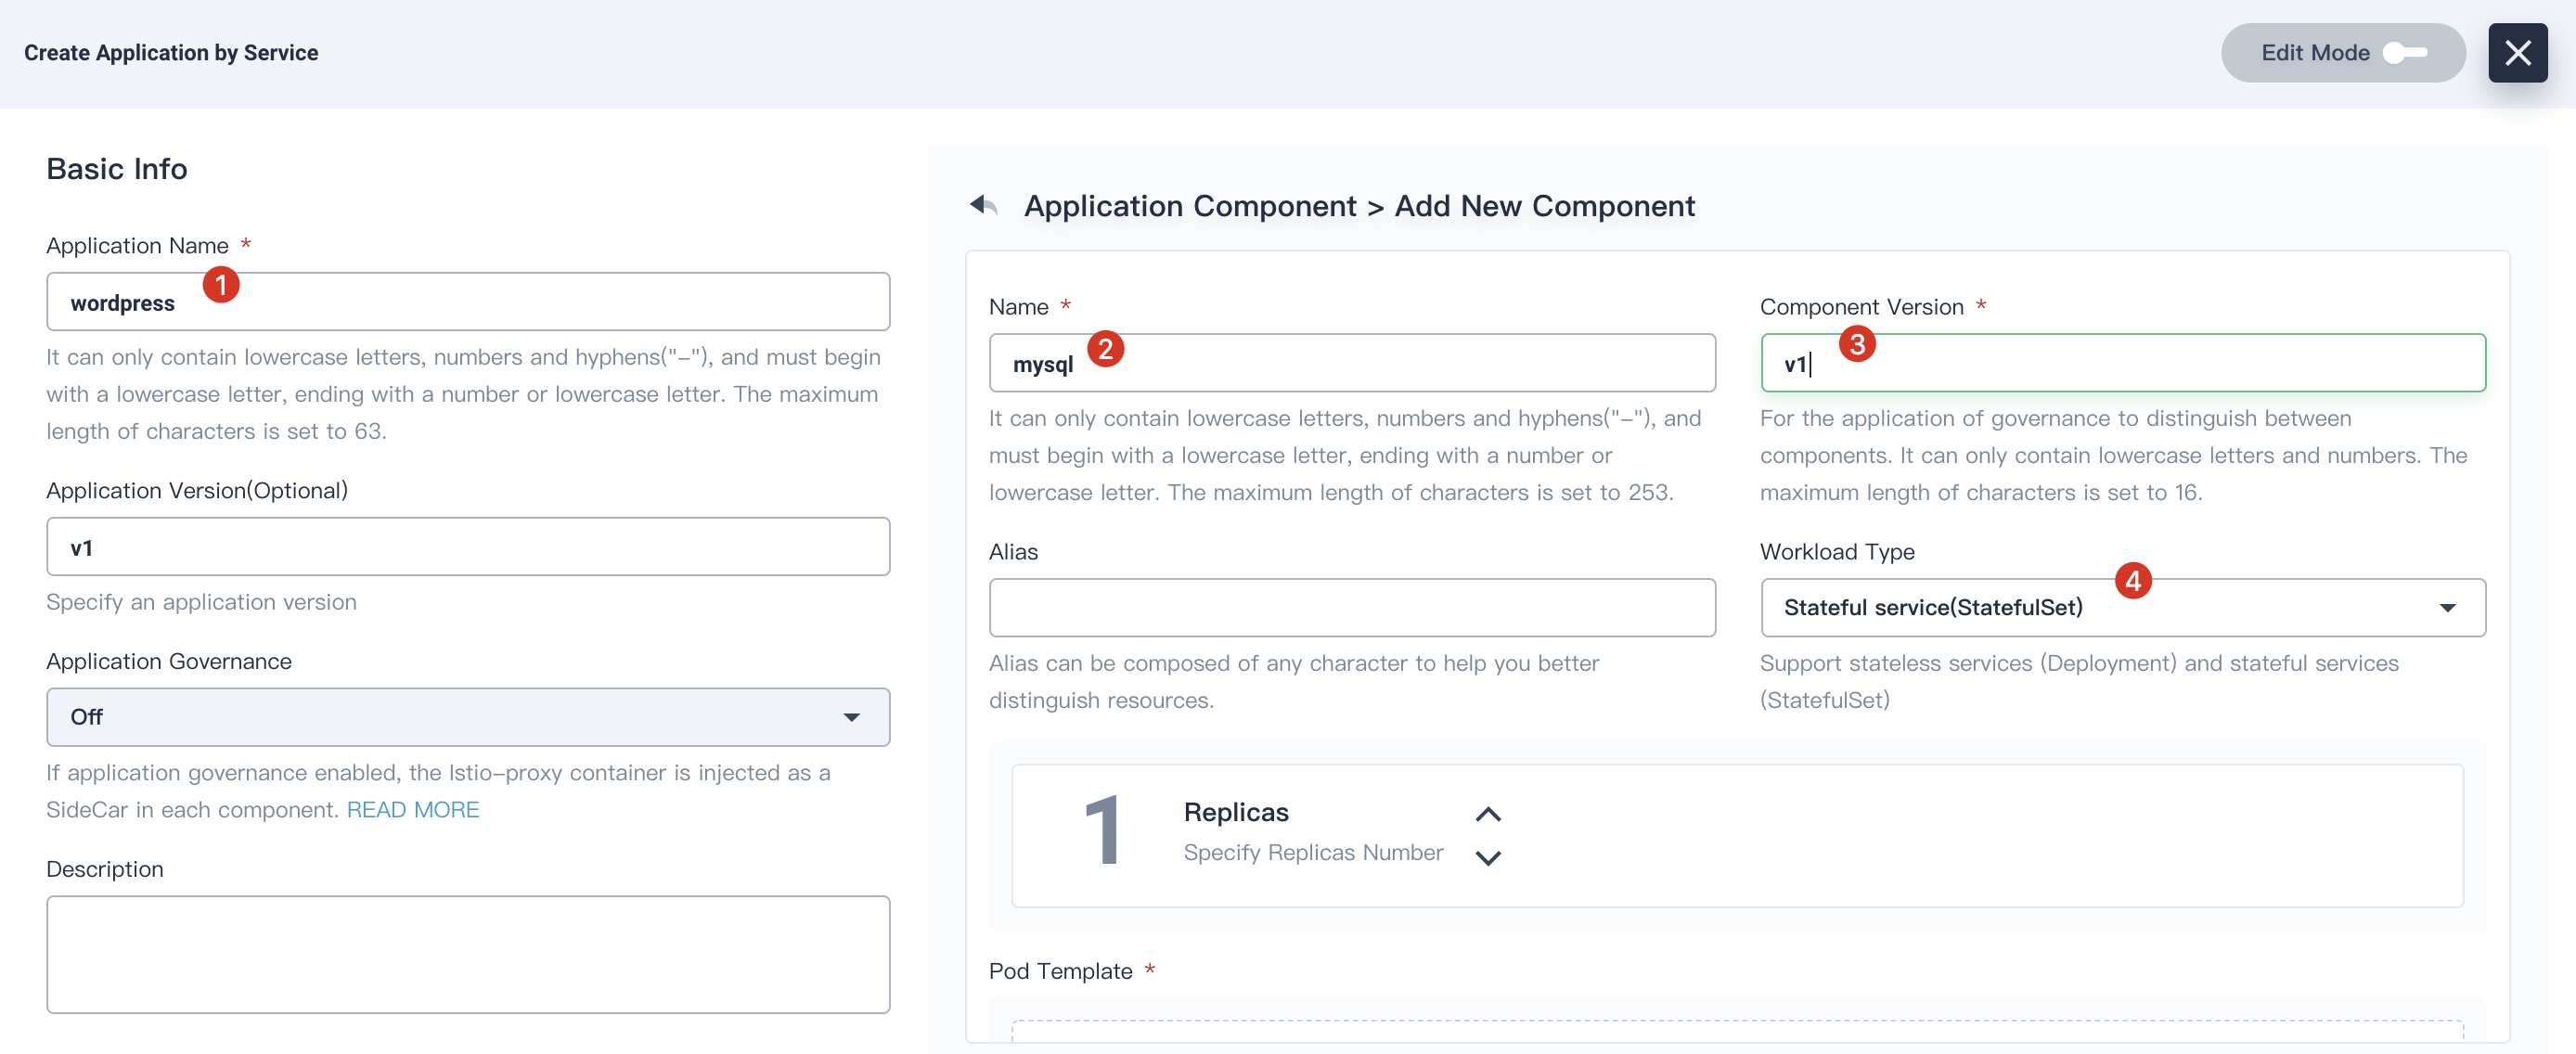
3.2. Fill in the pop-up table as follows:
- Application Name:
wordpress - Then click Add Component
- Name:
mysql - Component Version:
v1 - Workload Type: Stateful service (StatefulSet)
3.3. Scroll down and click Add Container Image, enter mysql:5.6 into the Image edit box, press the return key and click Use Default Ports.

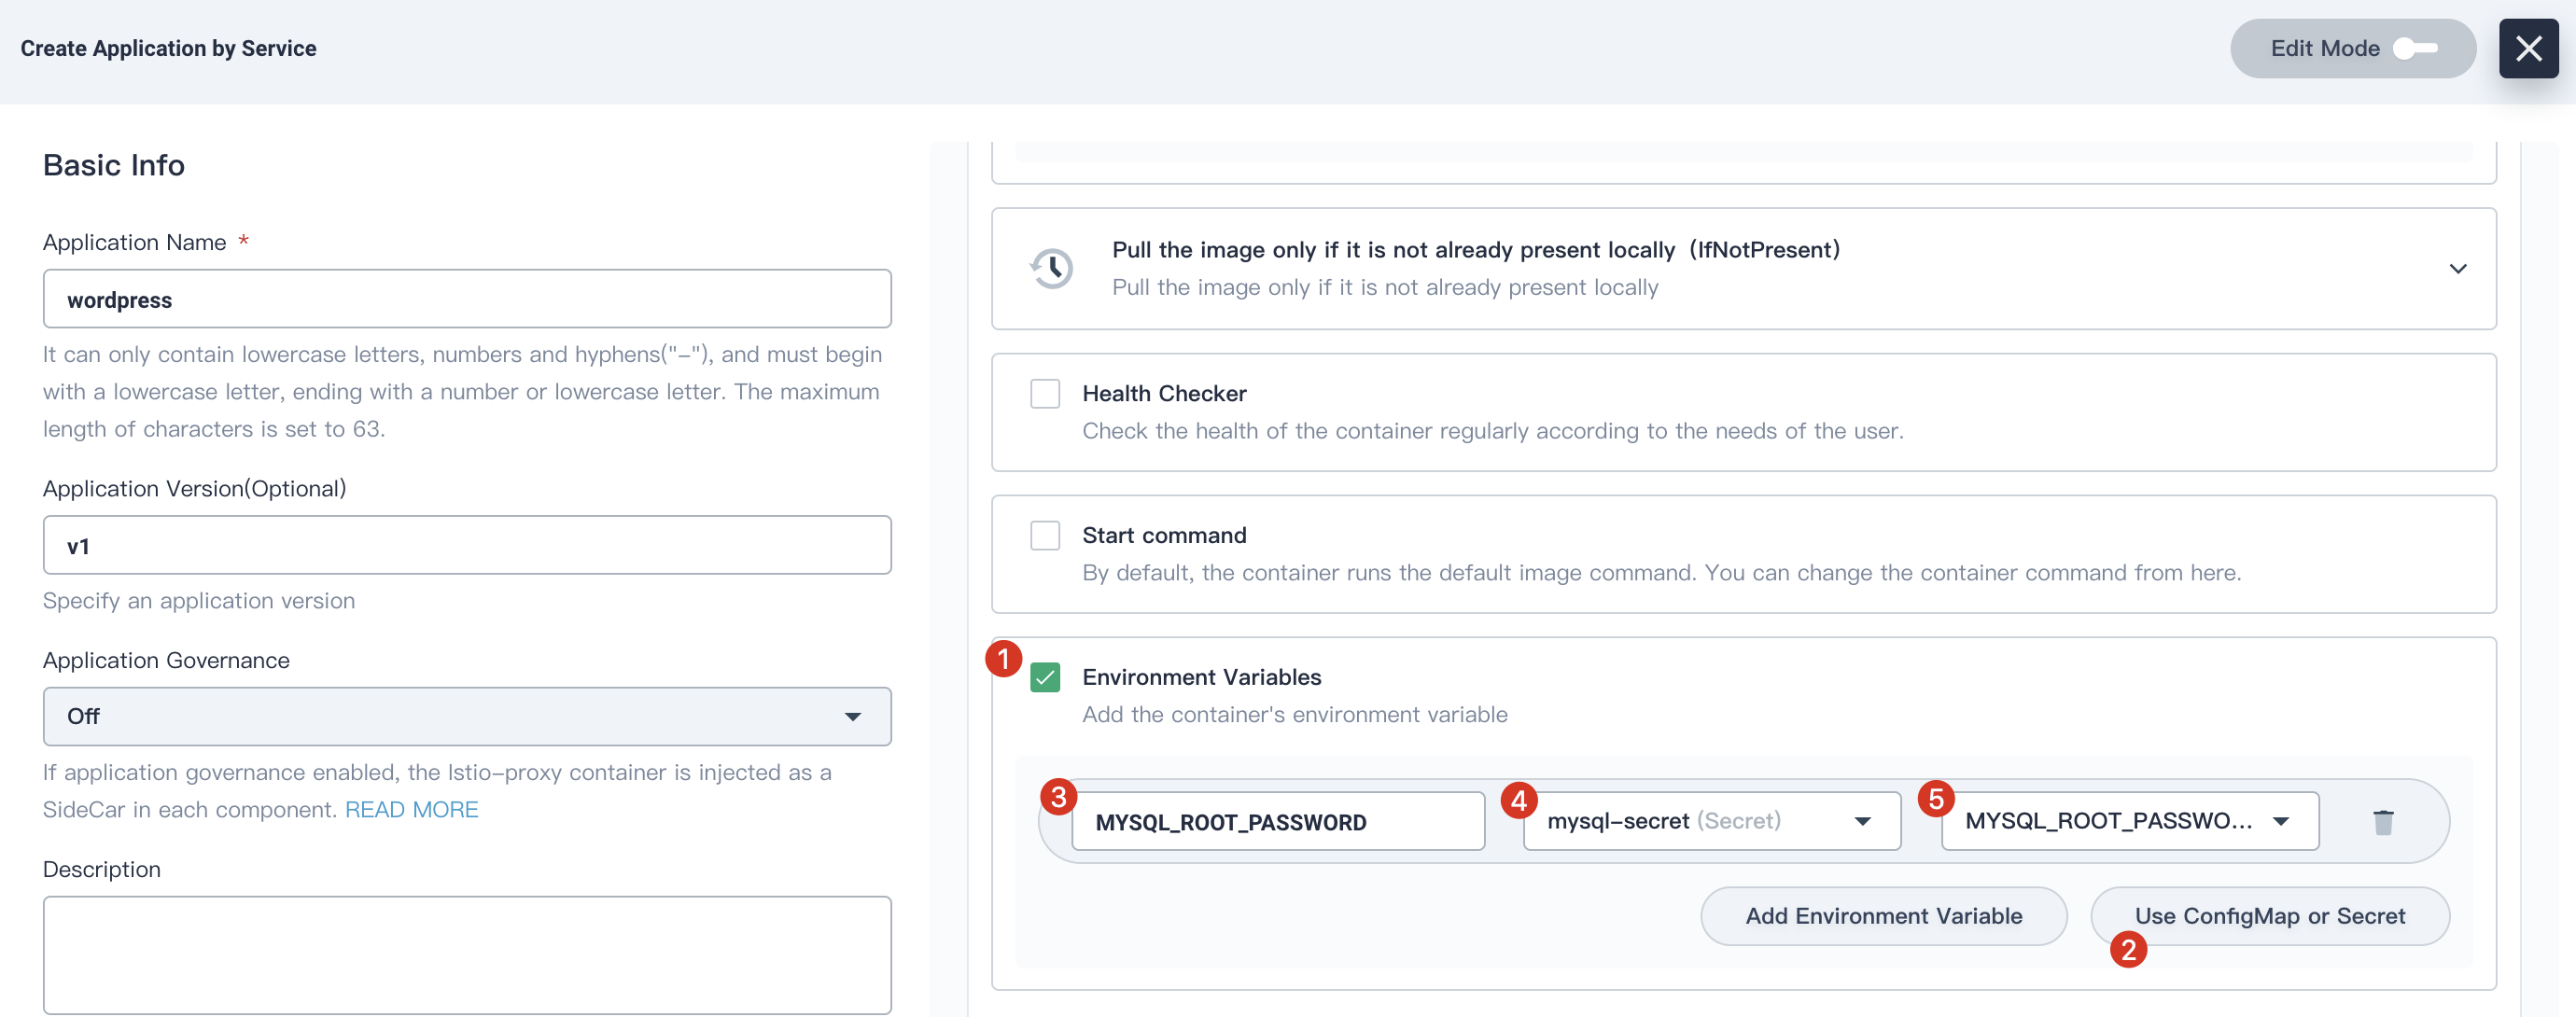
3.4. Scroll down to the Environment Variables, check Environment Variable and click Use ConfigMap or Secret, then input the name MYSQL_ROOT_PASSWORD and choose the resource mysql-secret and the key MYSQL_ROOT_PASSWORD we created in previous step.
Click √ to save it when you have finished.
3.5. Continue scrolling down and click Add Volume Template to create a PVC for MySQL according to the following screenshot.
3.6. Click √ to save it. At this point you have added the MySQL component.
Add WordPress front-end component
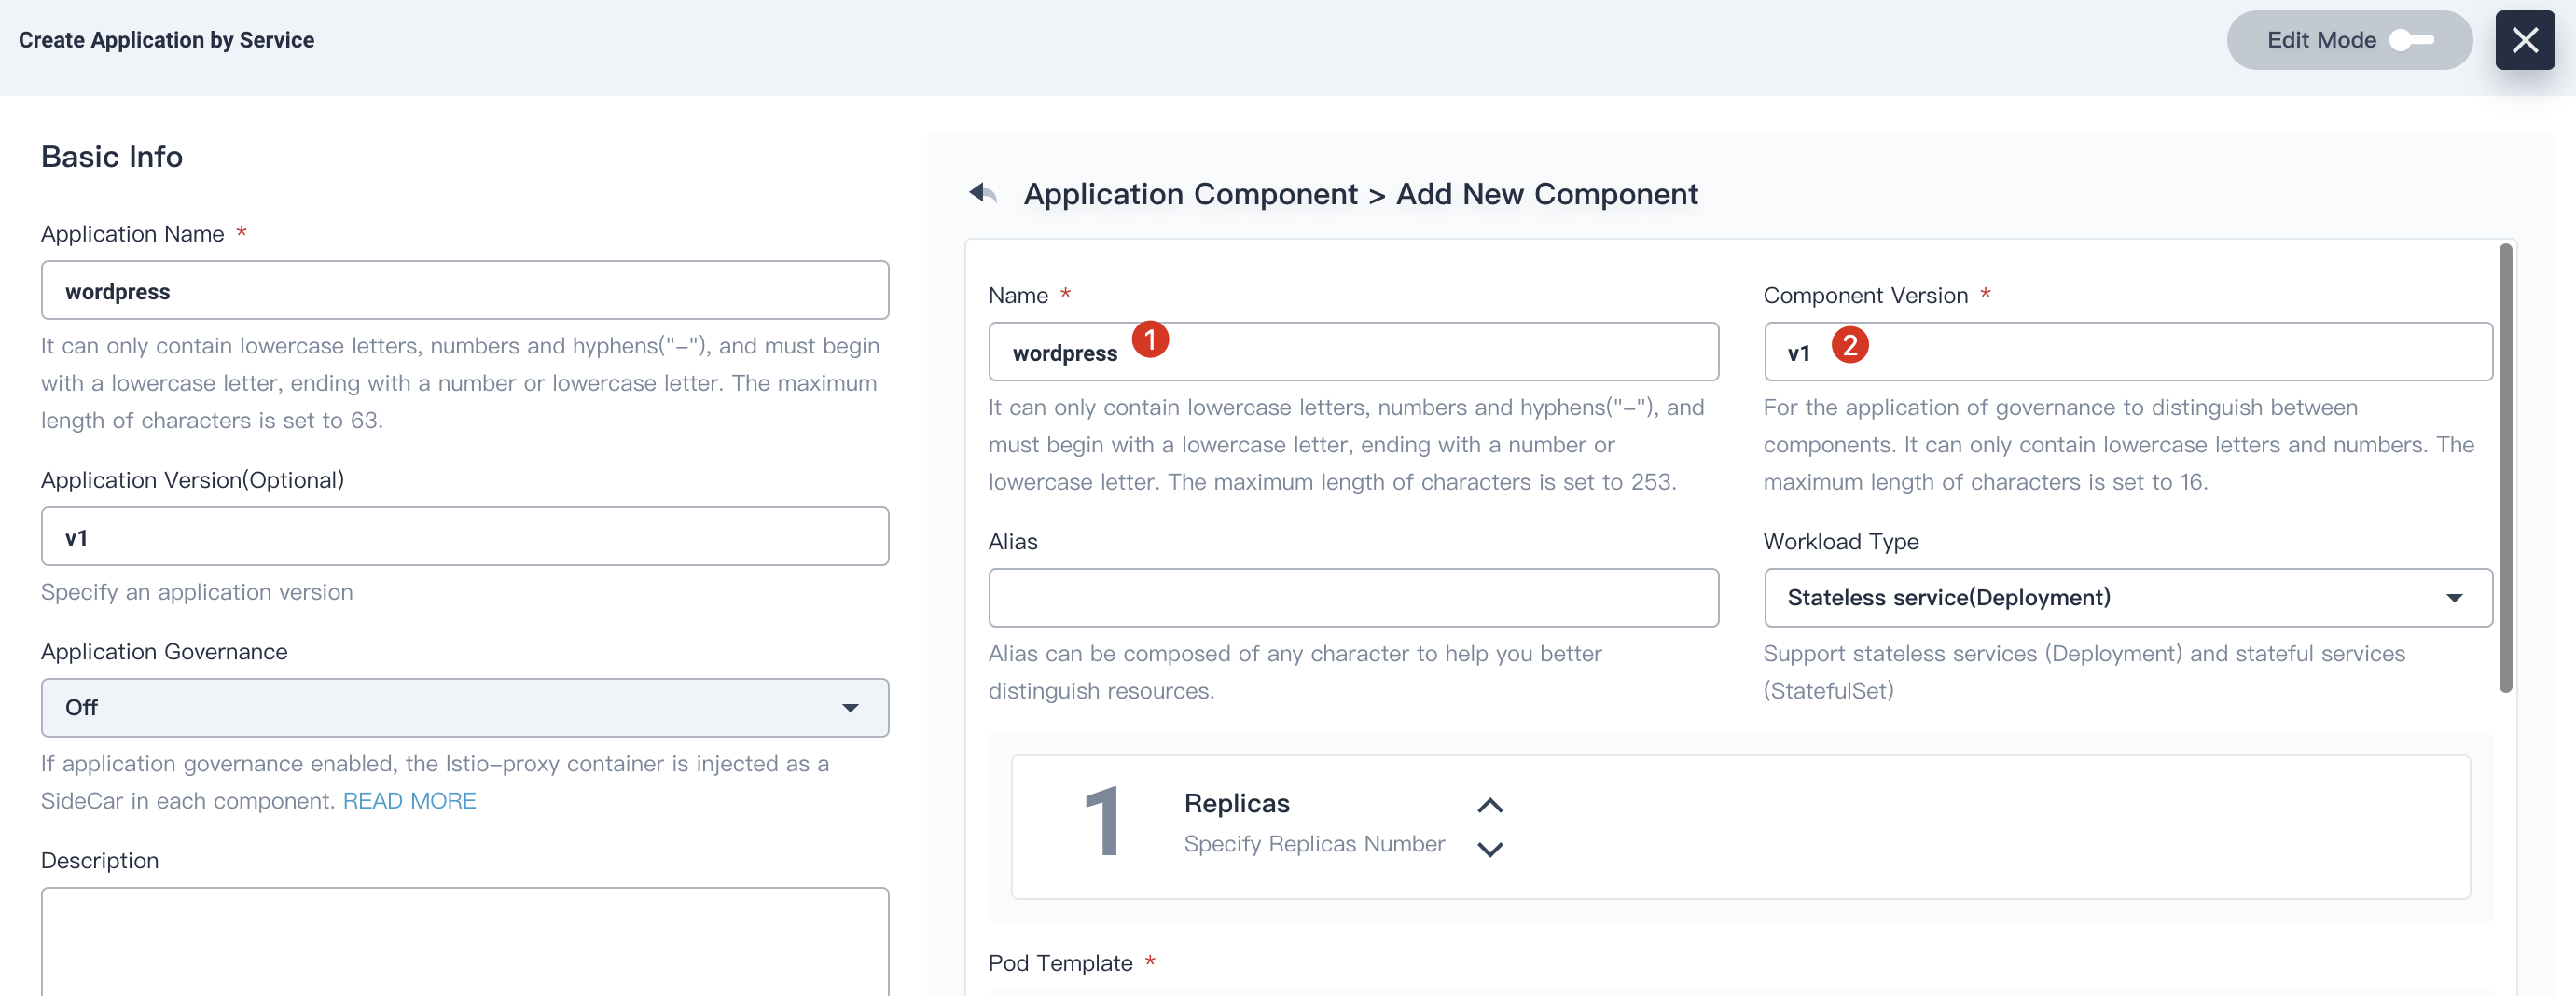
3.7. Click Add Component again, fill in the Name and Component Version refer to the following screenshot:
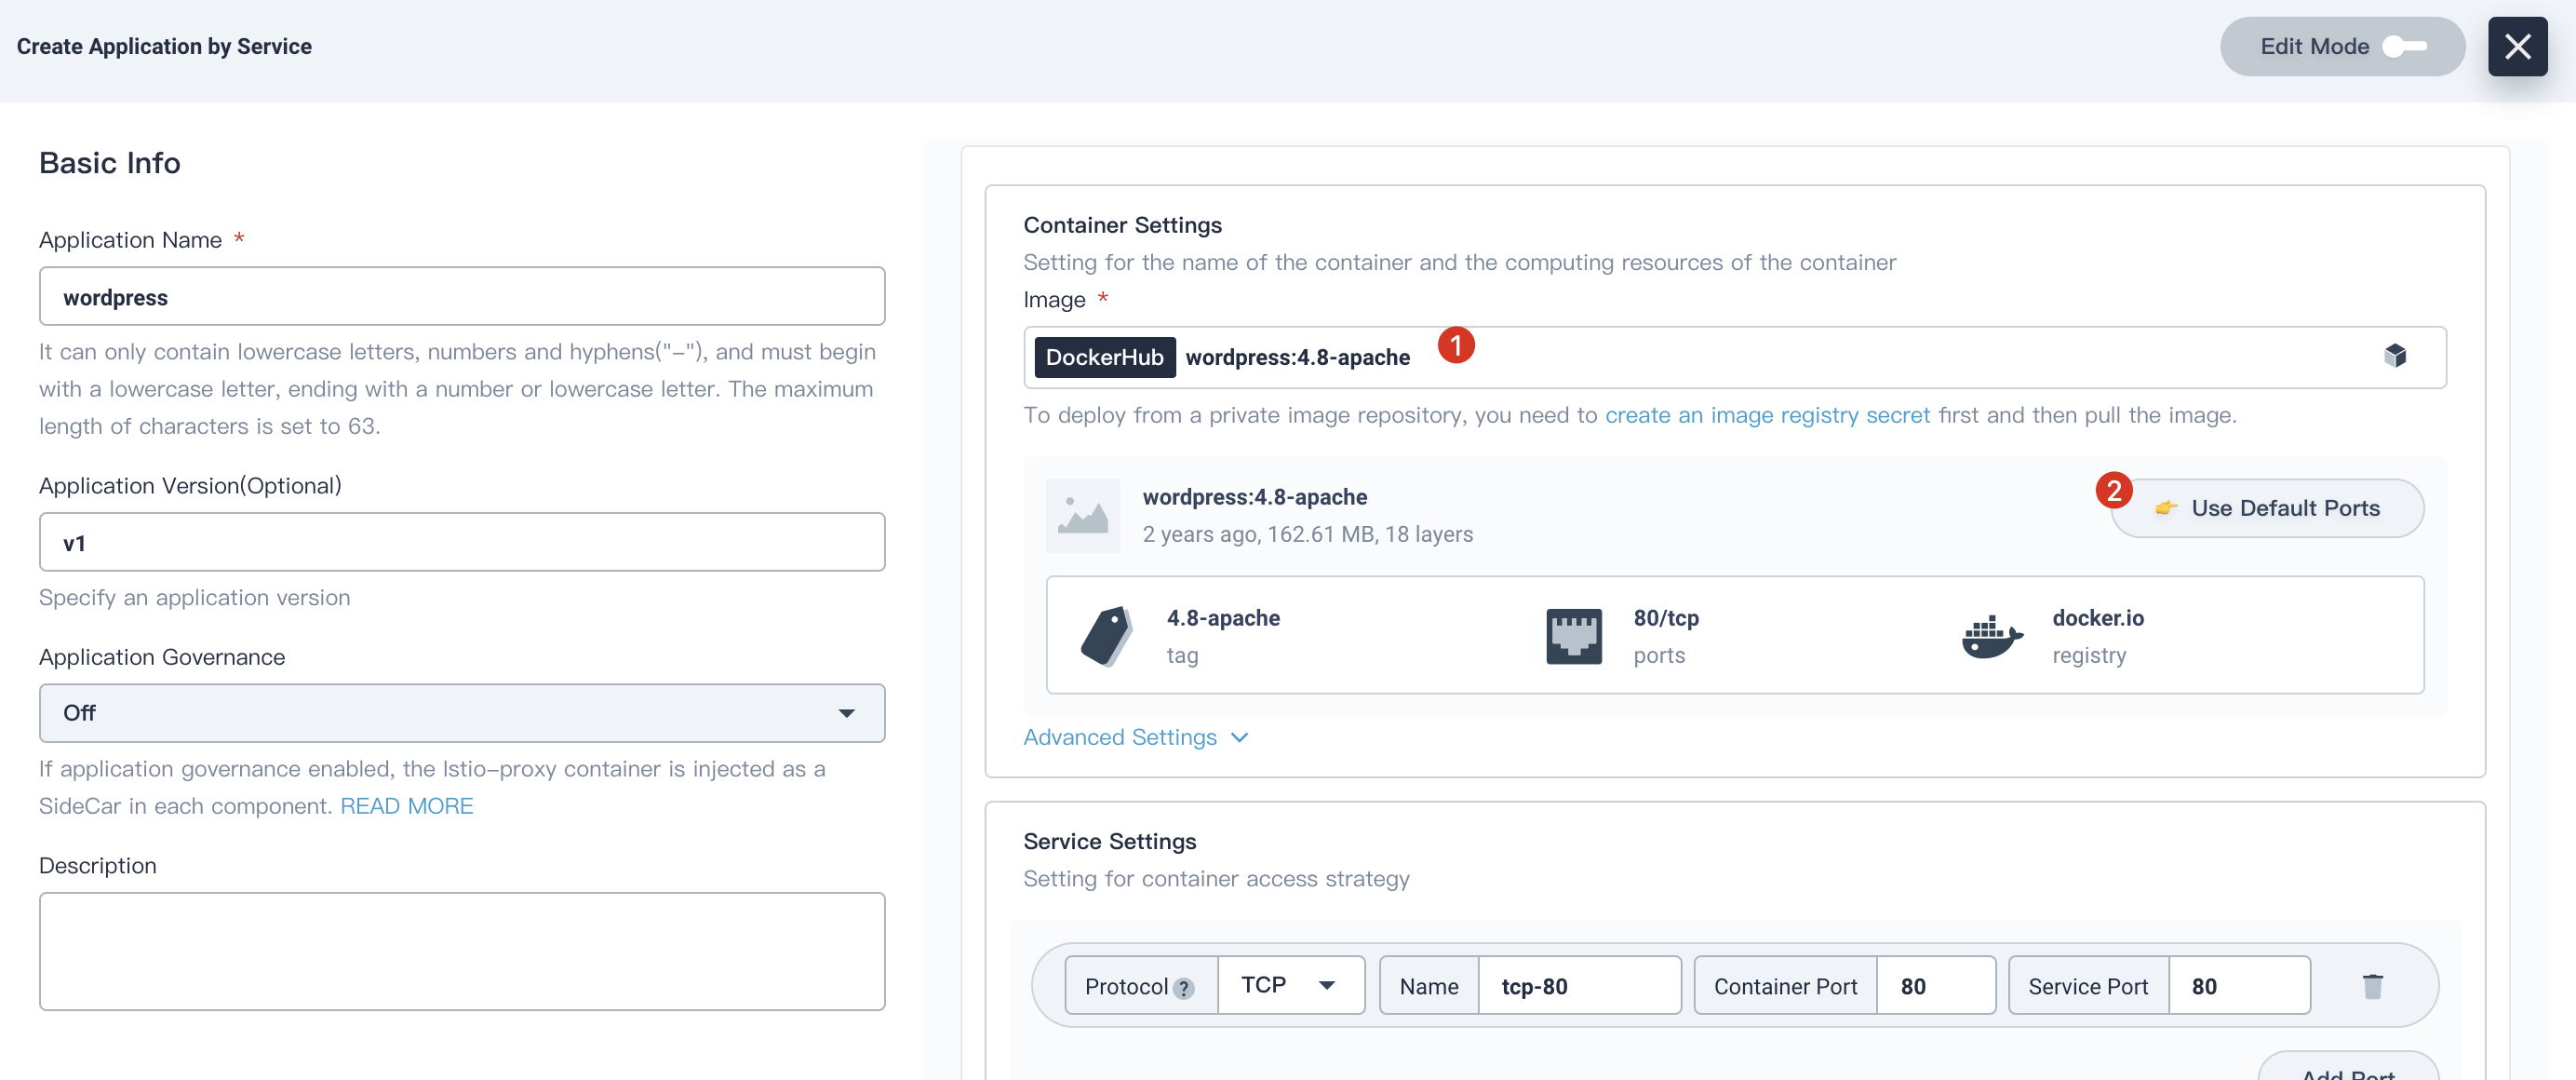
3.8. Click Add Container Image, enter wordpress:4.8-apache into the Image edit box, press the return key and click Use Default Ports.
3.9. Scroll down to the Environment Variables, check Environment Variable and click Use ConfigMap or Secret, then enter the values according to the following screenshot.
WORDPRESS_DB_PASSWORD, choosewordpress-secretandWORDPRESS_DB_PASSWORD- Click Add Environment Variable, then fill its key & value with
WORDPRESS_DB_HOSTandmysql.
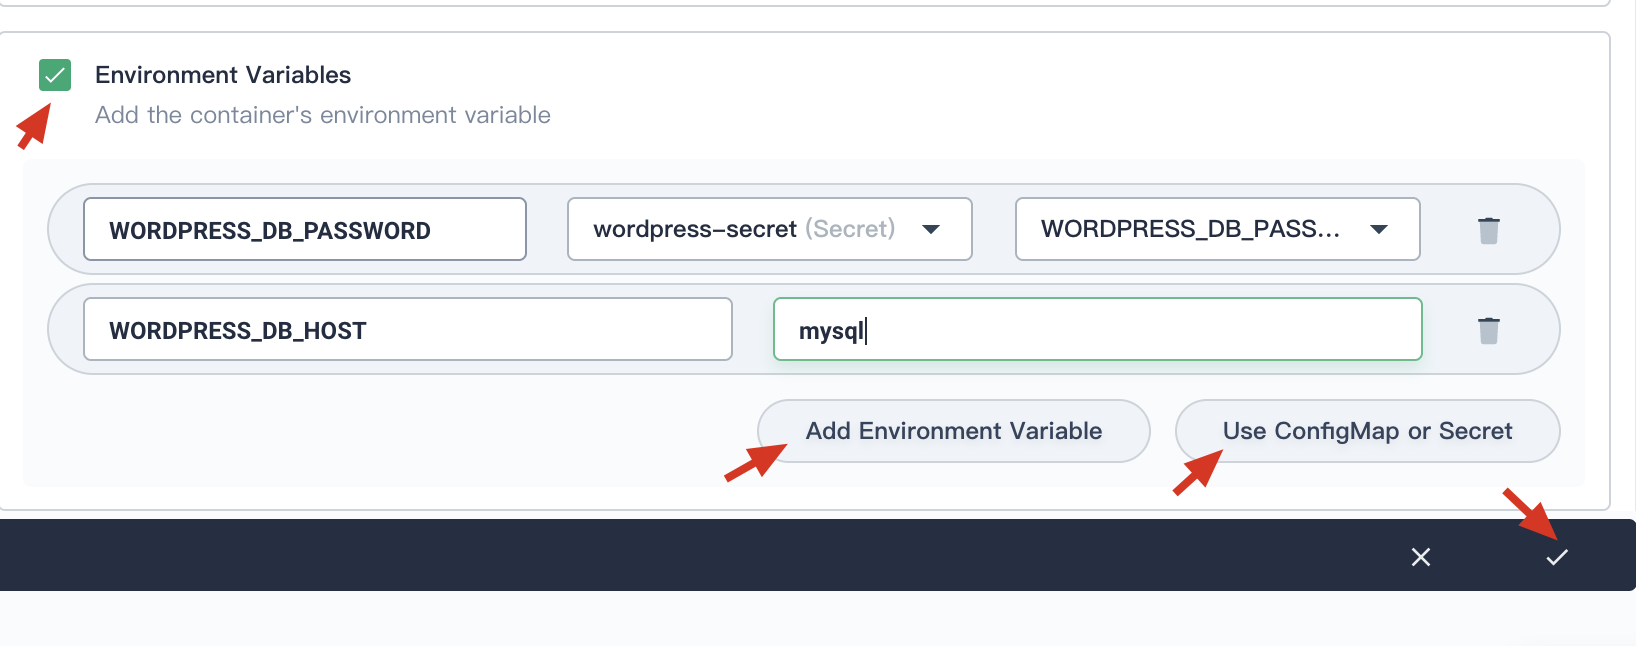
3.10. Click √ to save it.
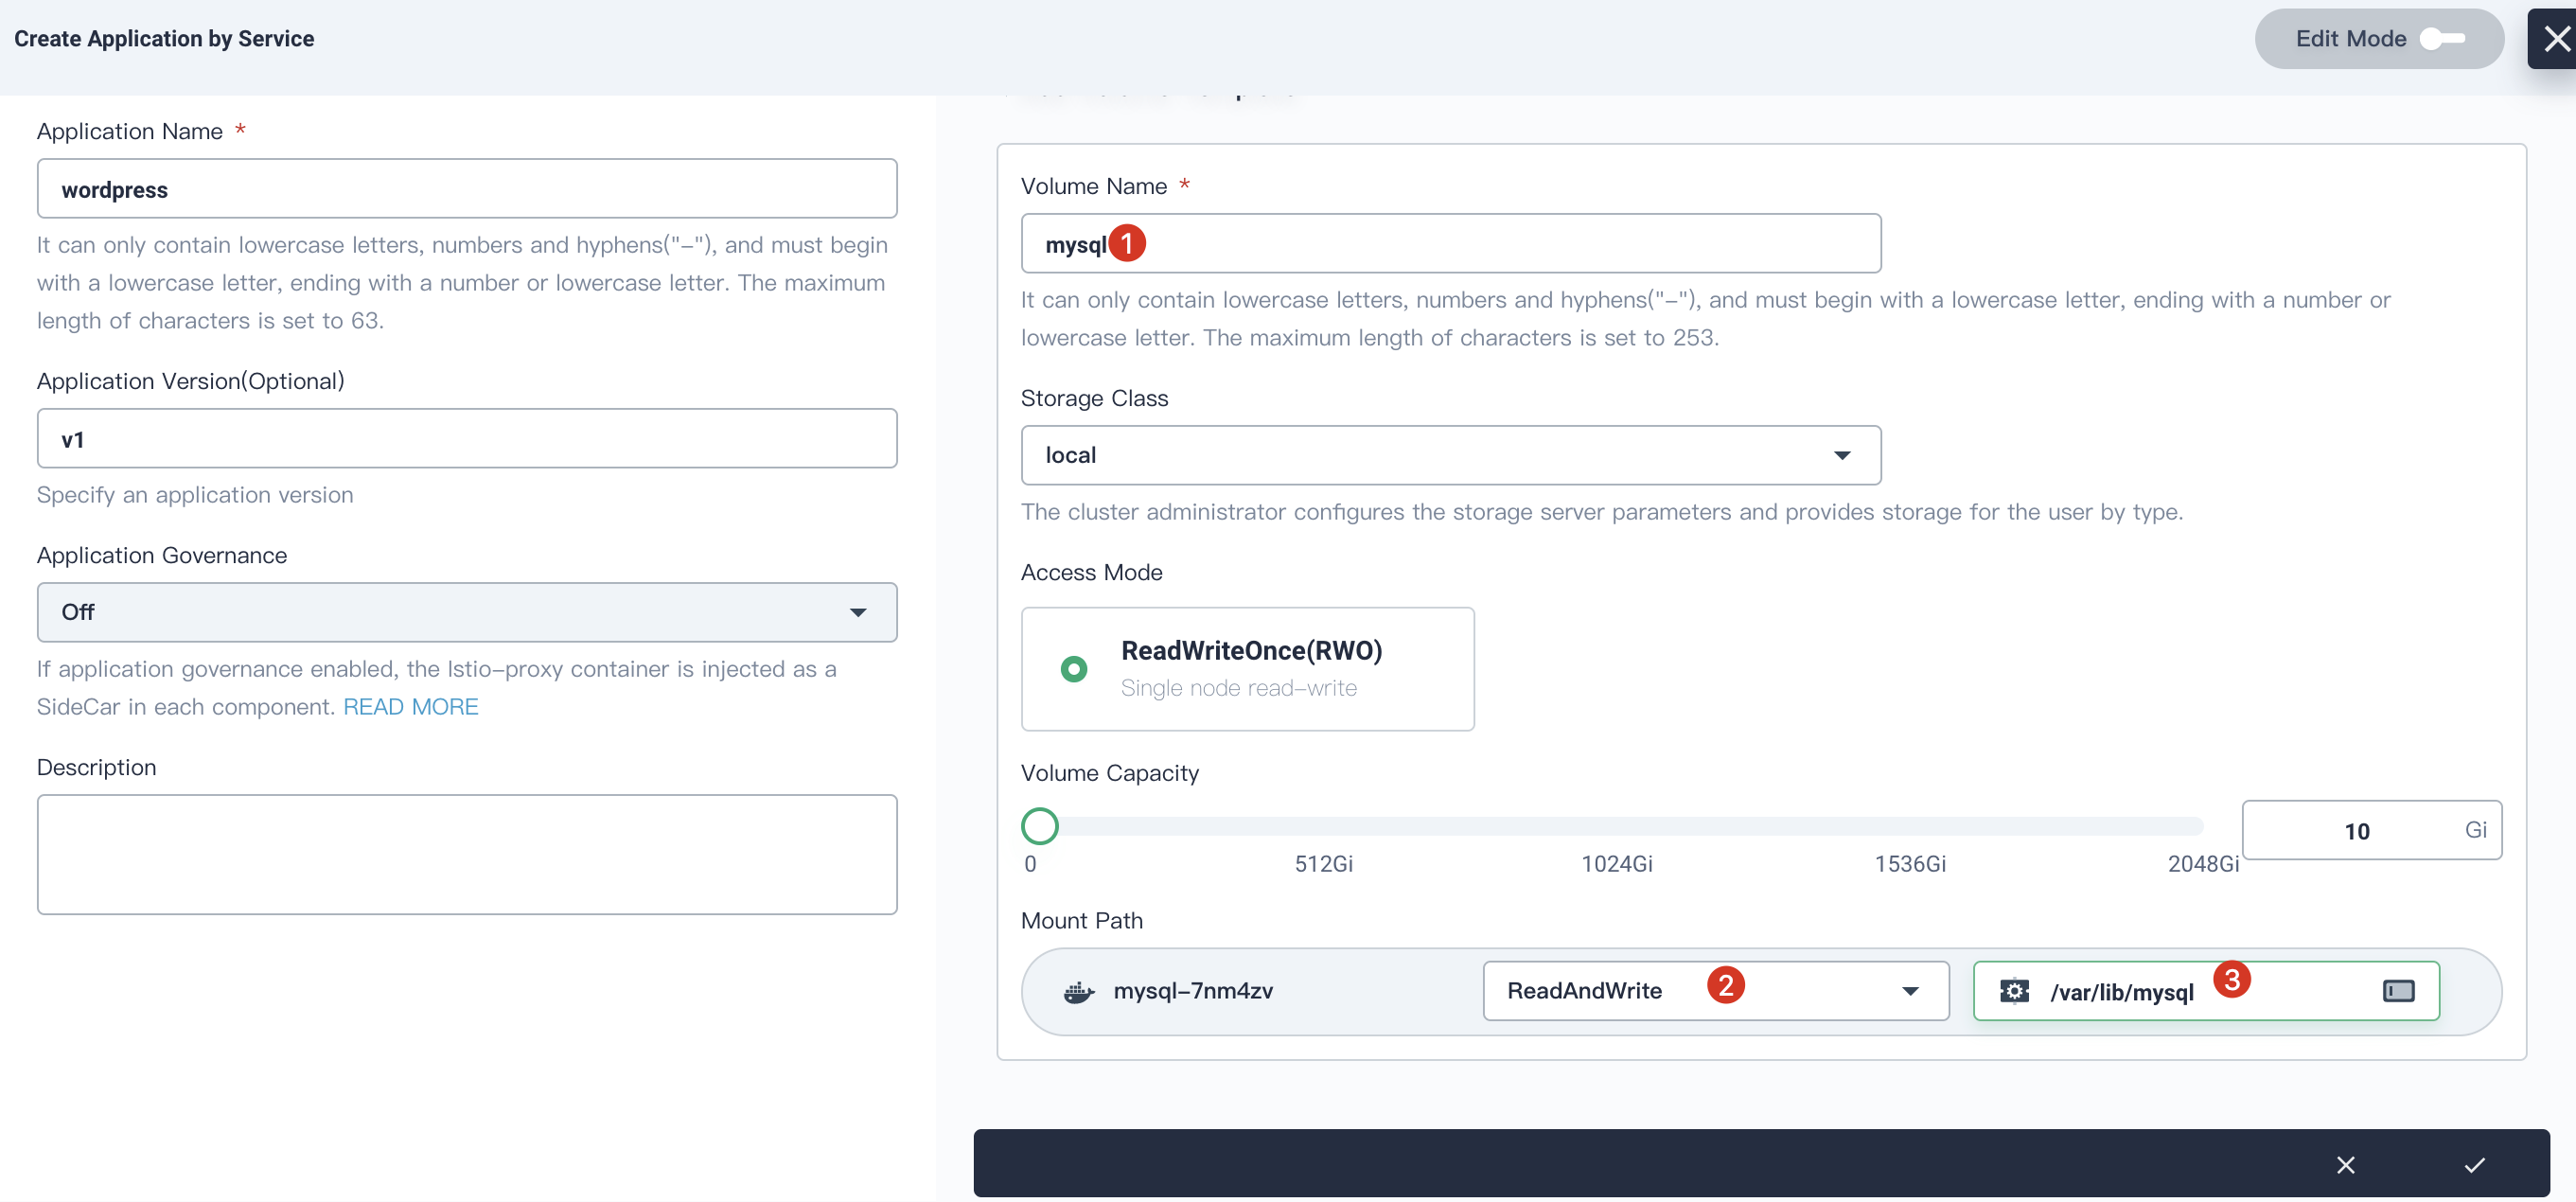
3.11. Continue scrolling down and click Add Volume to attach the existed volume to WordPress.
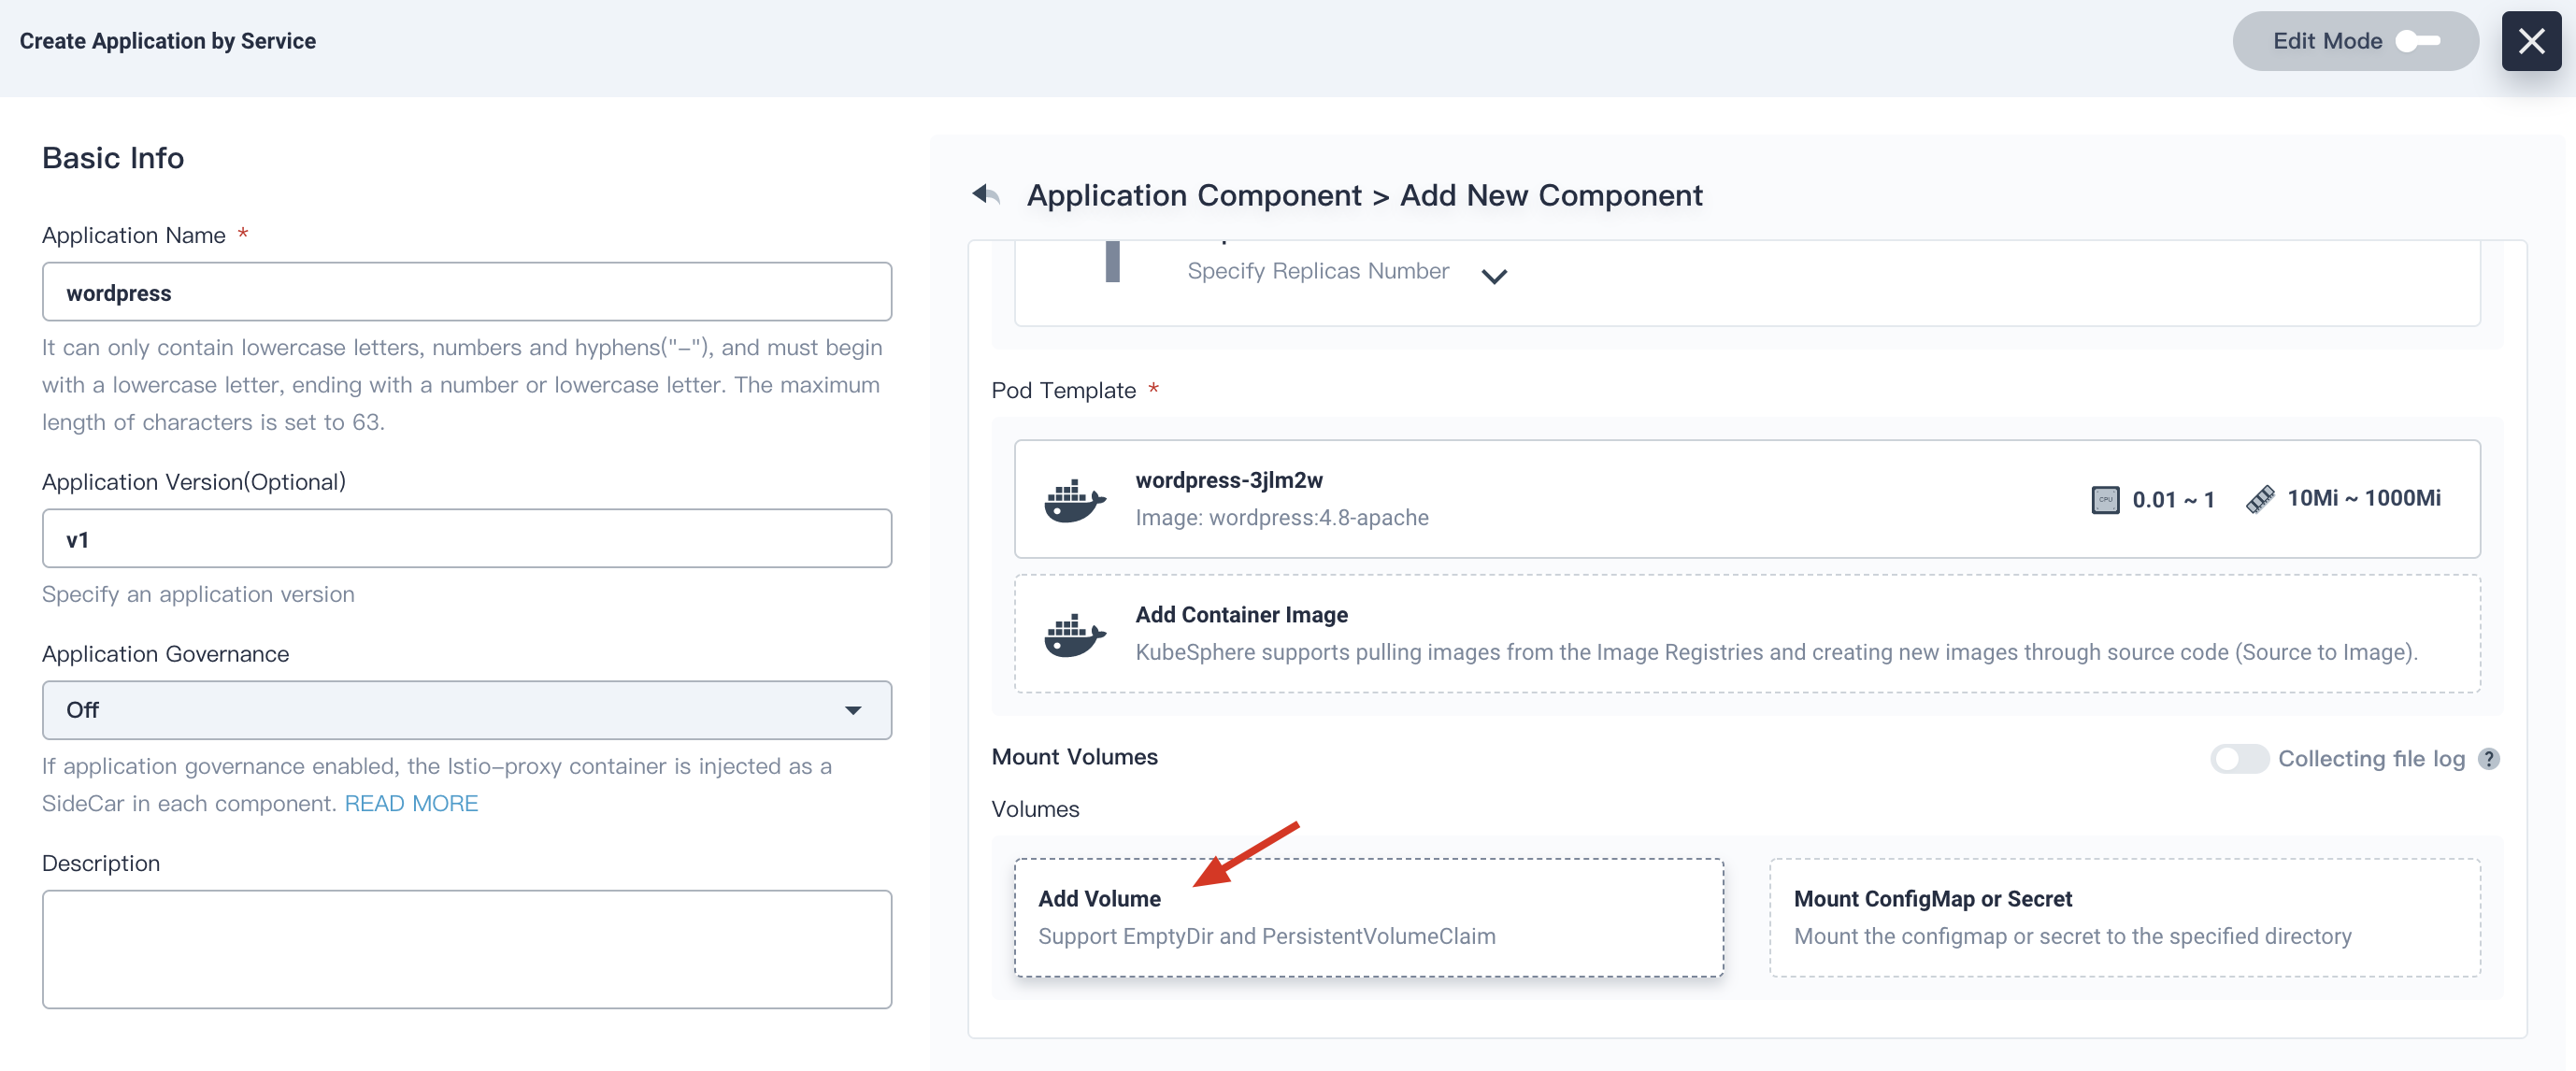
3.12. Select wordpress-pvc that we created in the previous step, and select ReadAndWrite, then input /var/www/html as its mount path. Click √ to save it.
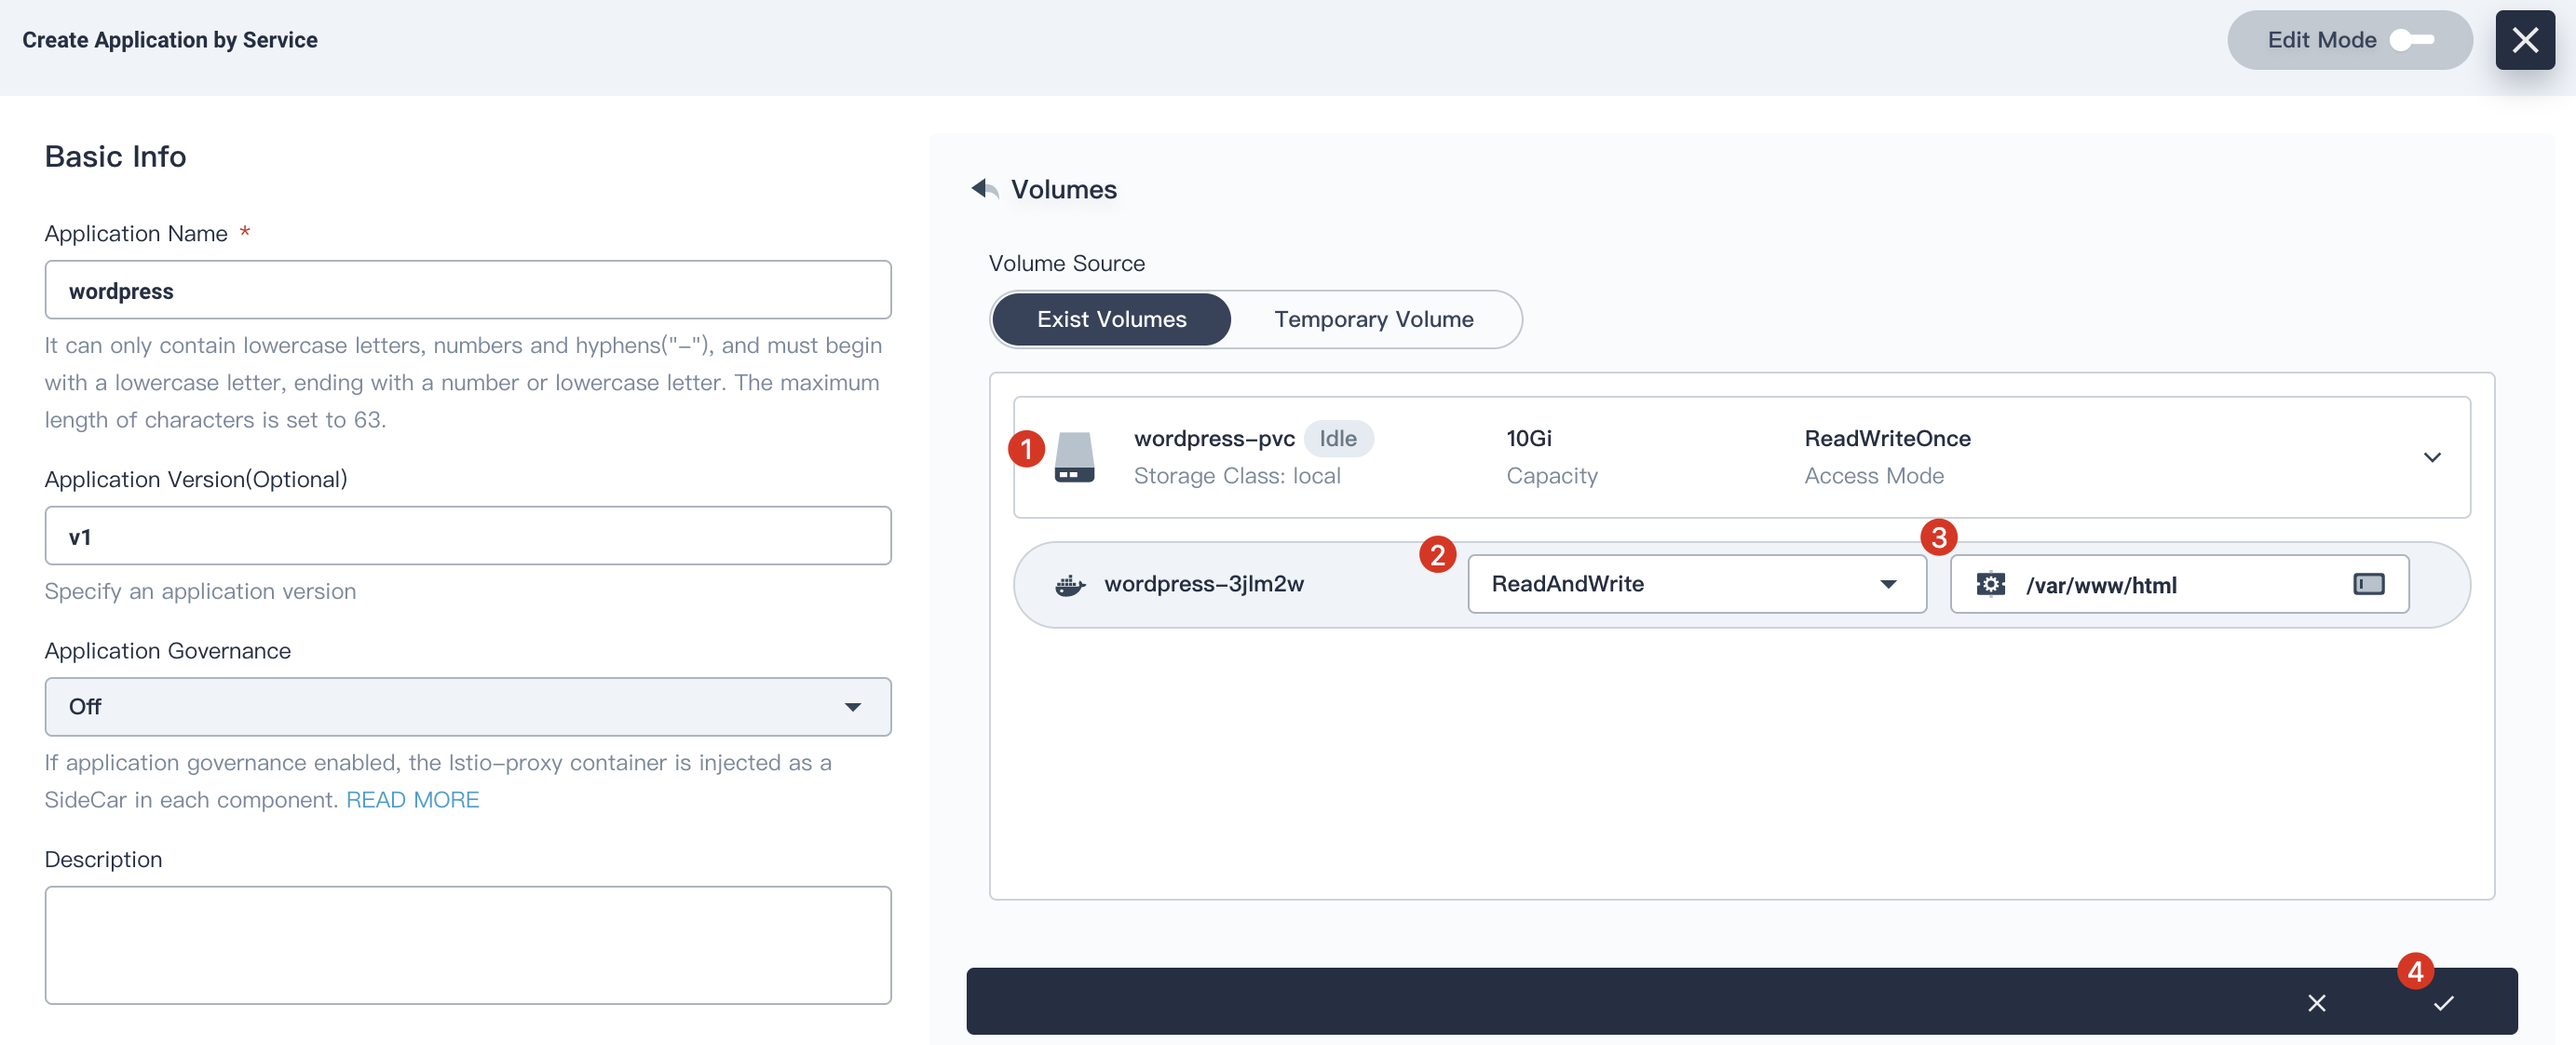
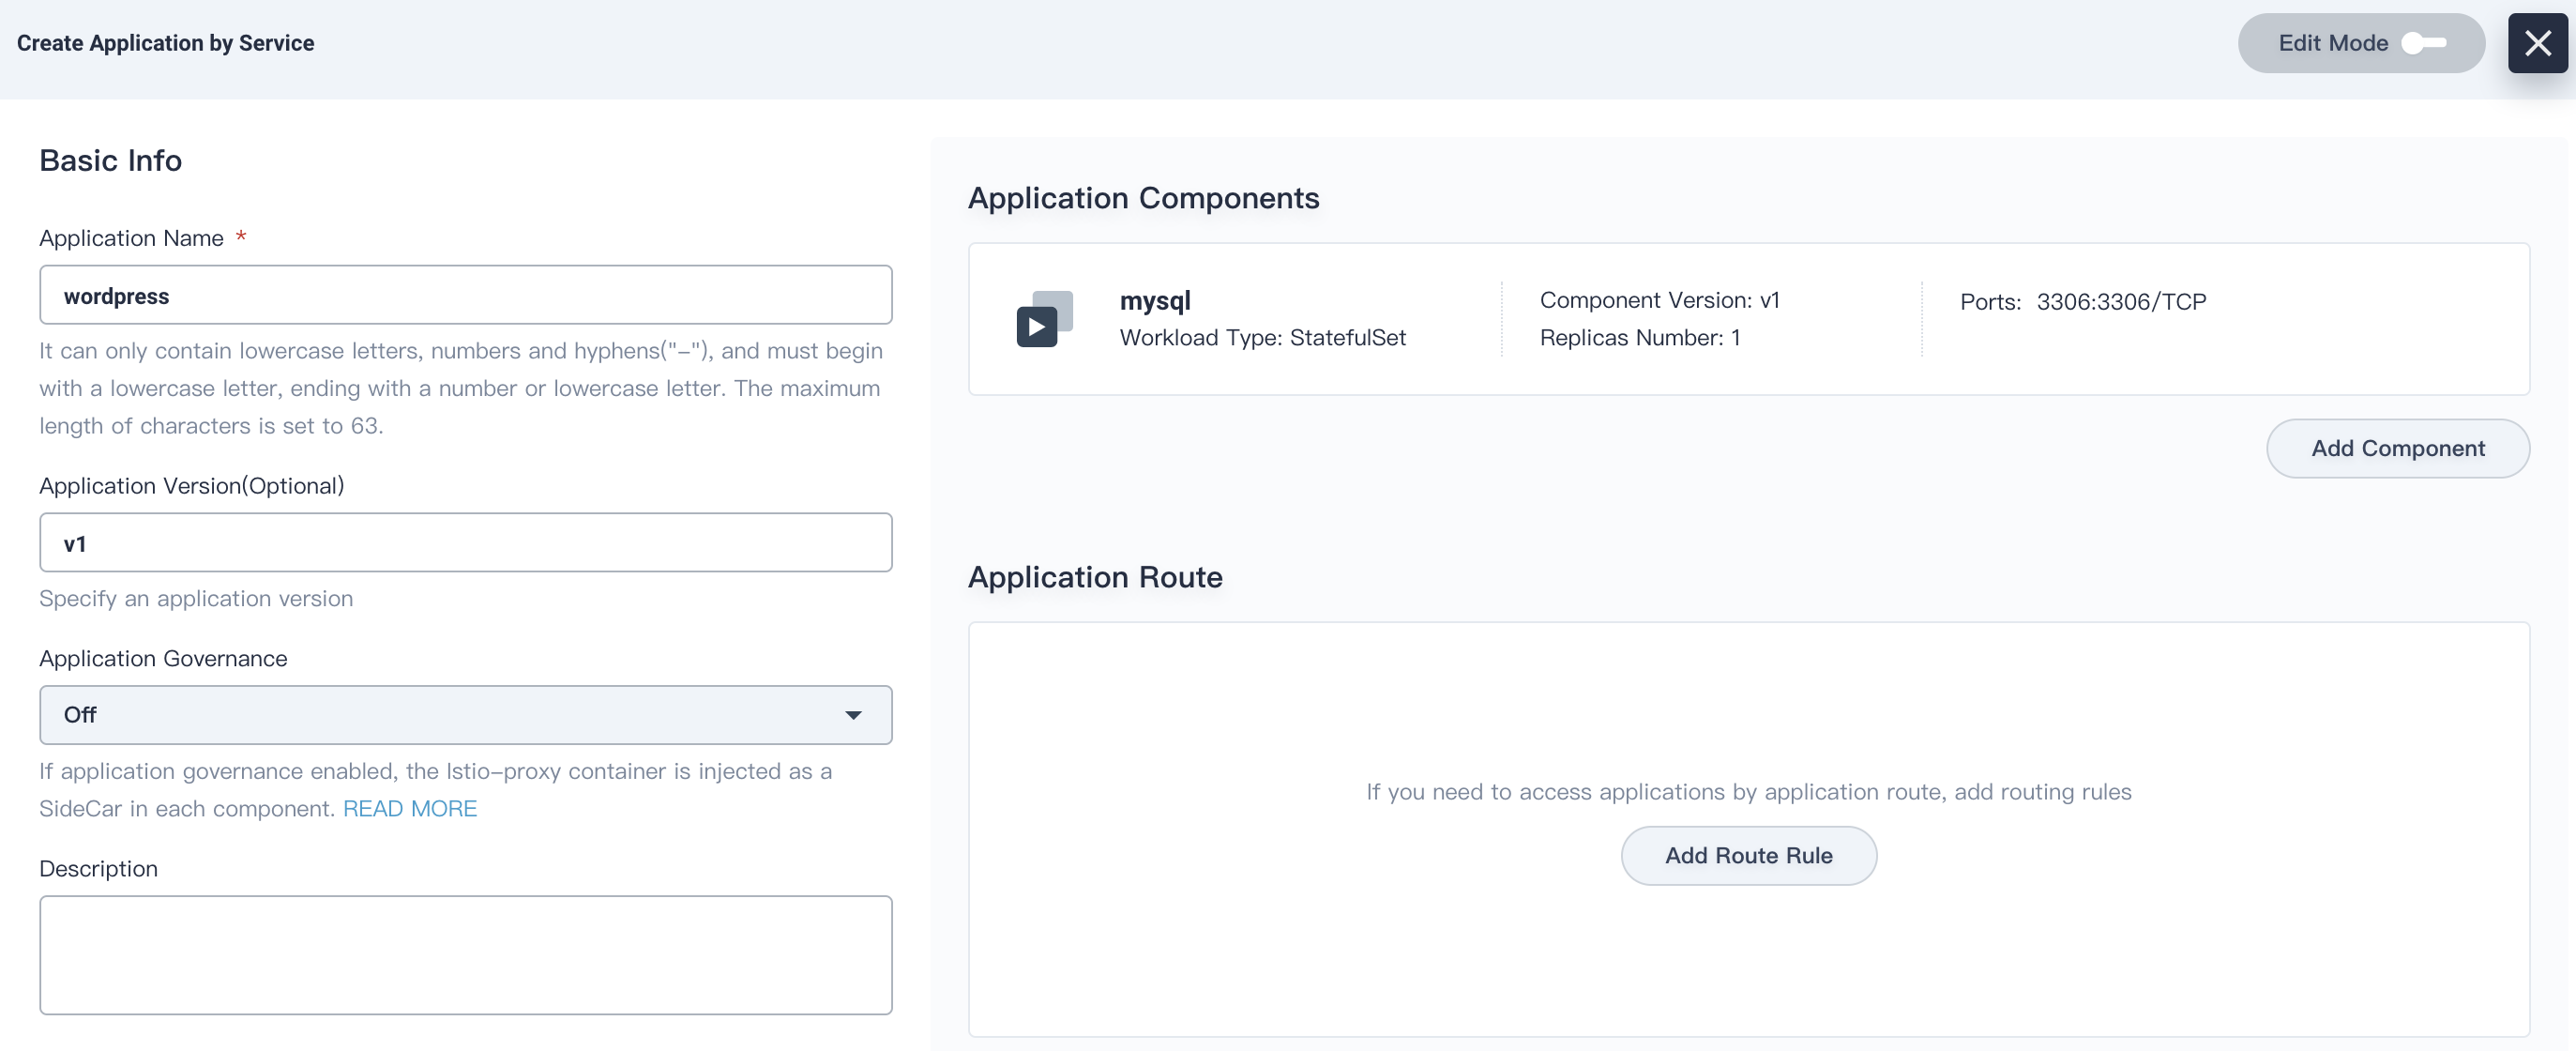
3.13. Again, click √ to save it. Ensure both mysql and wordpress application components have been added into the table, then you can click Create.

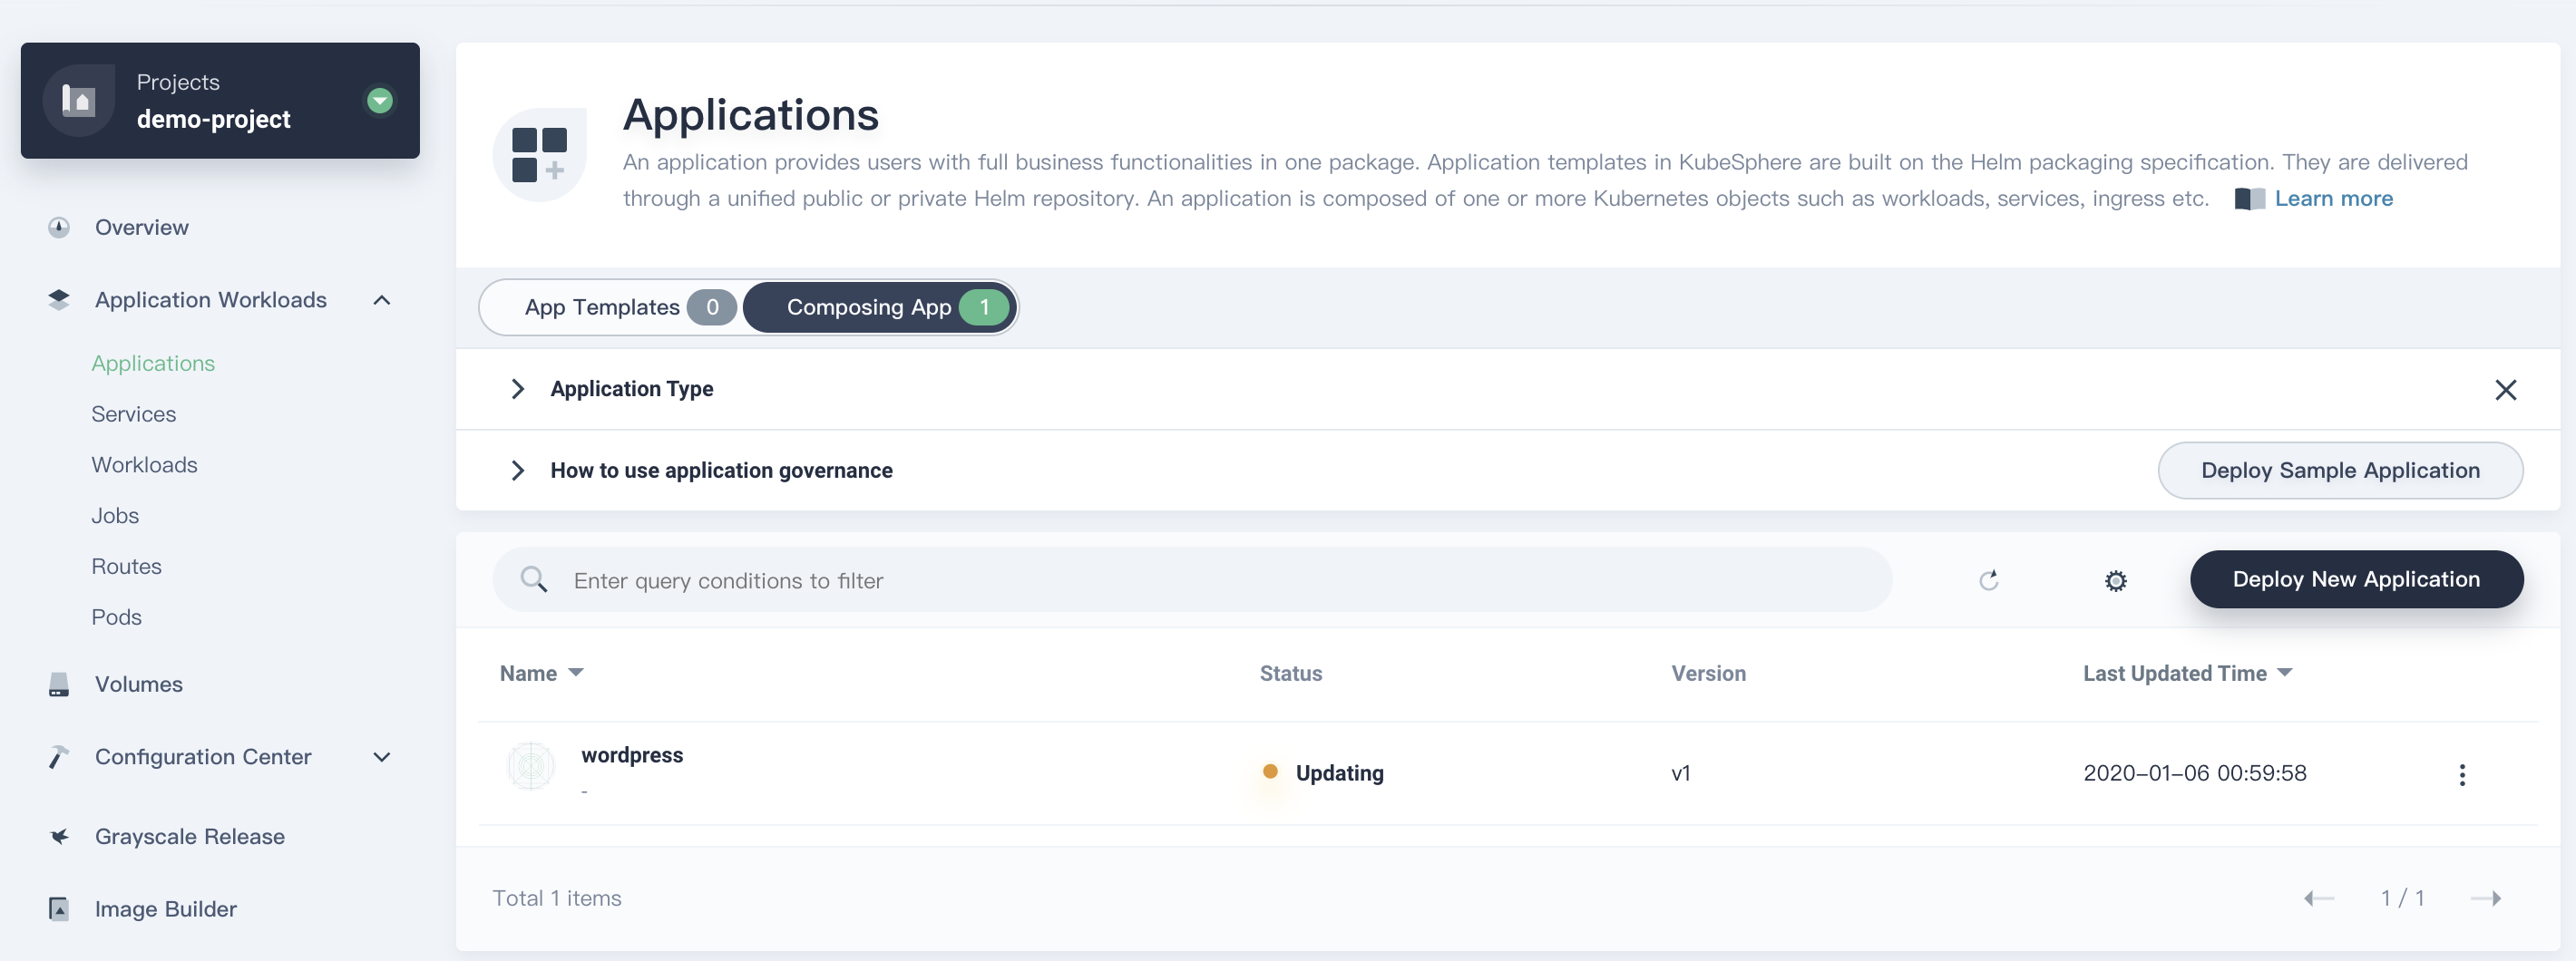
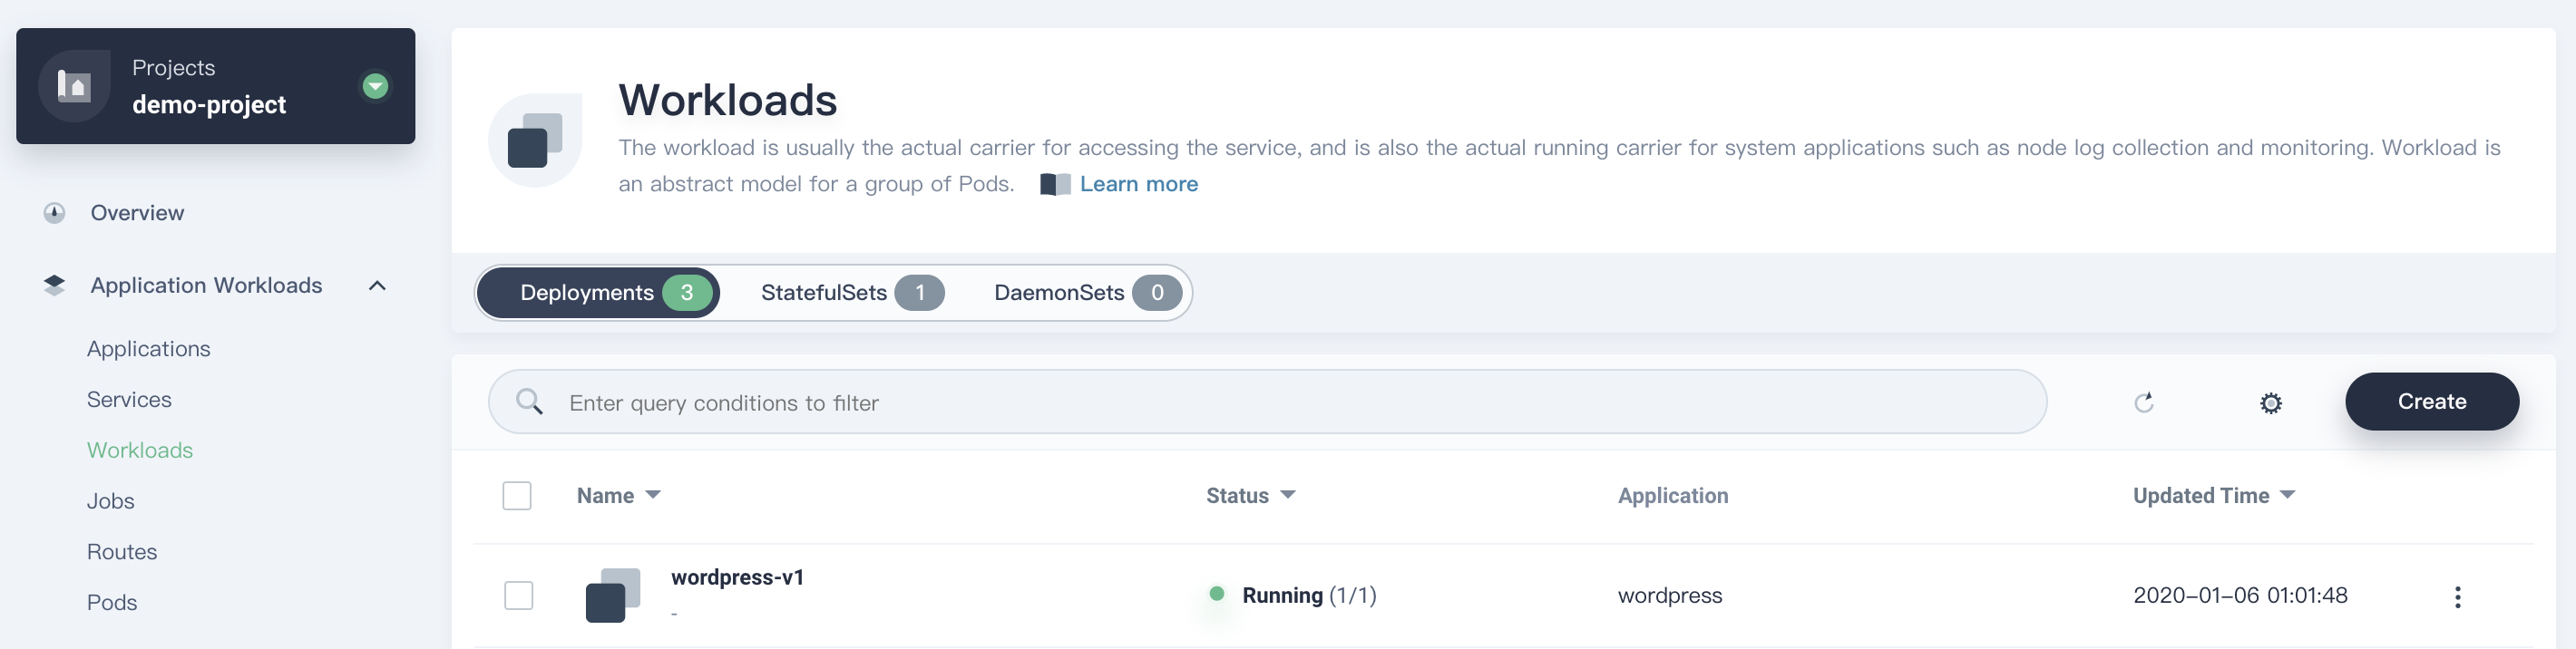
Step 4: Verify the Resources
Deployment
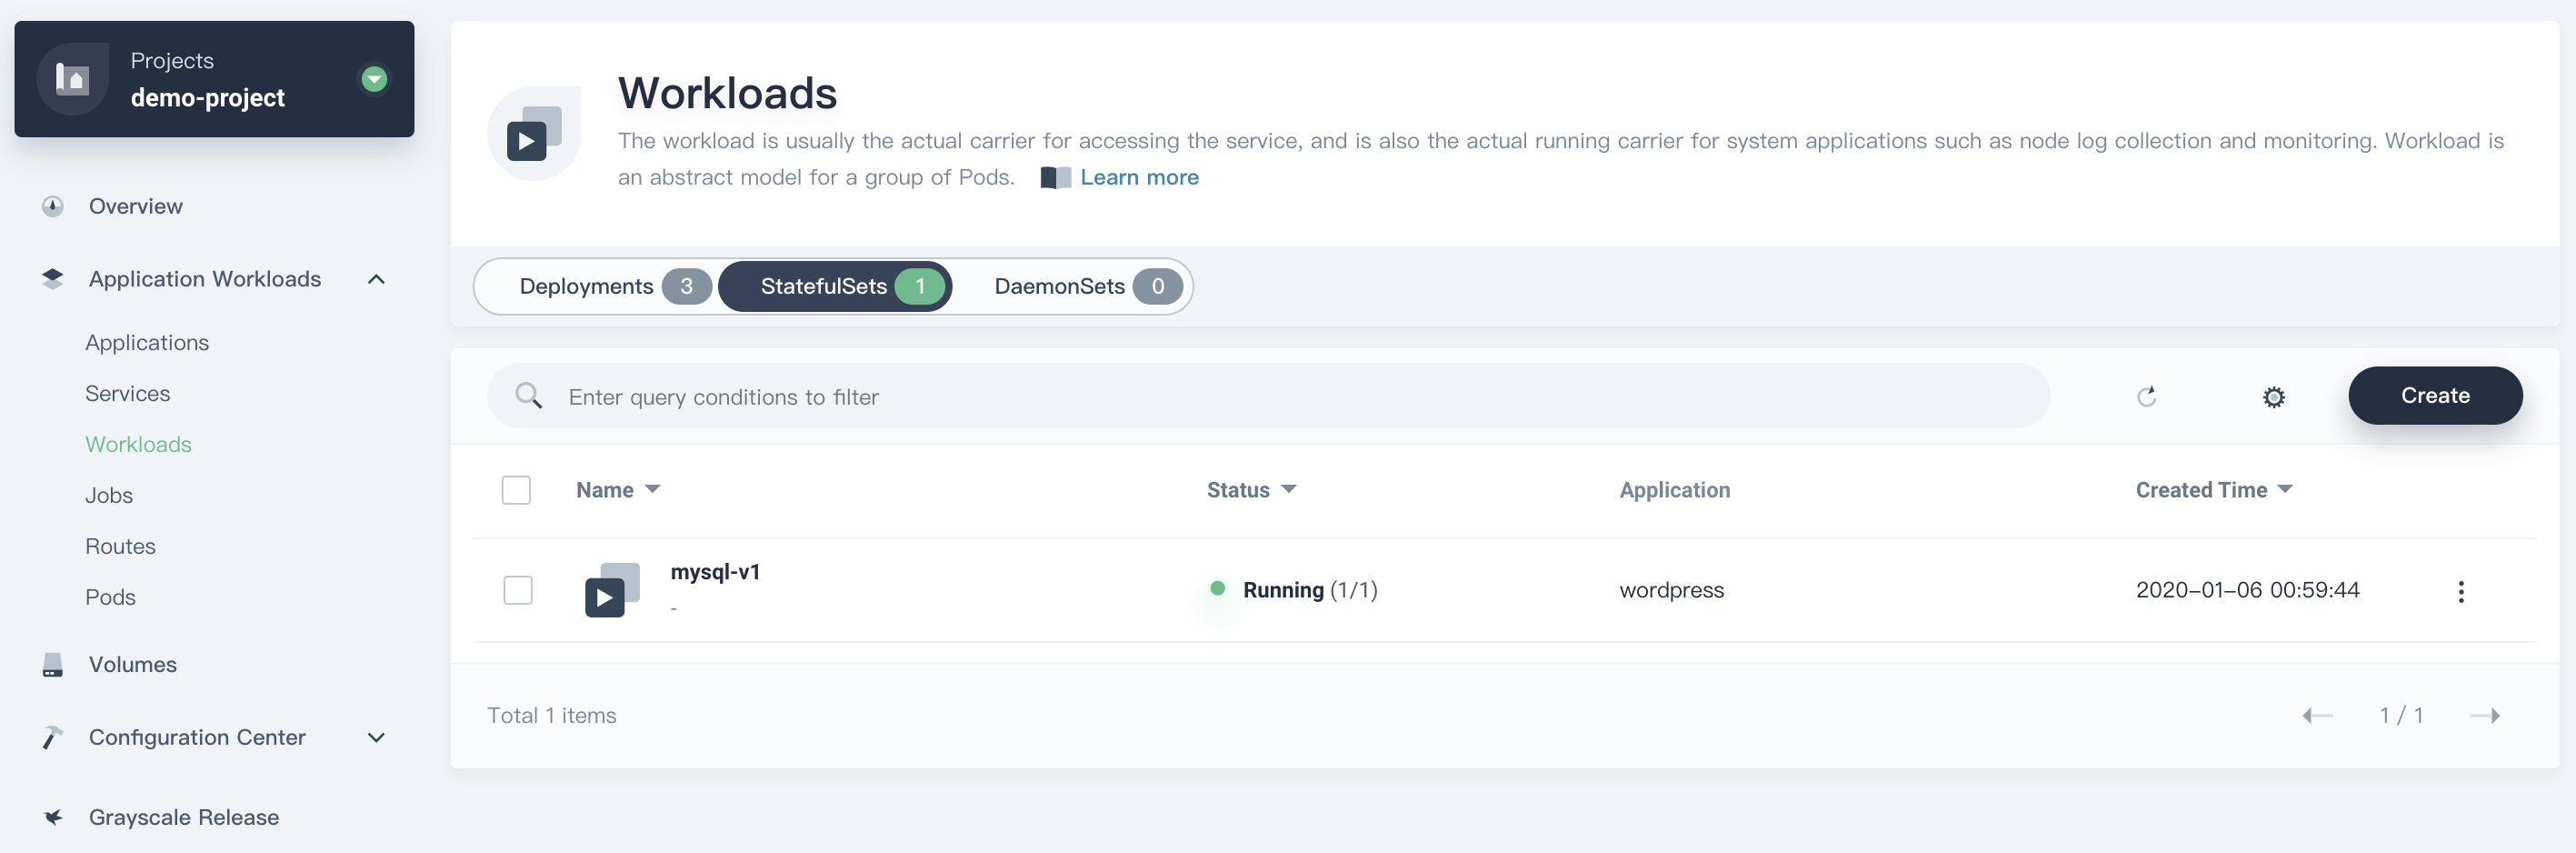
StatefulSet
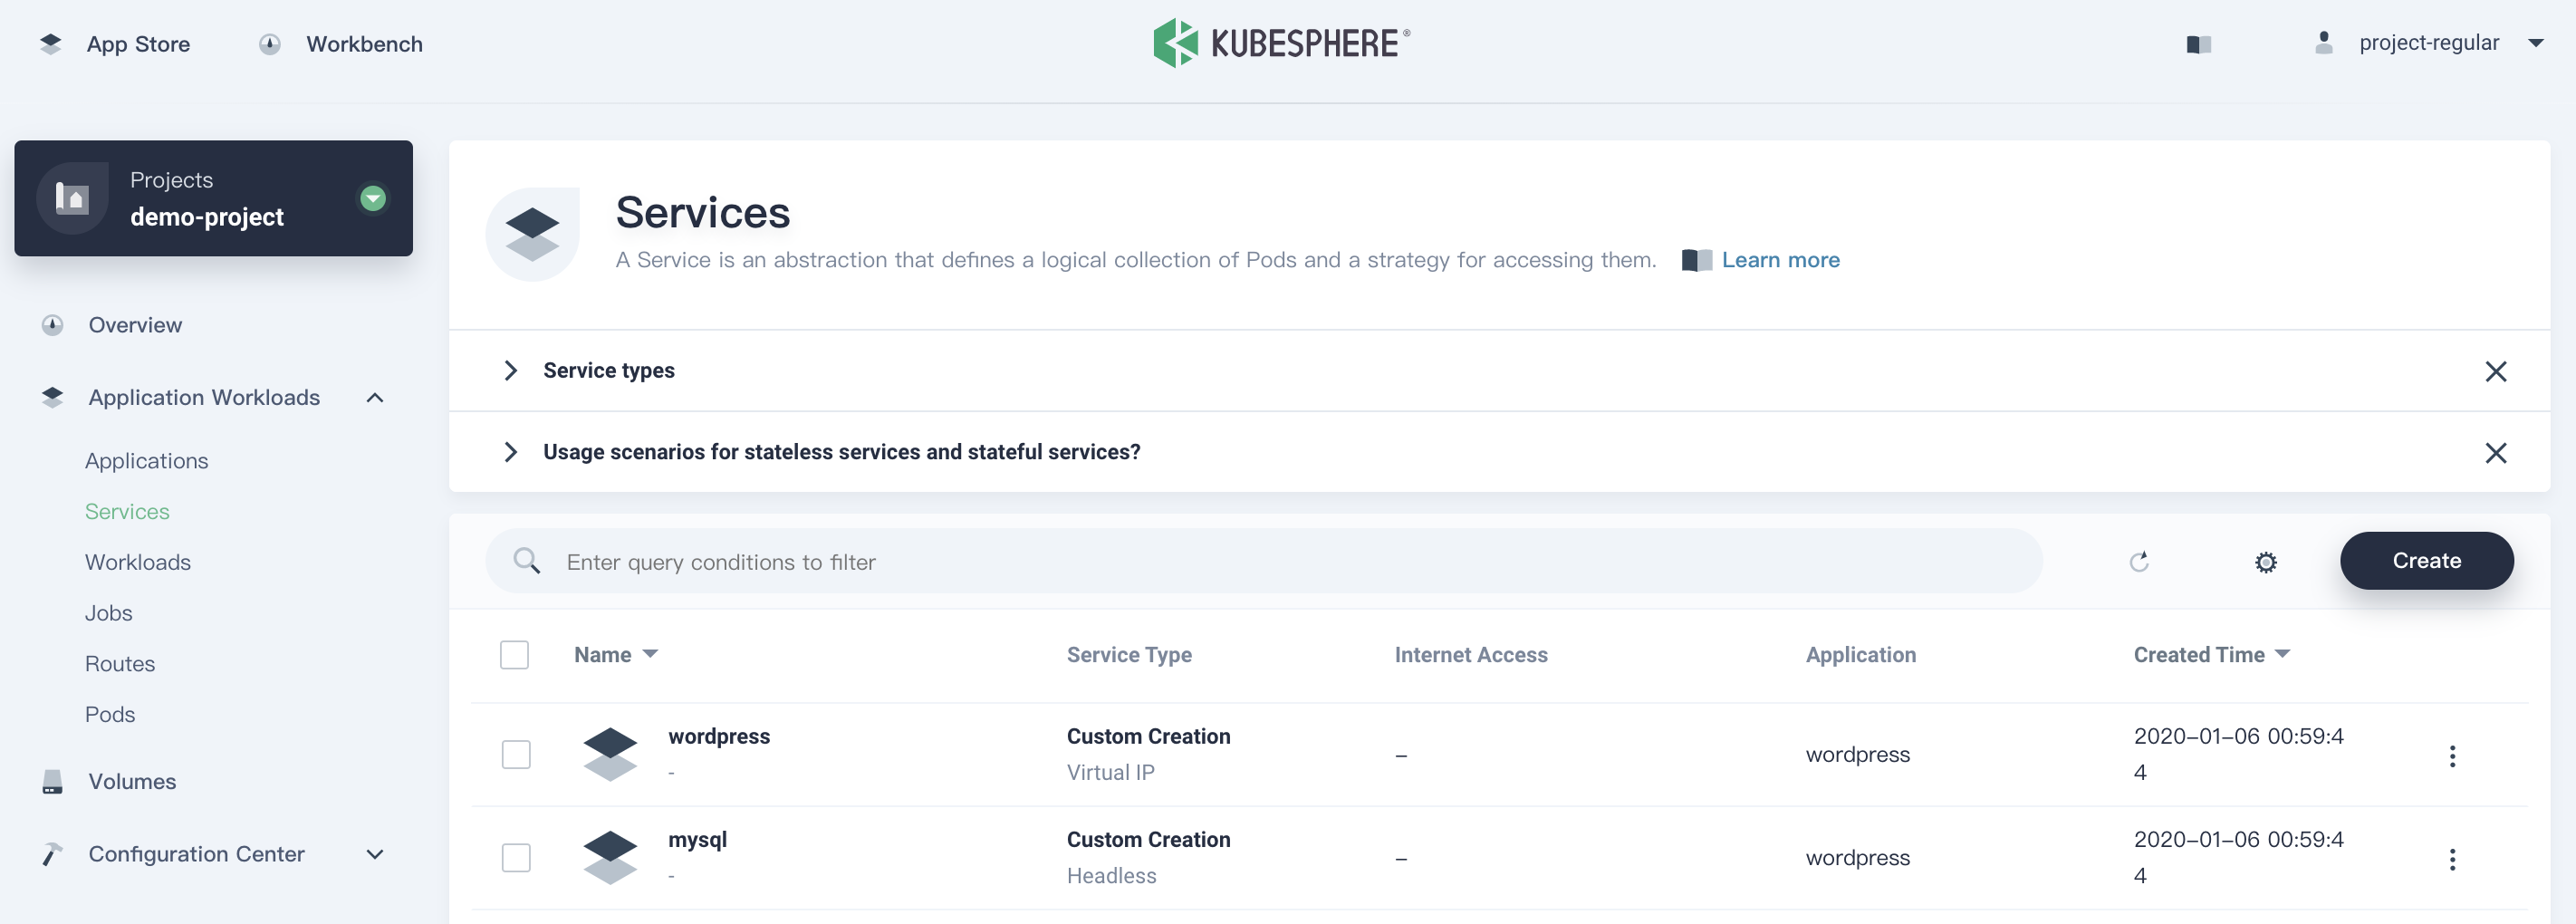
Services
Step 5: Access the WordPress Application
5.1. Enter wordpress service, and click Edit Internet Access.
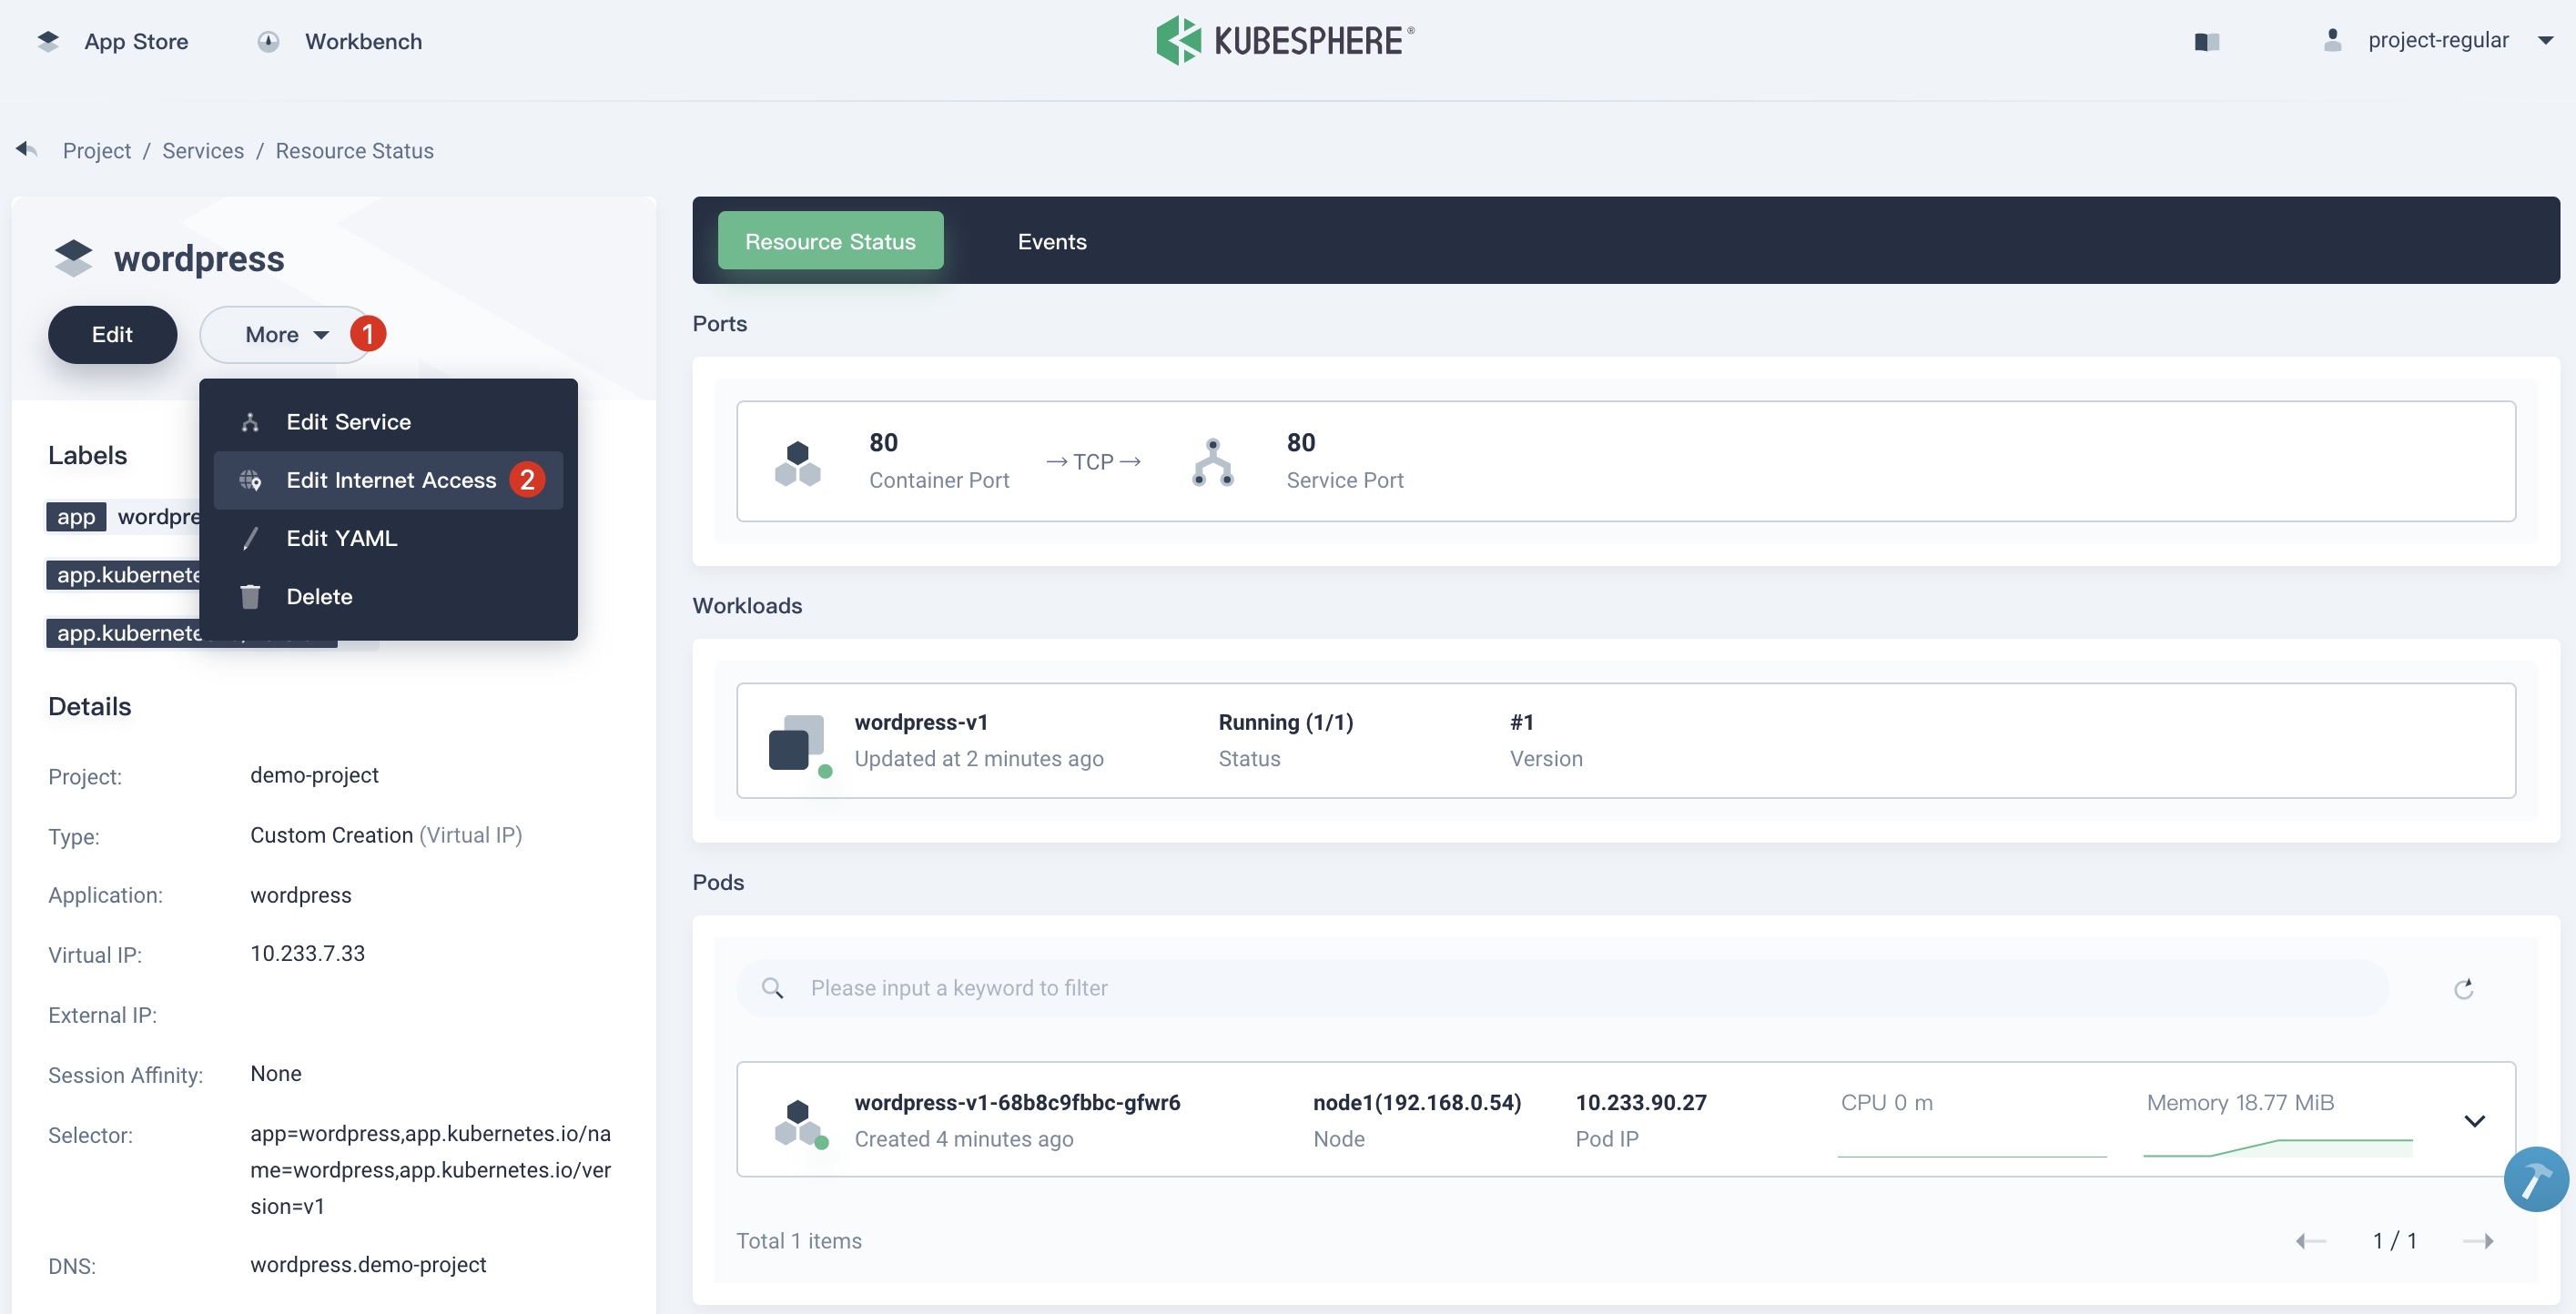
5.2. Choose NodePort as its service type.
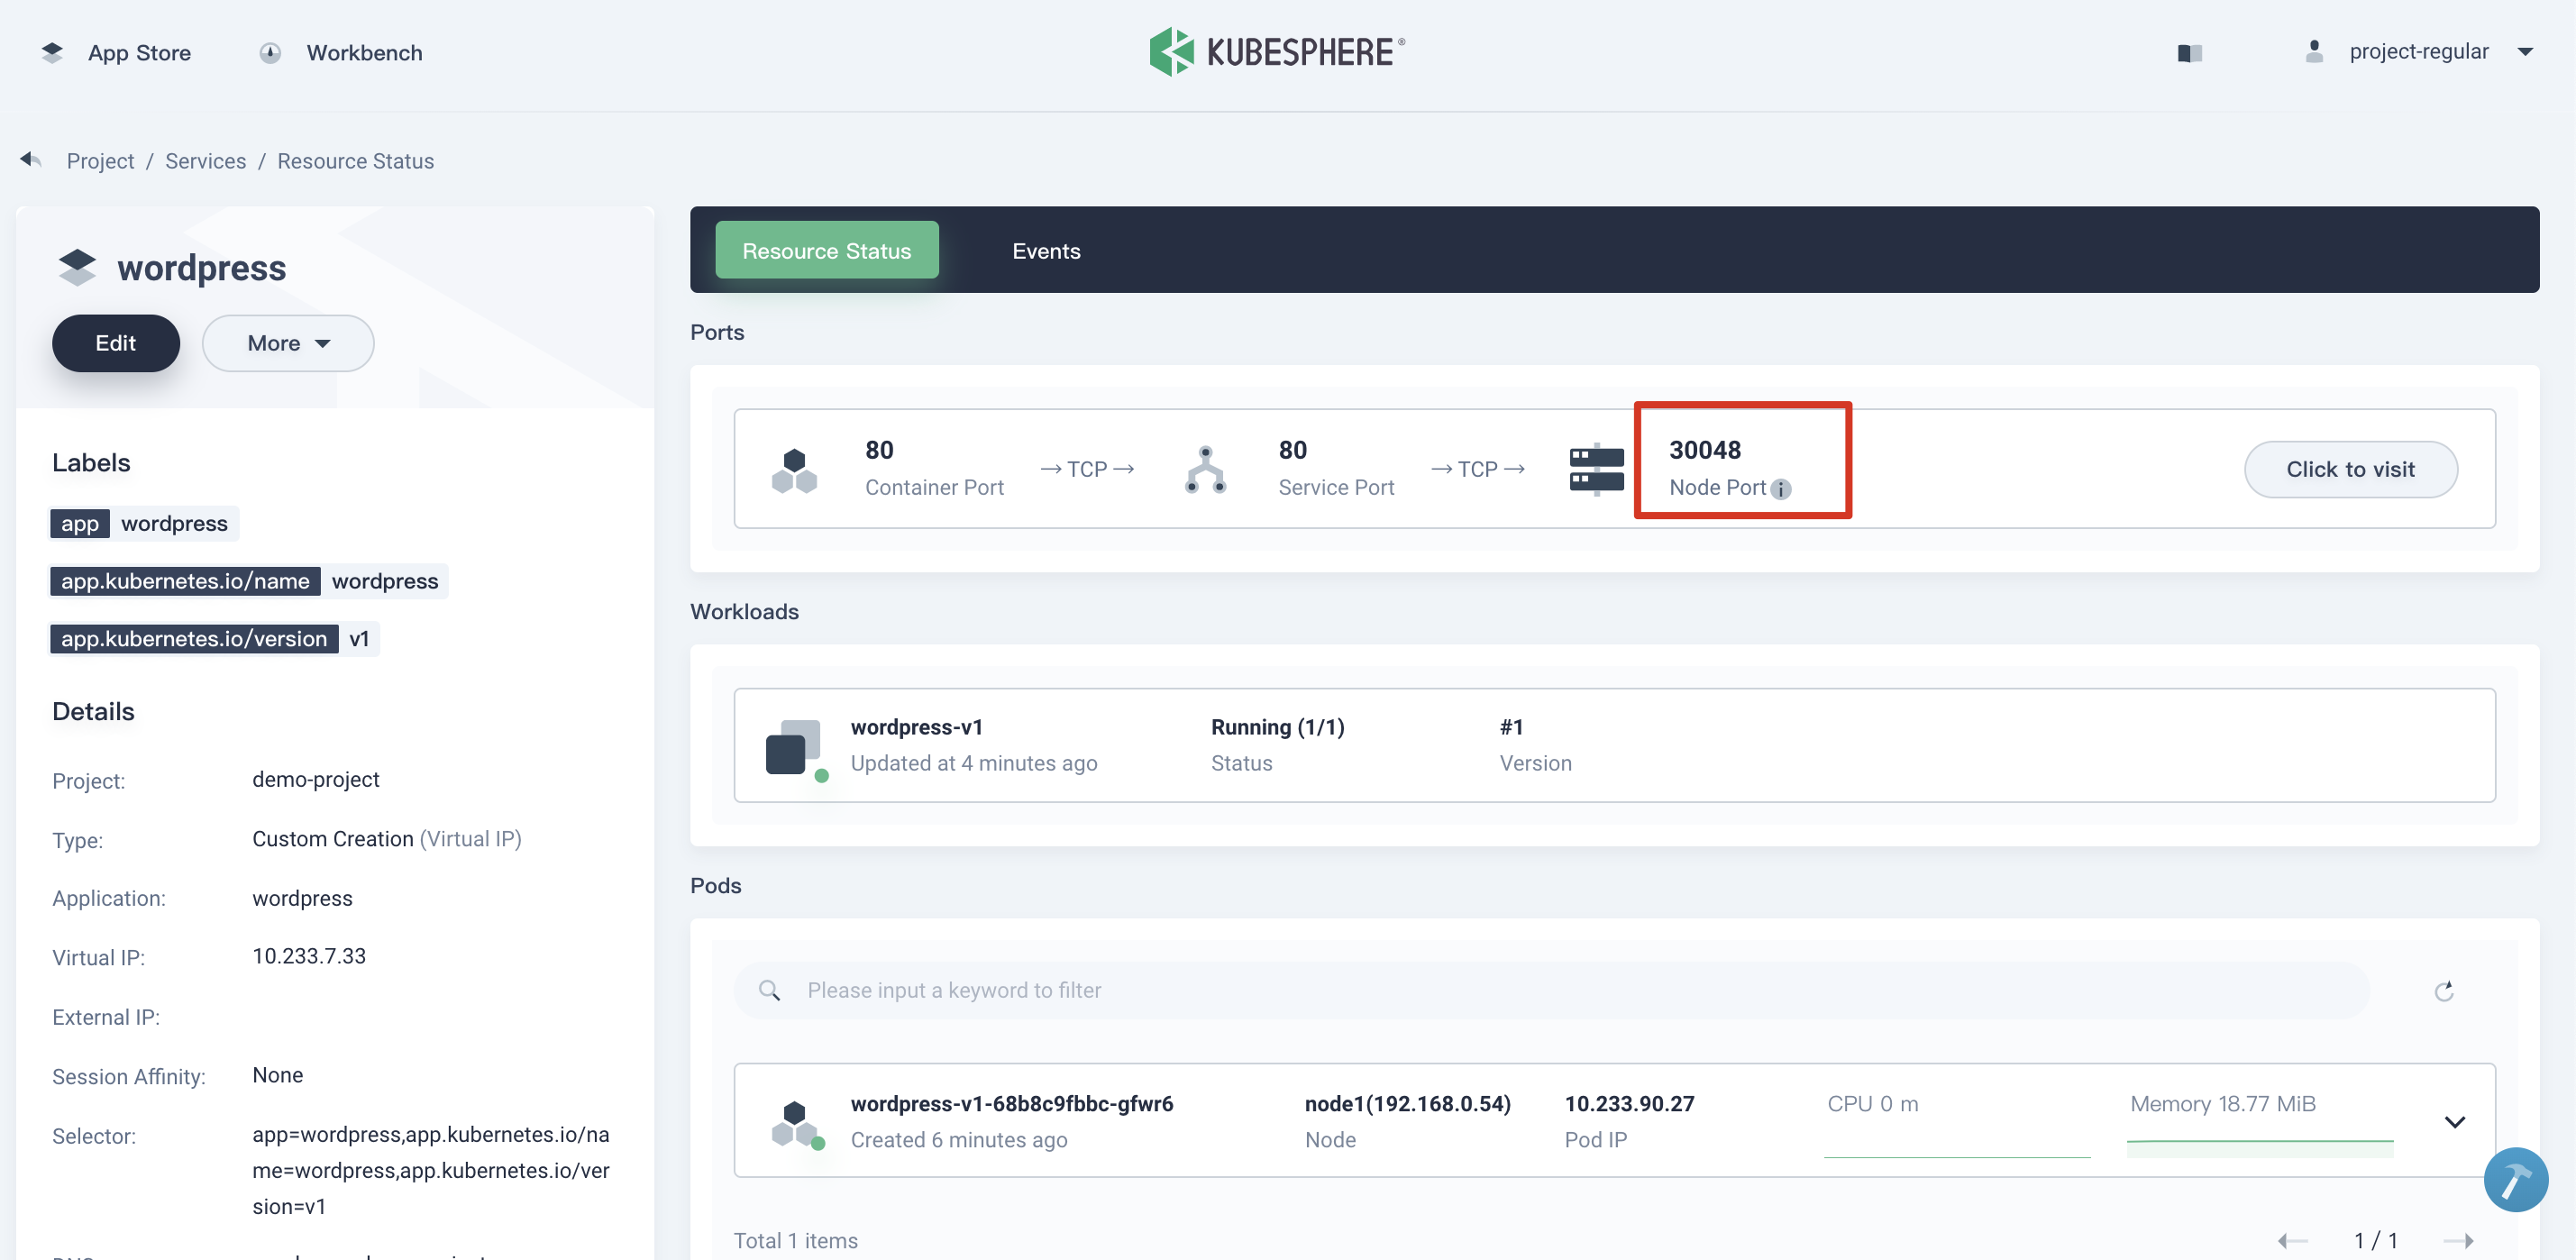
At this point, WordPress is exposed to outside through the service, thus we can access this application in browser via {$Node IP}:{$NodePort}, for example http://192.168.0.88:30048 since we selected http protocol previously.
