Release Notes
Installation
Install on Linux
Install on Kubernetes
Pluggable Components
Upgrade
Third-Party Tools
Authentication Integration
Cluster Operations
Quick Start
DevOps
User Guide
Configration Center
Logging
Developer Guide
API Documentation
Troubleshooting
FAQ
Create a Job to Compute π to 2000 Places
EditA Job creates one or more Pods and ensures a specified number of them successfully terminate. You can also use a Job to run multiple Pods in parallel. For example, we can use Kubernetes Job to process and analyze data in batch.
Objective
This tutorial describes the basic features of a Job by creating a parallel job to compute π to 2000 places and print it out.
Prerequisites
- You need to create a workspace, project and
project-regularaccount. Please refer to the Getting Started with Multi-tenant Management if not yet. - You need to sign in with
project-adminaccount and inviteproject-regularto enter the corresponding project if not yet. Please refer to Invite Member.
Estimated Time
About 15 minutes
Hands-on Lab
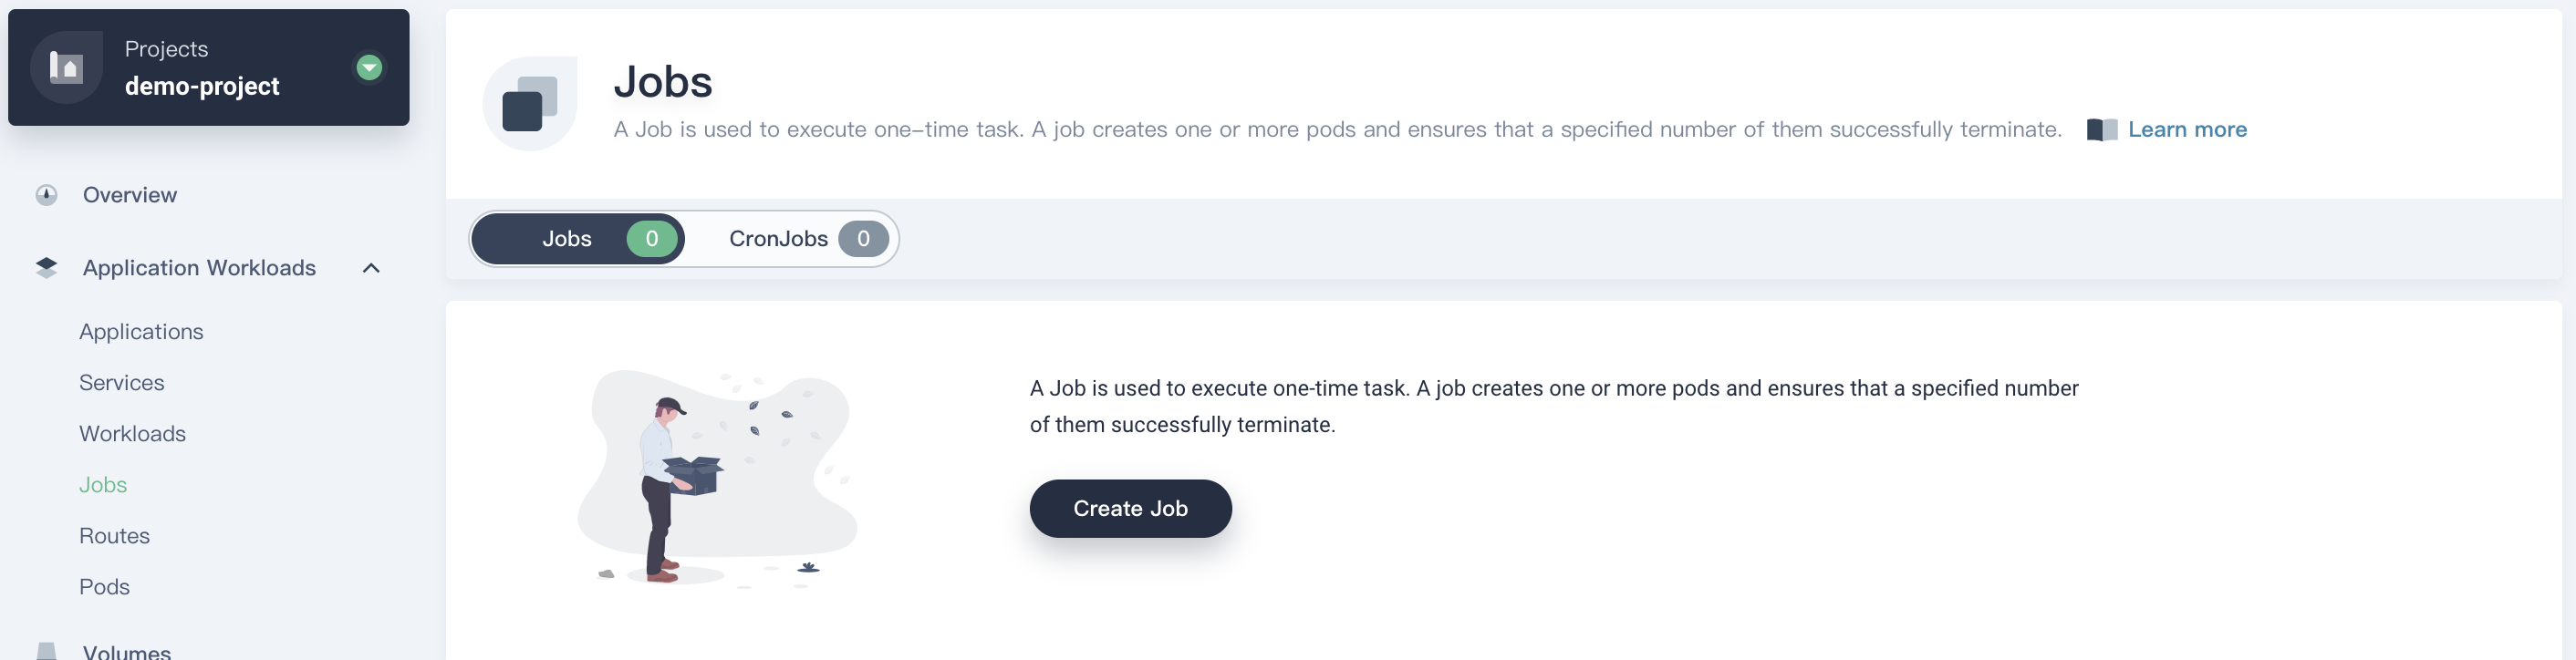
Create a Job
Step 1: Fill in Basic Information
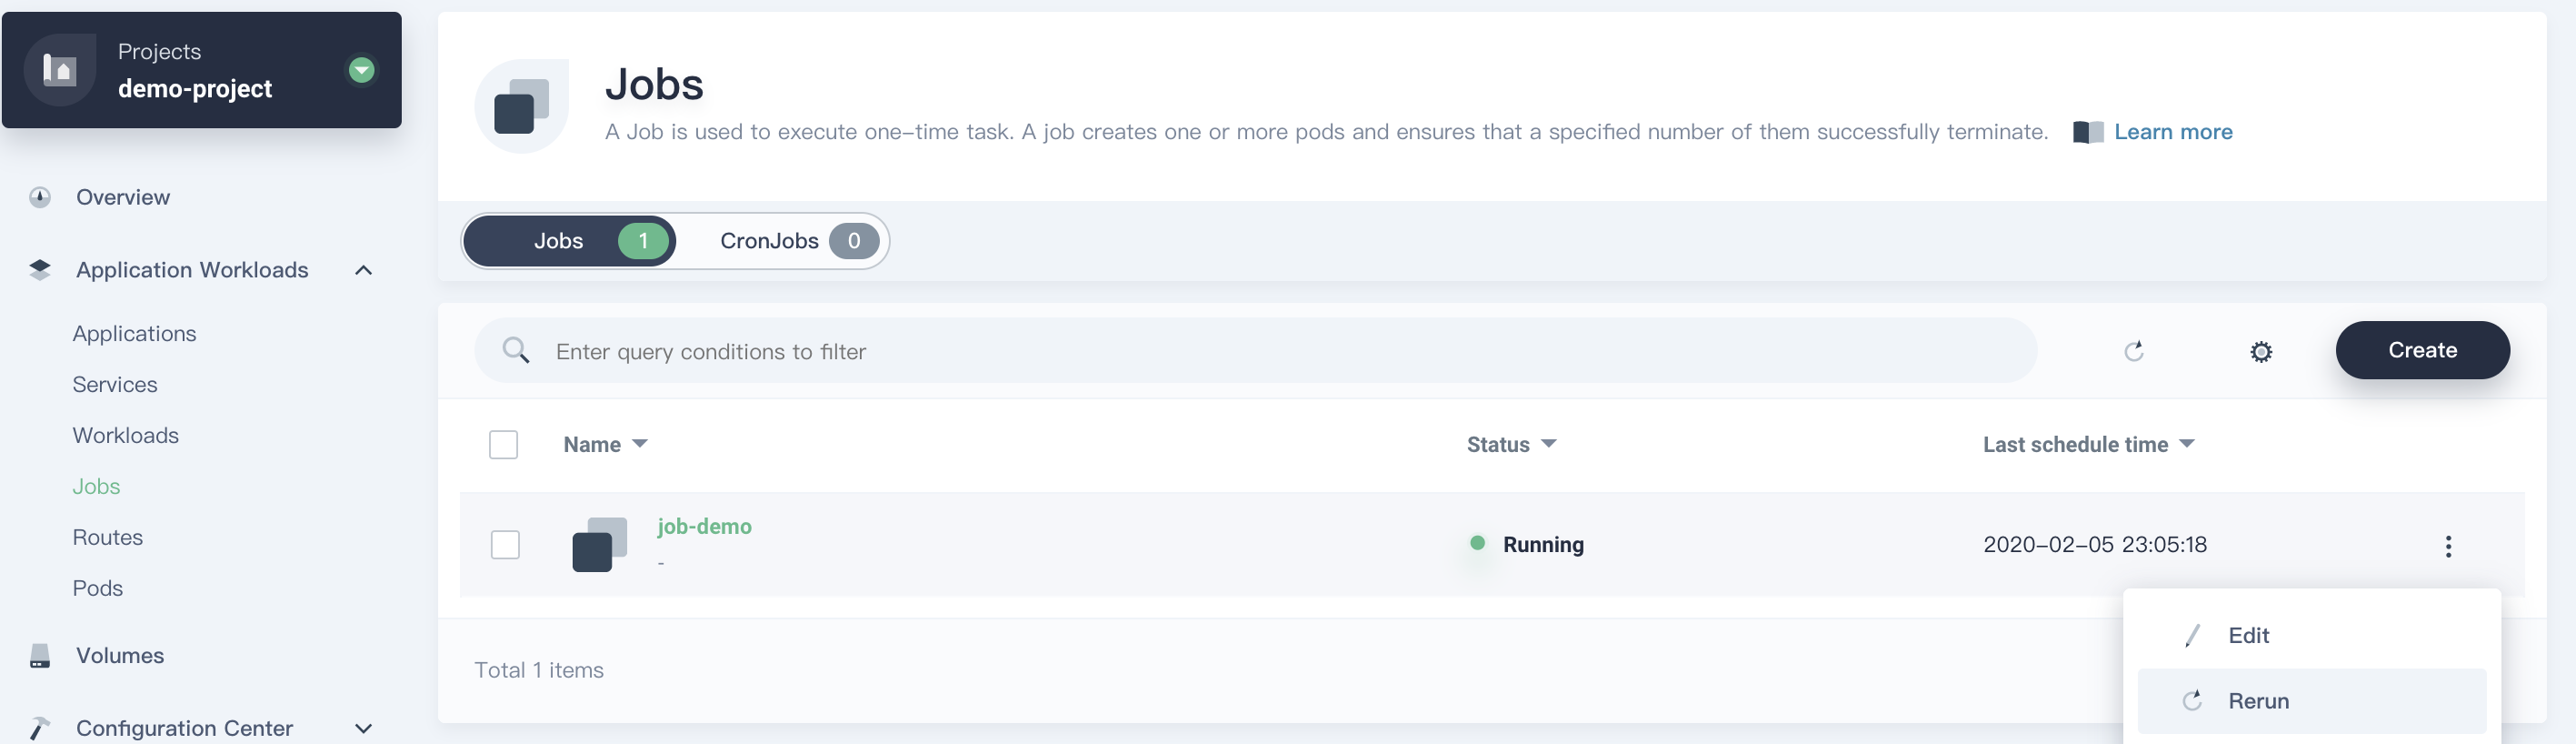
Log in the KubeSphere console with project-regular account, then enter a project, navigate to Application Workloads → Jobs and click Create Job. Then fill in the basic information, e.g. job-demo as its name, and choose Next.
Step 2: Configure Job Settings
Set the four configuration parameters of the Job Spec as the following shown.
- Back Off Limit:specifies the number of retries before the build job failed; Set to
5. - Completions:expected number of completed build jobs; Change the value from default 1 to
4. - Parallelism:expected maximum number of parallel build jobs; Change the value from default 1 to
2. - Active Deadline Seconds:the timeout of the running build jobs. Once a Job reaches its value, all of its running Pods are terminated and the Job status will become "Failed". Set to
300.
then click Next when you are done.

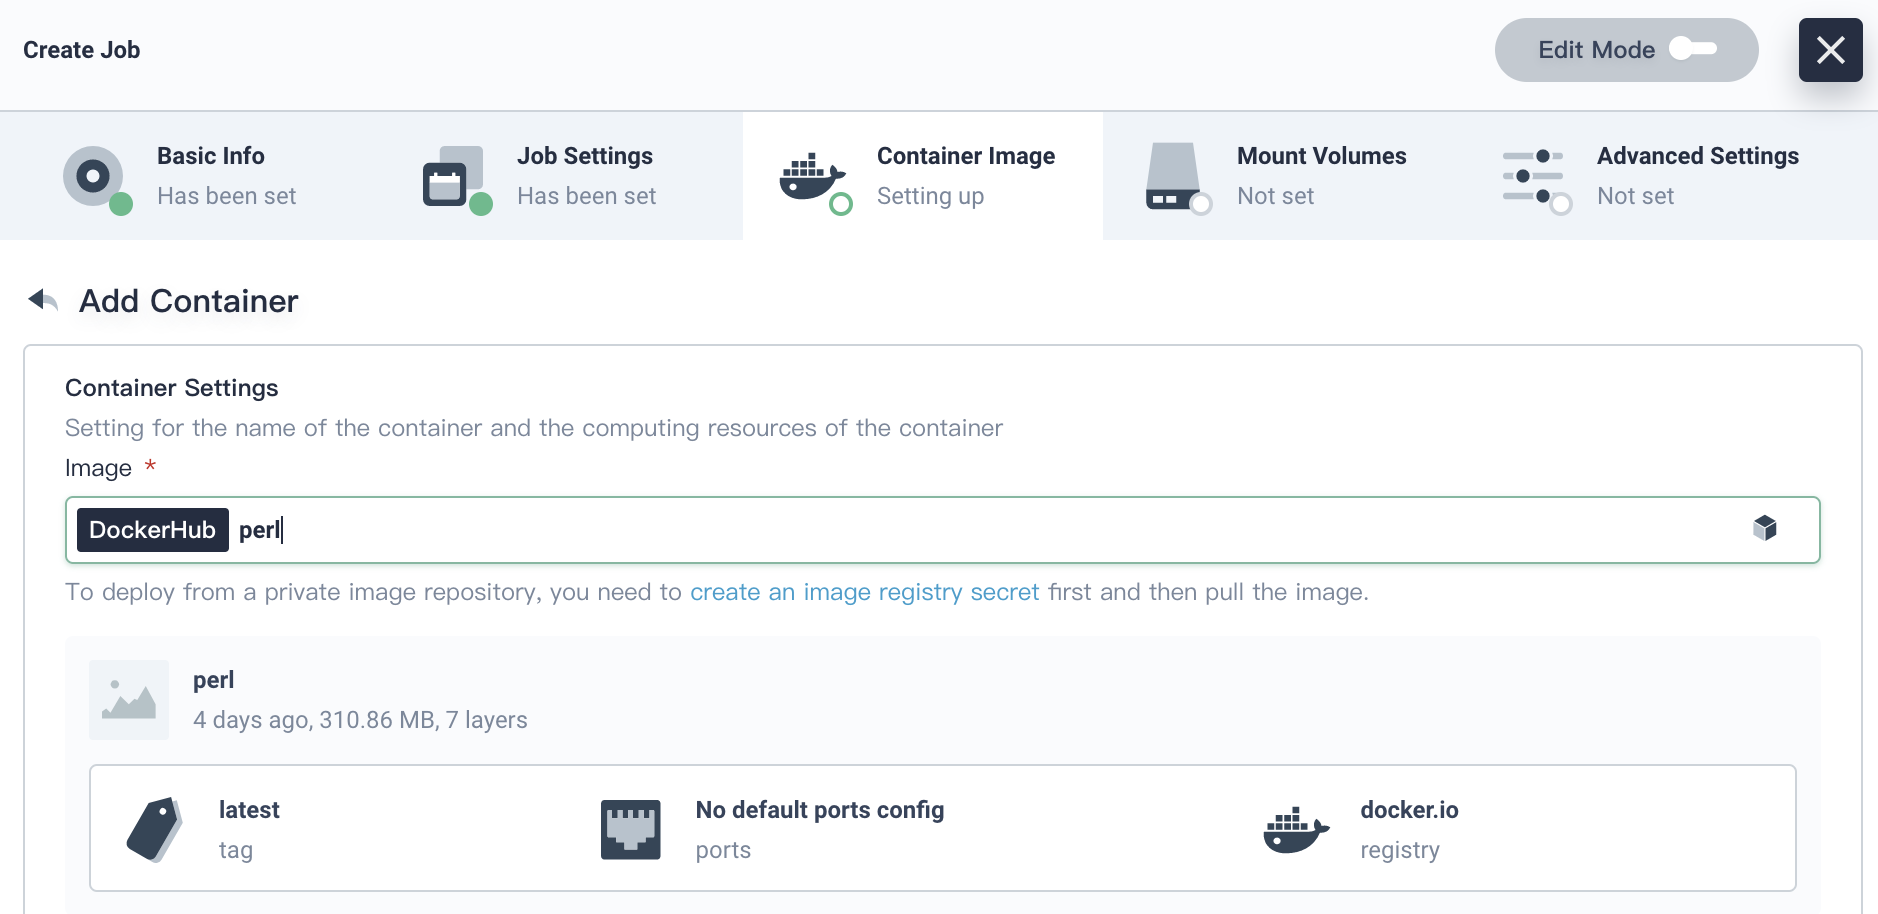
Step 3: Set the Job Template
Leave the RestartPolicy as Never, then click Add Container Image.
- Never: The job will create a new container group when the errors occur and it will not disappear.
- OneFailure: The job will restart the container when the errors occur, instead of creating a new container group.
Enter perl in the image name and press return key, then scroll down to Start Command.
Check Start Command, add the following command which performs a simple calculation and outputs the result of the Pi to 2000 places. Then click √ to save it and choose Next to finish this step.
perl,-Mbignum=bpi,-wle,print bpi(2000)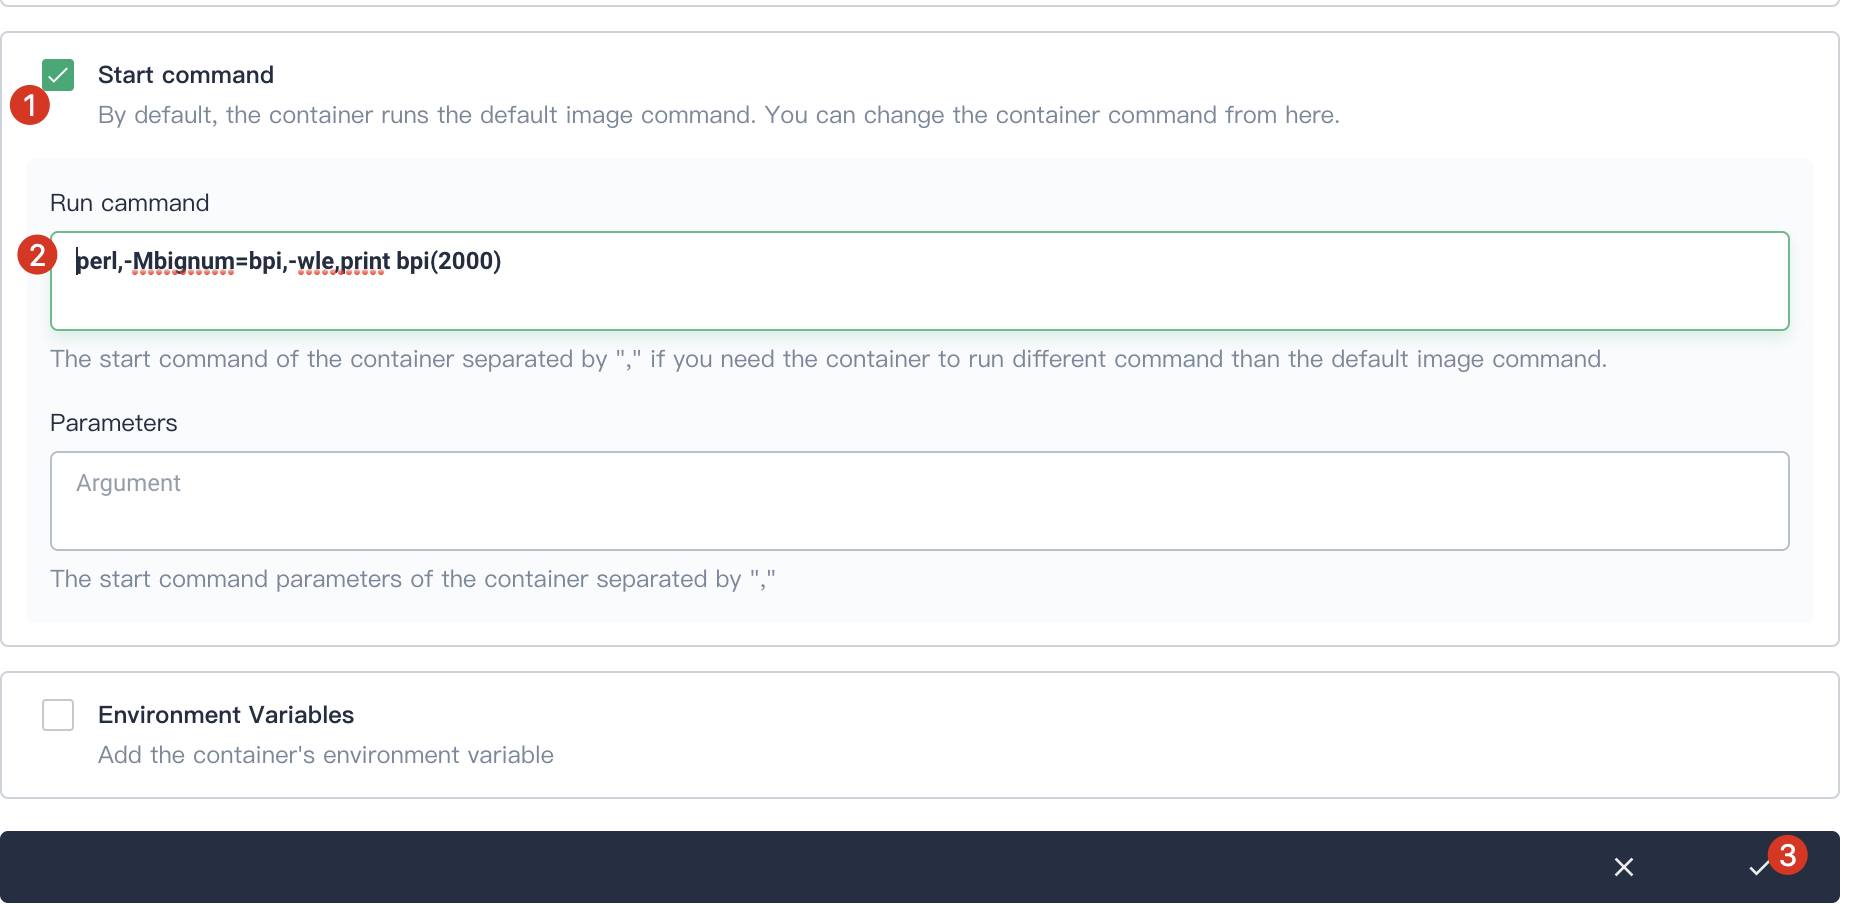
Click Next to skip Mount Volumes. Click Create to complete job creation.
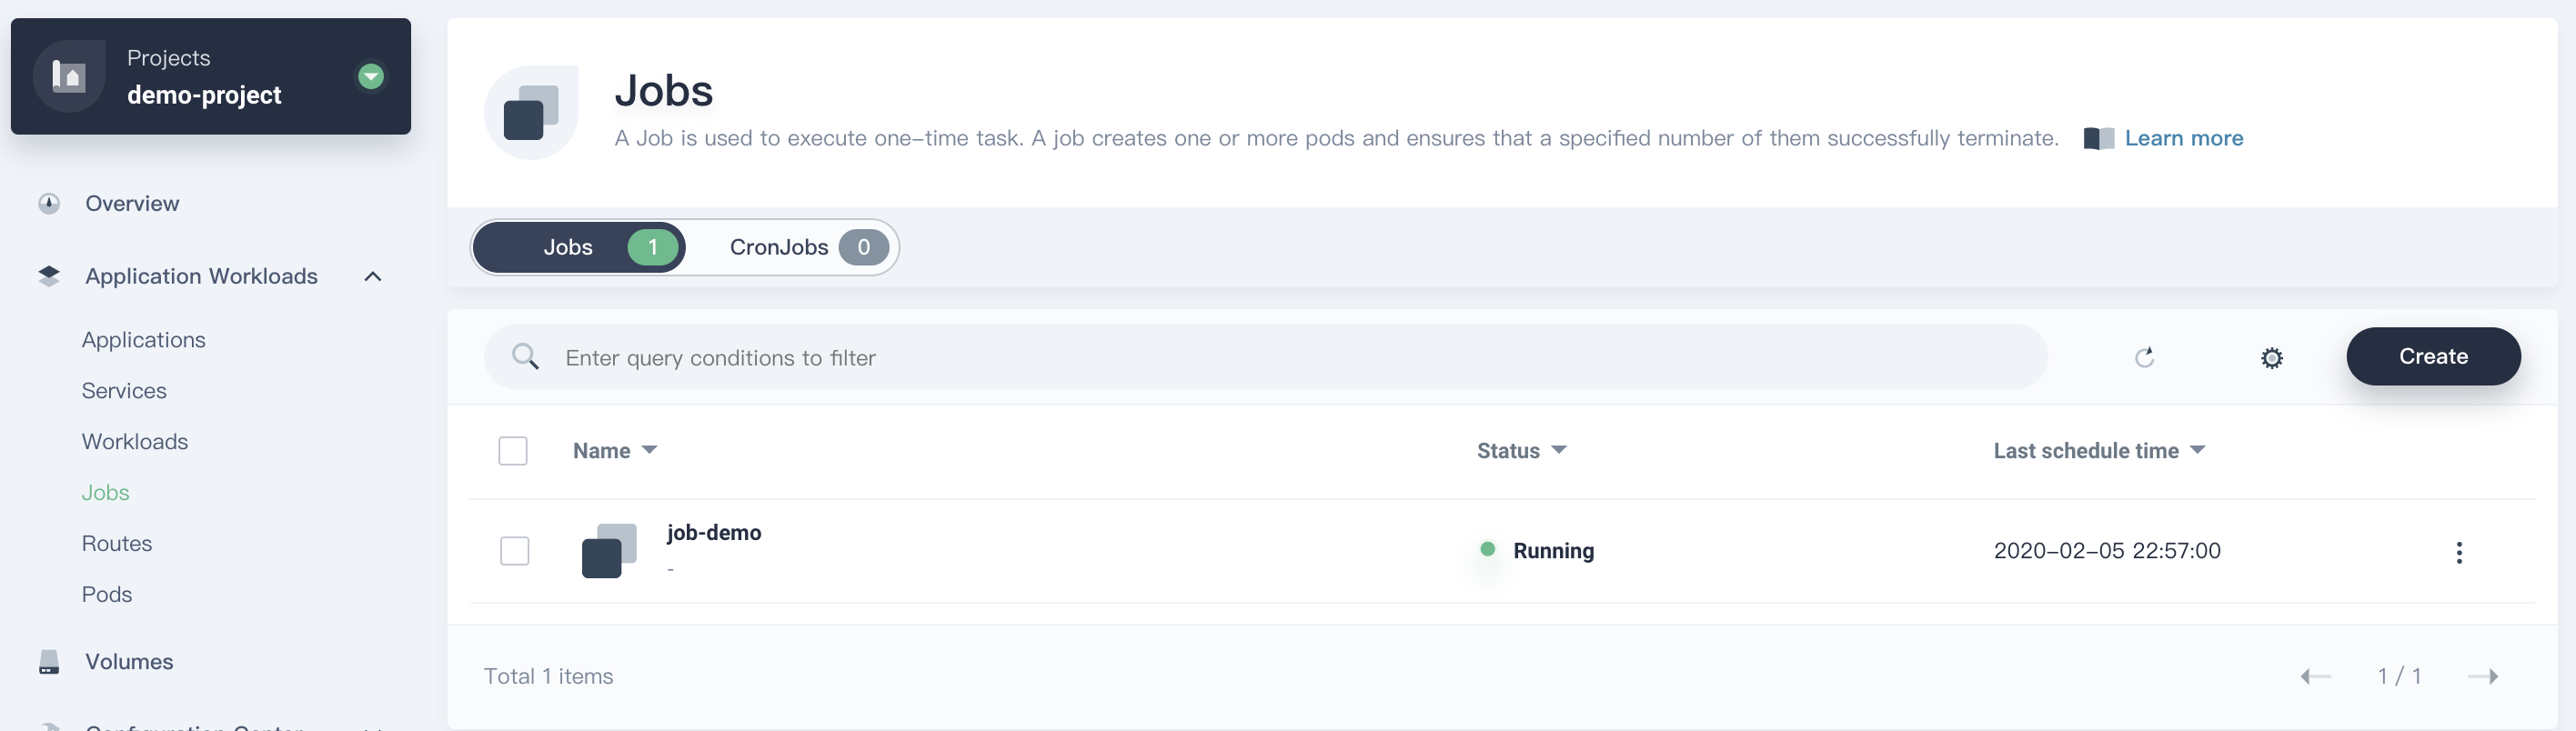
Verify the Job Result
- Enter the
job-demoand inspect the execution records. You can see it displays "completed". There are four completed Pods since the Completions was set to4in the Step 2.

- In the Resource Status, you can inspect the Pod status. Since the Parallelism was set to 2, there are two Pods created in the first batch. Then it continues to create two more Pods. Finally four Pods are created at the end of the Job.
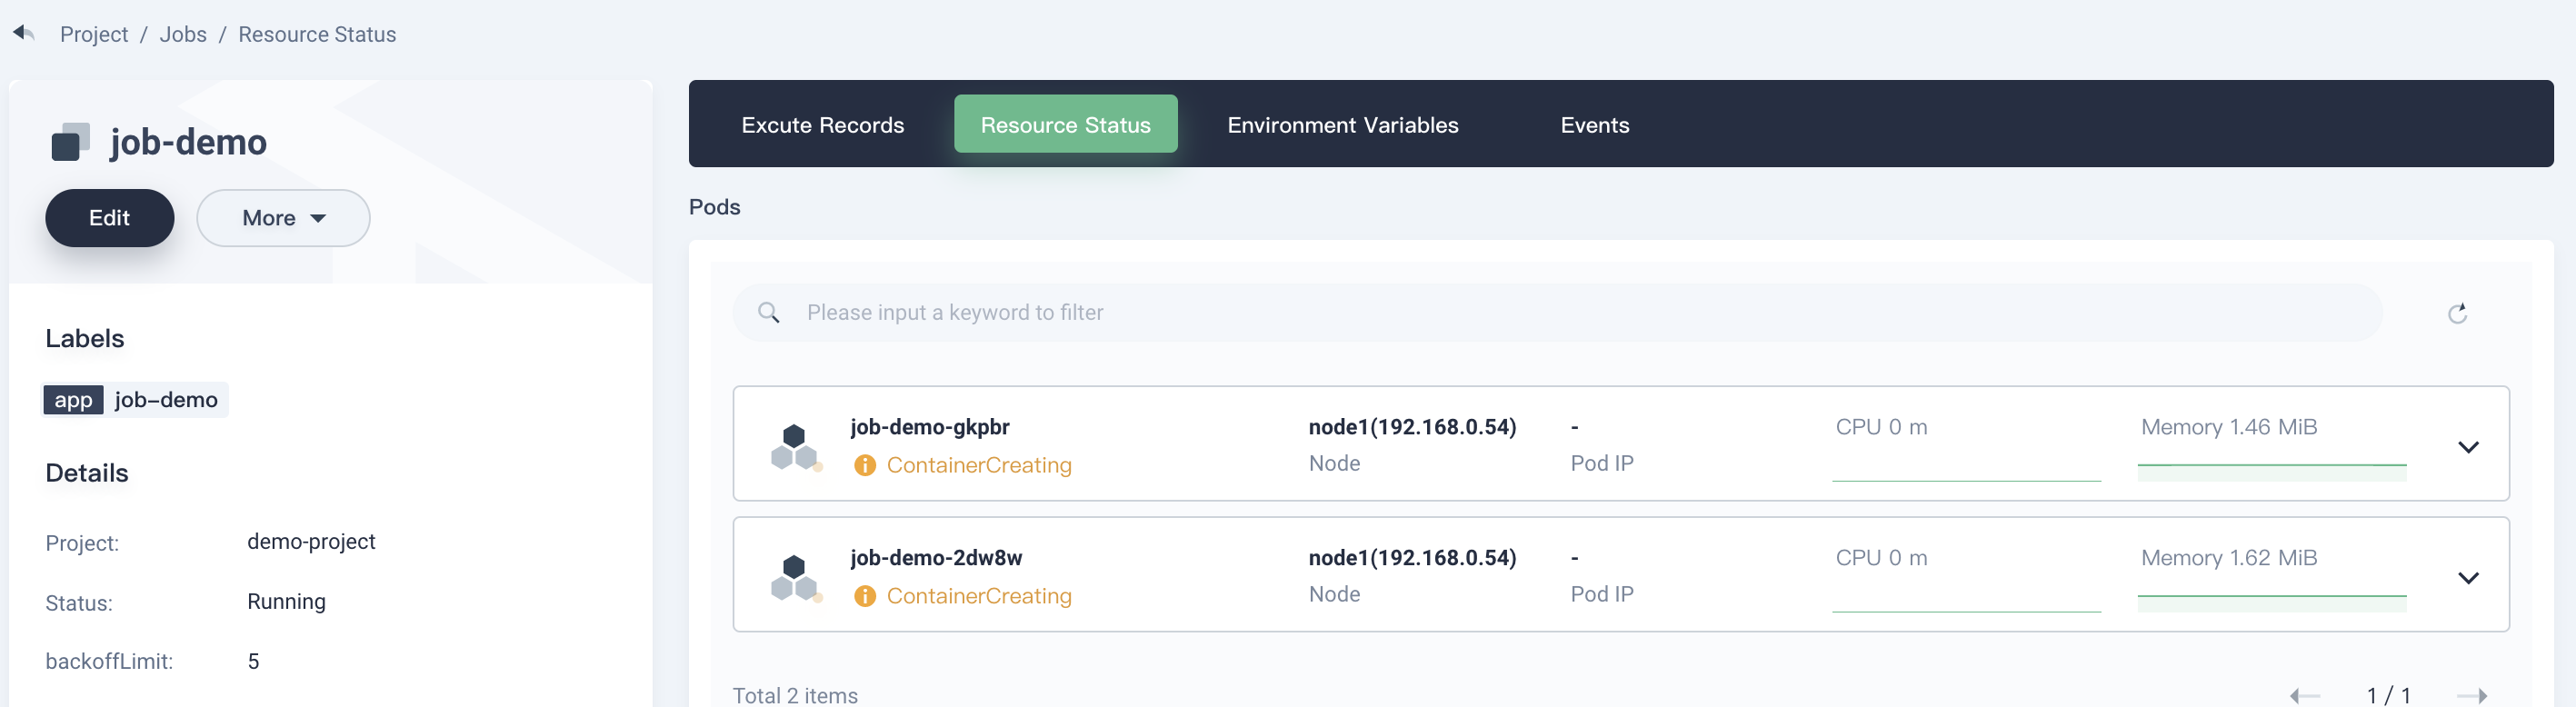
Tips: Since the creation of the container may encounter timed out, if the job fails, click ··· → Rerun from the list to rerun this job.
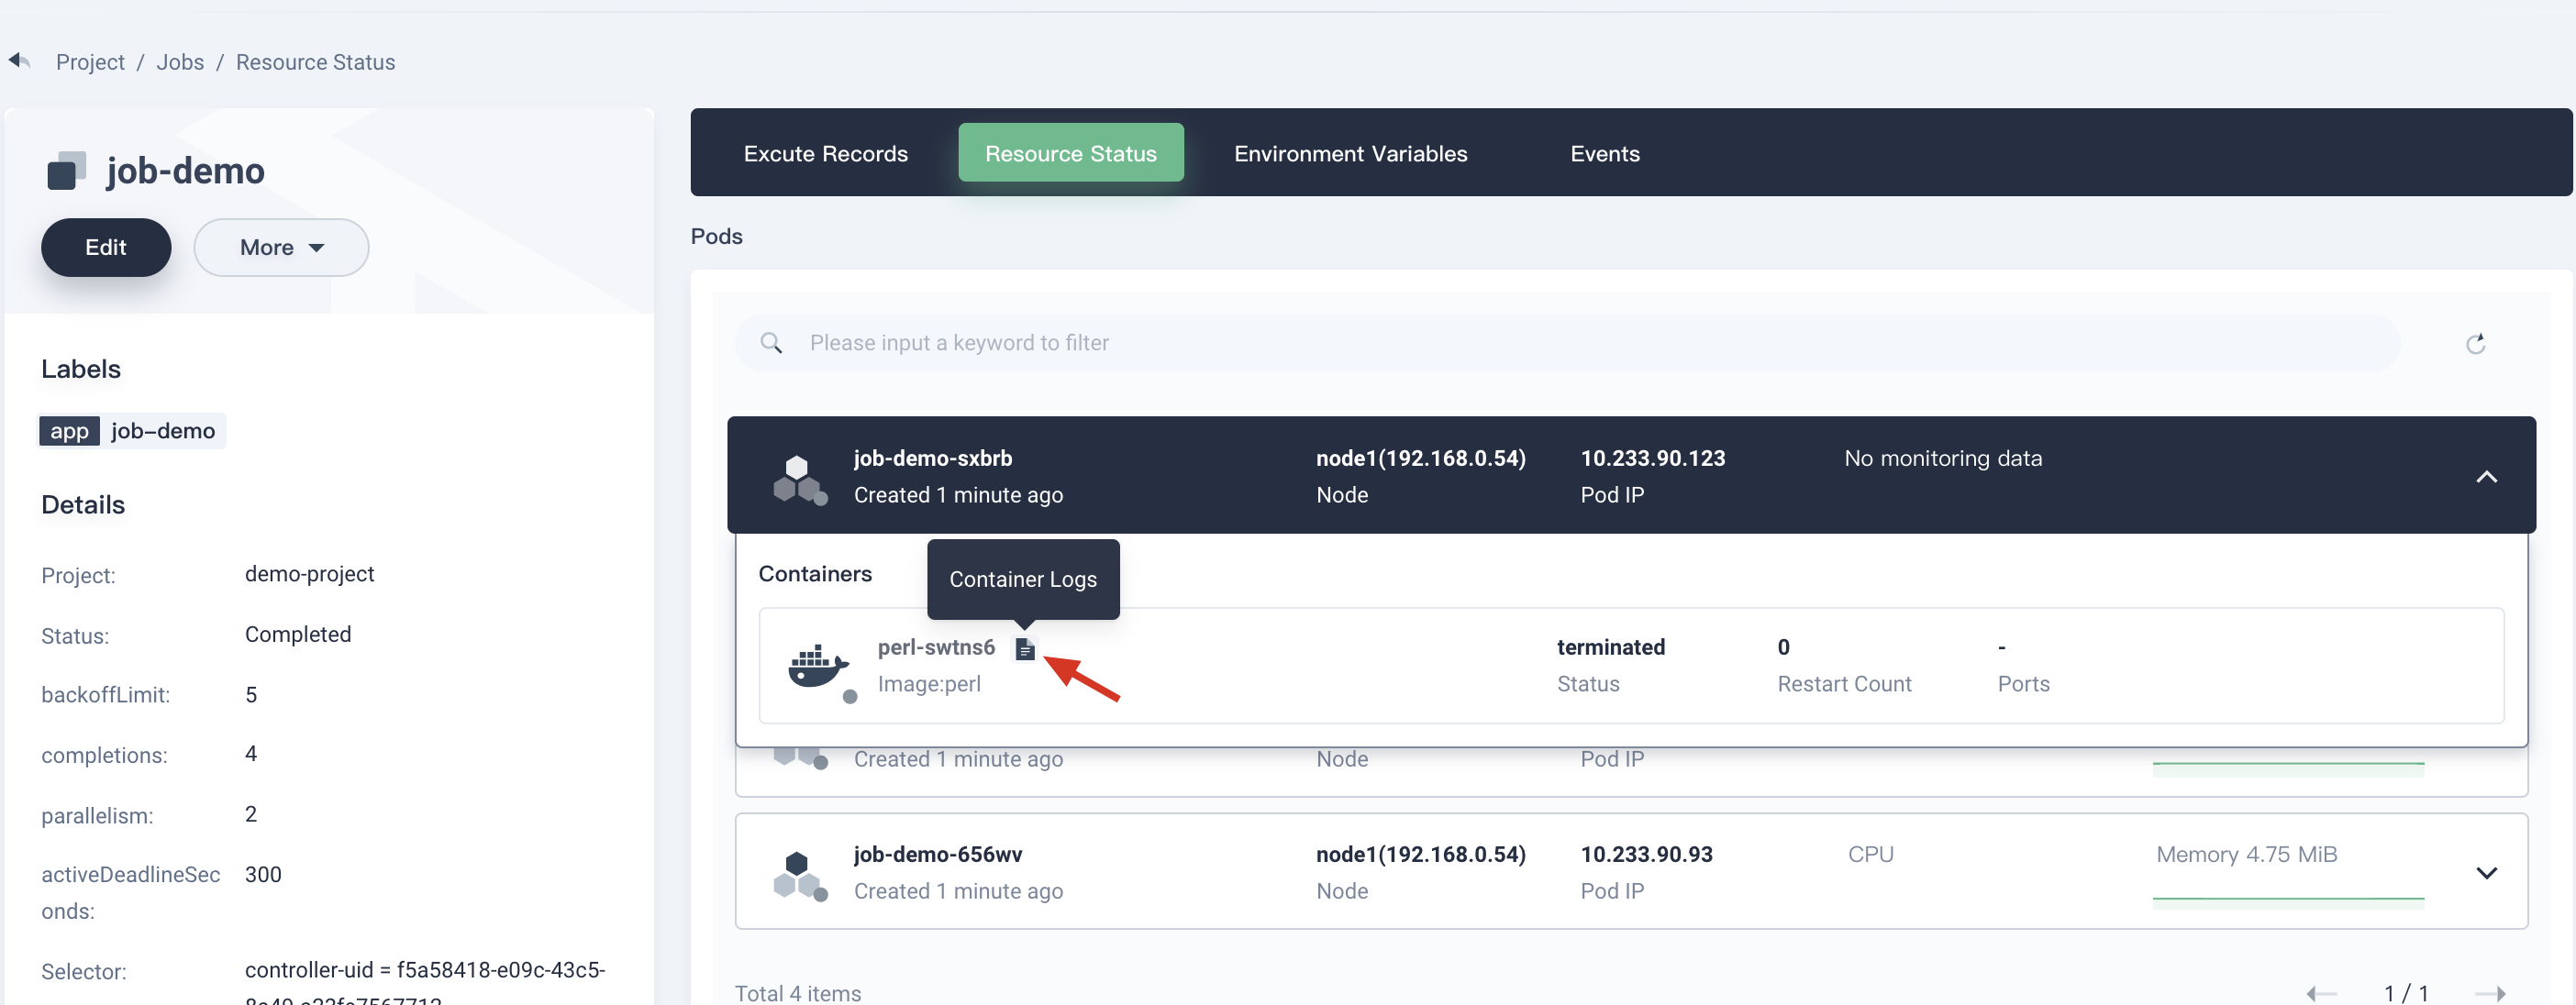
- In the Resource Status tap, expand one of its Pod, then click into Container Logs to inspect the container logs which display the calculation result, i.e. PI to 2000 places.

Congratulation! You have learned Job's basic functions. For further details, please refer to Jobs - Run to Completion.