Release Notes
Installation
Install on Linux
Install on Kubernetes
Pluggable Components
Upgrade
Third-Party Tools
Authentication Integration
Cluster Operations
Quick Start
DevOps
User Guide
Configration Center
Logging
Developer Guide
API Documentation
Troubleshooting
FAQ
Managing Canary Release of Microservice App based on Istio
EditIstio,as an open source service mesh, provides powerful traffic management which makes canary release of a microservice possible. Canary release provides canary rollouts, and staged rollouts with percentage-based traffic splits.
The following paragraph is from Istio official website.
Istio’s traffic routing rules let you easily control the flow of traffic and API calls between services. Istio simplifies configuration of service-level properties like circuit breakers, timeouts, and retries, and makes it easy to set up important tasks like A/B testing, canary rollouts, and staged rollouts with percentage-based traffic splits. It also provides out-of-box failure recovery features that help make your application more robust against failures of dependent services or the network.
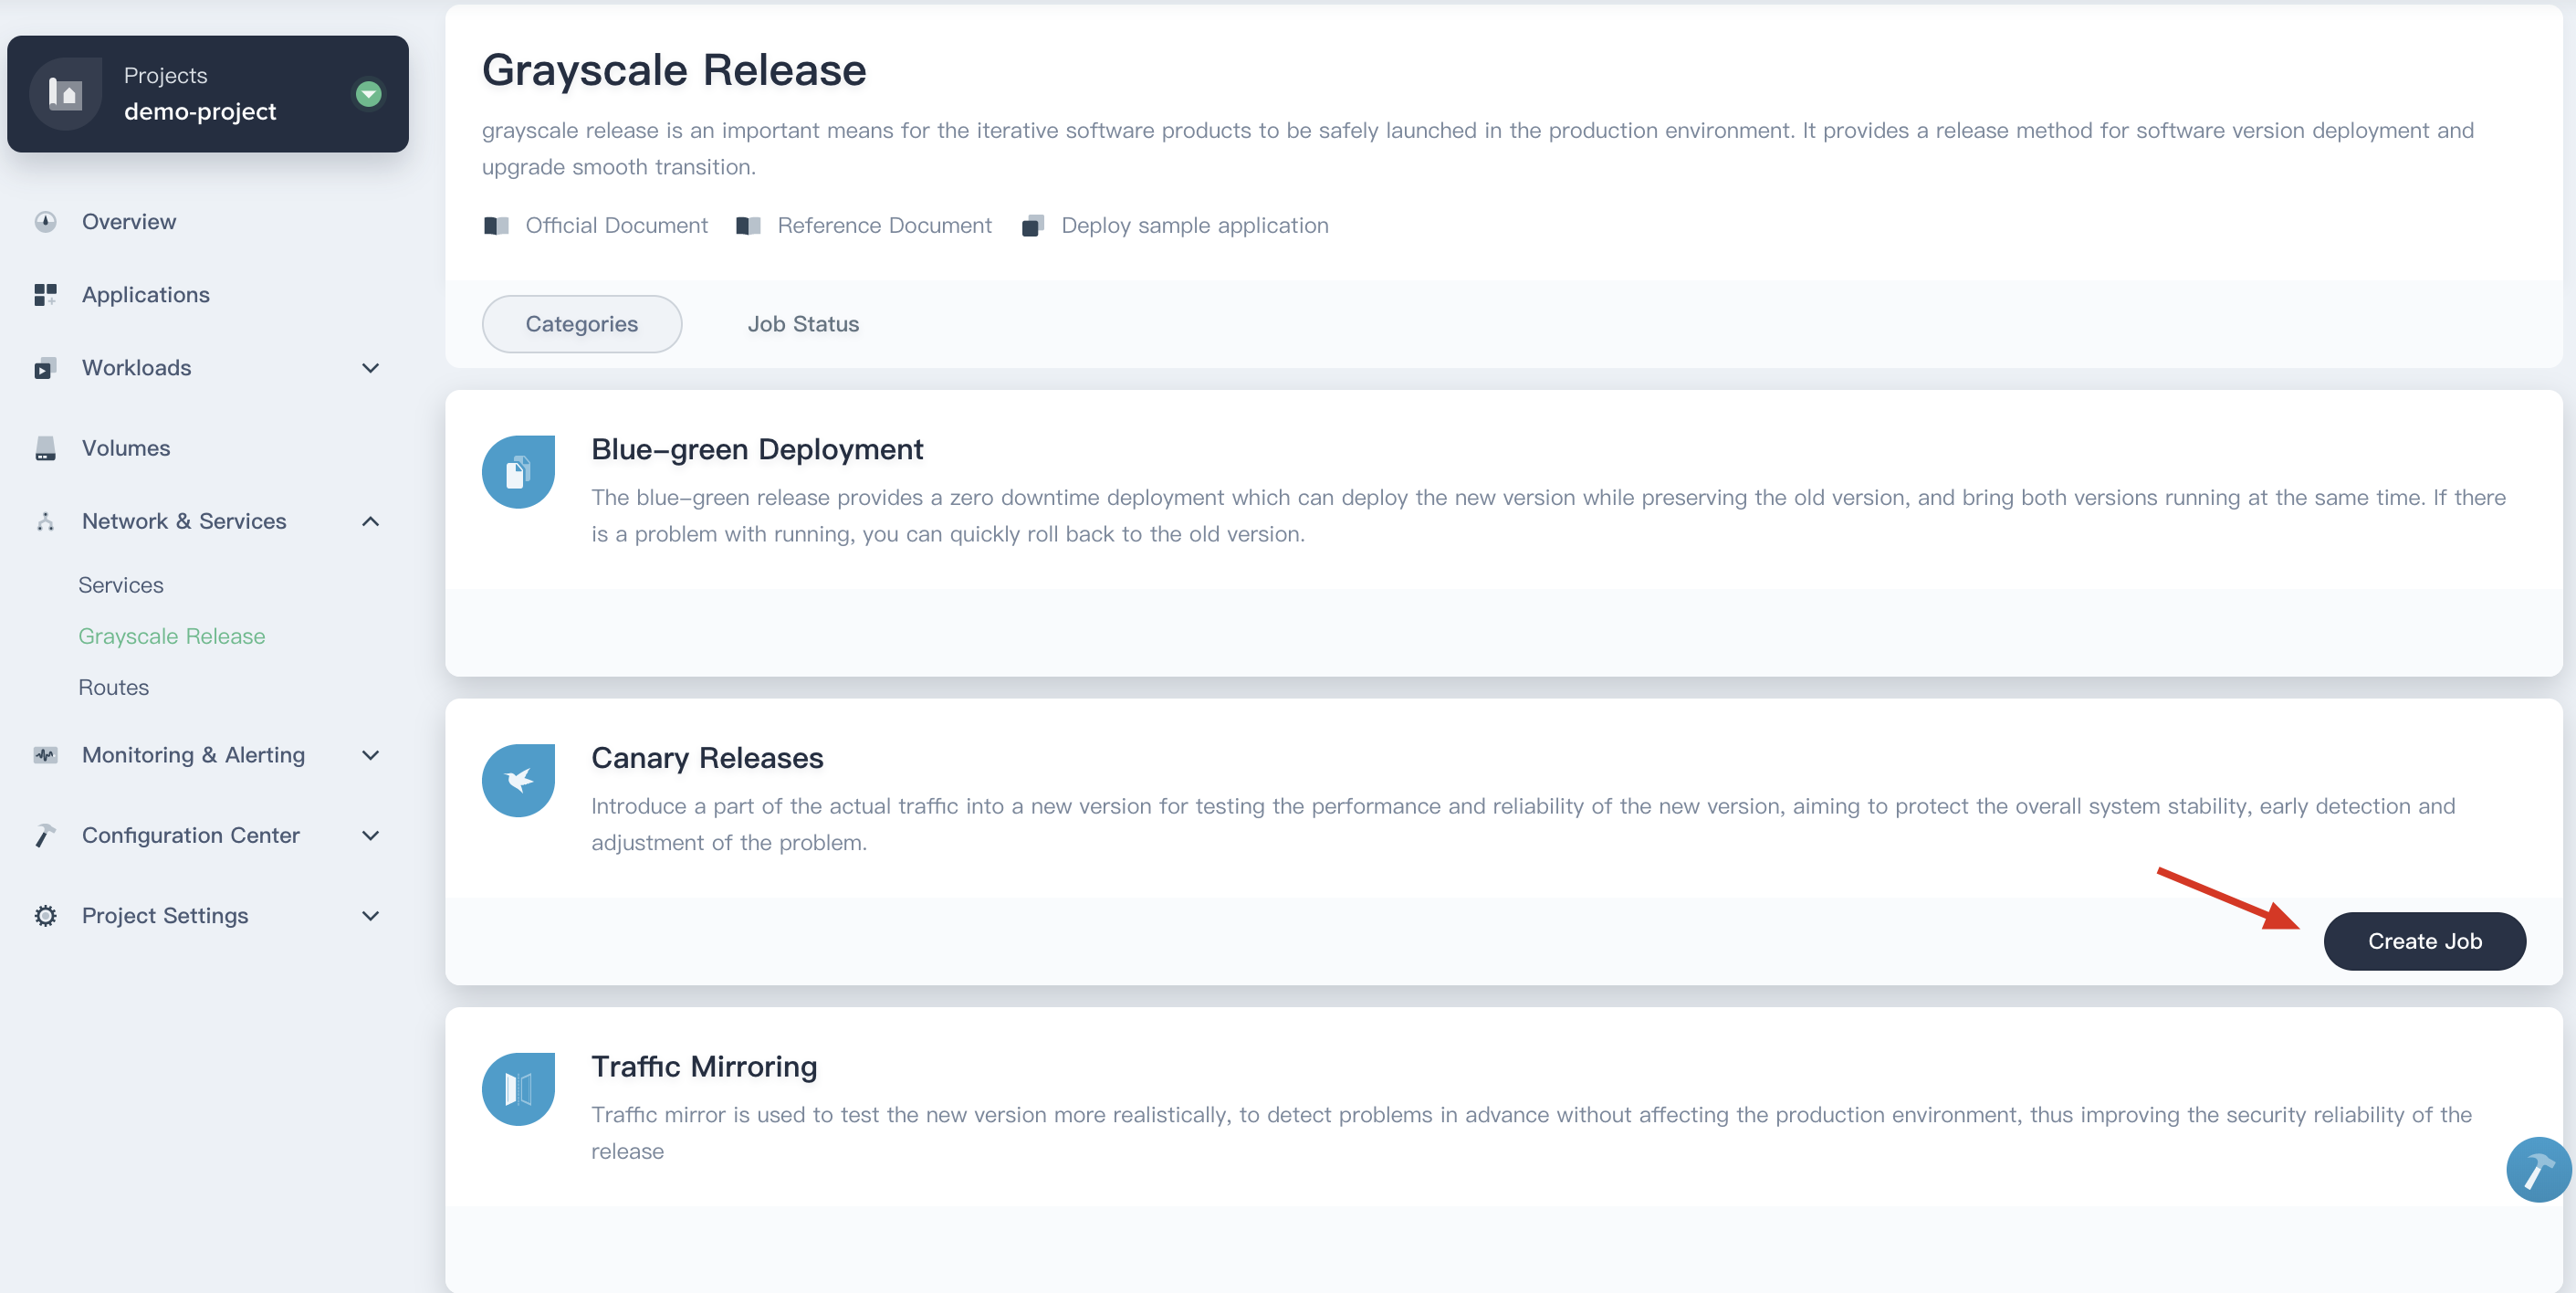
KubeSphere provides three kinds of grayscale strategies based on Istio, including blue-green deployment, canary release and traffic mirroring.
Objective
In this tutorial, we are going to deploy a Bookinfo sample application composed of four separate microservices to demonstrate the canary release, tracing and traffic monitoring using Istio on KubeSphere.
Prerequisites
- You need to Enable Service Mesh System.
- You need to complete all steps in Getting Started with Multi-tenant Management.
- Log in with
project-adminand go to your project, then navigate to Project Settings → Advanced Settings → Set Gateway and turn on Application Governance.
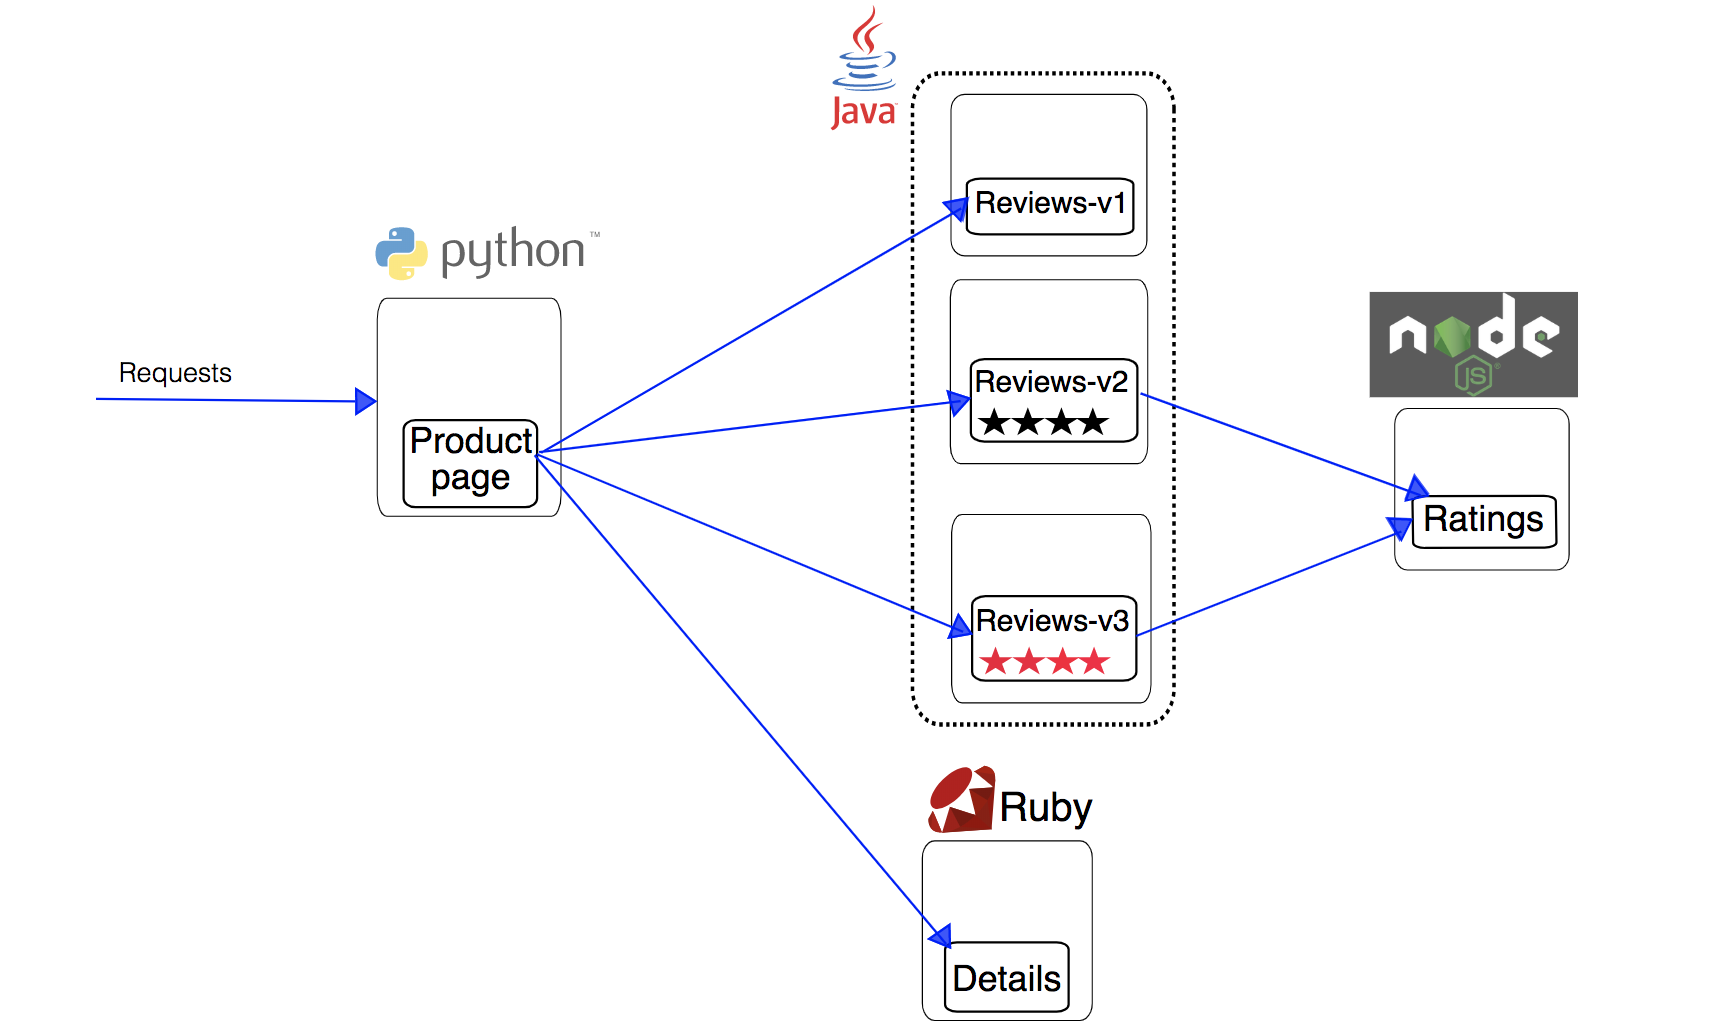
What is Bookinfo Application
The Bookinfo application is composed of four distributed microservices as shown below. There are three versions of the Reviews microservice.
- The productpage microservice calls the details and reviews microservices to populate the page.
- The details microservice contains book information.
- The reviews microservice contains book reviews. It also calls the ratings microservice.
- The ratings microservice contains book ranking information that accompanies a book review.
The end-to-end architecture of the application is shown below, see Bookinfo Application for more details.
Hands-on Lab
Step 1: Deploy Bookinfo Application
1.1. Log in with account project-regular and enter the demo-project, navigate to Application Workloads → Applications, click Deploy Sample Application.
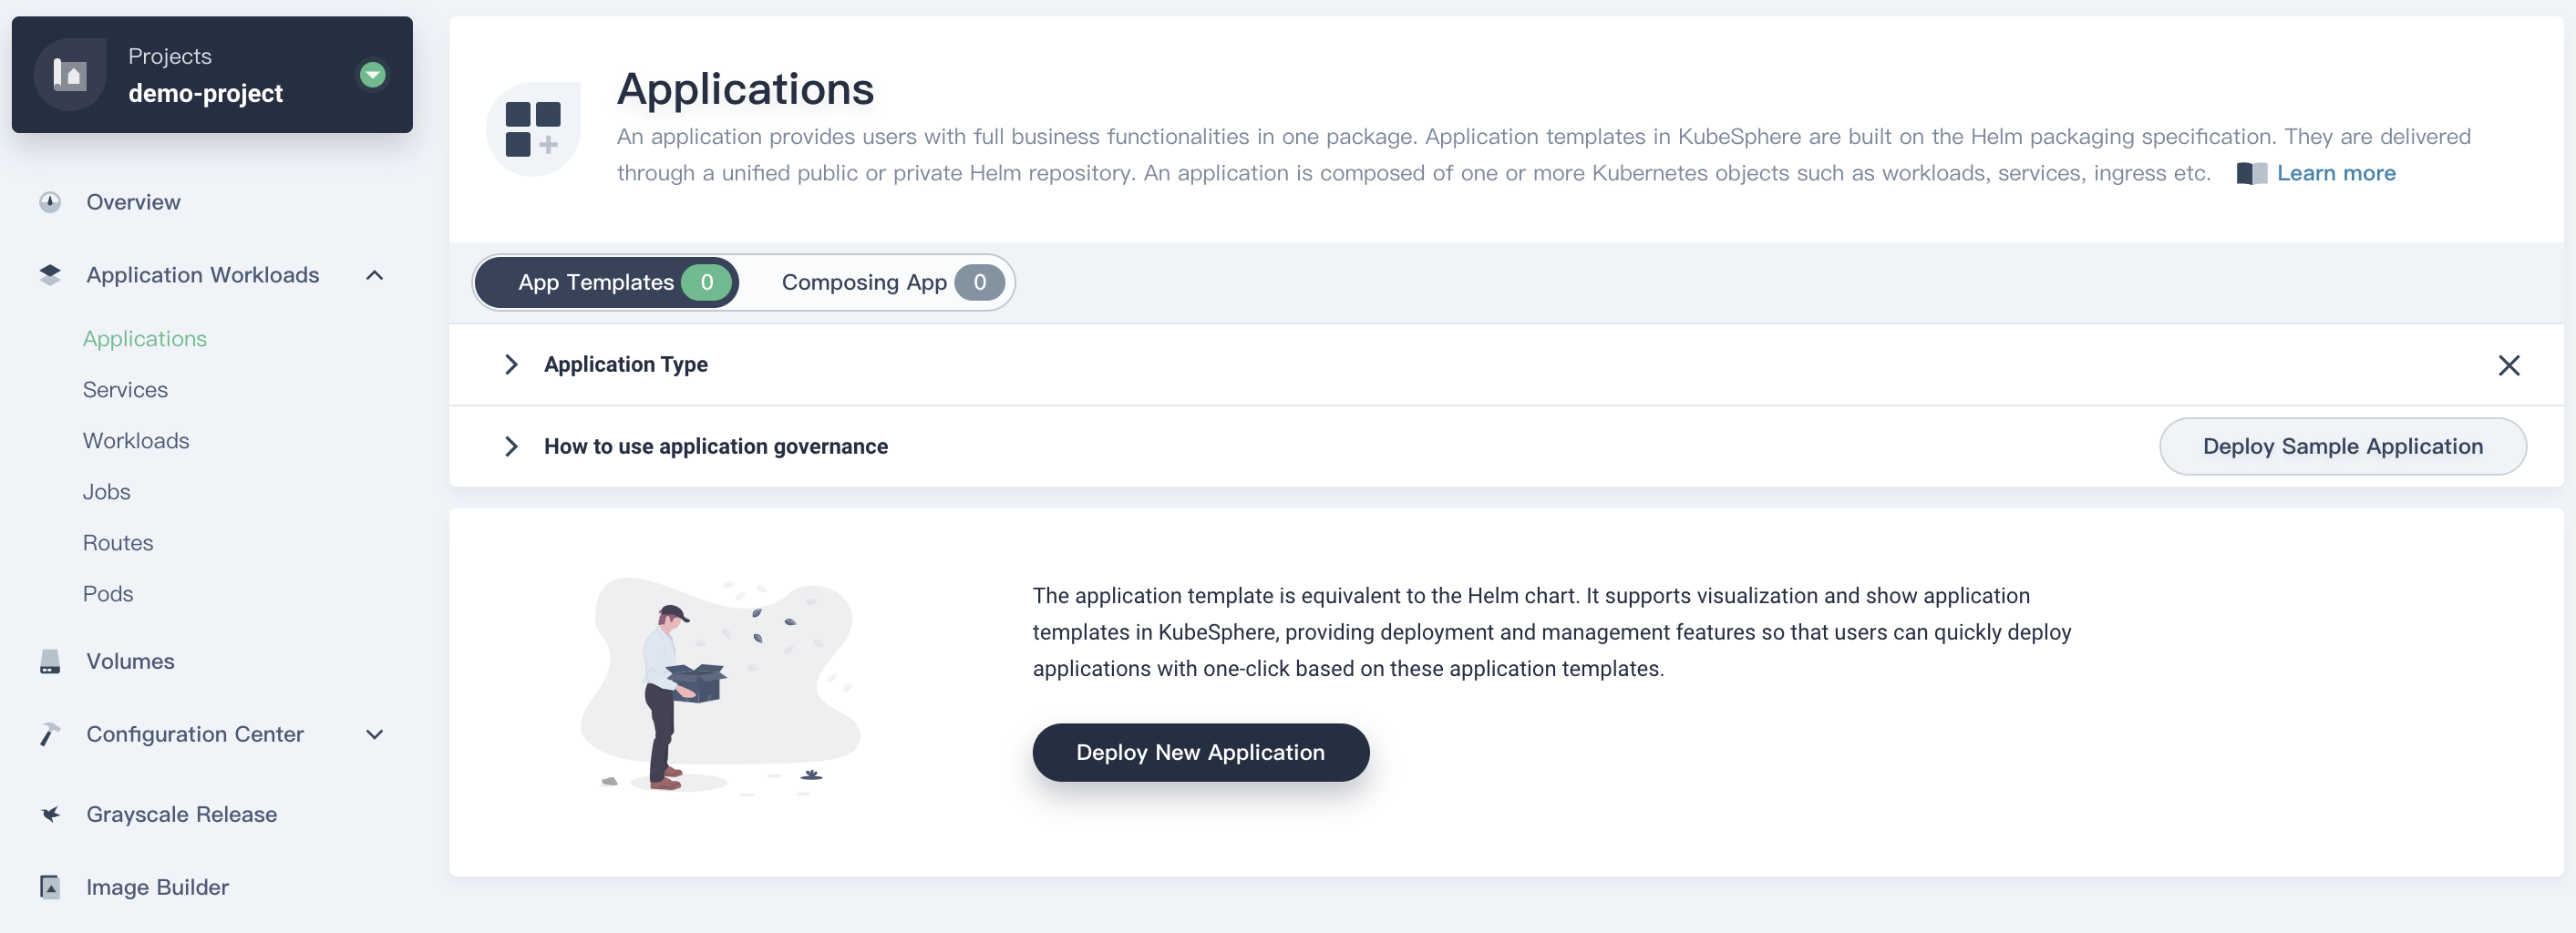
1.2. Click Create in the pop-up window, then the Bookinfo application will be deployed automatically, and the application components are listed in the following page, as well as the routes and hostname.
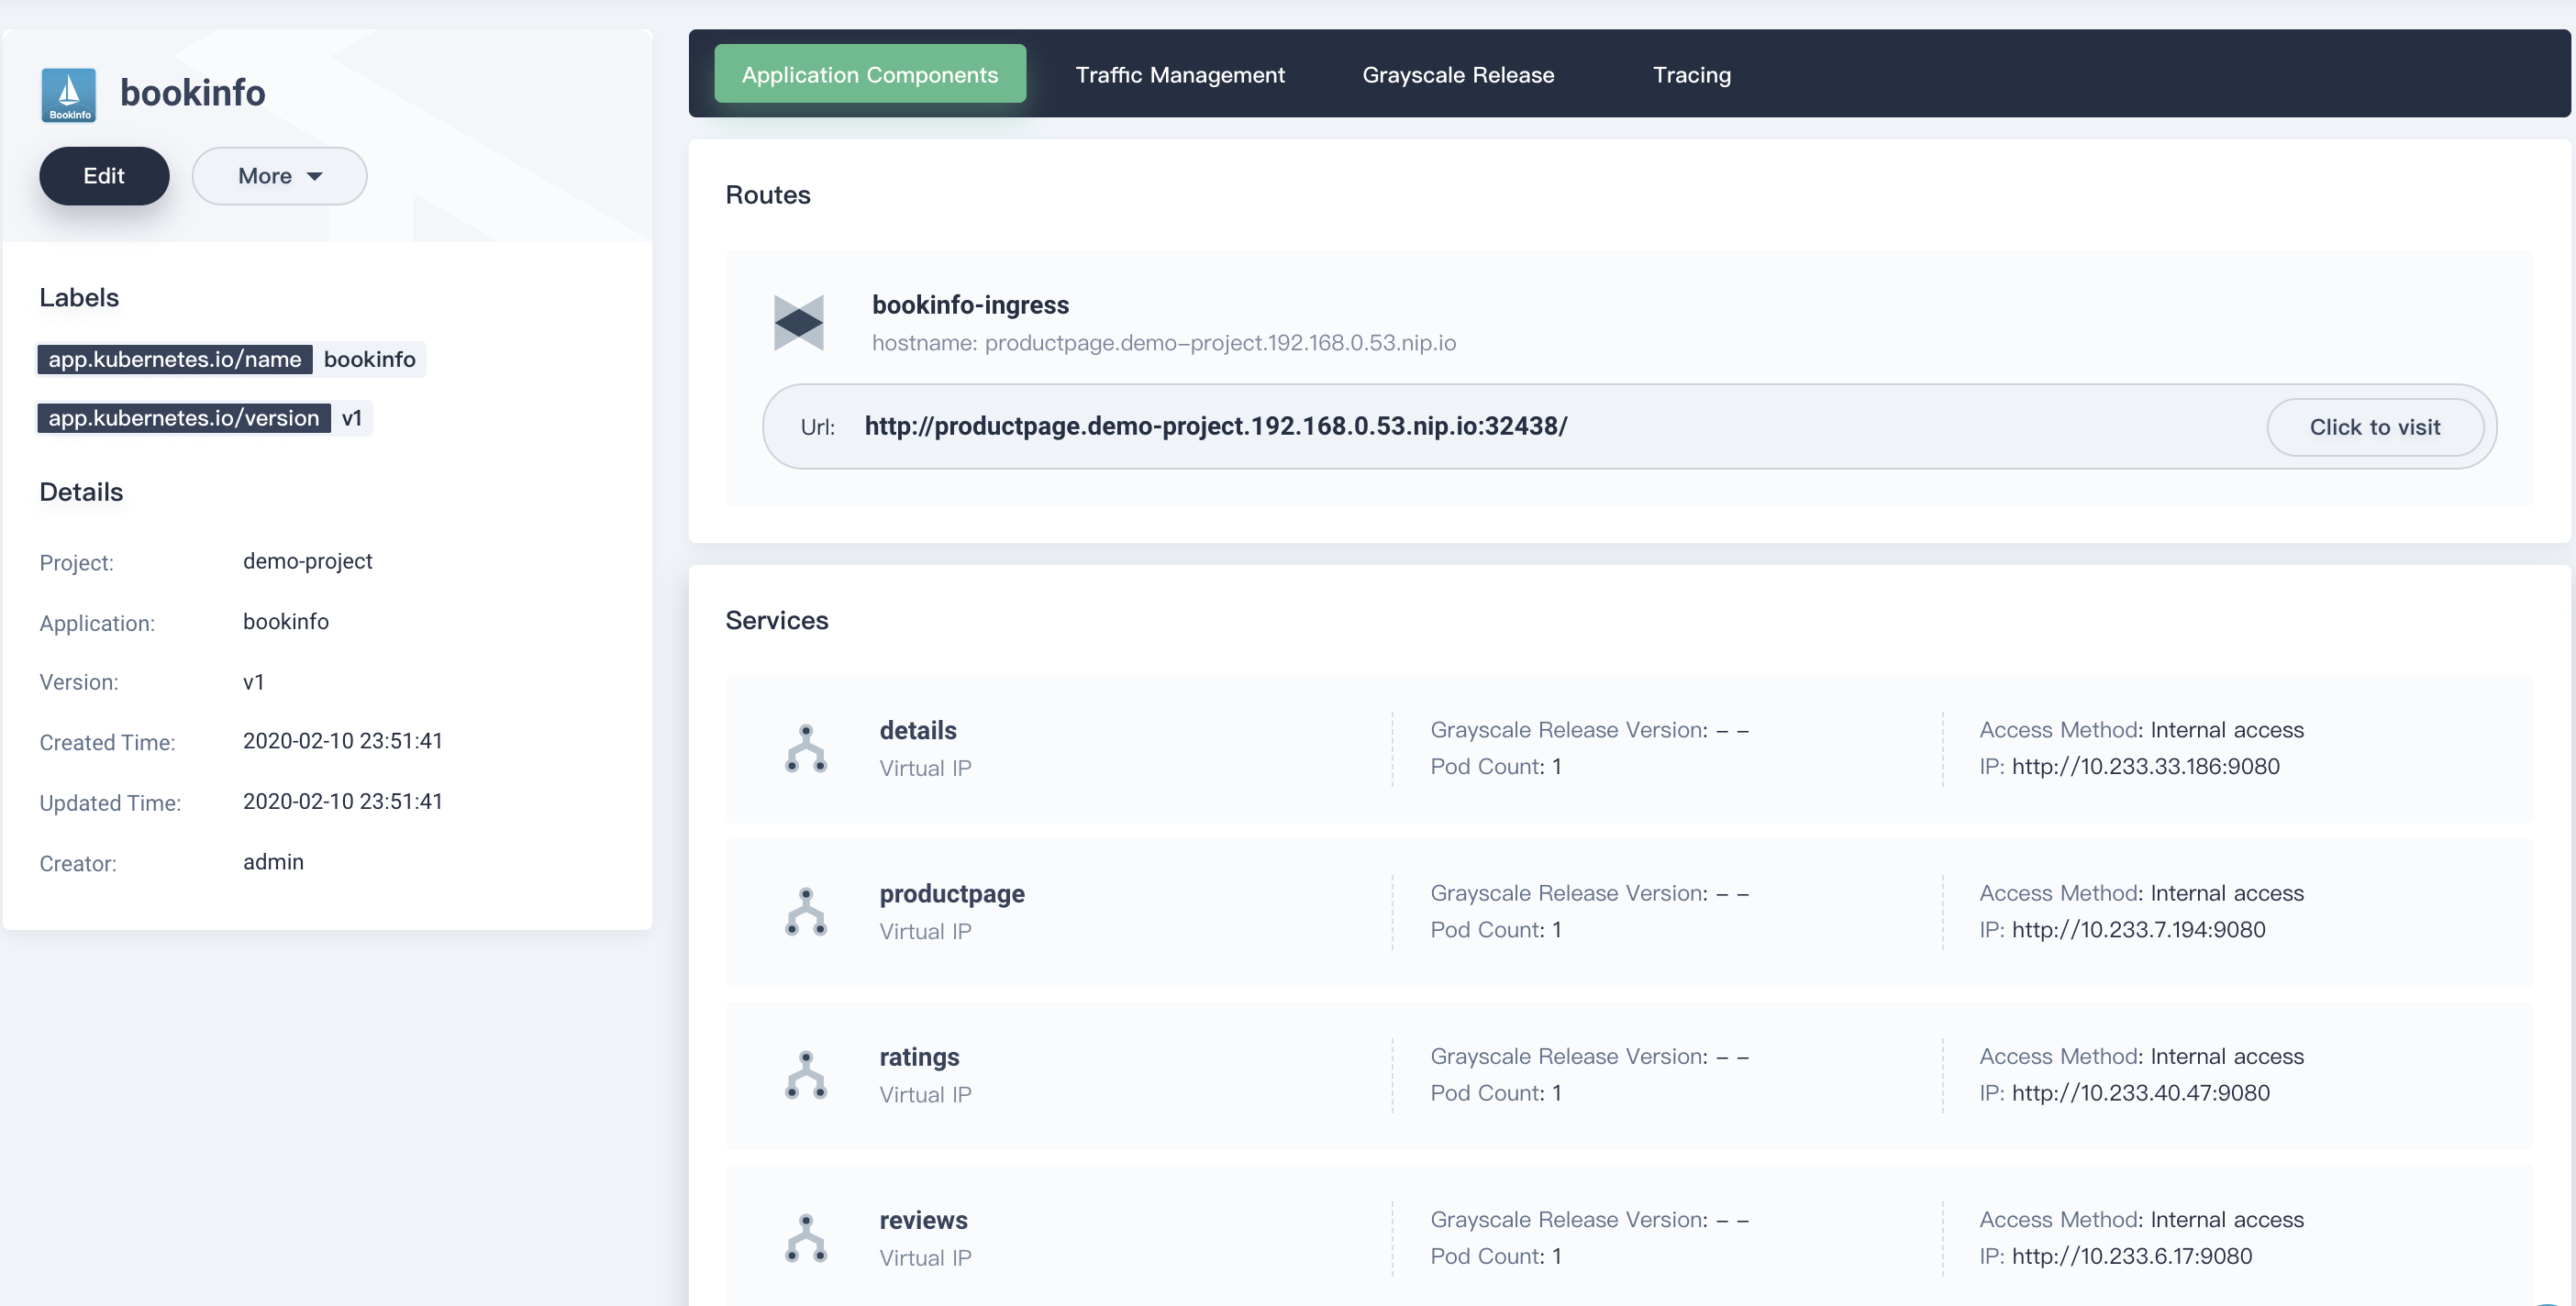
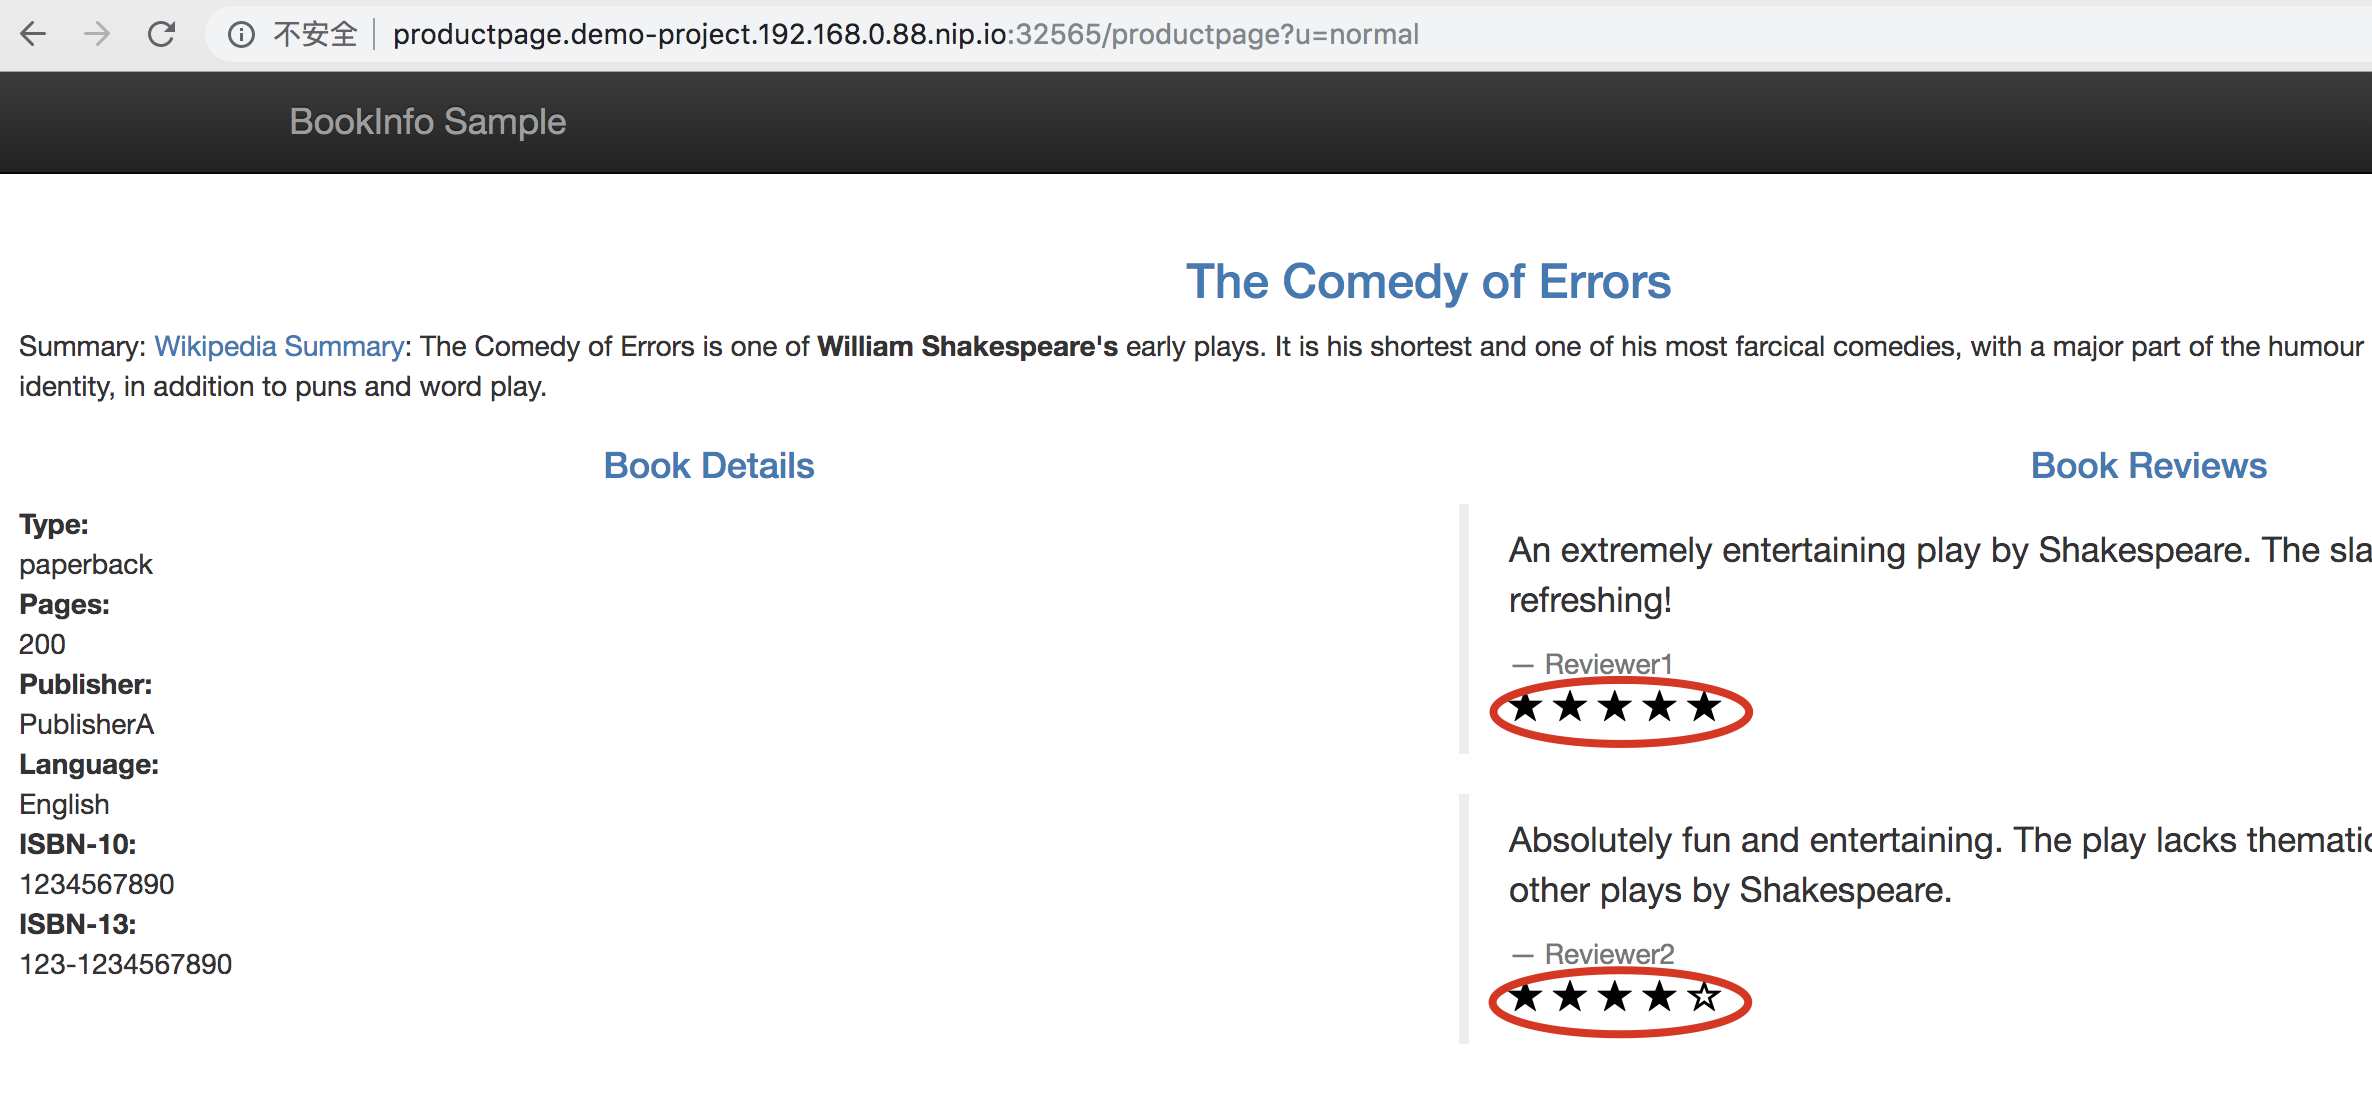
1.3. Now you can access the Bookinfo homepage as the following screenshot shown via Click to visit button. Click on the Normal user to enter into the summary page.
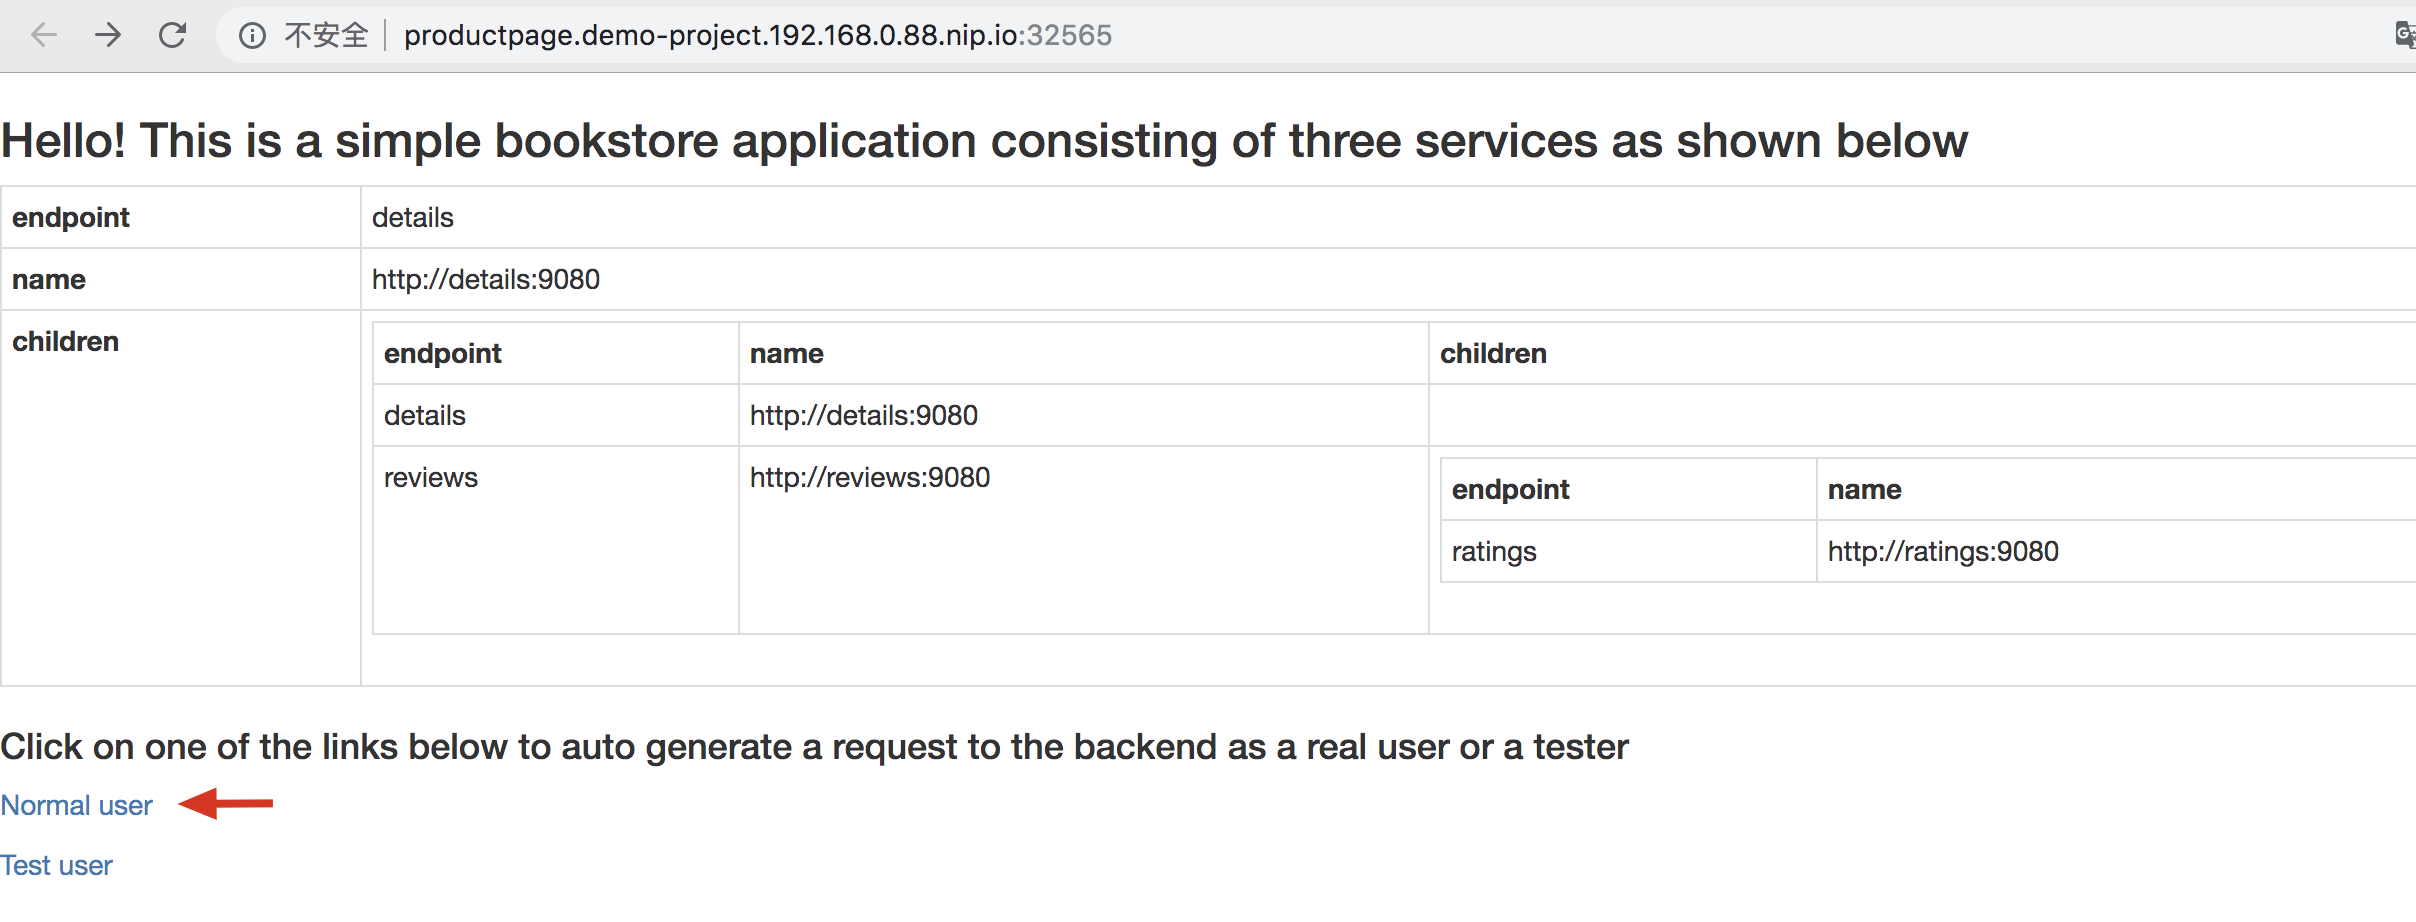
Note you need to make the URL above accessible from your computer.
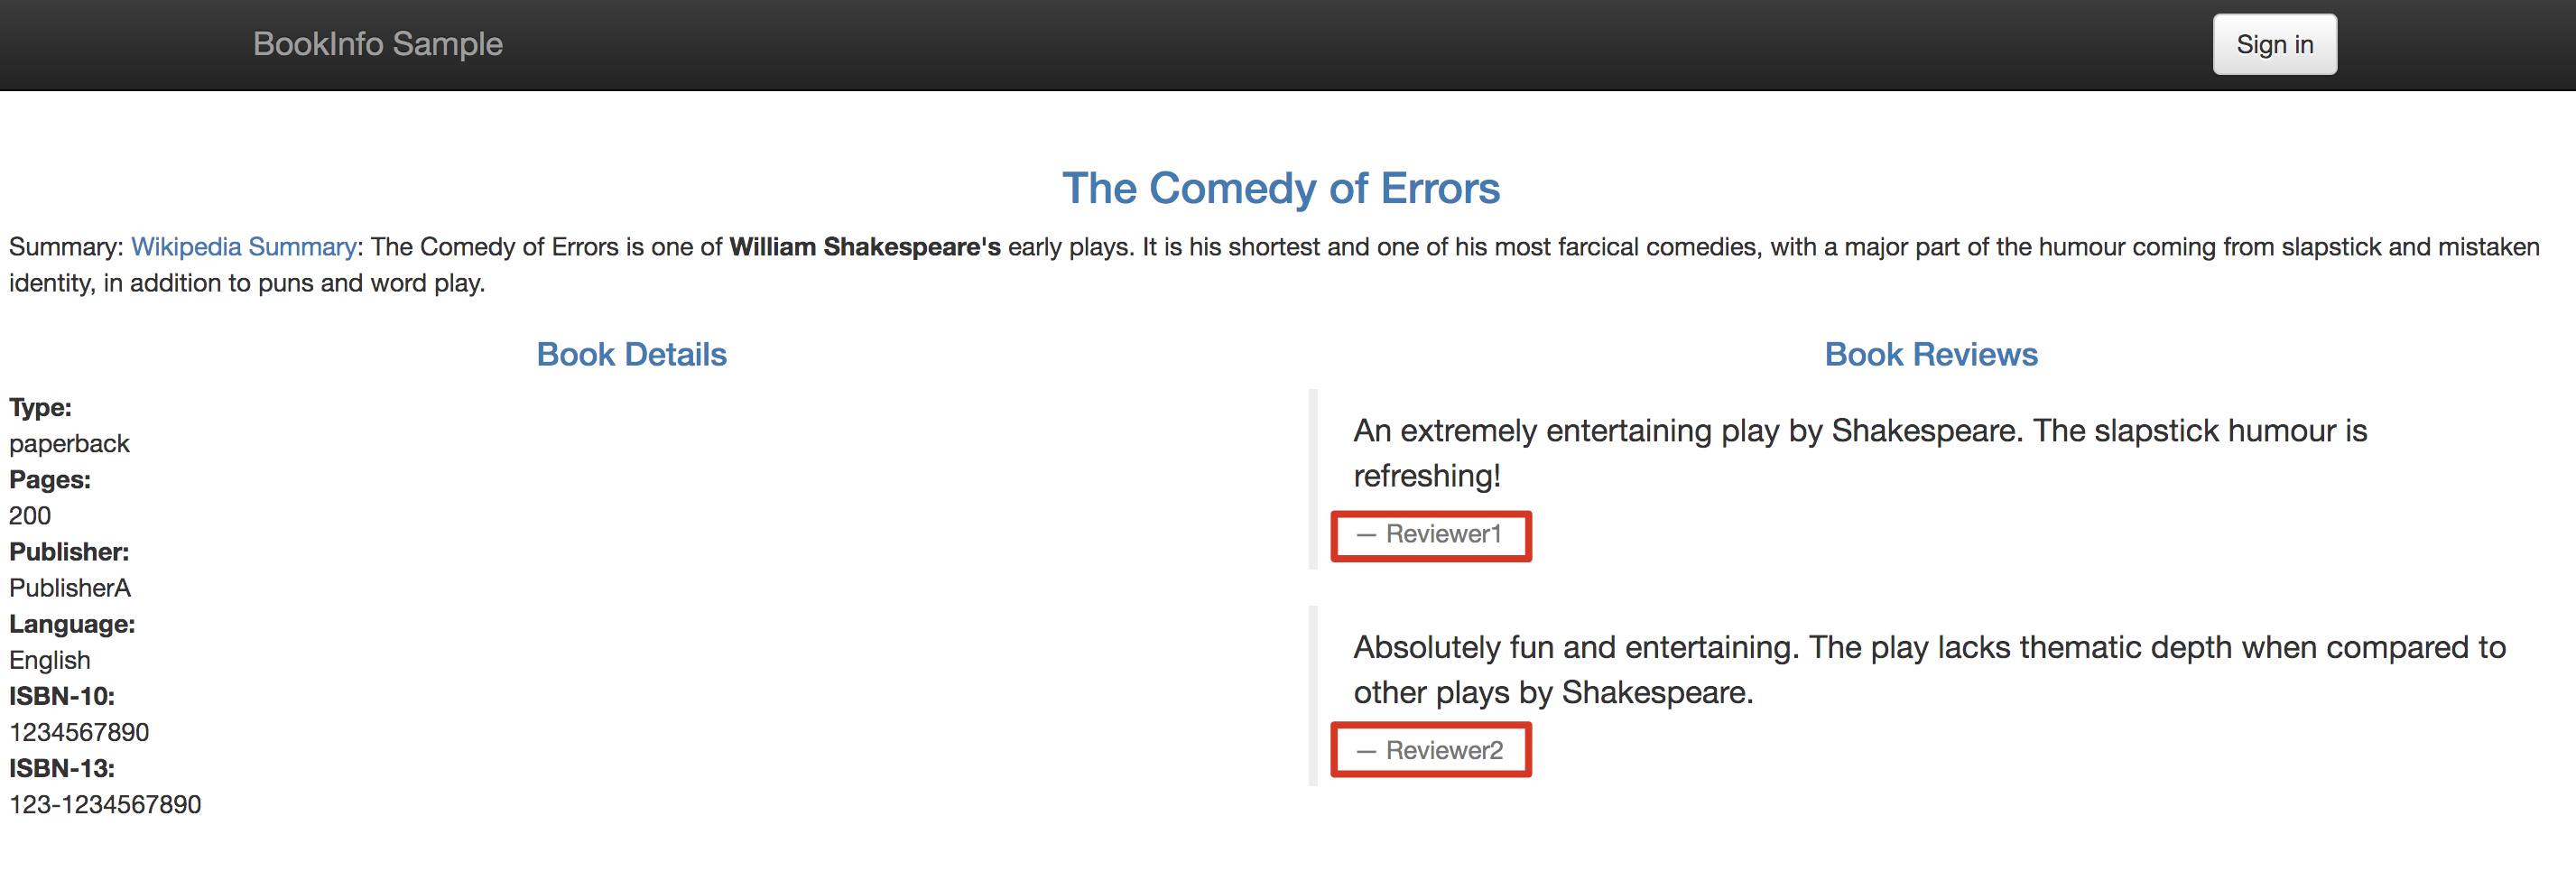
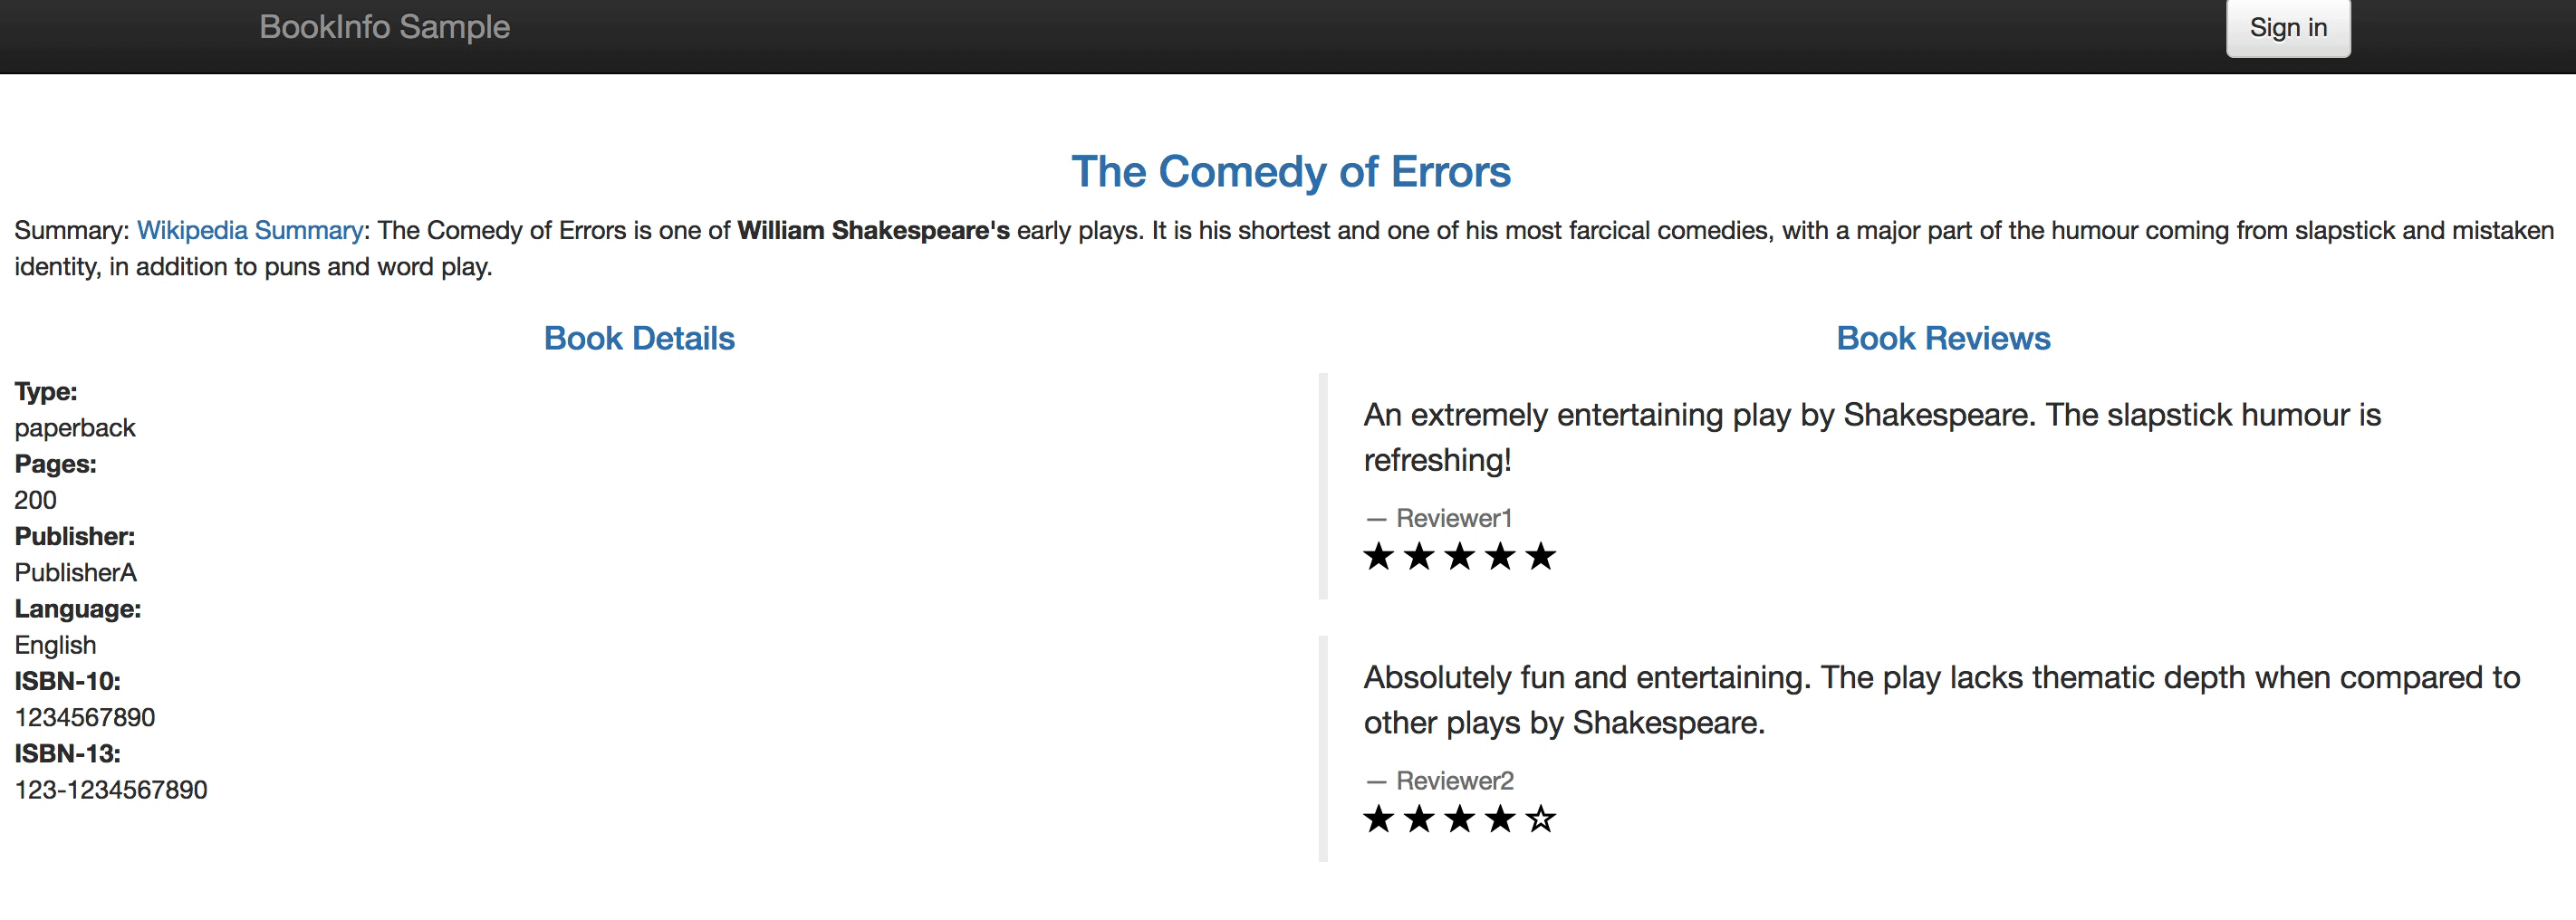
1.4. Notice that at this point it only shows - Reviewer1 and - Reviewer2 without any stars at the Book Reviews section. This is the initial status of this step.
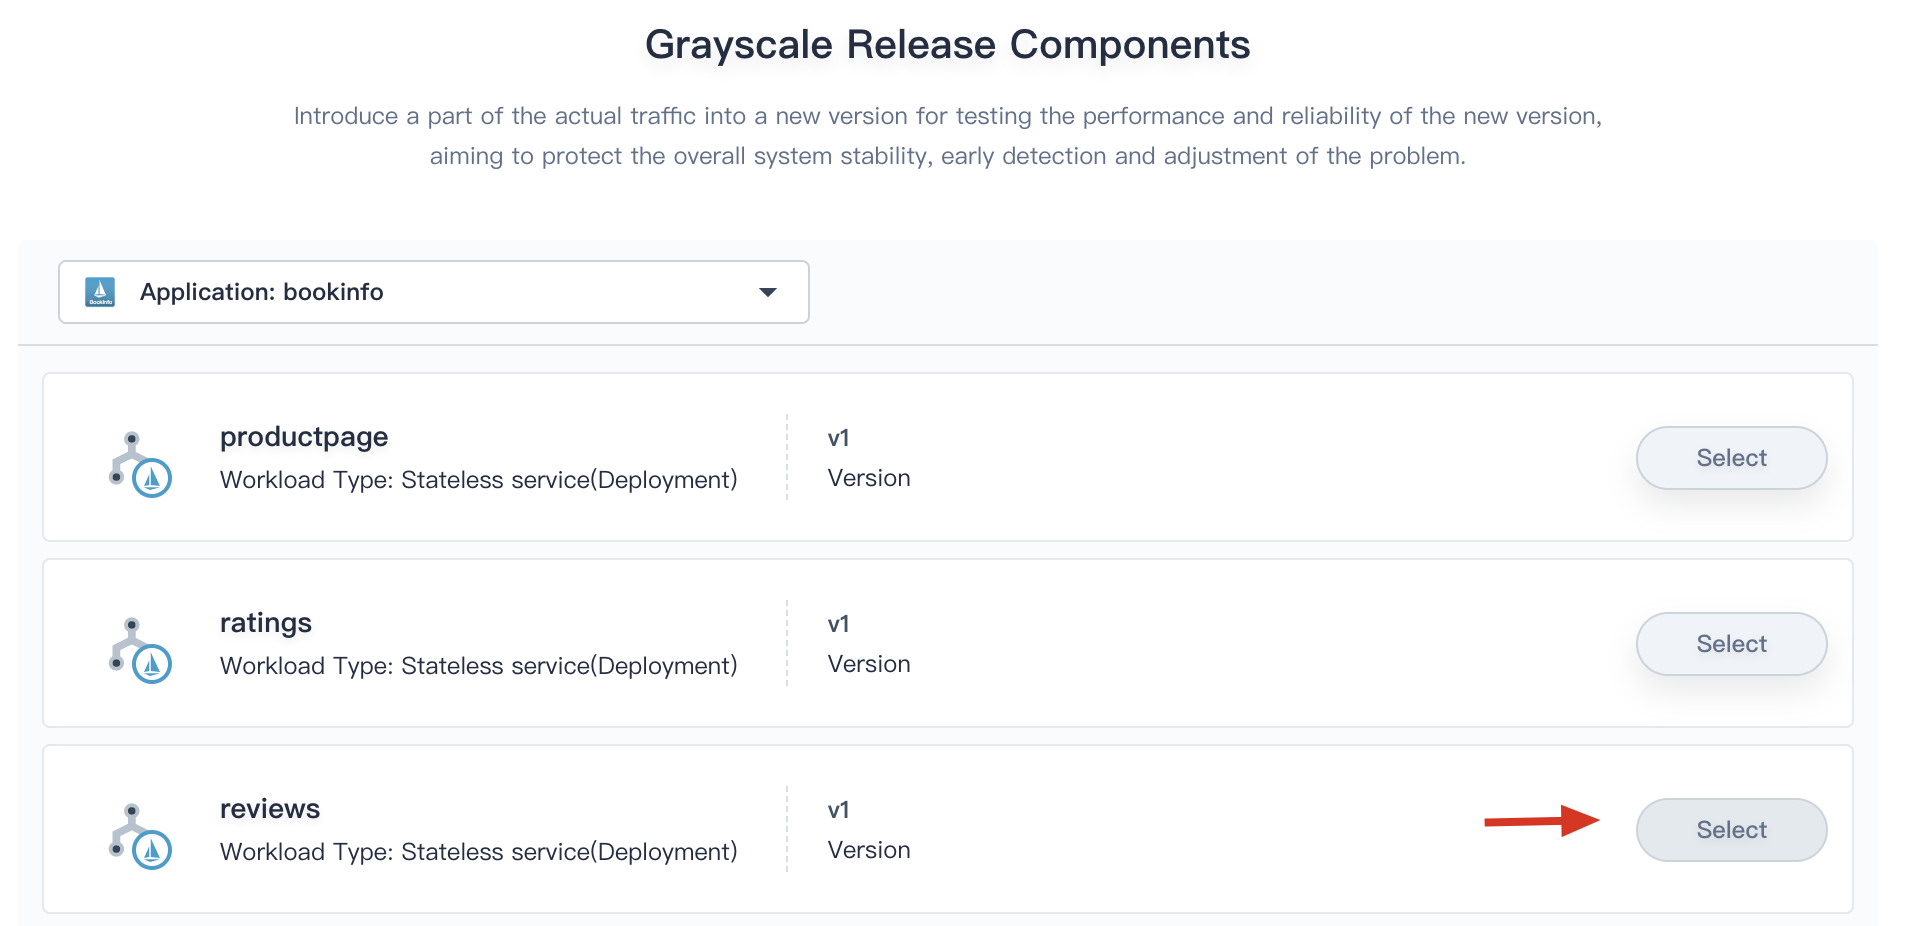
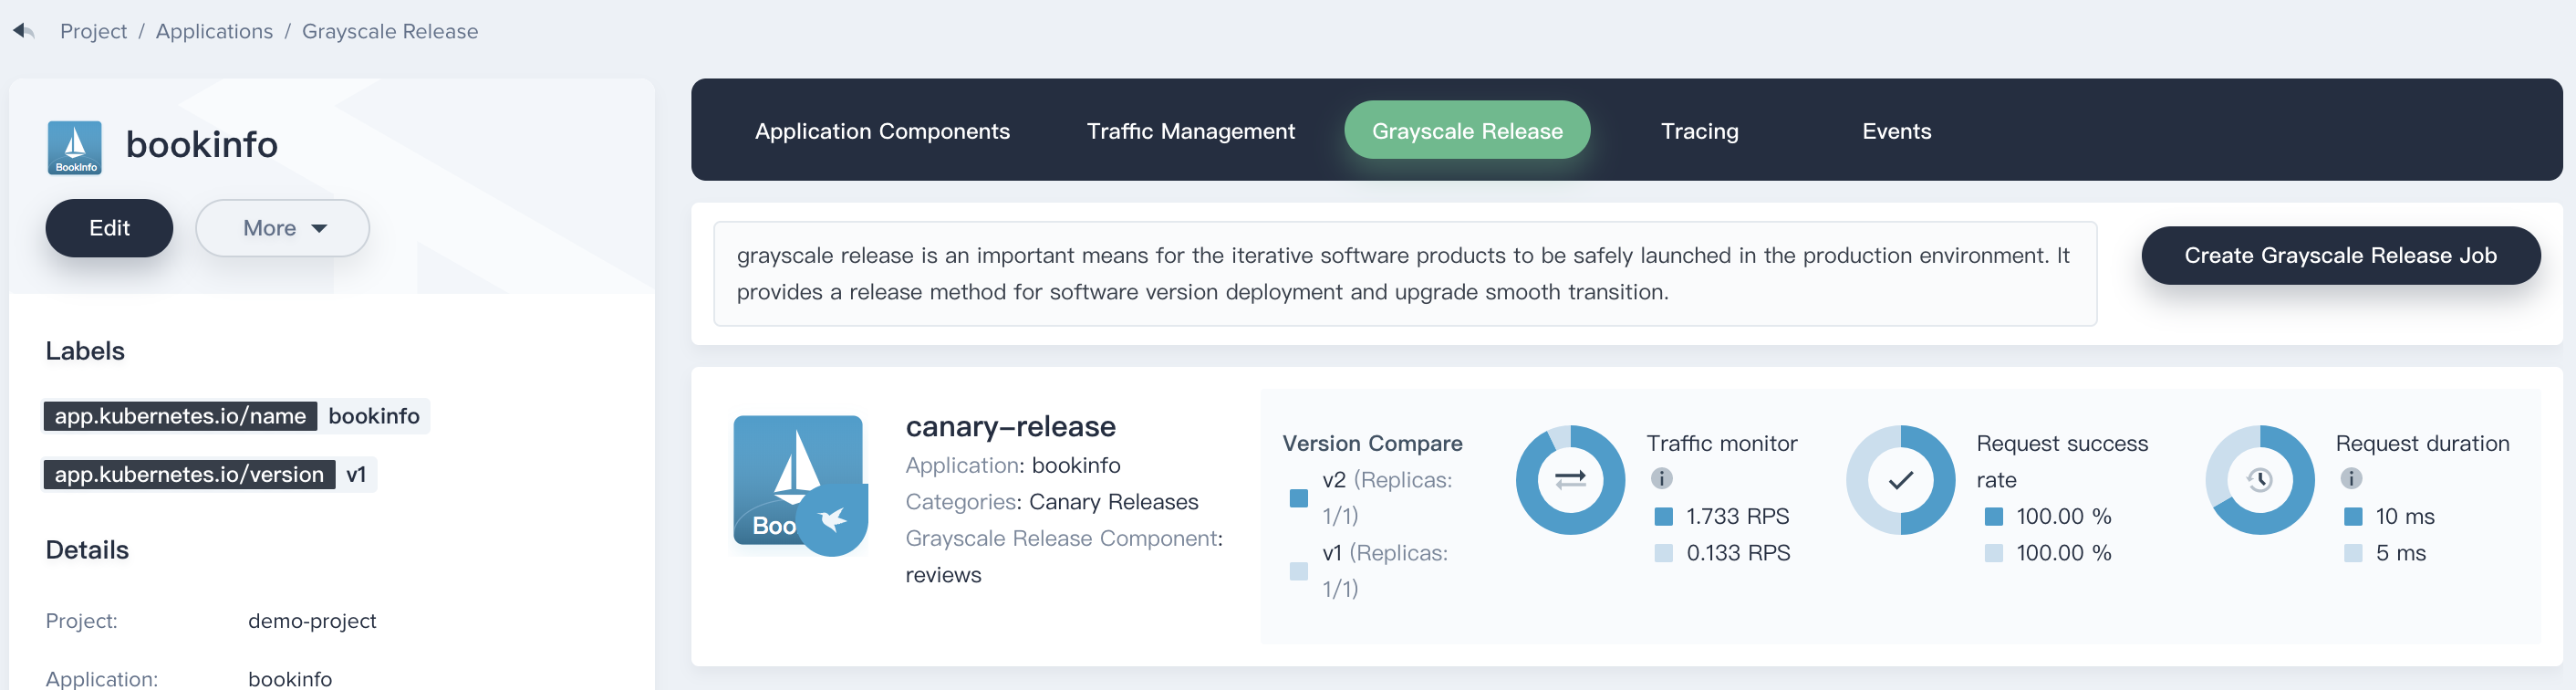
Step 2: Create Canary Release for Reviews Service
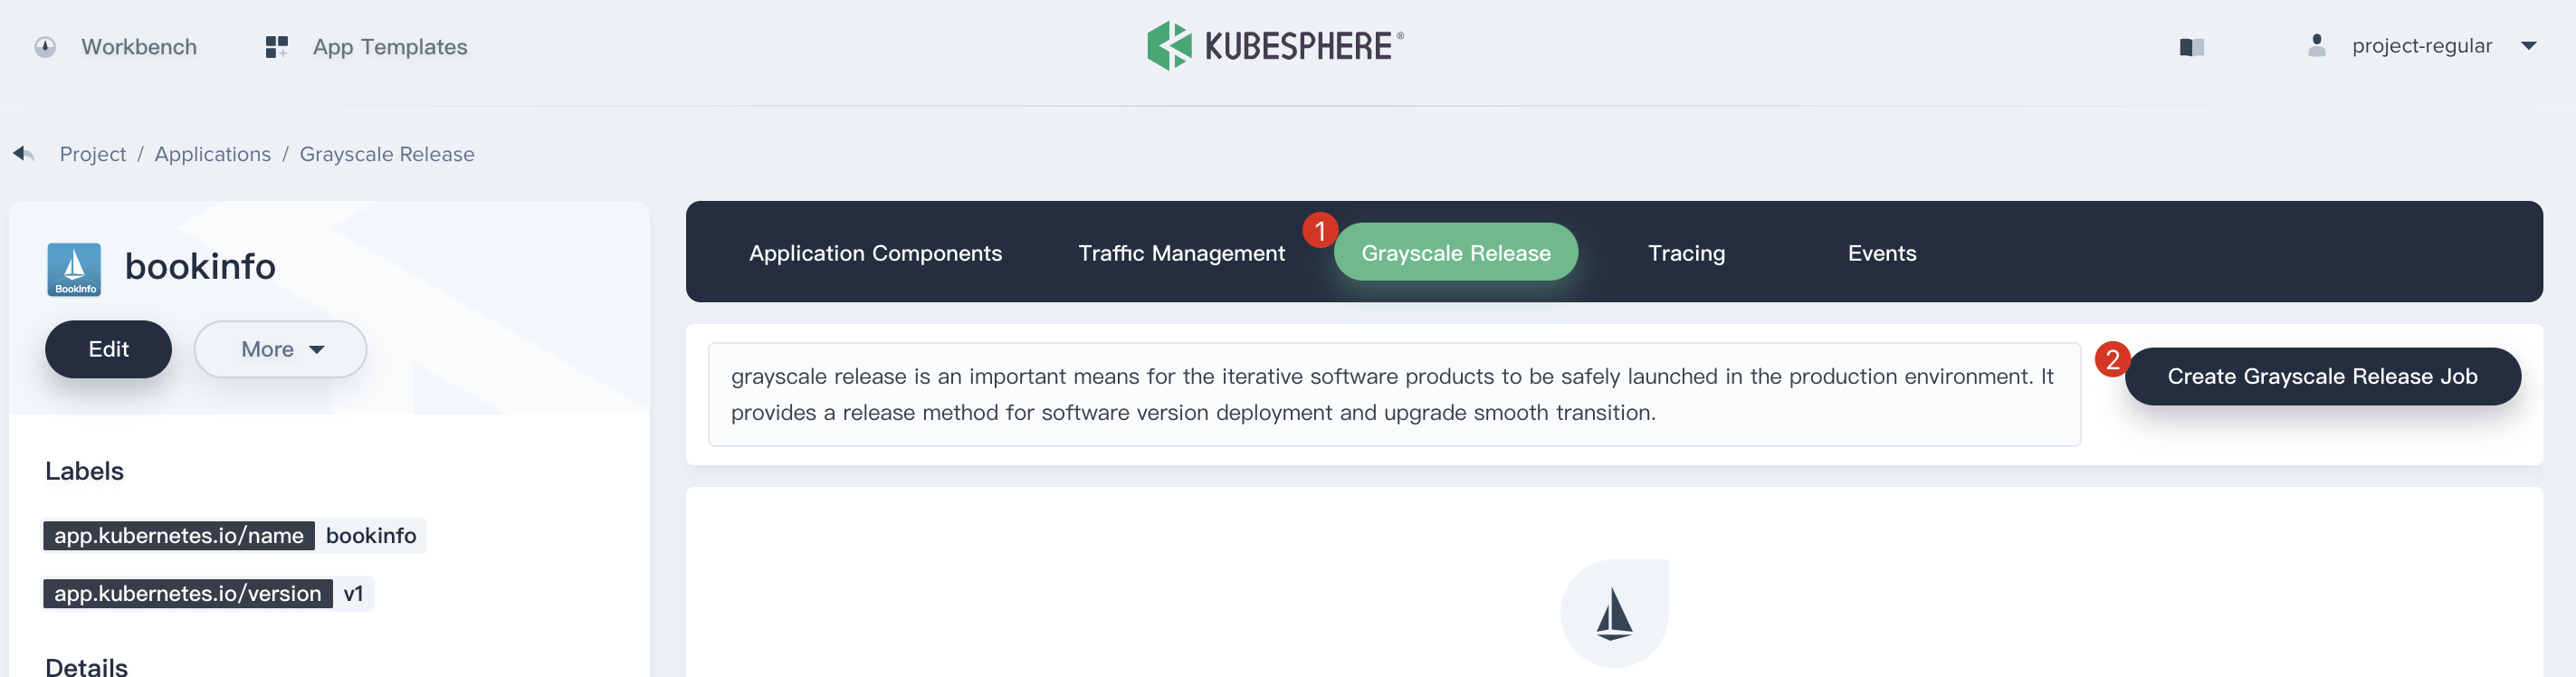
2.1. Back to KubeSphere console, choose Grayscale Release, and click Create Canary Release Job. Then select Canary Release and click Create Job.
2.2. Fill in the basic information, e.g. name it canary-release, click Next and select reviews as the canary service, then click Next.
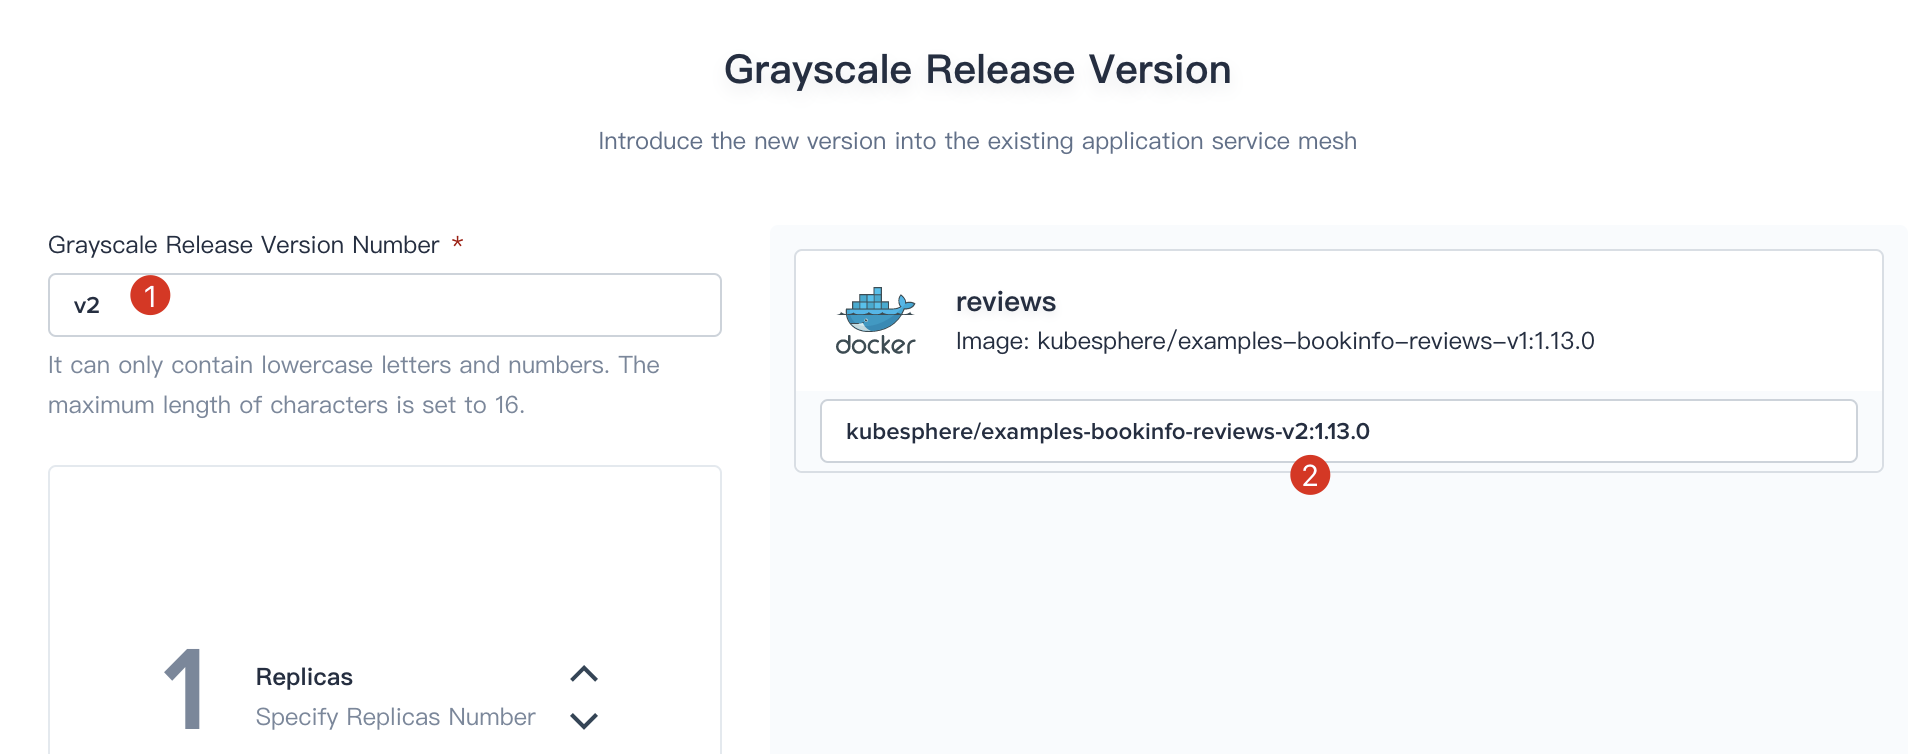
2.3. Enter v2 as Grayscale Release Version Number and fill in the new image box with kubesphere/examples-bookinfo-reviews-v2:1.13.0. You can simply change the version of the default value in the box from v1 to v2. Then click Next.
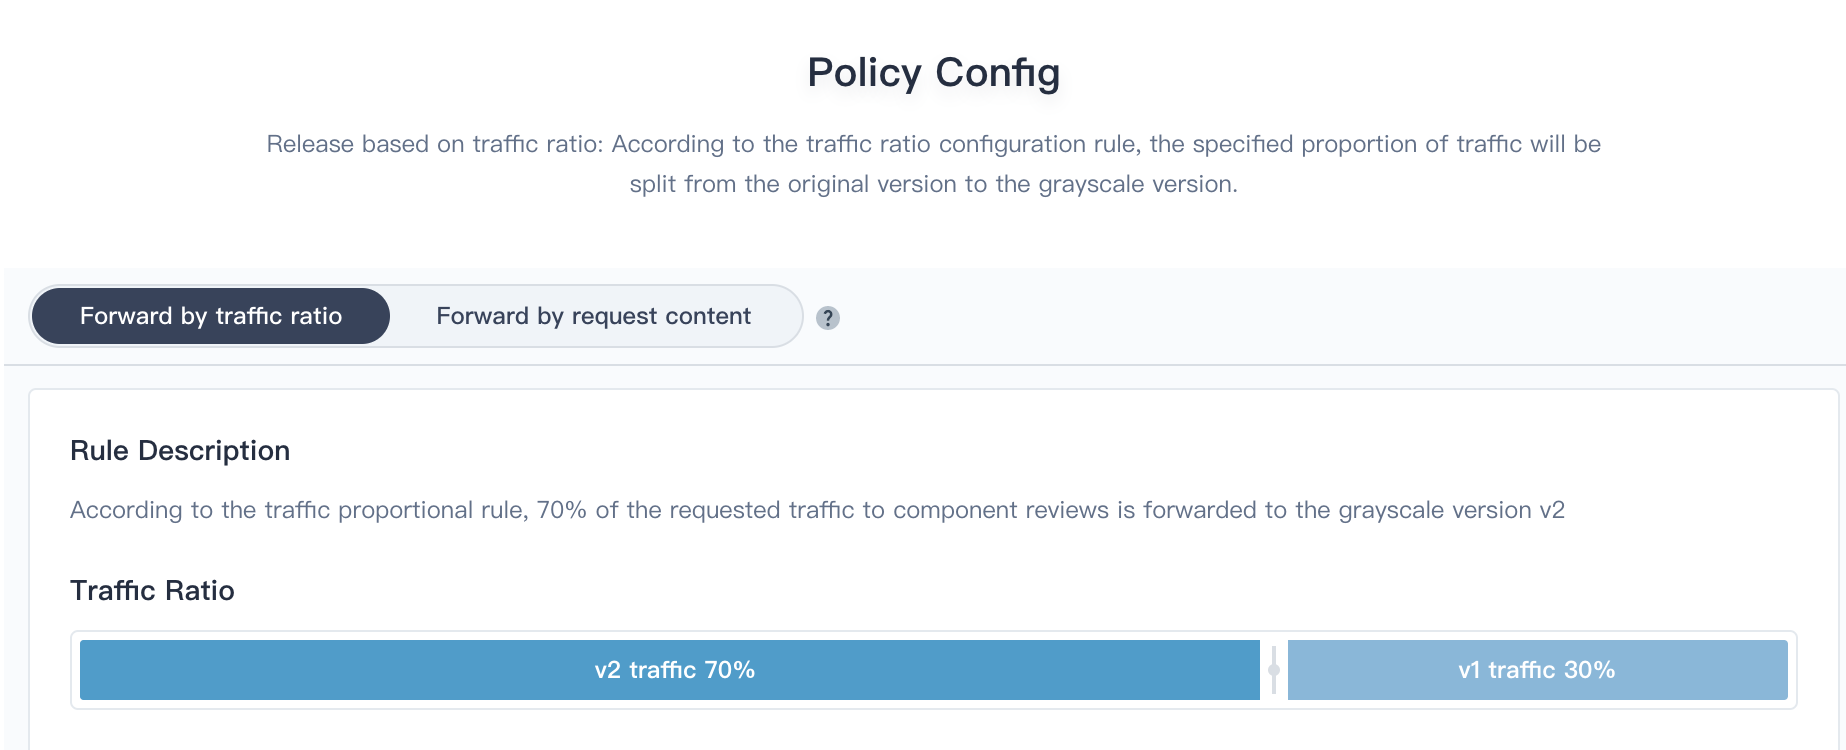
2.4. The canary release supports Forward by traffic ratio and Forward by request content. In this tutorial we choose adjusting the traffic ratio to manage traffic routing between v1 and v2. Drag the slider to adjust v2 up 30% traffic, and v2 up 70%.
2.5. Click Create when you have completed the configuration, then you are able to see the canary-release has been created successfully.
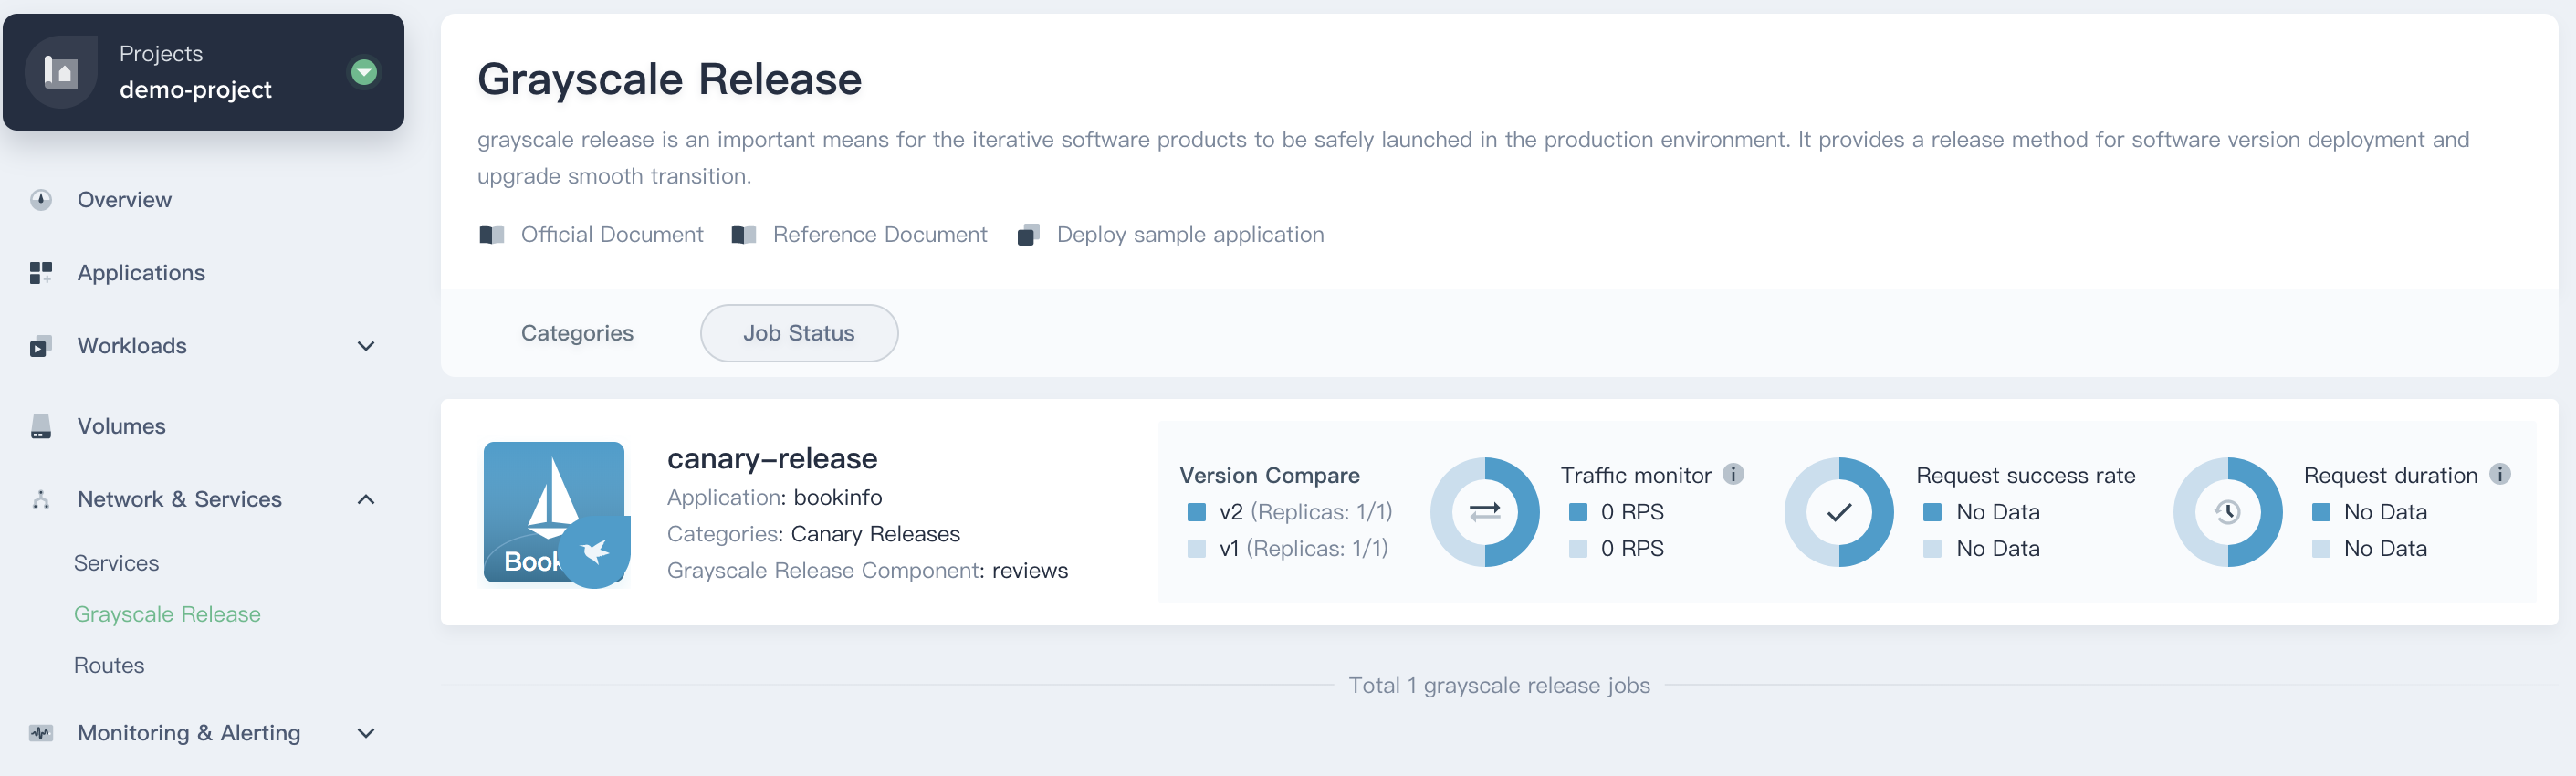
Step 3: Verify the Canary Release
When you visit the Bookinfo website again and refresh your browser repeatedly, you will be able to see that the Bookinfo reviews section switch between v1 and v2 at a random rate of about 30% and 70% respectively.
Step 4: Inspect the Traffic Topology Graph
4.1. Connect to your SSH Client, use the following command to introduce real traffic to simulate the access to the bookinfo application every 0.5 seconds.
$ curl http://productpage.demo-project.192.168.0.88.nip.io:32565/productpage?u=normal
% Total % Received % Xferd Average Speed Time Time Time Current
Dload Upload Total Spent Left Speed
0 0 0 0 0 0 0 0 --:--:-- --:--:-- --:--:-- 0< 74 5183 74 3842 0 0 73957 0 --:--:-- --:--:-- --:--:-- 73884<!DOCTYPE html>
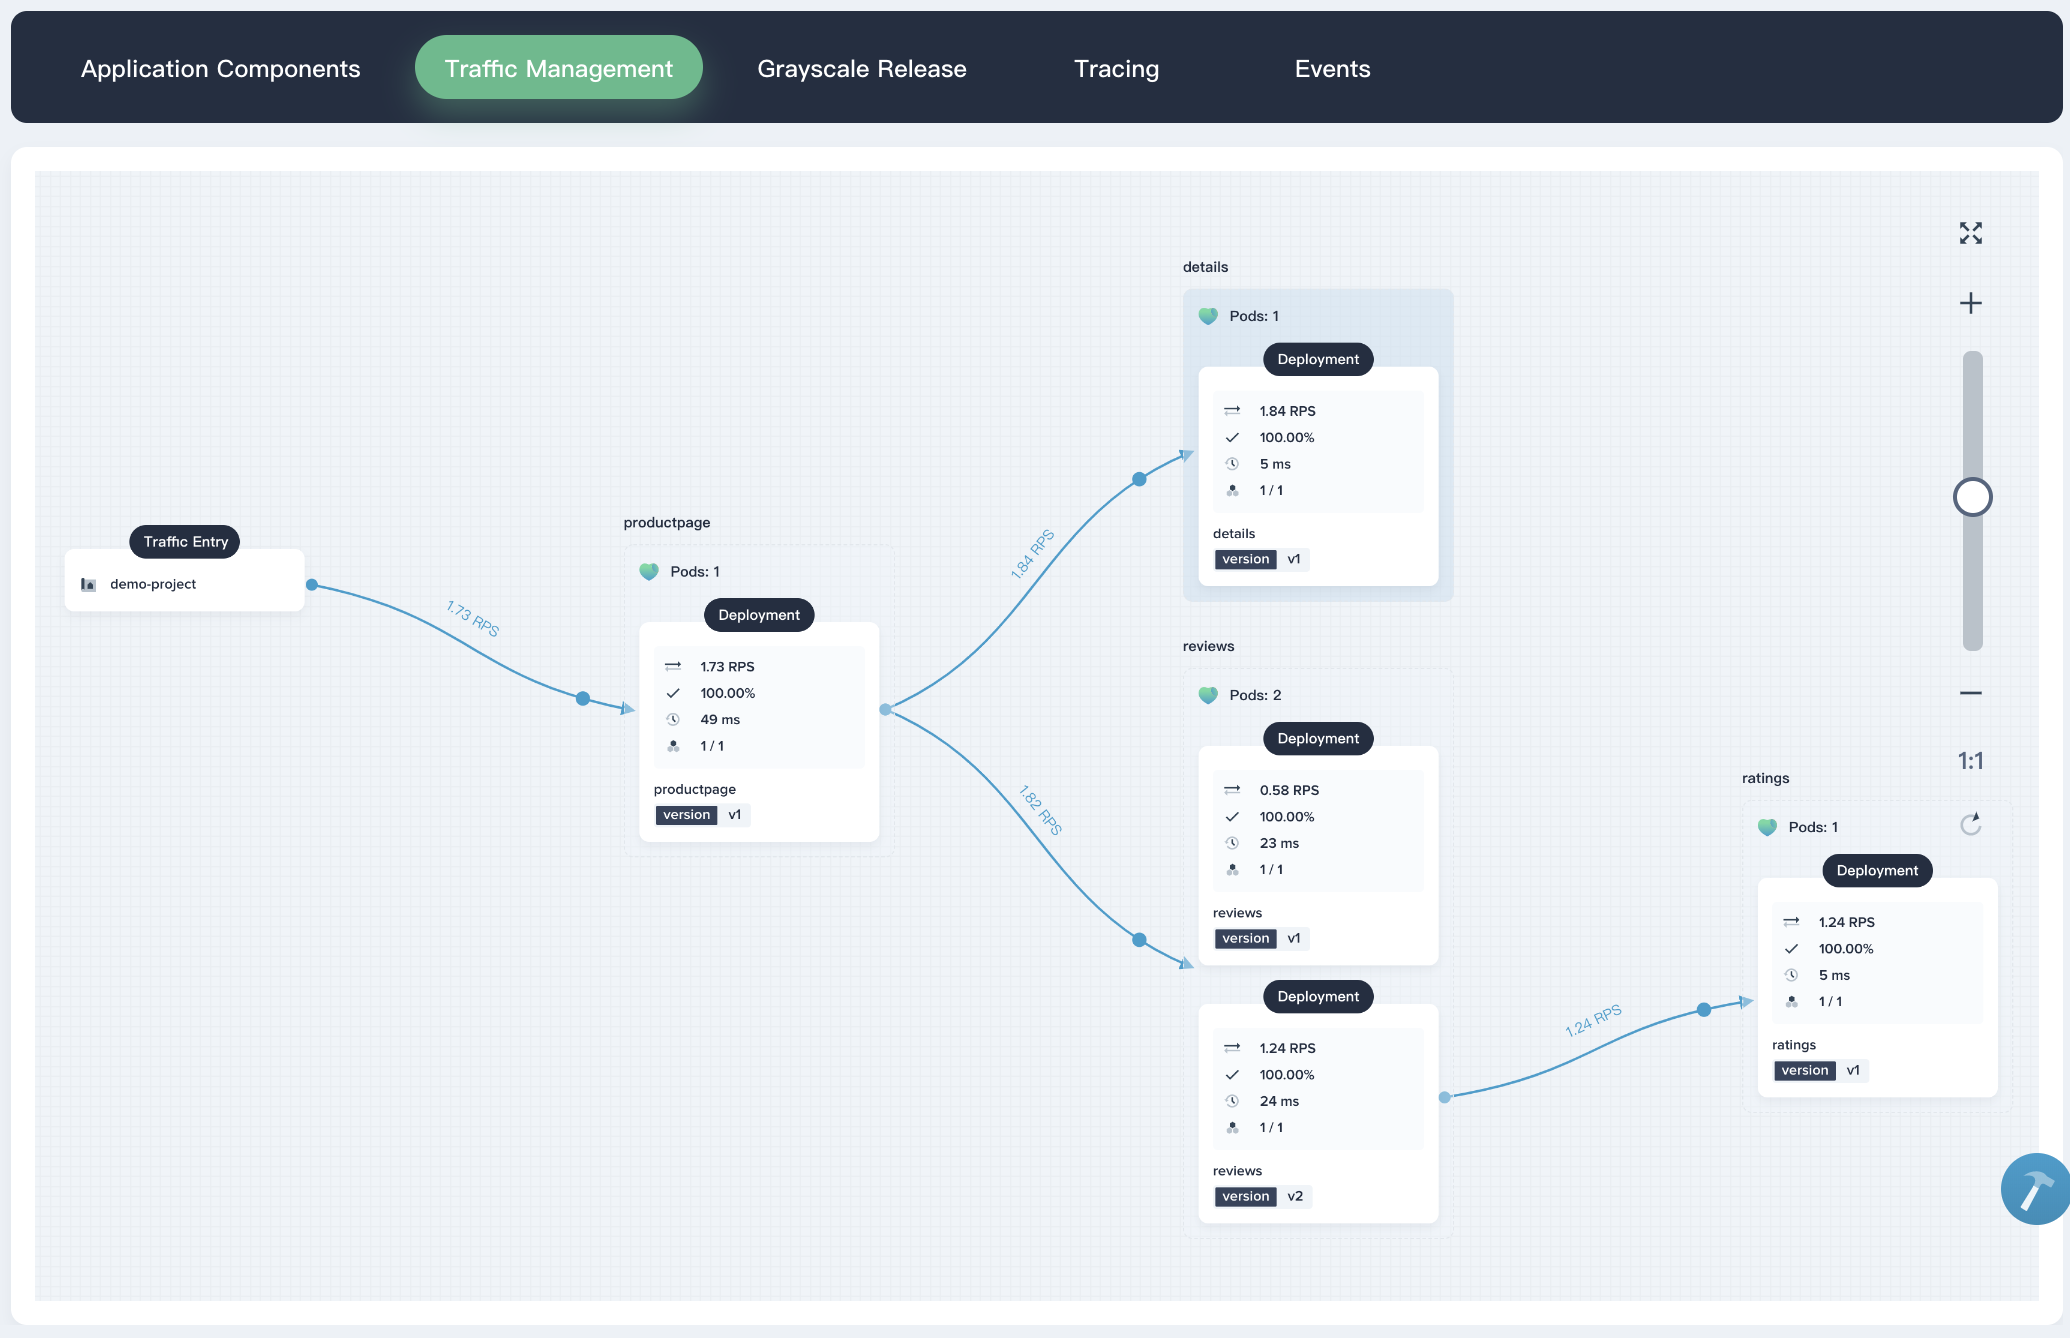
···4.2. From the traffic management diagram, you can easily see the service invocation and dependencies, health, performance between different microservices.
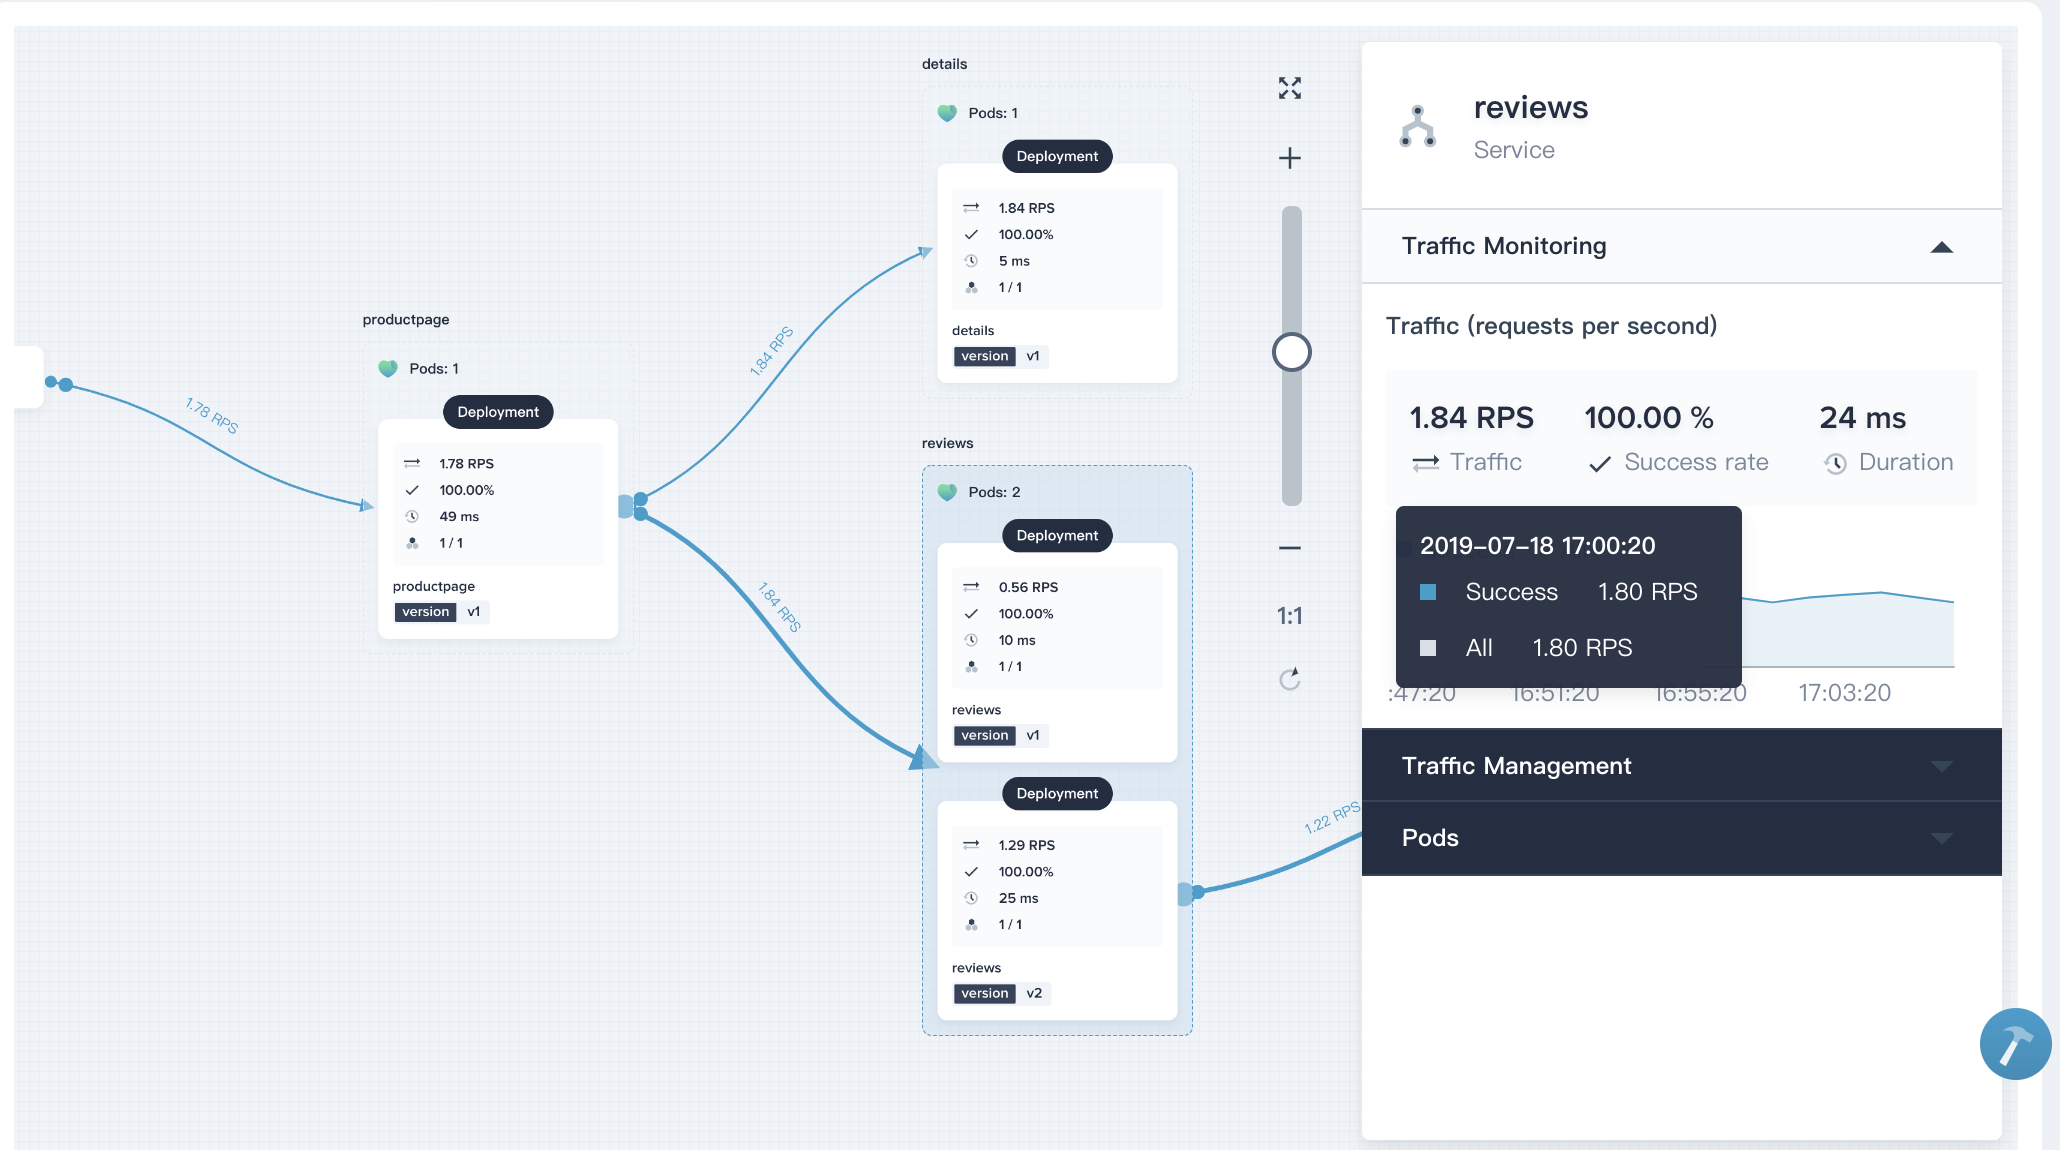
4.3. Click on the reviews card. The traffic monitoring graph will come out including real-time data of Success rate, Traffic and Duration.
Step 5: Inspect the Tracing Details
KubeSphere provides distributed tracing feature based on Jaeger, which is used for monitoring and troubleshooting microservices-based distributed application.
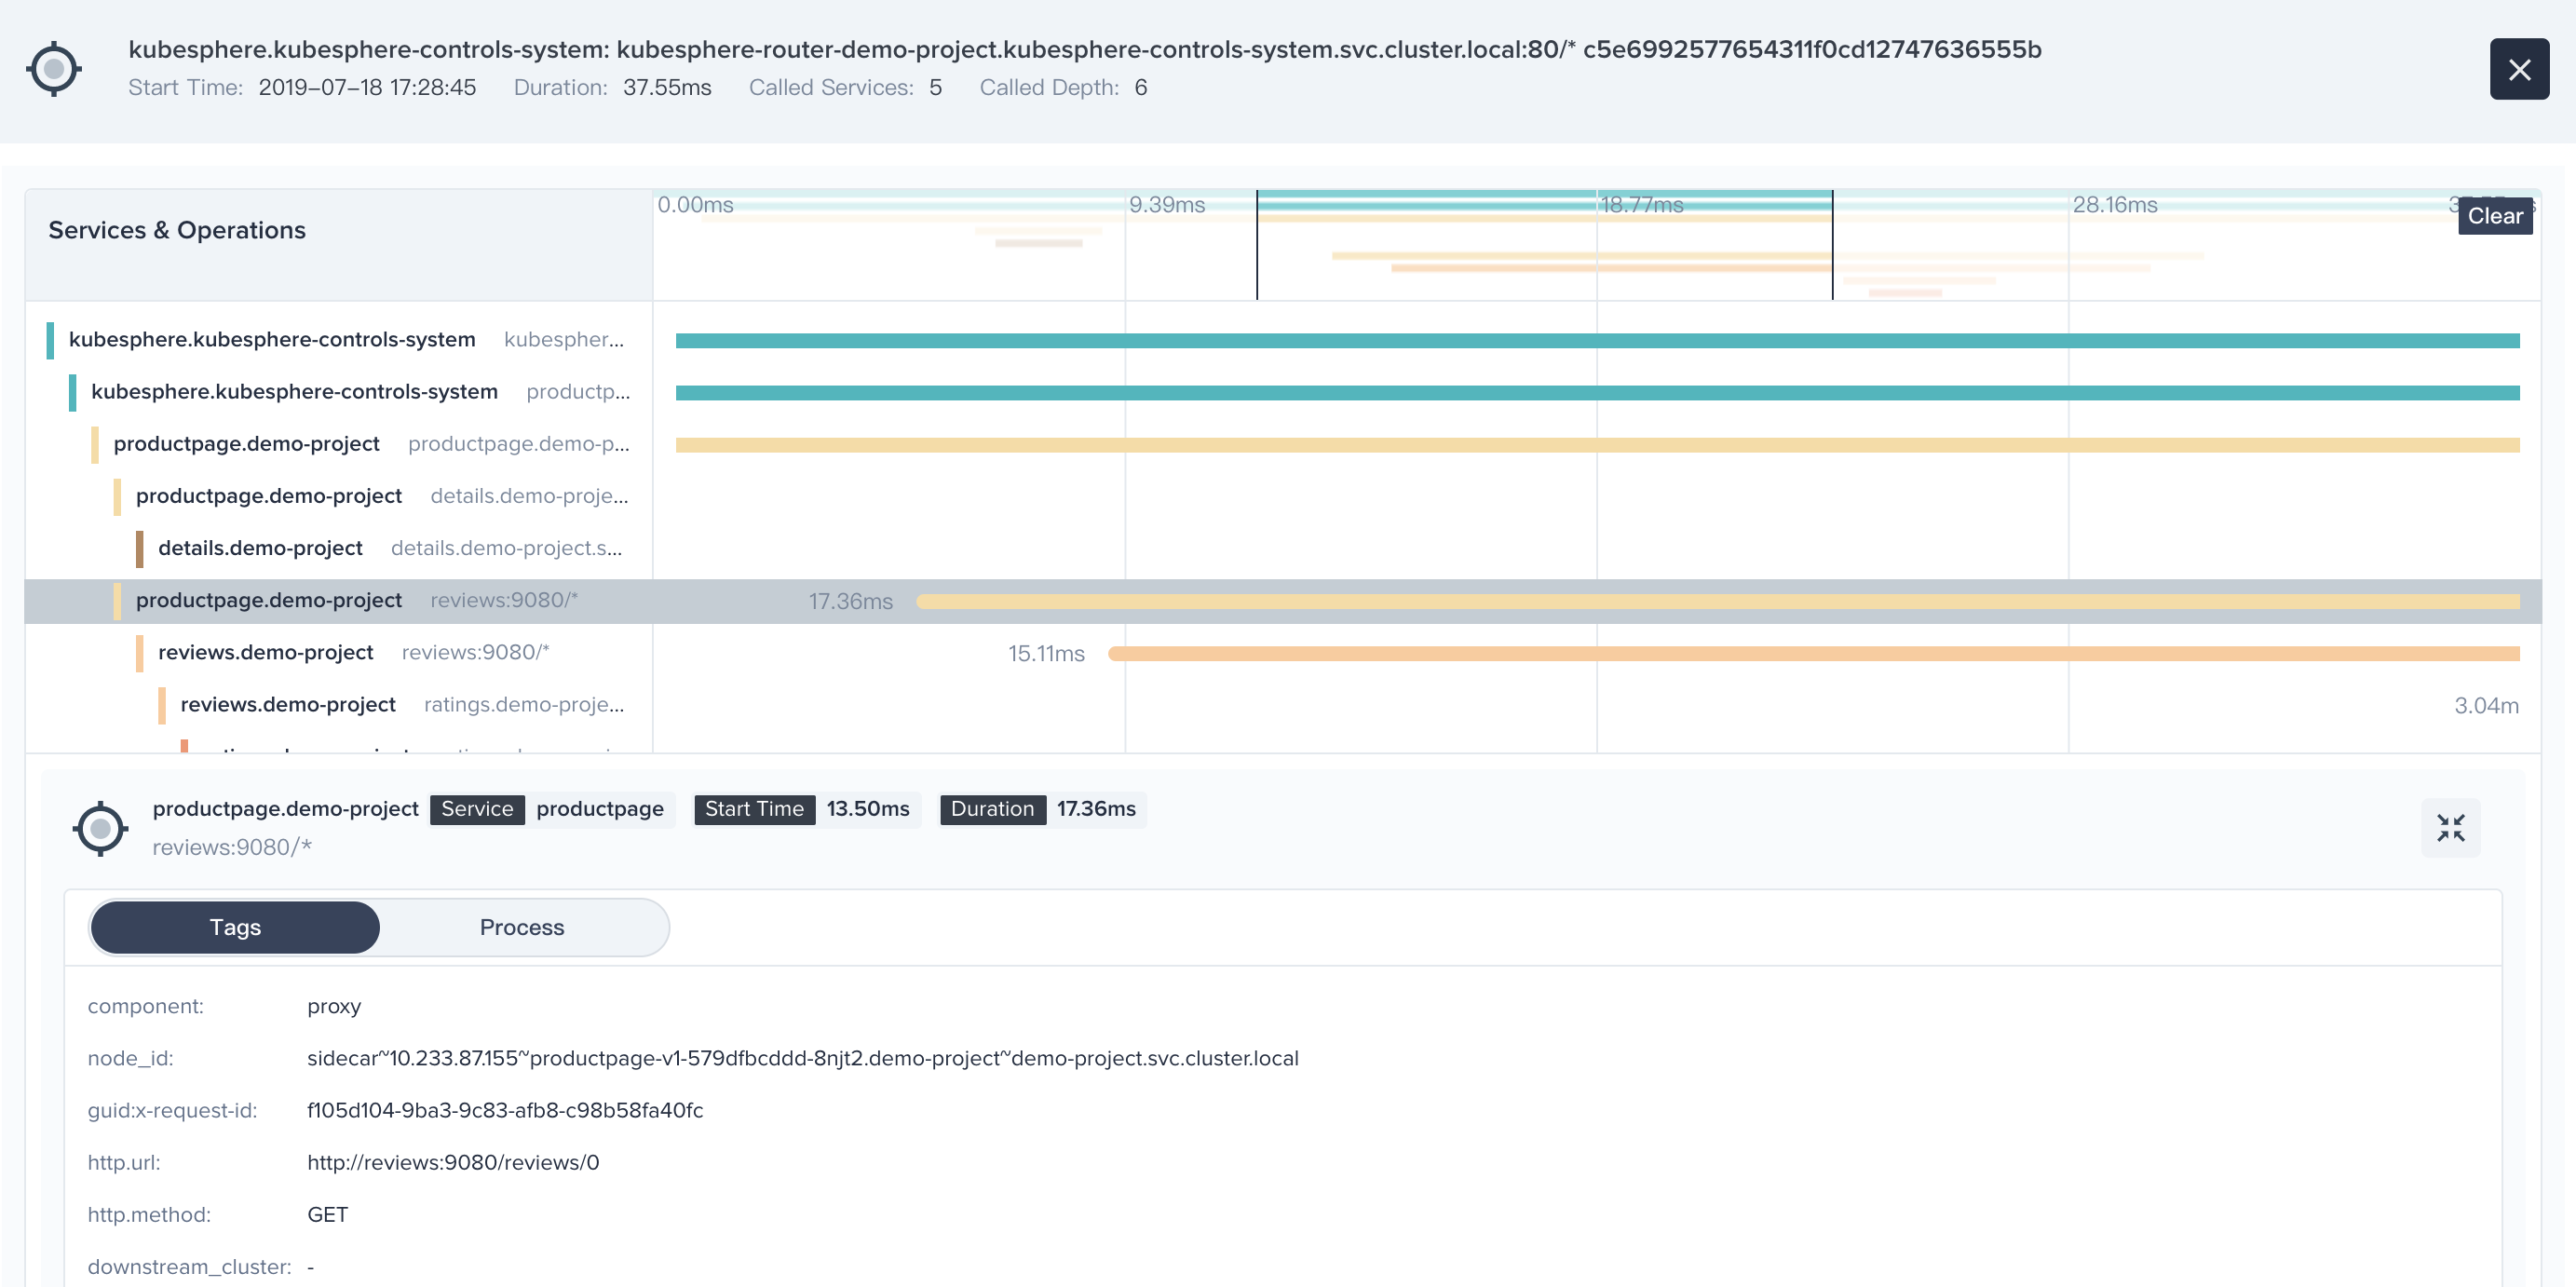
5.1. Choose Tracing tab. You can clearly see all phases and internal calls of a request, as well as the period in each phase.

5.2. Click any item, you can even drill down to see the request details and this request is being processed by which machine or container.
Step 6: Take Over All Traffic
6.1. As mentioned previously, when the canary version v2 is released, it could be used to send a portion of traffic to the canary version. Publishers can test the new version online and collect user feedbacks.
Switch to Grayscale Release tab, click into canary-release.
6.2. Click ··· at reviews v2 and select Take Over. Then 100% of traffic will be sent to the new version v2.
Note: If anything goes wrong along the way, we can abort and roll back to the previous version v1 in no time.
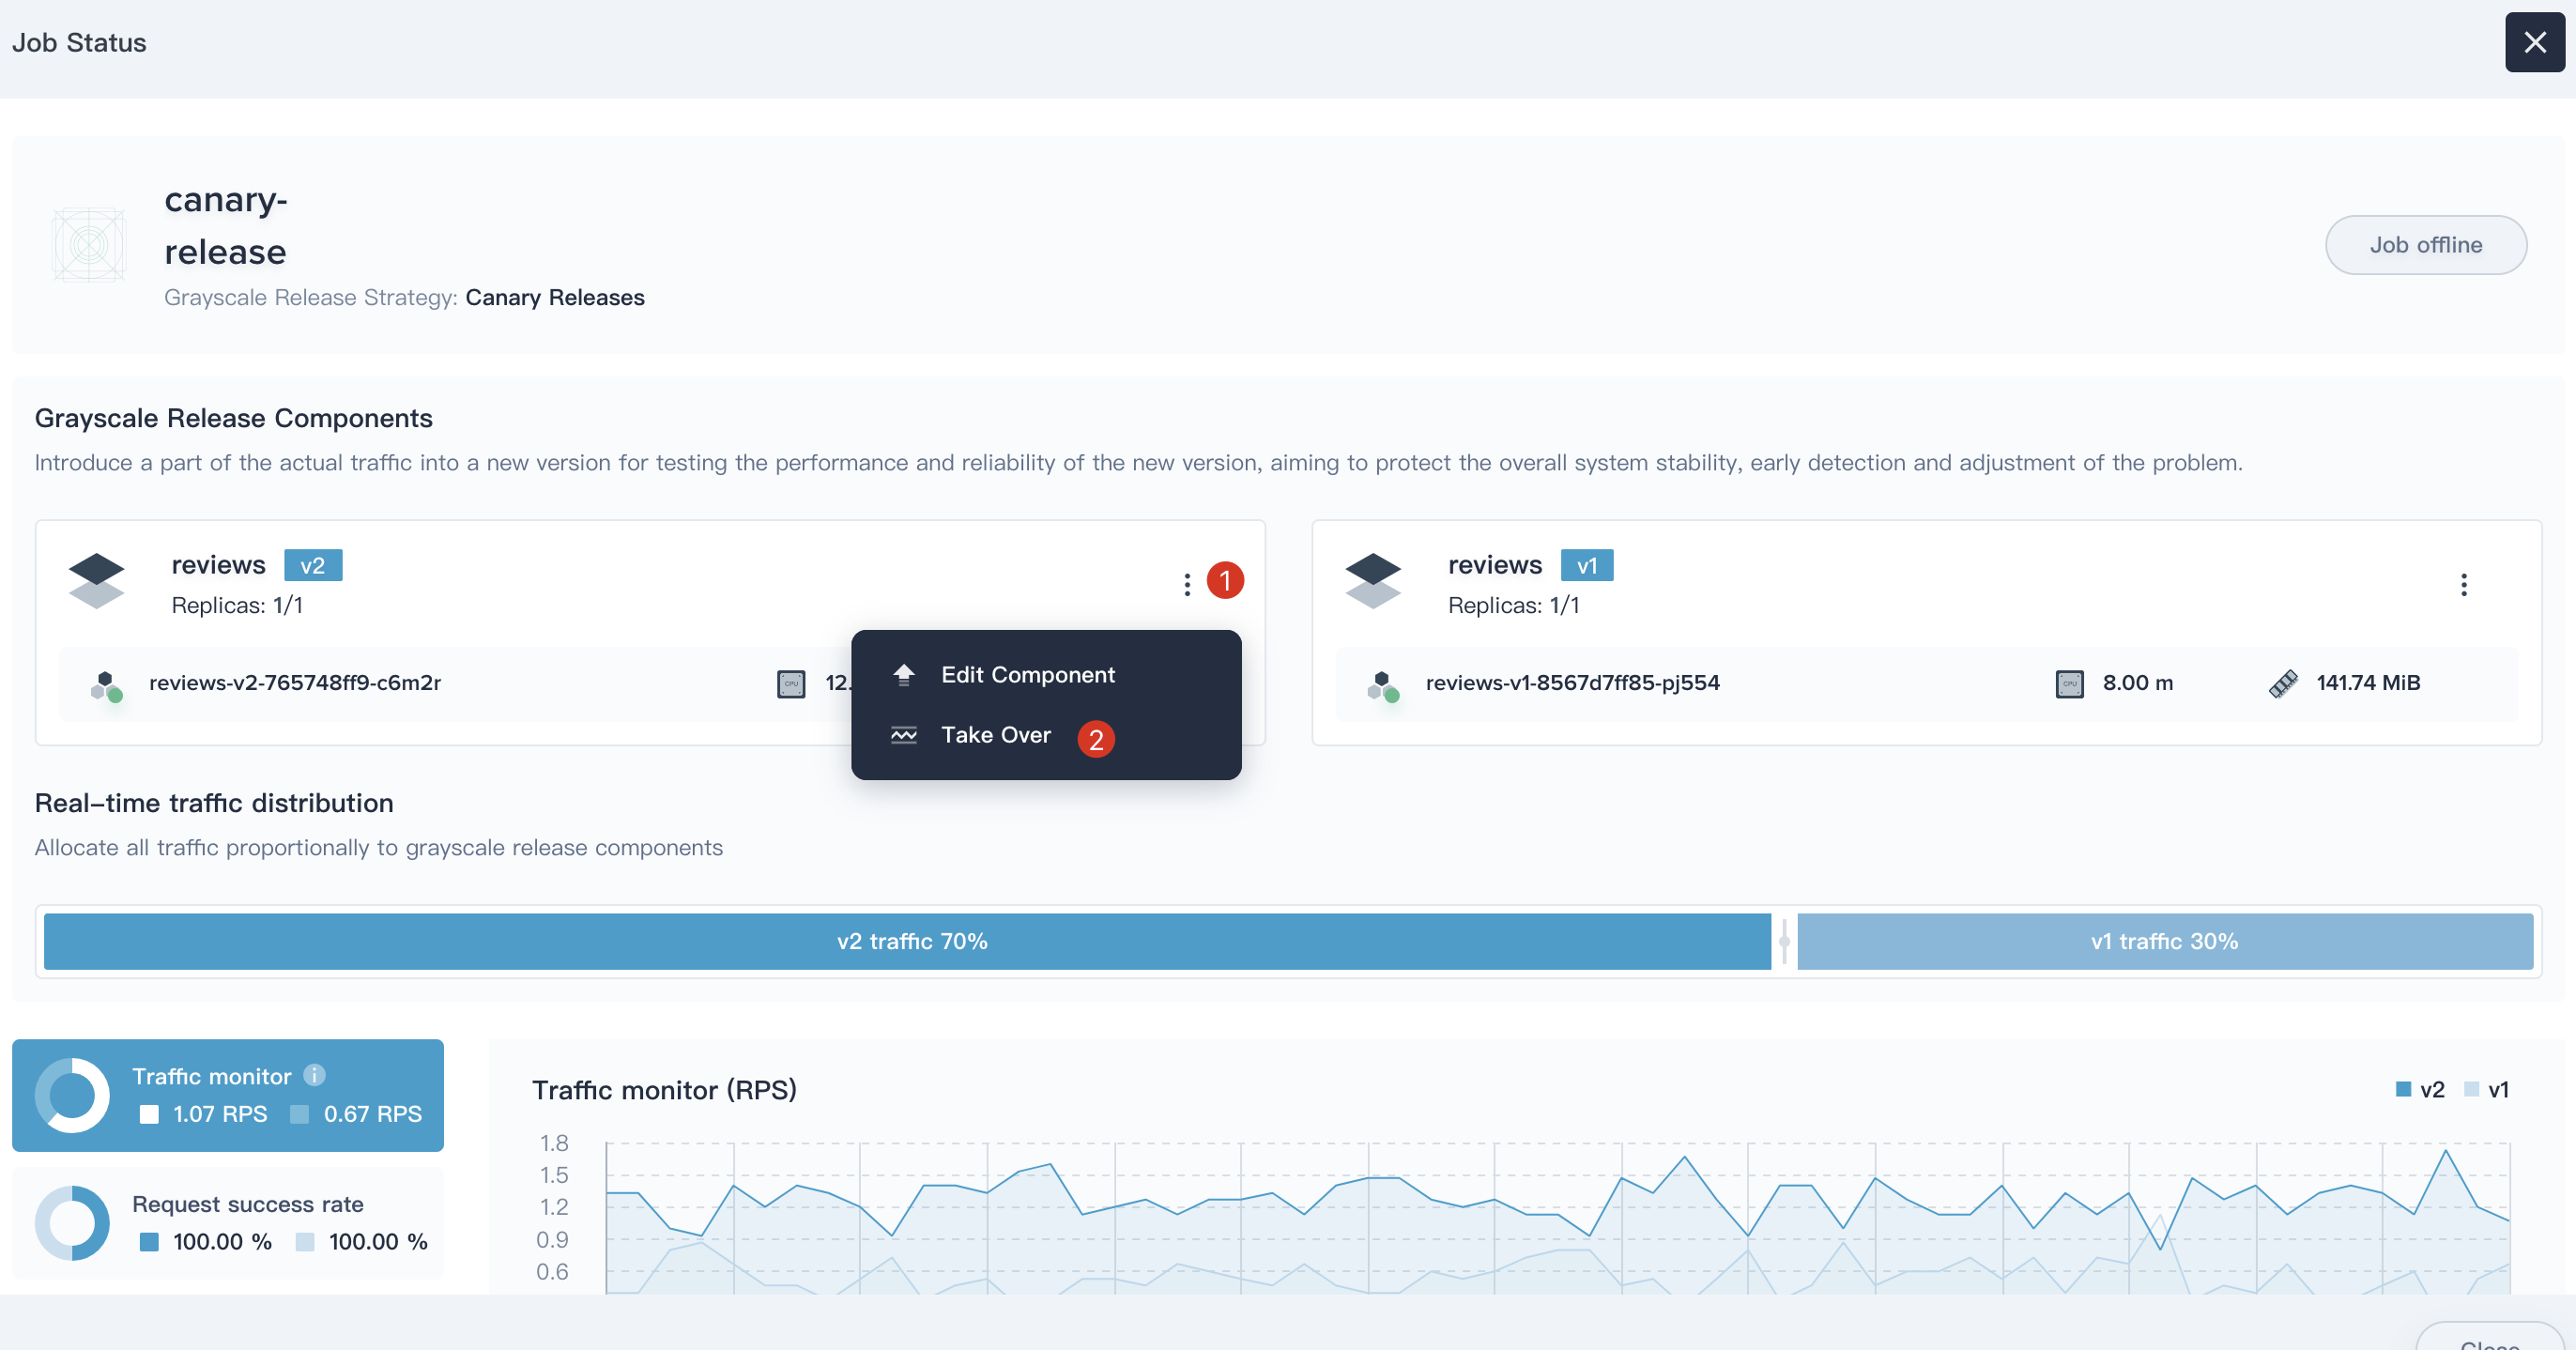
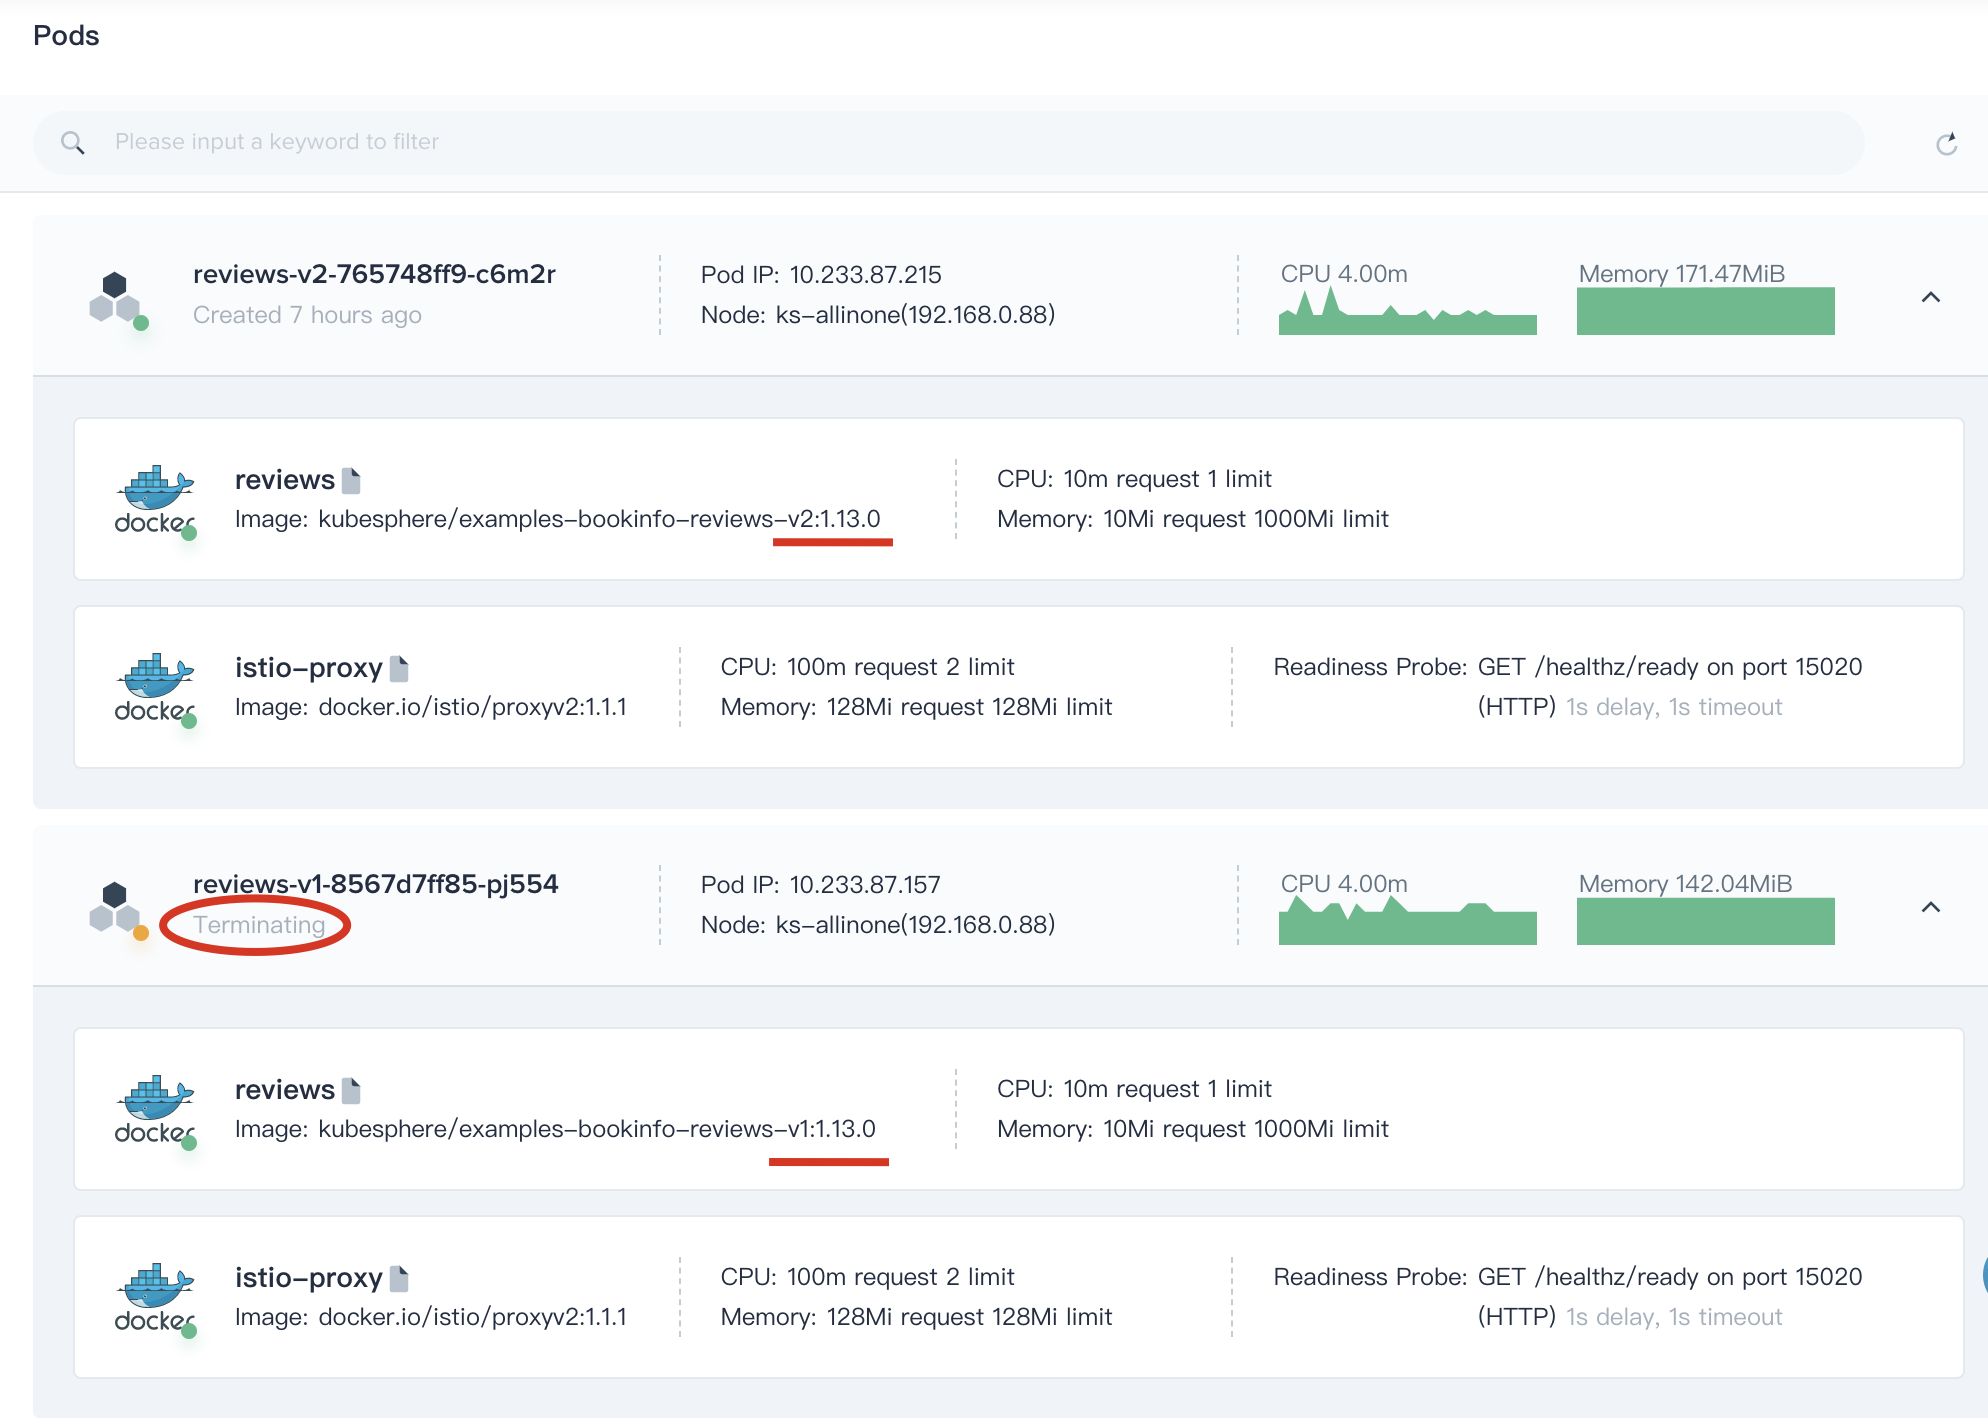
6.3. Open the Bookinfo page again and refresh the browsers several times. We can find that it only shows the result of reviews v2, i.e., ratings with black stars.
Step 7: Take Down the Old Version
When the new version v2 has been released online and takes over all the traffic successfully. Also, the testing results and online users feedback are confirmed to be correct. You can take down the old version and remove the resources of v1.
Click on the Job Offline button to take down the old version.

Notice: If take down a specific version of the component, the associated workloads and Istio related configuration resources will be removed simultaneously. It turns out that v1 is being replaced by v2.