Release Notes
Installation
Install on Linux
Install on Kubernetes
Pluggable Components
Upgrade
Third-Party Tools
Authentication Integration
Cluster Operations
Quick Start
DevOps
User Guide
Configration Center
Logging
Developer Guide
API Documentation
Troubleshooting
FAQ
Application Store
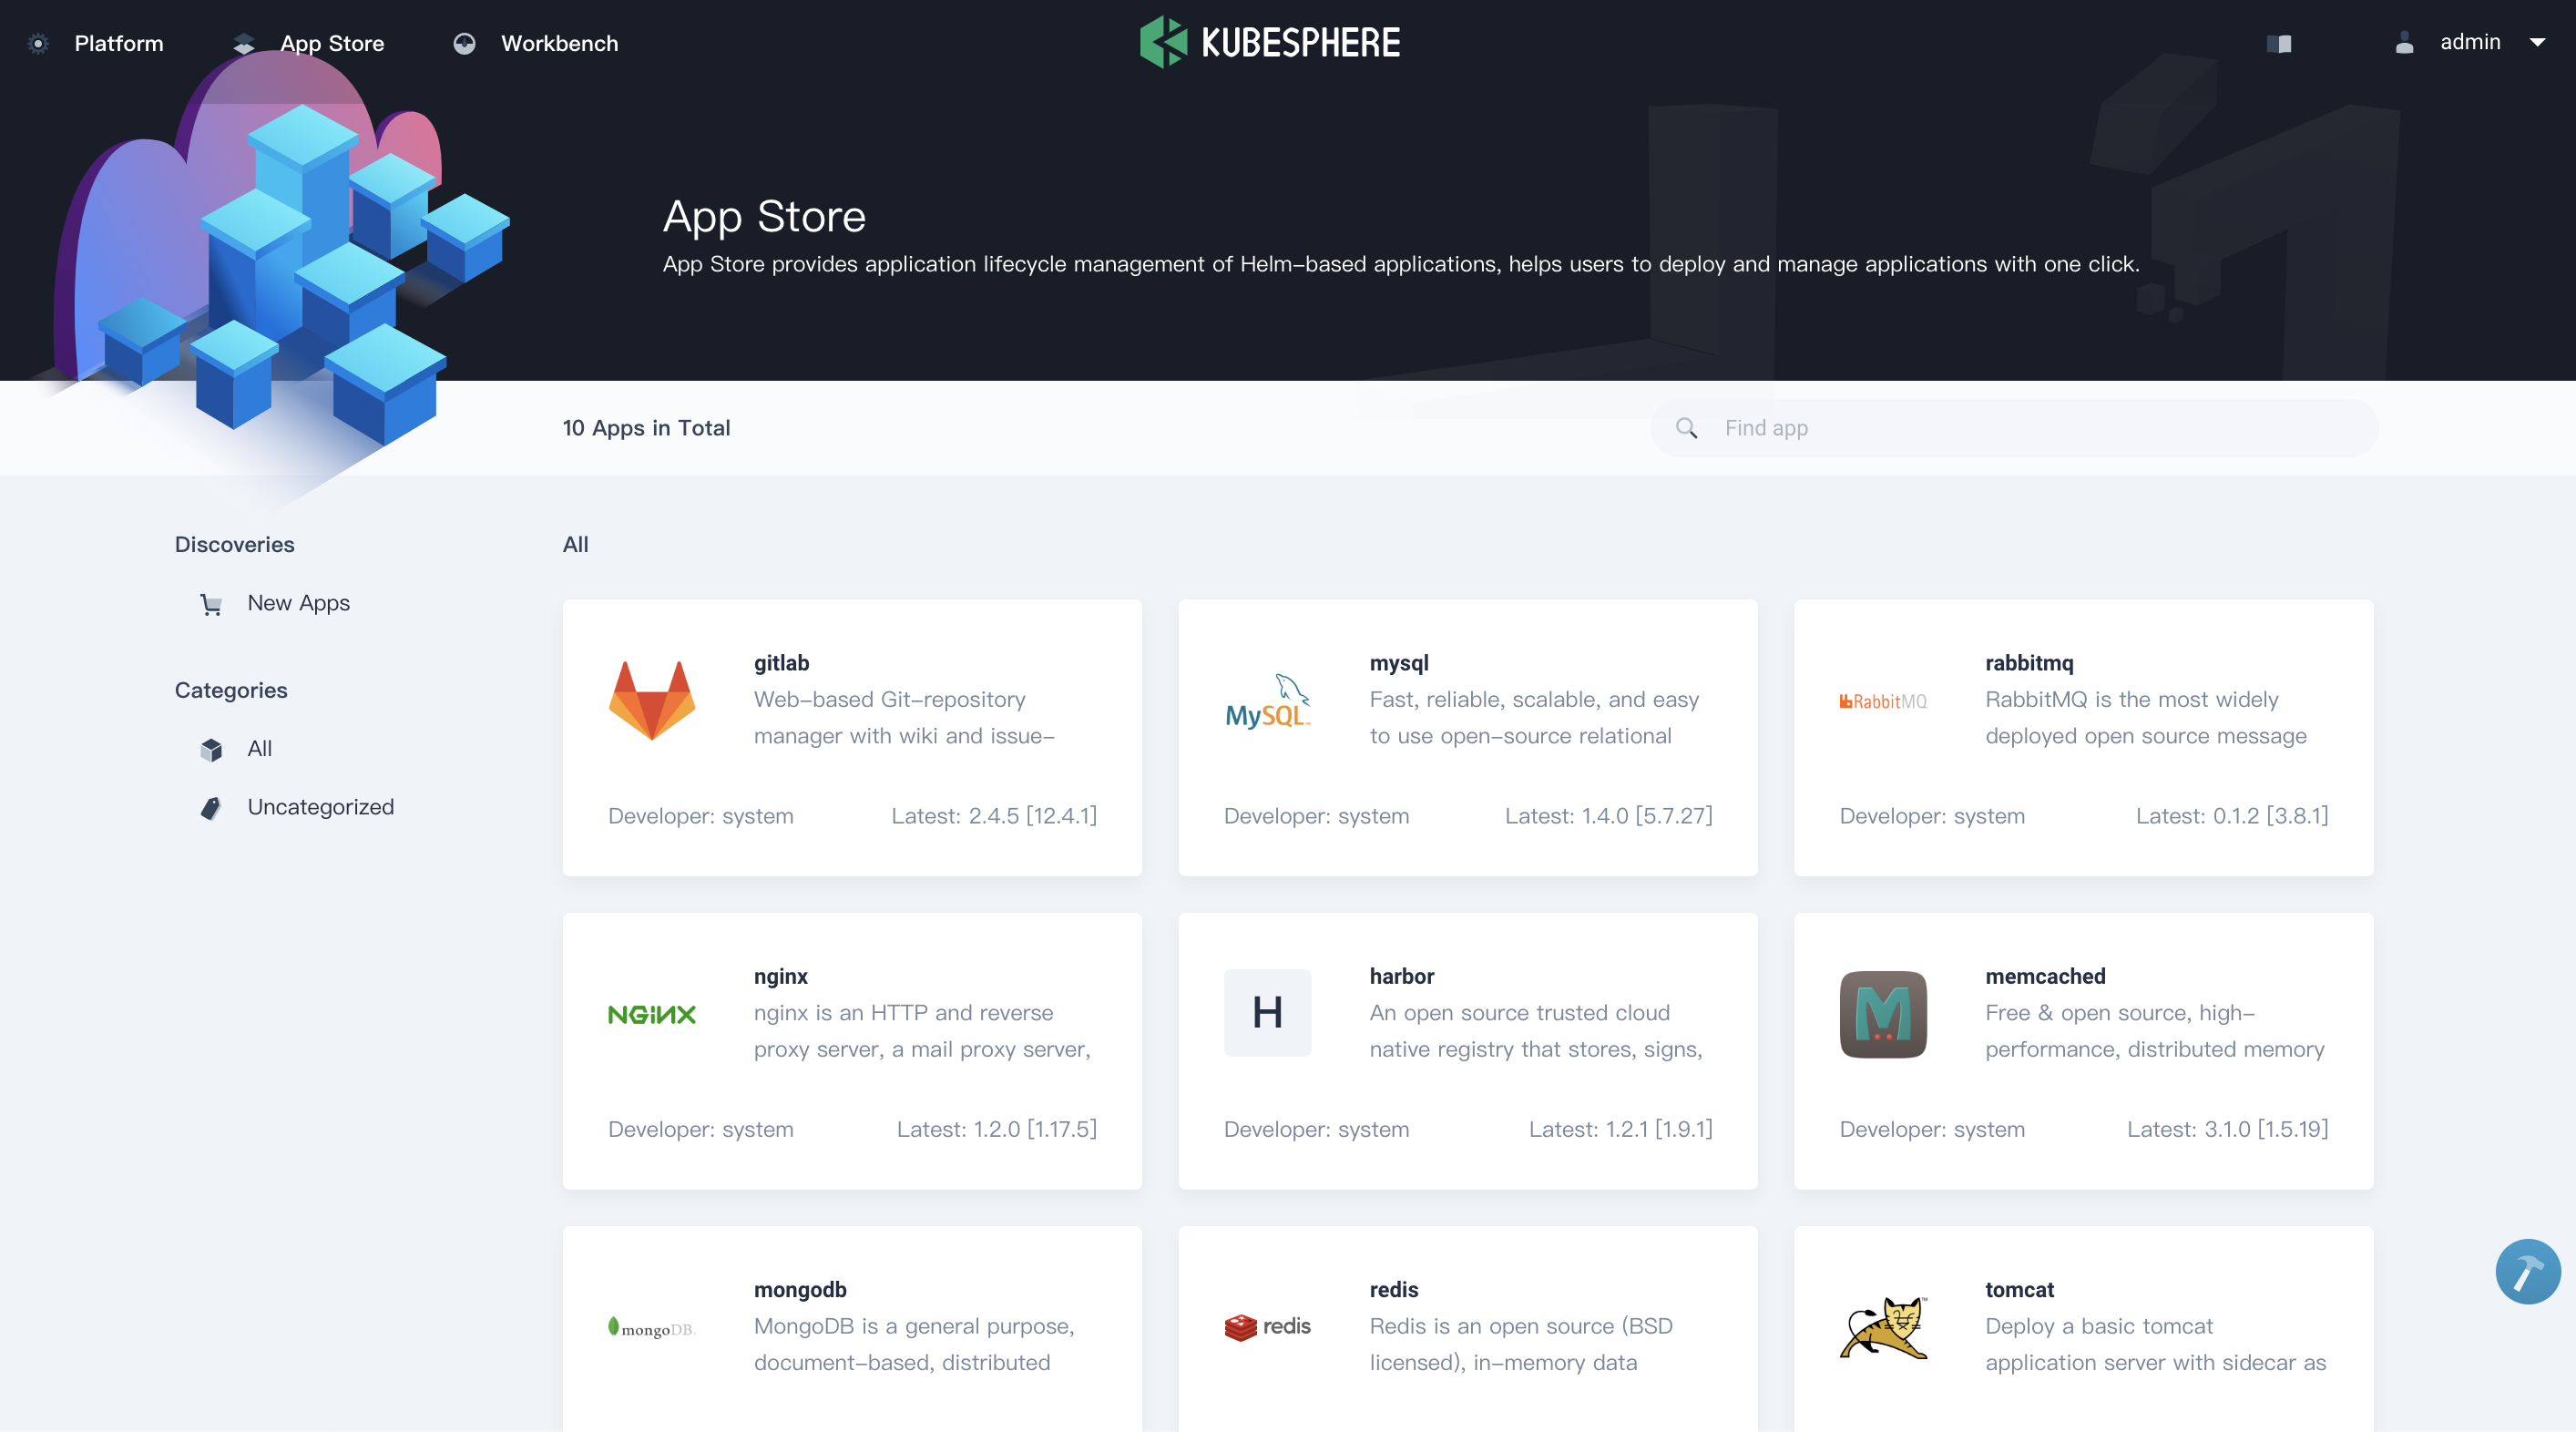
EditKubeSphere integrates open source OpenPitrix to set up app store and app repository services which provide full lifecycle of application management. Application Store supports three kinds of application deployment as follows:
- Global application store provides one-click deployment service for Helm-based applications. It provides nine built-in applications for testing.
- Application template provides a way for developers and ISVs to share applications with users in a workspace. It also supports importing third-party application repositories within workspace.
- Composing application means users can quickly compose multiple microservices into a complete application through the one-stop console.
Objective
In this tutorial, we will walk you through how to use EMQ X as a demo application to demonstrate the global application store and application lifecycle management including upload / submit / review / test / release / upgrade / delete application templates.
Prerequisites
- You need to install Application Store (OpenPitrix).
- You need to create a workspace and a project, see Get Started with Multi-tenant Management.
Hands-on Lab
Step 1: Create Customized Role and Account
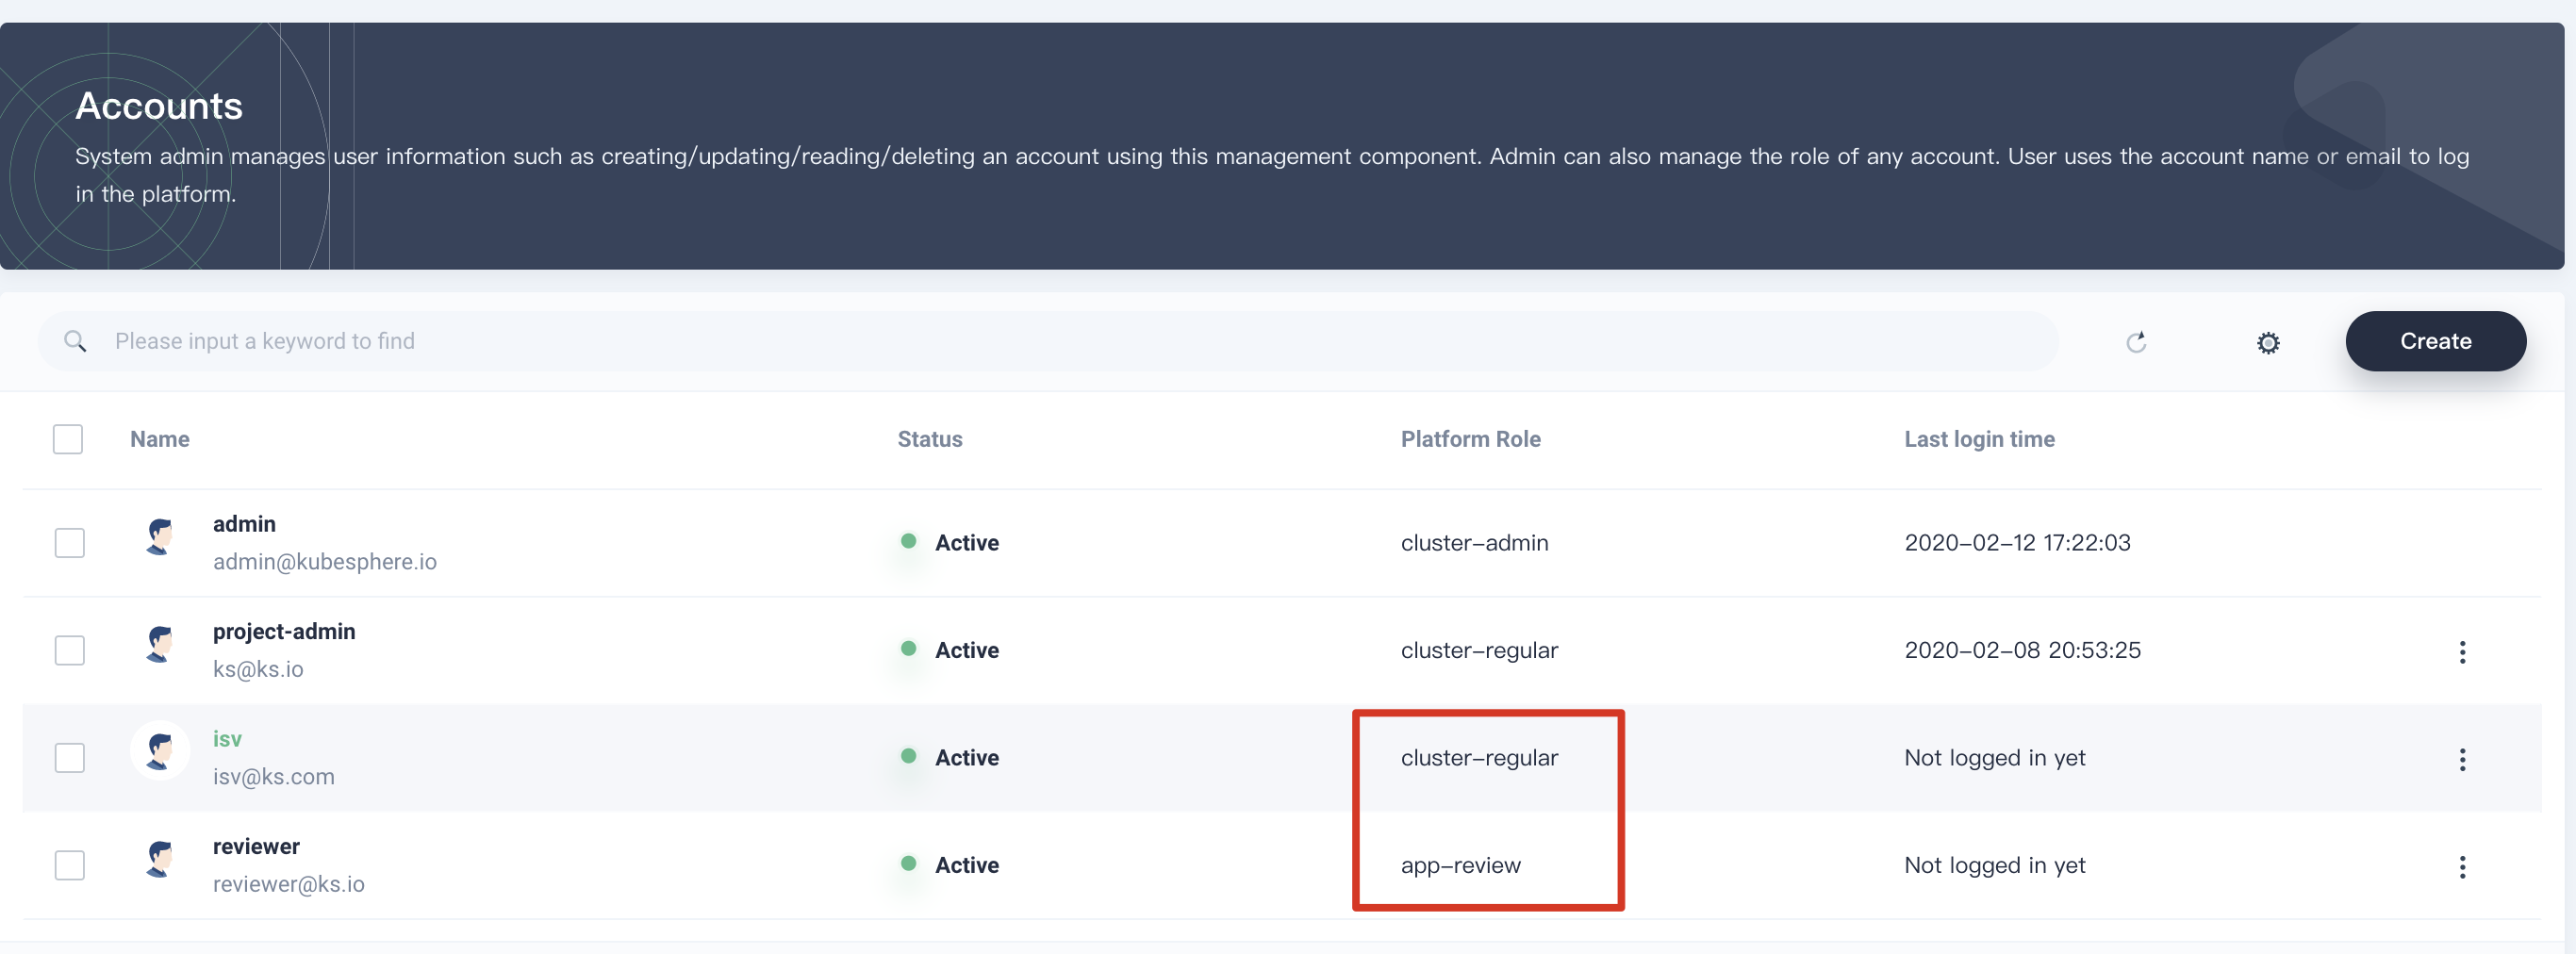
In this step, we will create two accounts, i.e., isv for ISVs and reviewer for app technical reviewers.
1.1. First of all, we need to create a role for app reviewers. Log in KubeSphere console with the account admin, go to Platform → Platform Roles, then click Create and name it app-review, choose App Template in the authorization settings list, then click Create.

1.2. Create an account reviewer, and grant the role of app-review to it.
1.3. Similarly, create an account isv, and grant the role of cluster-regular to it.
1.4. Invite the accounts that we created above to an existing workspace such as demo-workspace, and grant them the role of workspace-admin.
Step 2: Upload and Submit Application
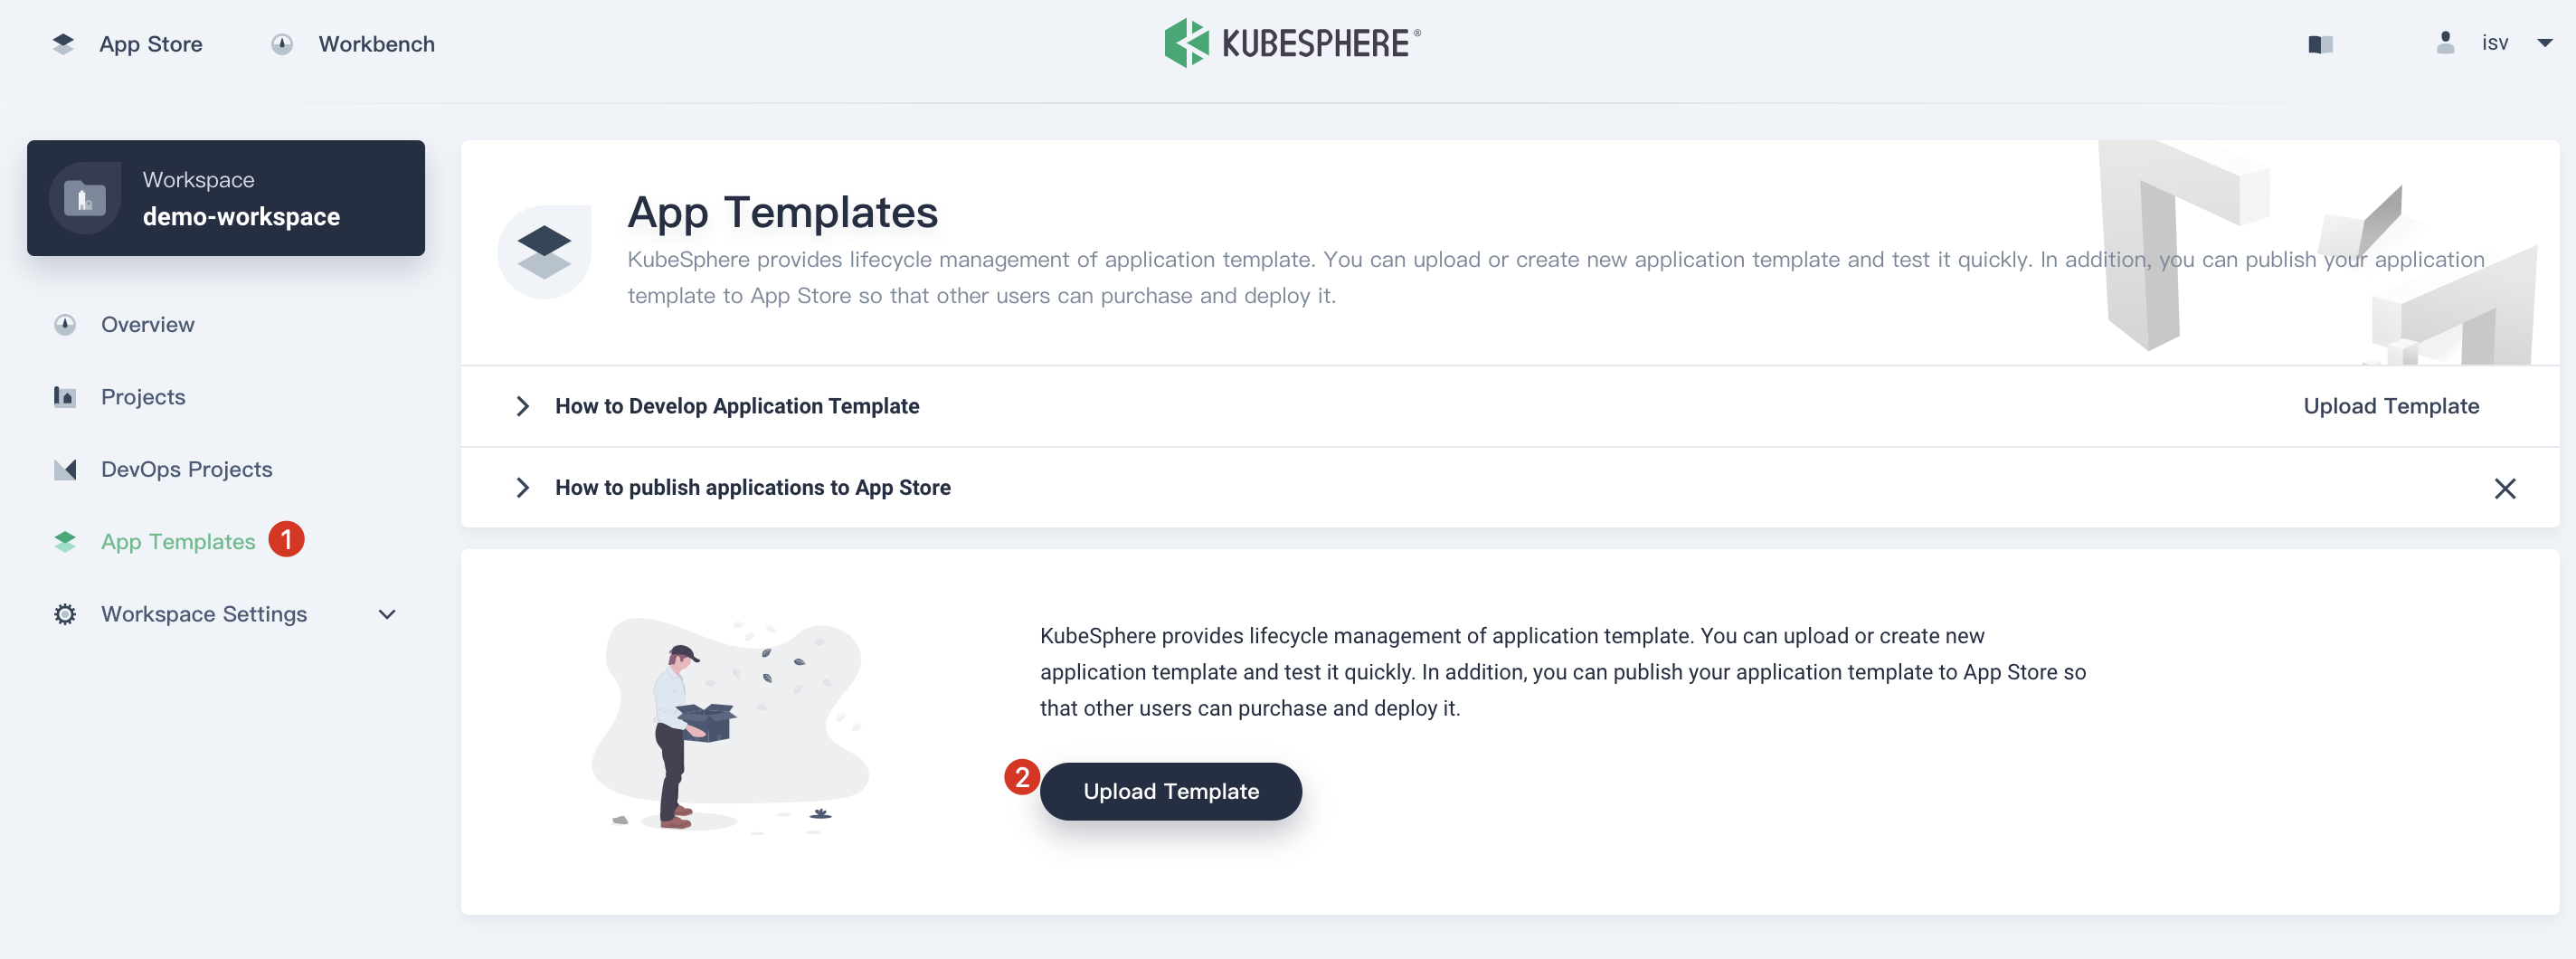
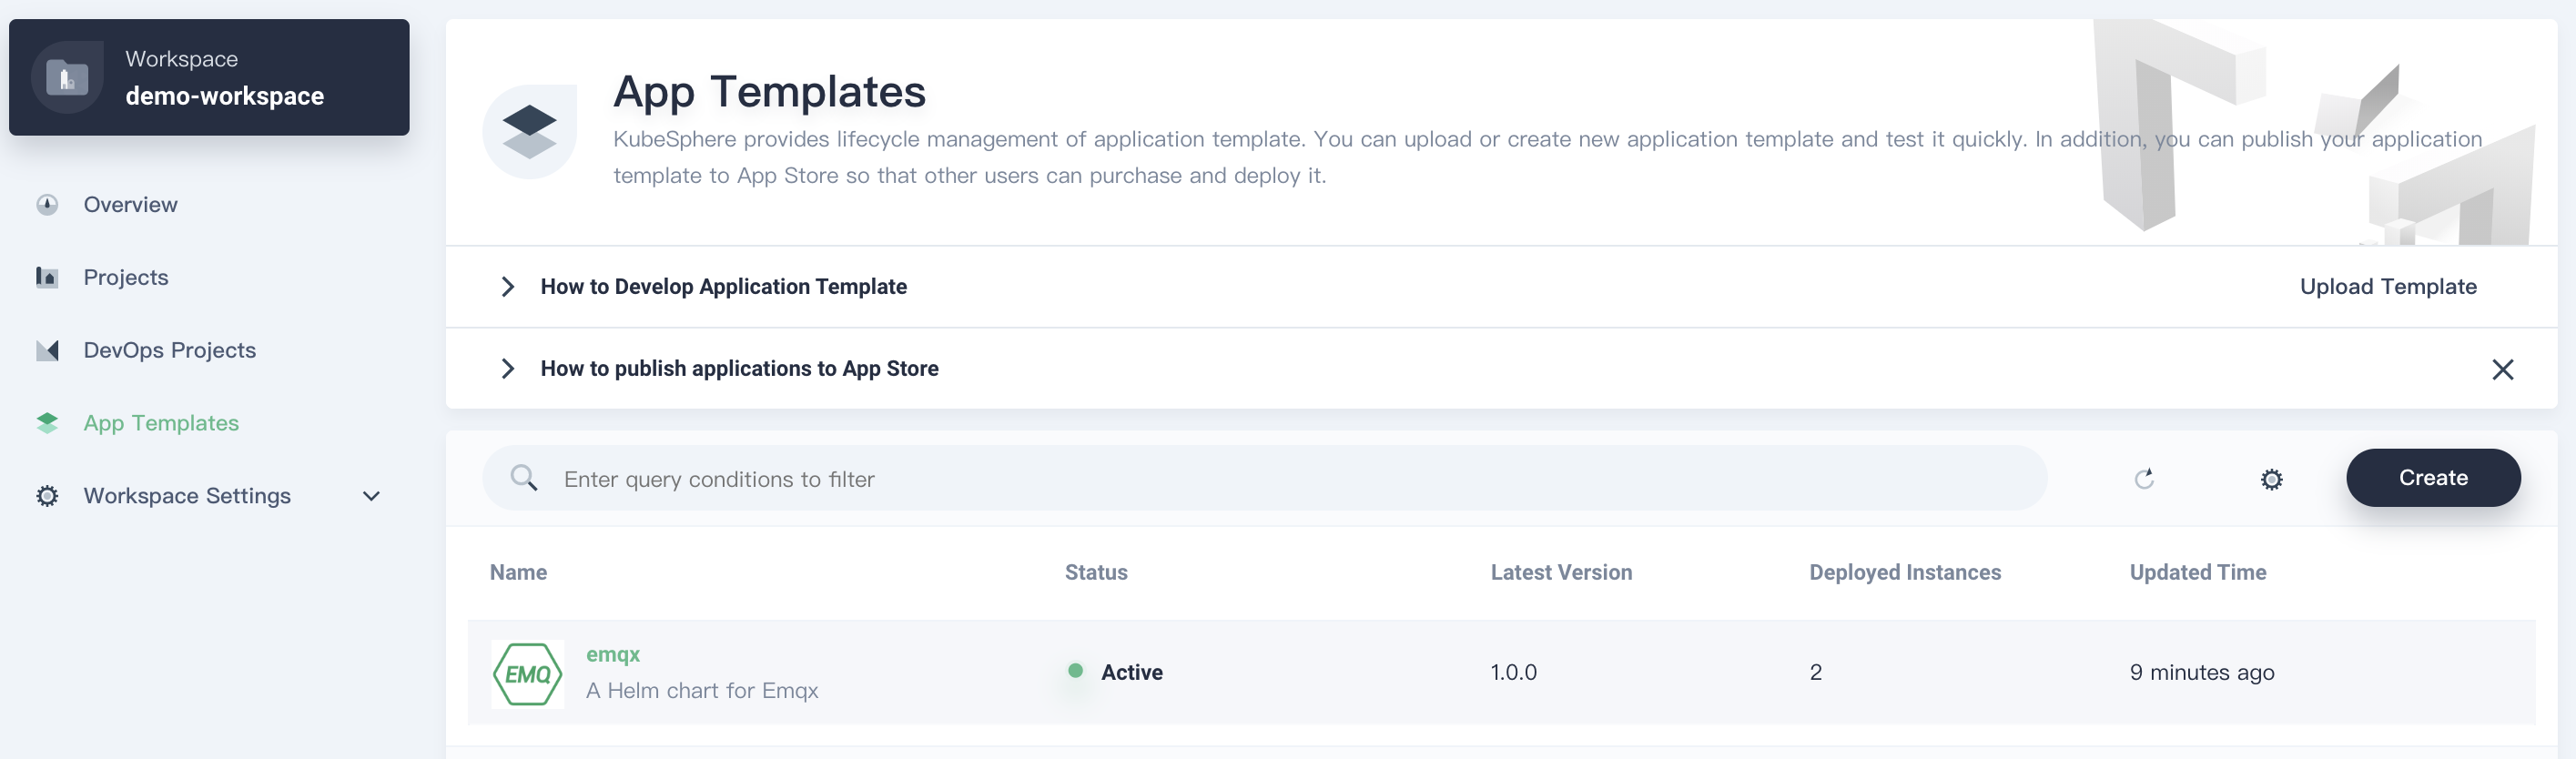
2.1. Log in KubeSphere with isv, enter the workspace. We are going to upload the EMQ X app to this workspace. First please download EMQ X chart v1.0.0 and click Upload Template by choosing App Templates.
Note we are going to upload a newer version of EMQ X to demo the upgrade feature later on.
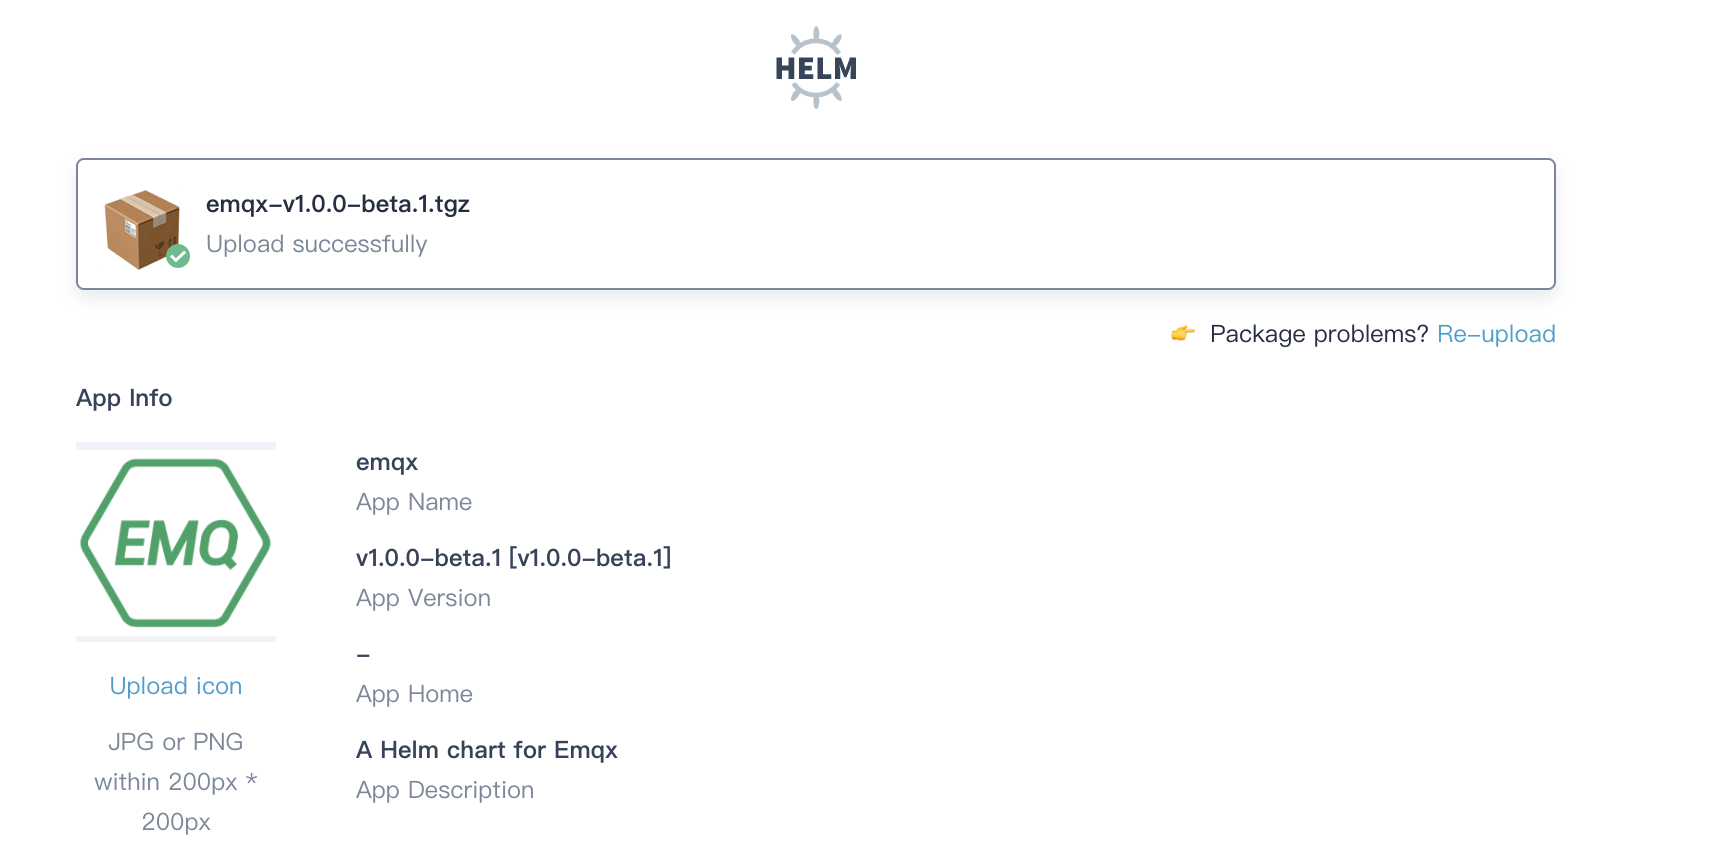
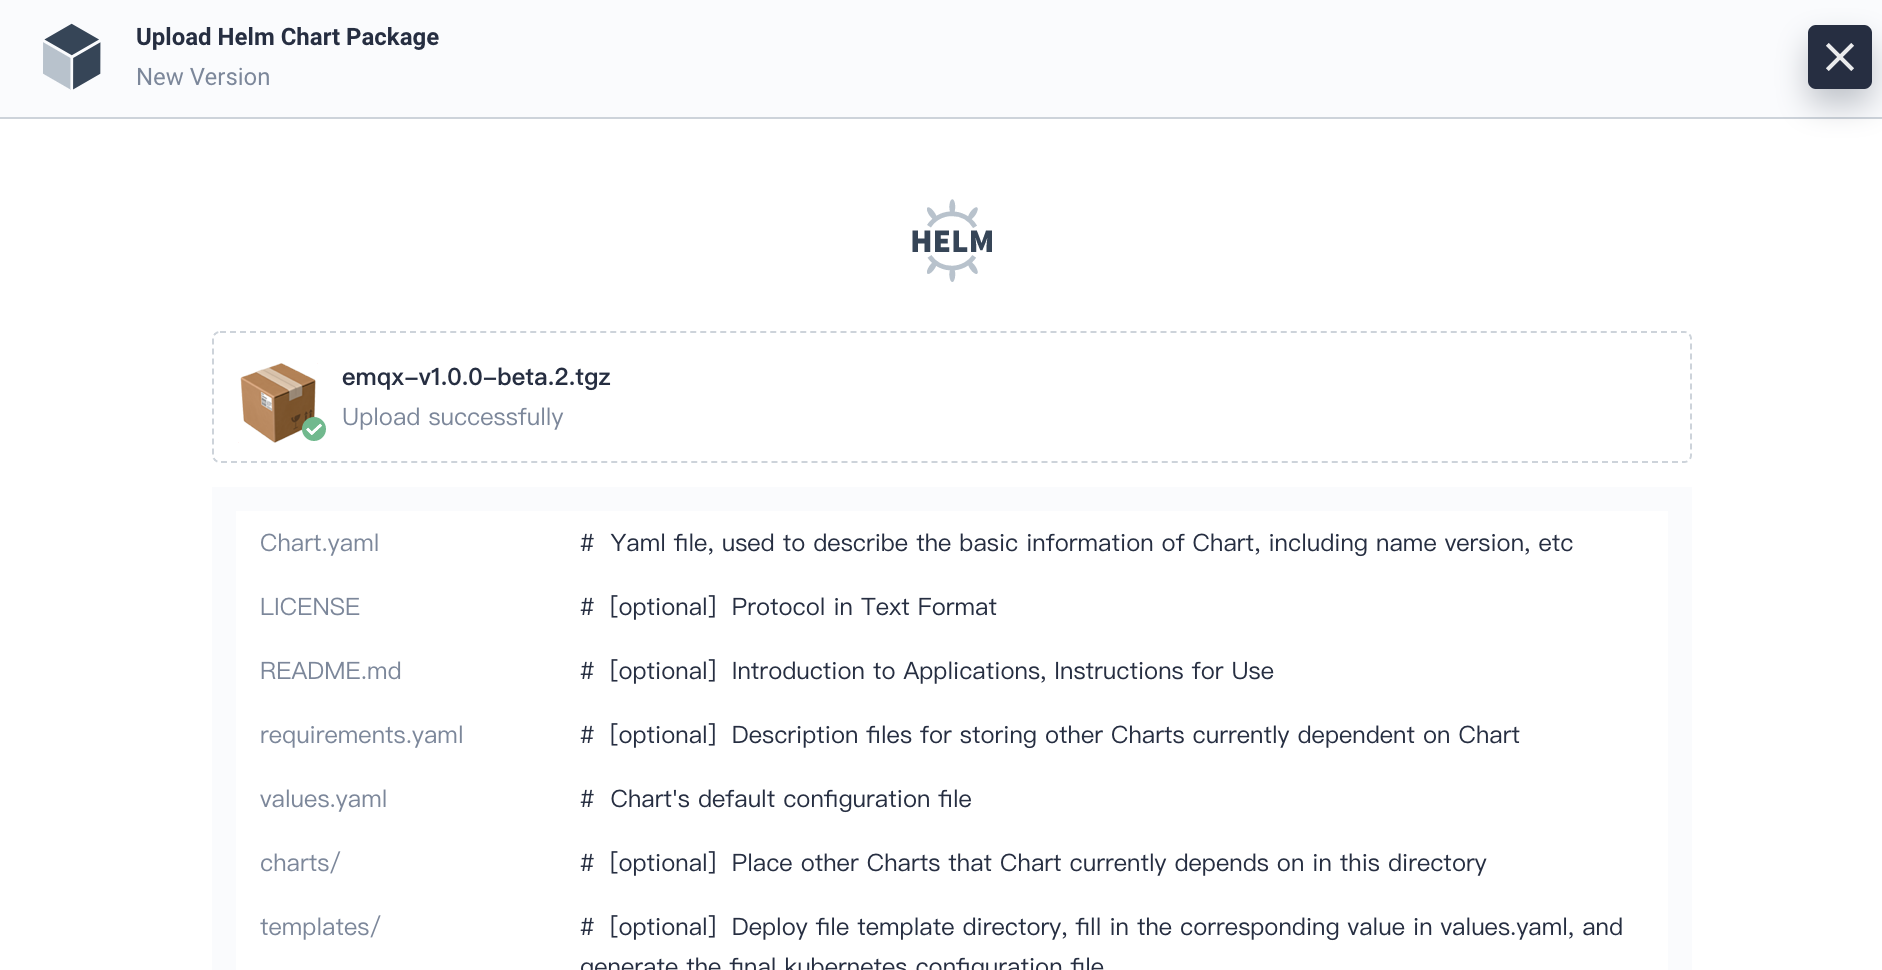
2.2. Click Upload, then click Upload Helm Chart Package to upload the chart.
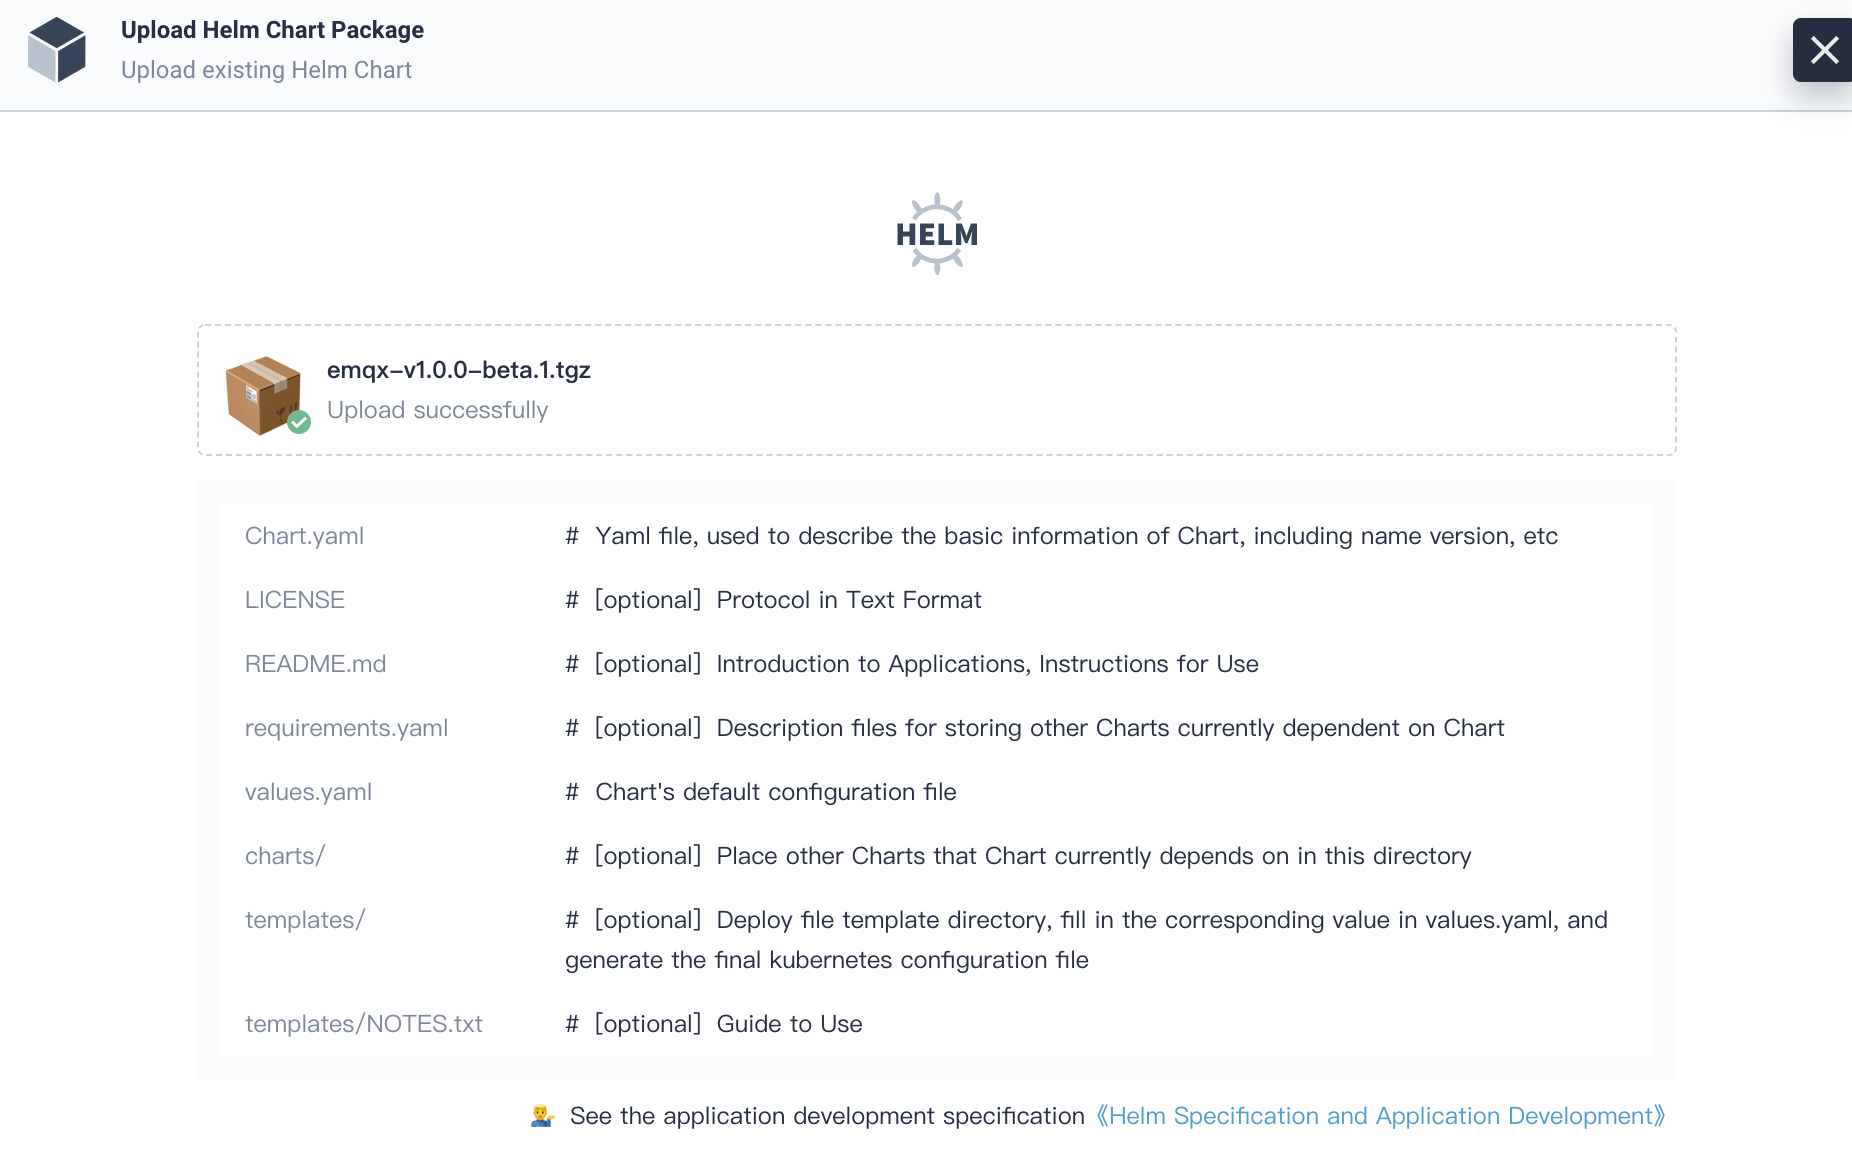
2.3. Click OK. Now download EMQ Icon and click Upload icon to upload App logo. Click OK when you are done.
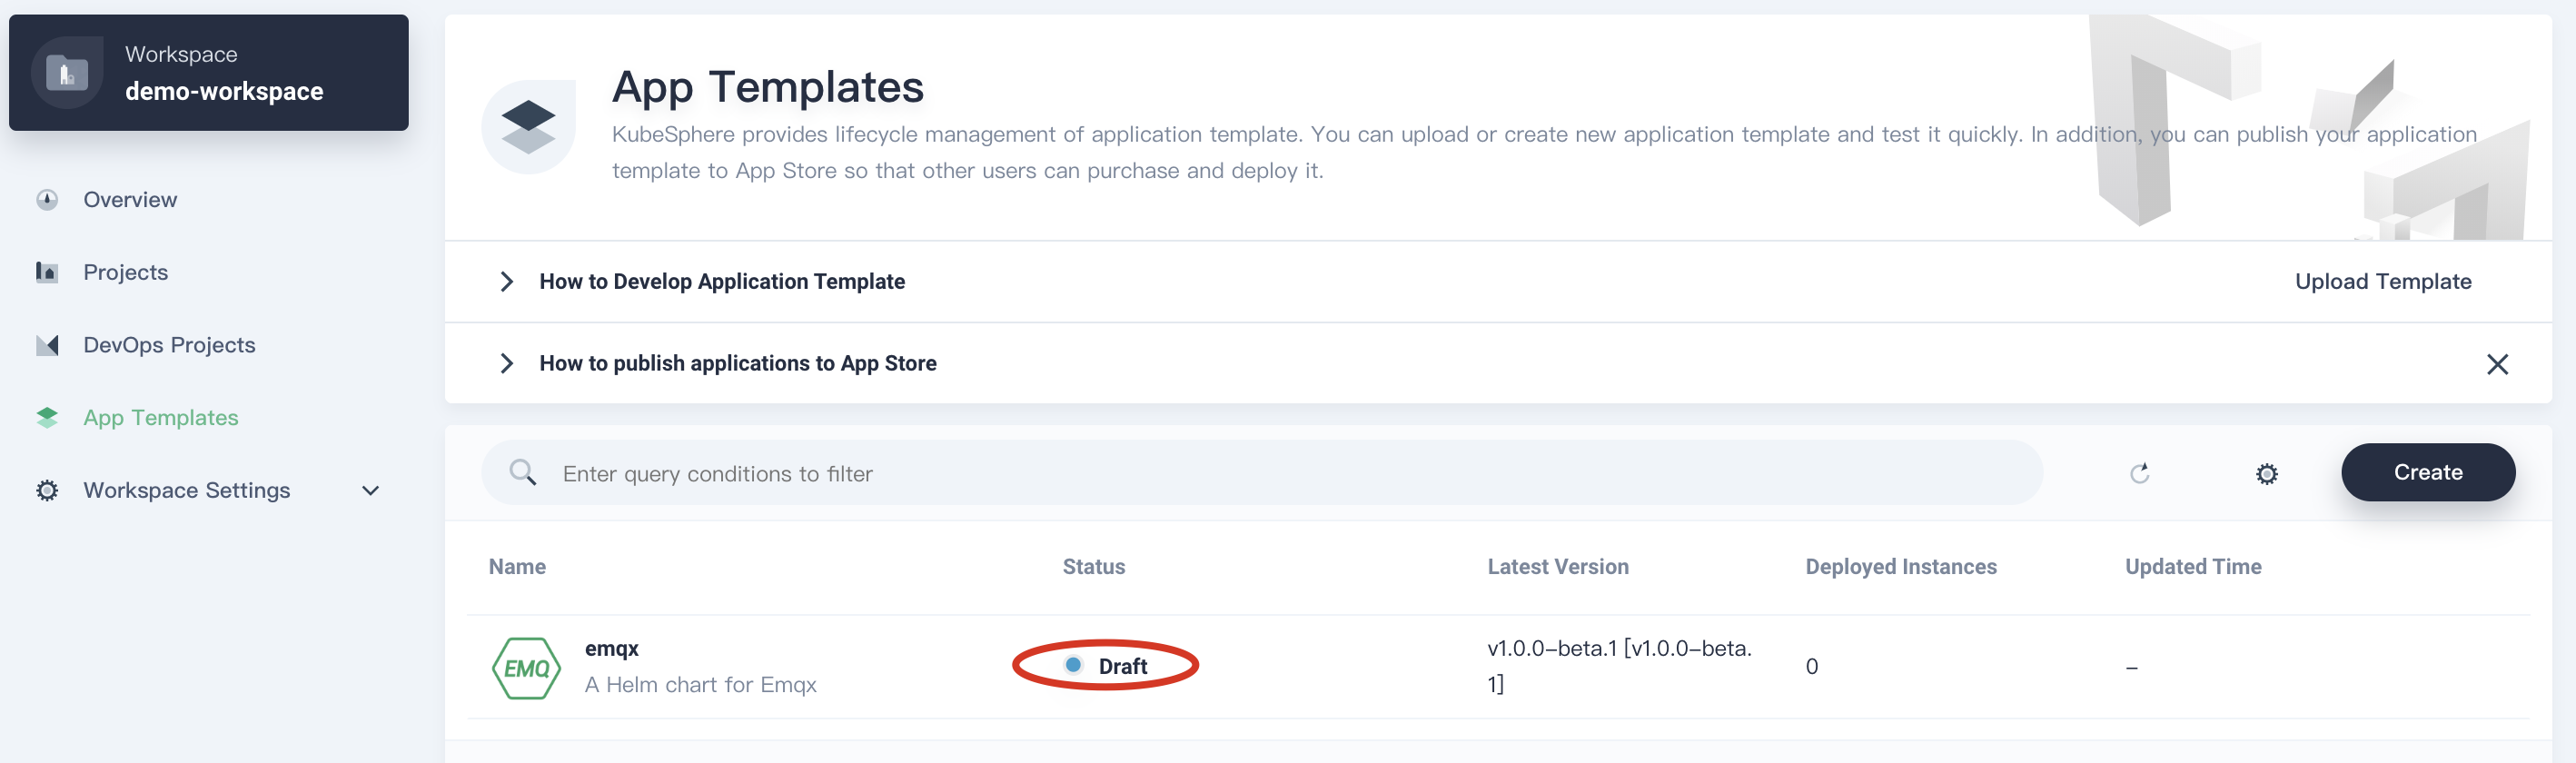
2.4. At this point, you will be able to see the status displays draft, which means this app is under developing. The uploaded app is visible for all members in the same workspace.
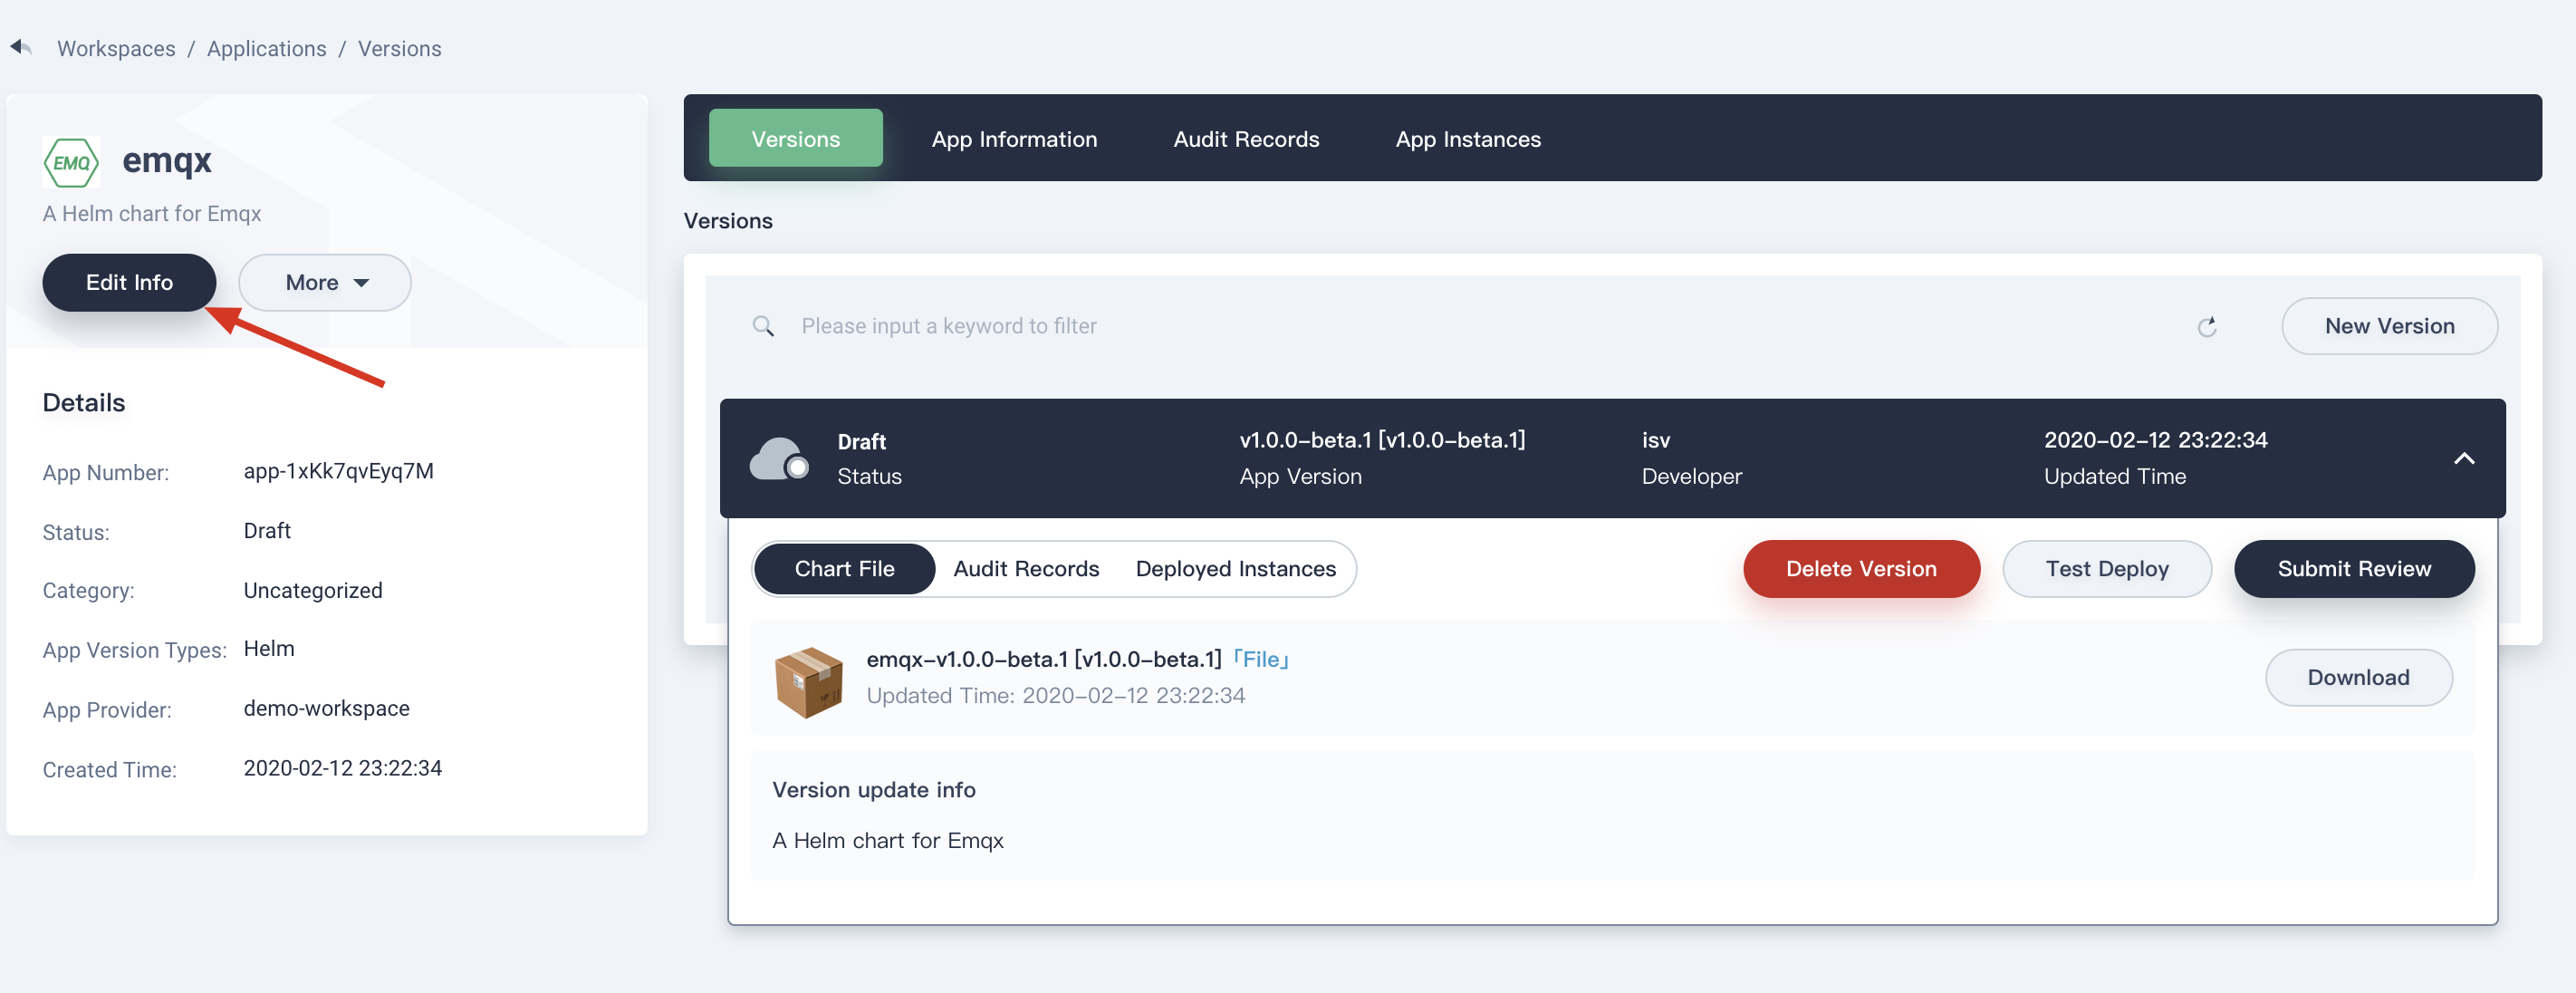
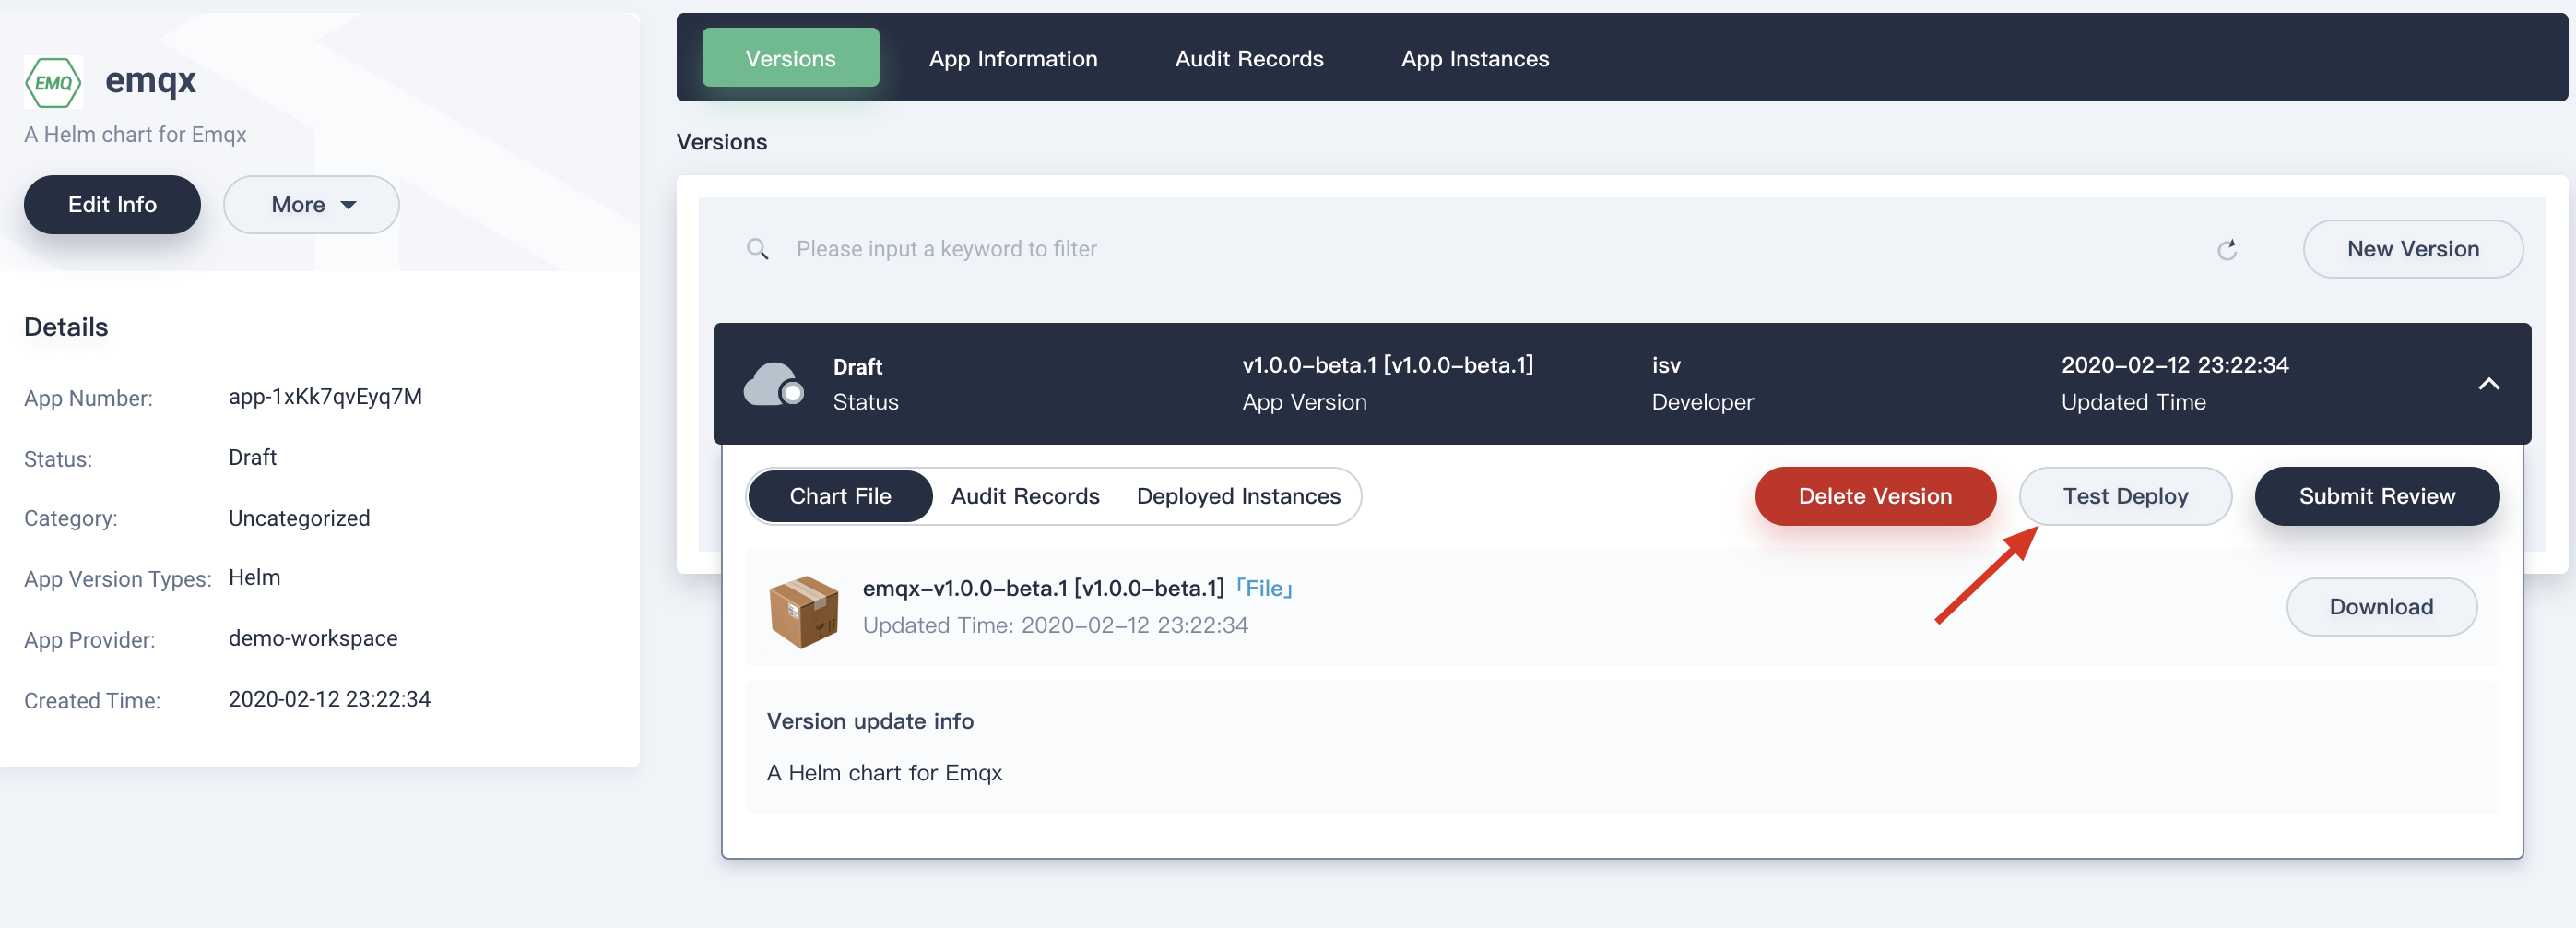
2.5. Enter app template detailed page by clicking on EMQ X from the list. You can edit the basic information of this app by clicking Edit Info.
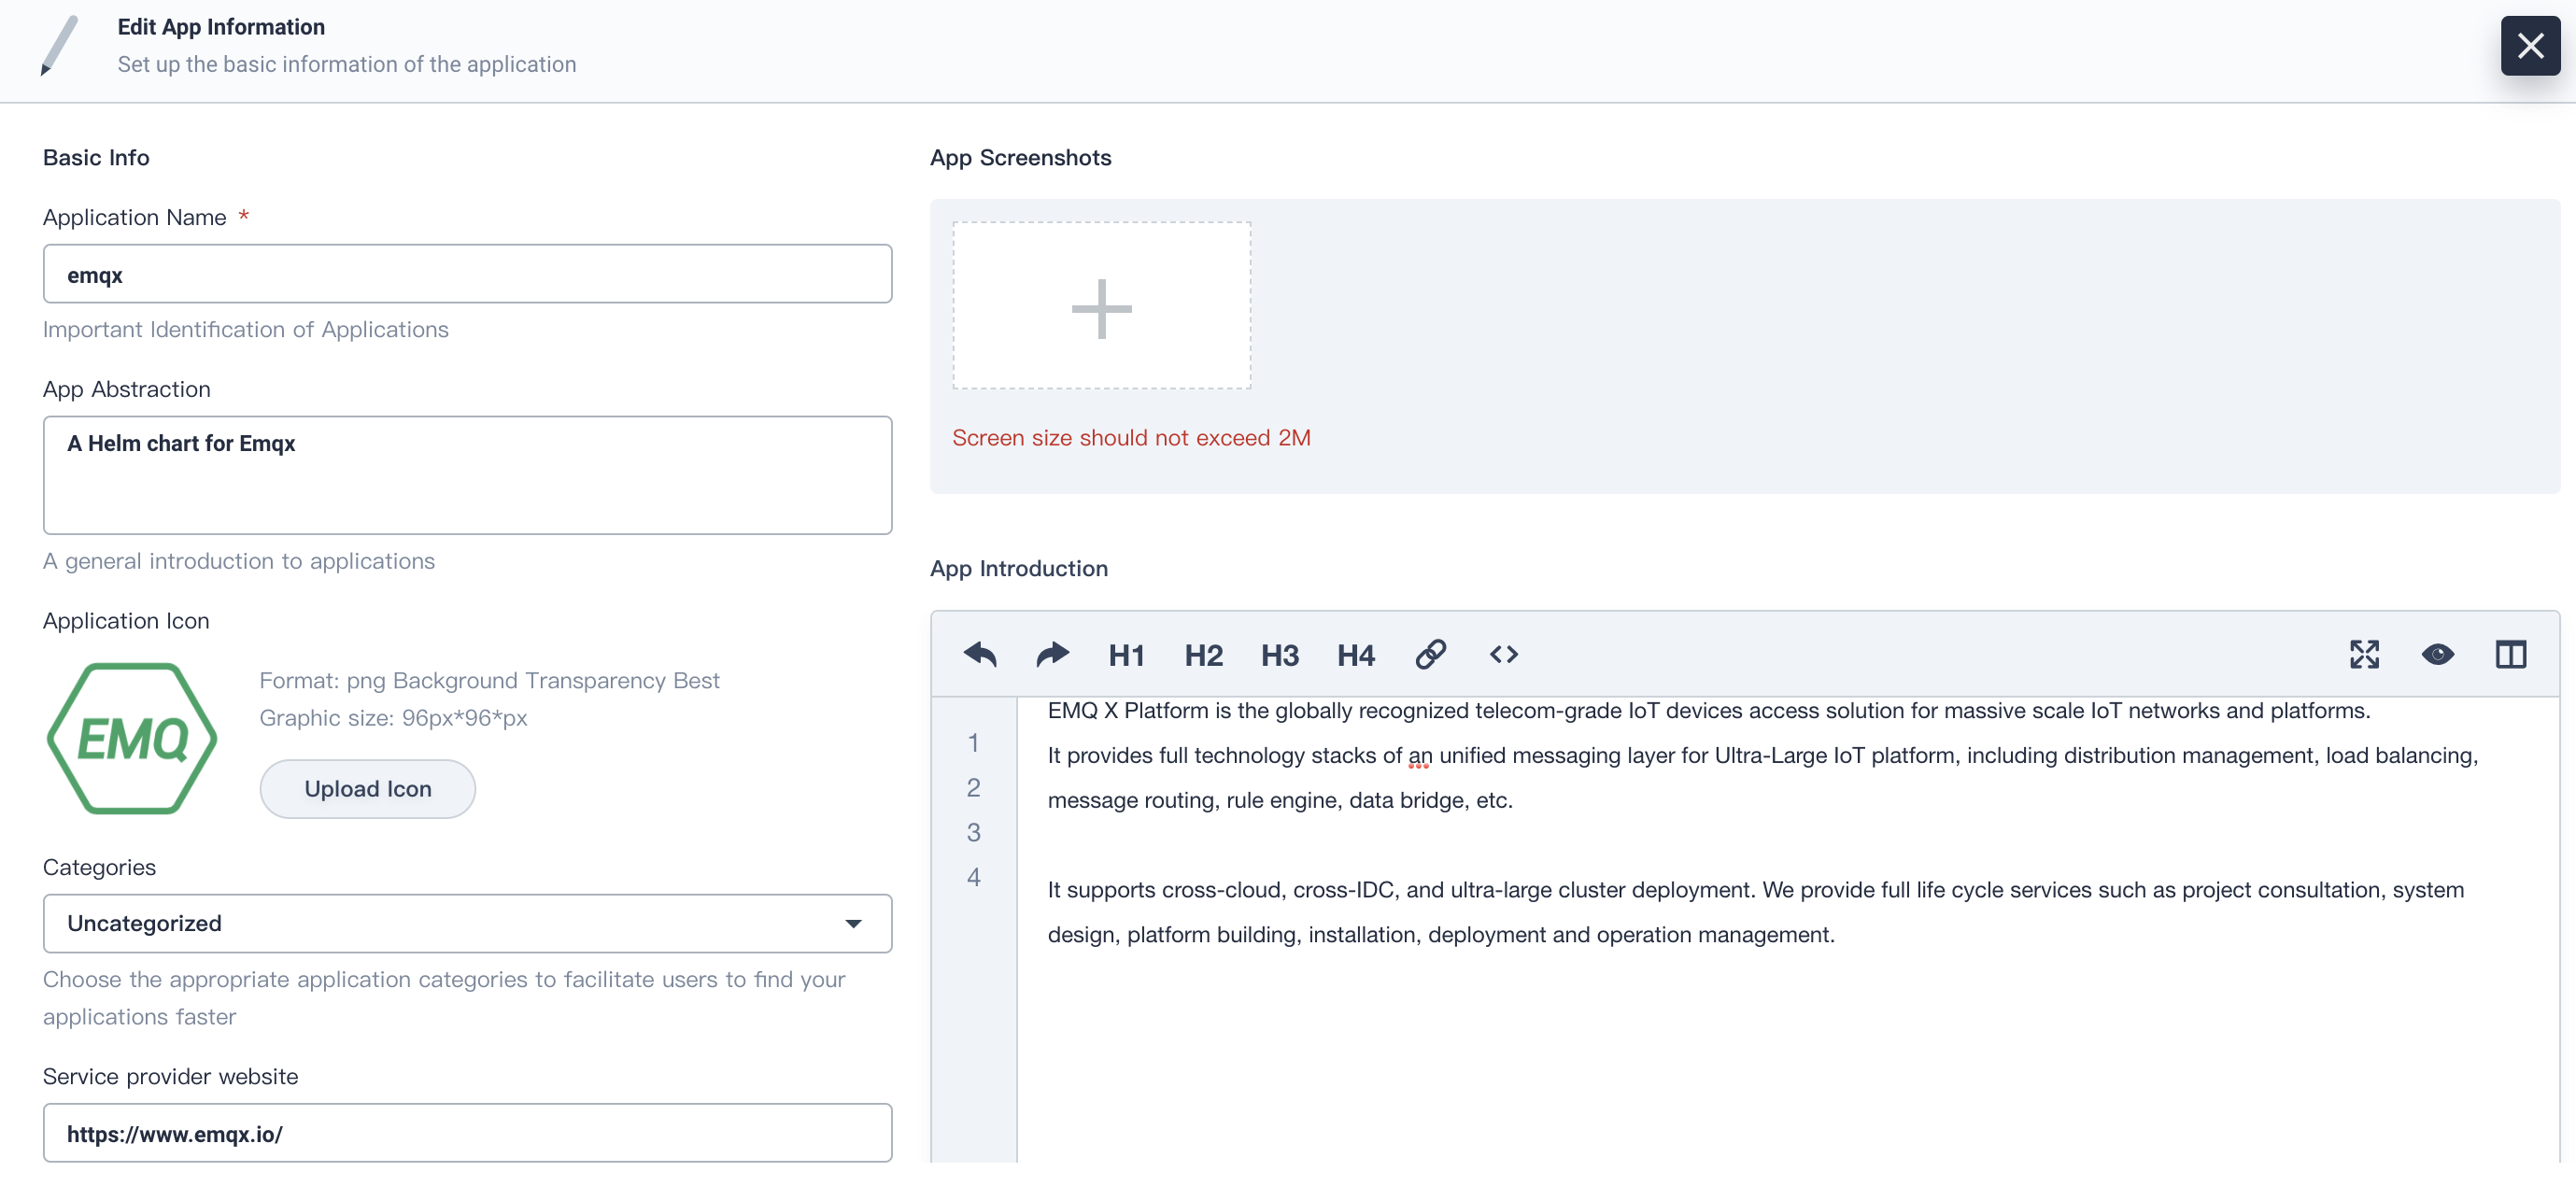
2.6. You can customize the app's basic information by filling in the table as the following screenshot.
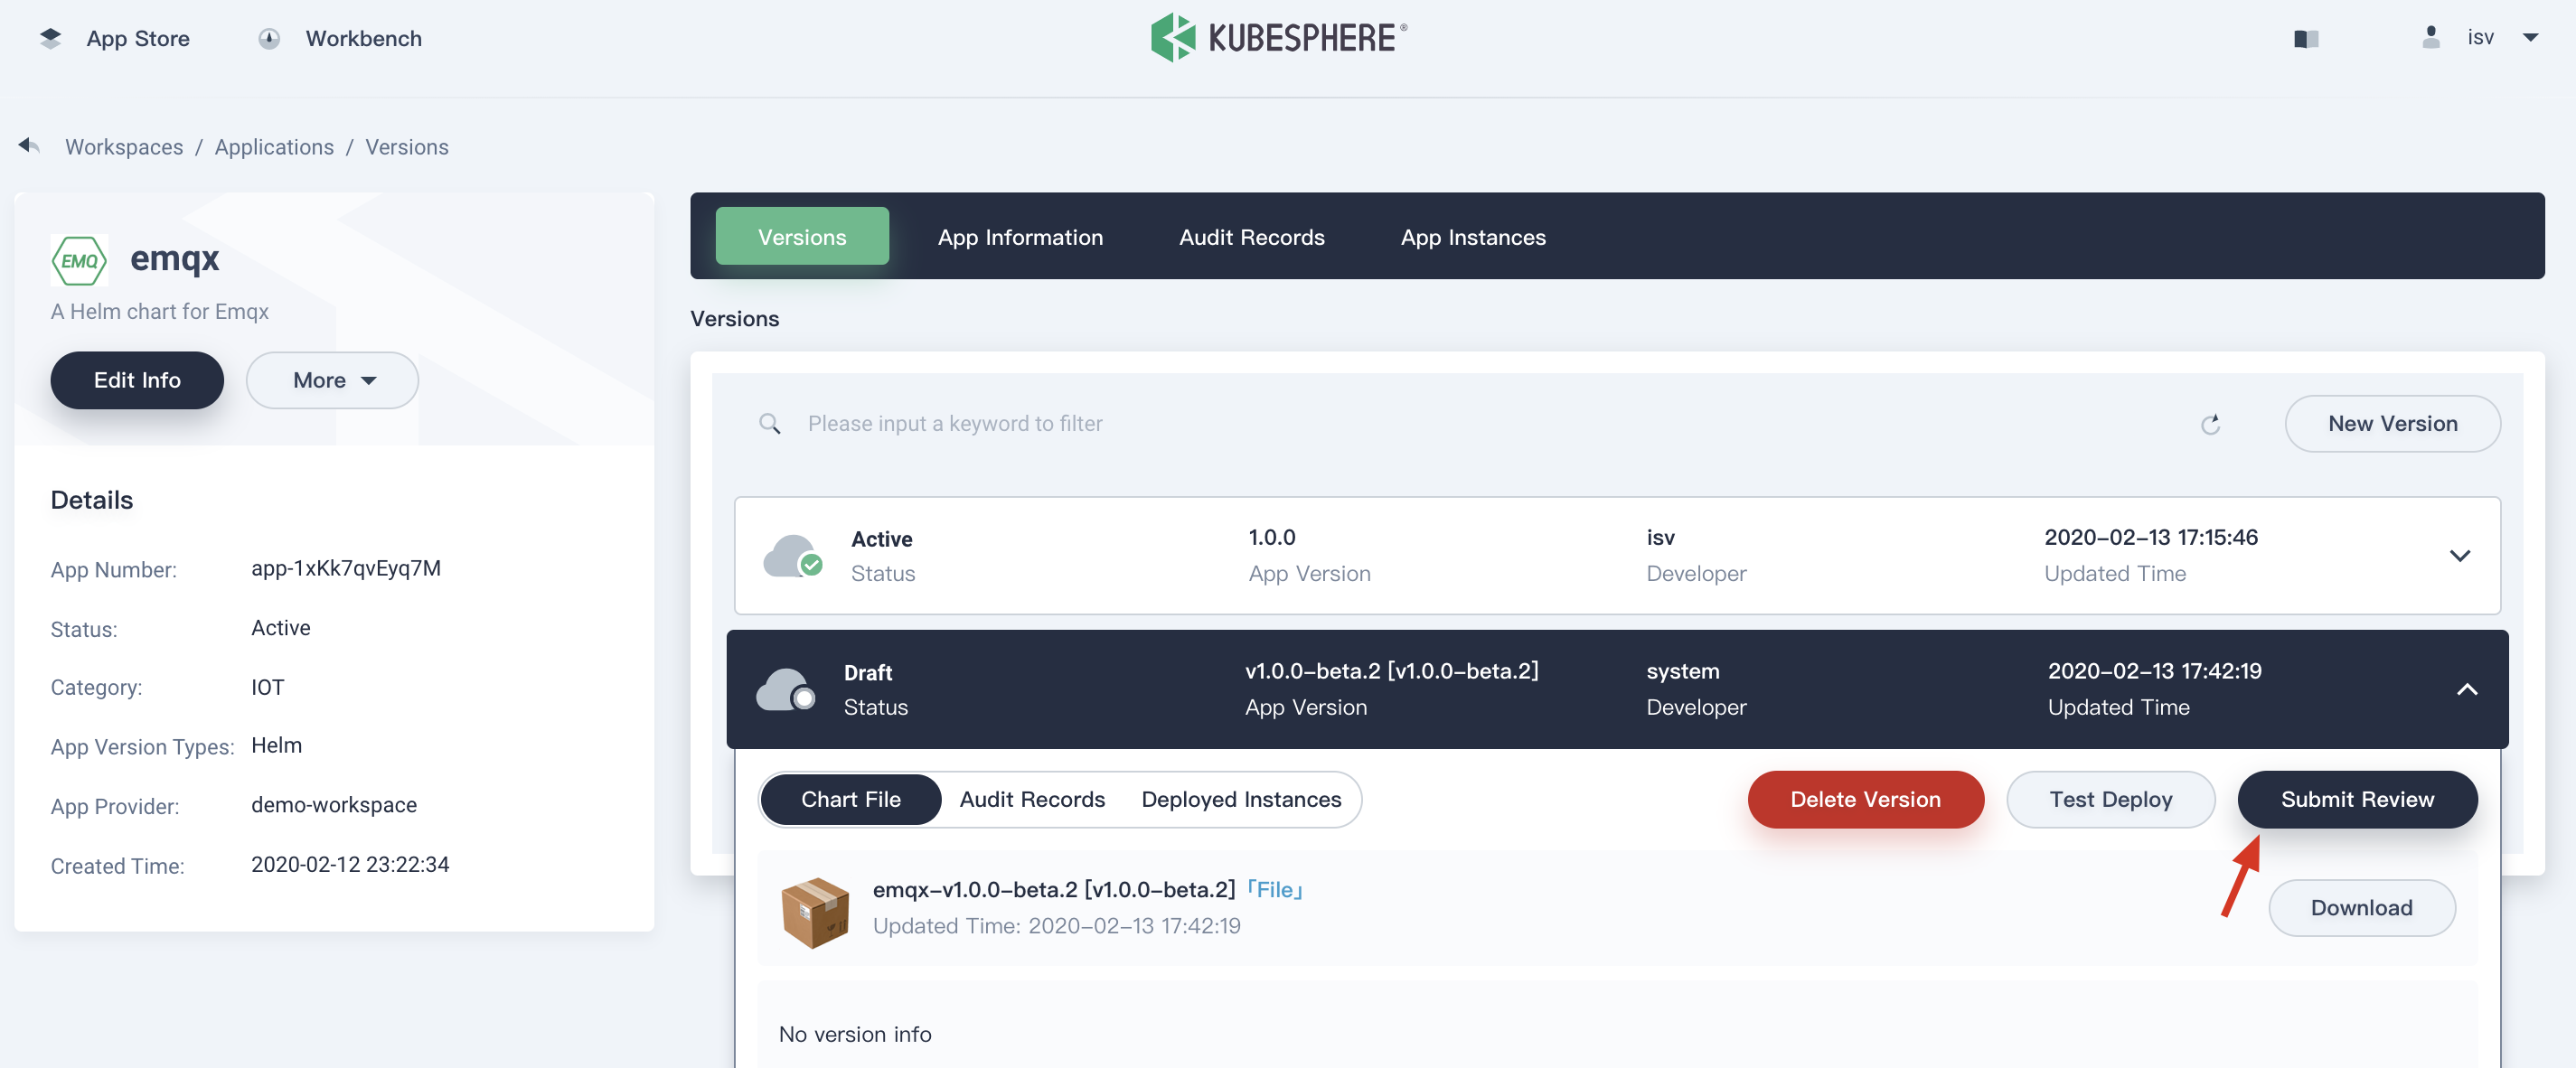
2.7. Save your changes, then you can test this application by deploying to Kubernetes. Click on the Test Deploy button.
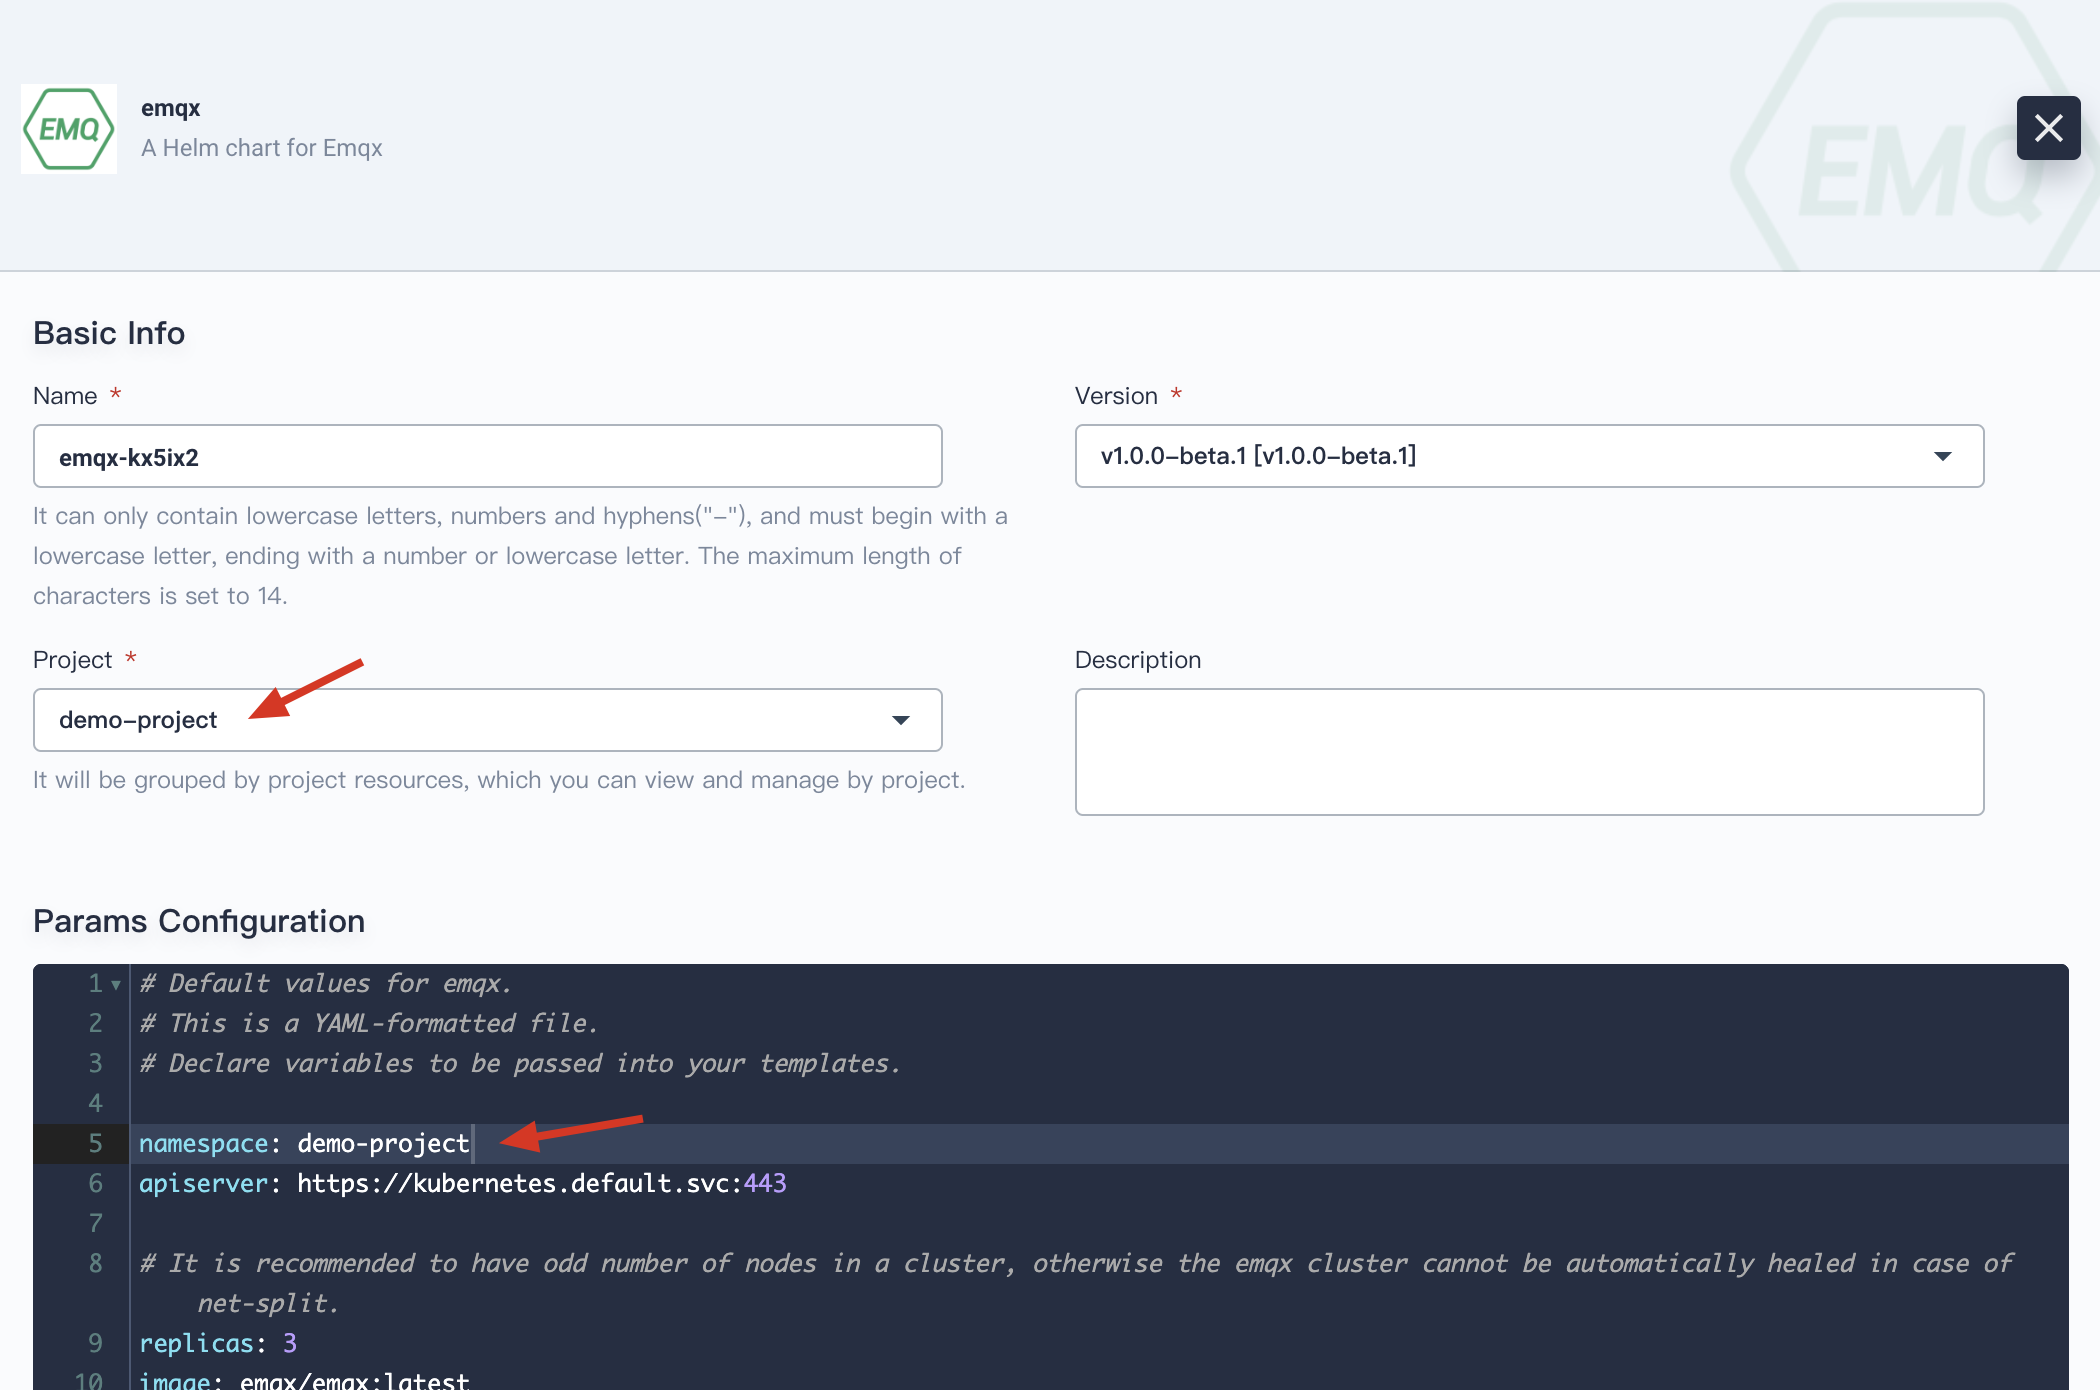
2.8. Select project that you want to deploy into, then click Deploy.
2.9. Wait for a few minutes, then switch to the tab Deployed Instances. You will find EMQ X App has been deployed successfully.
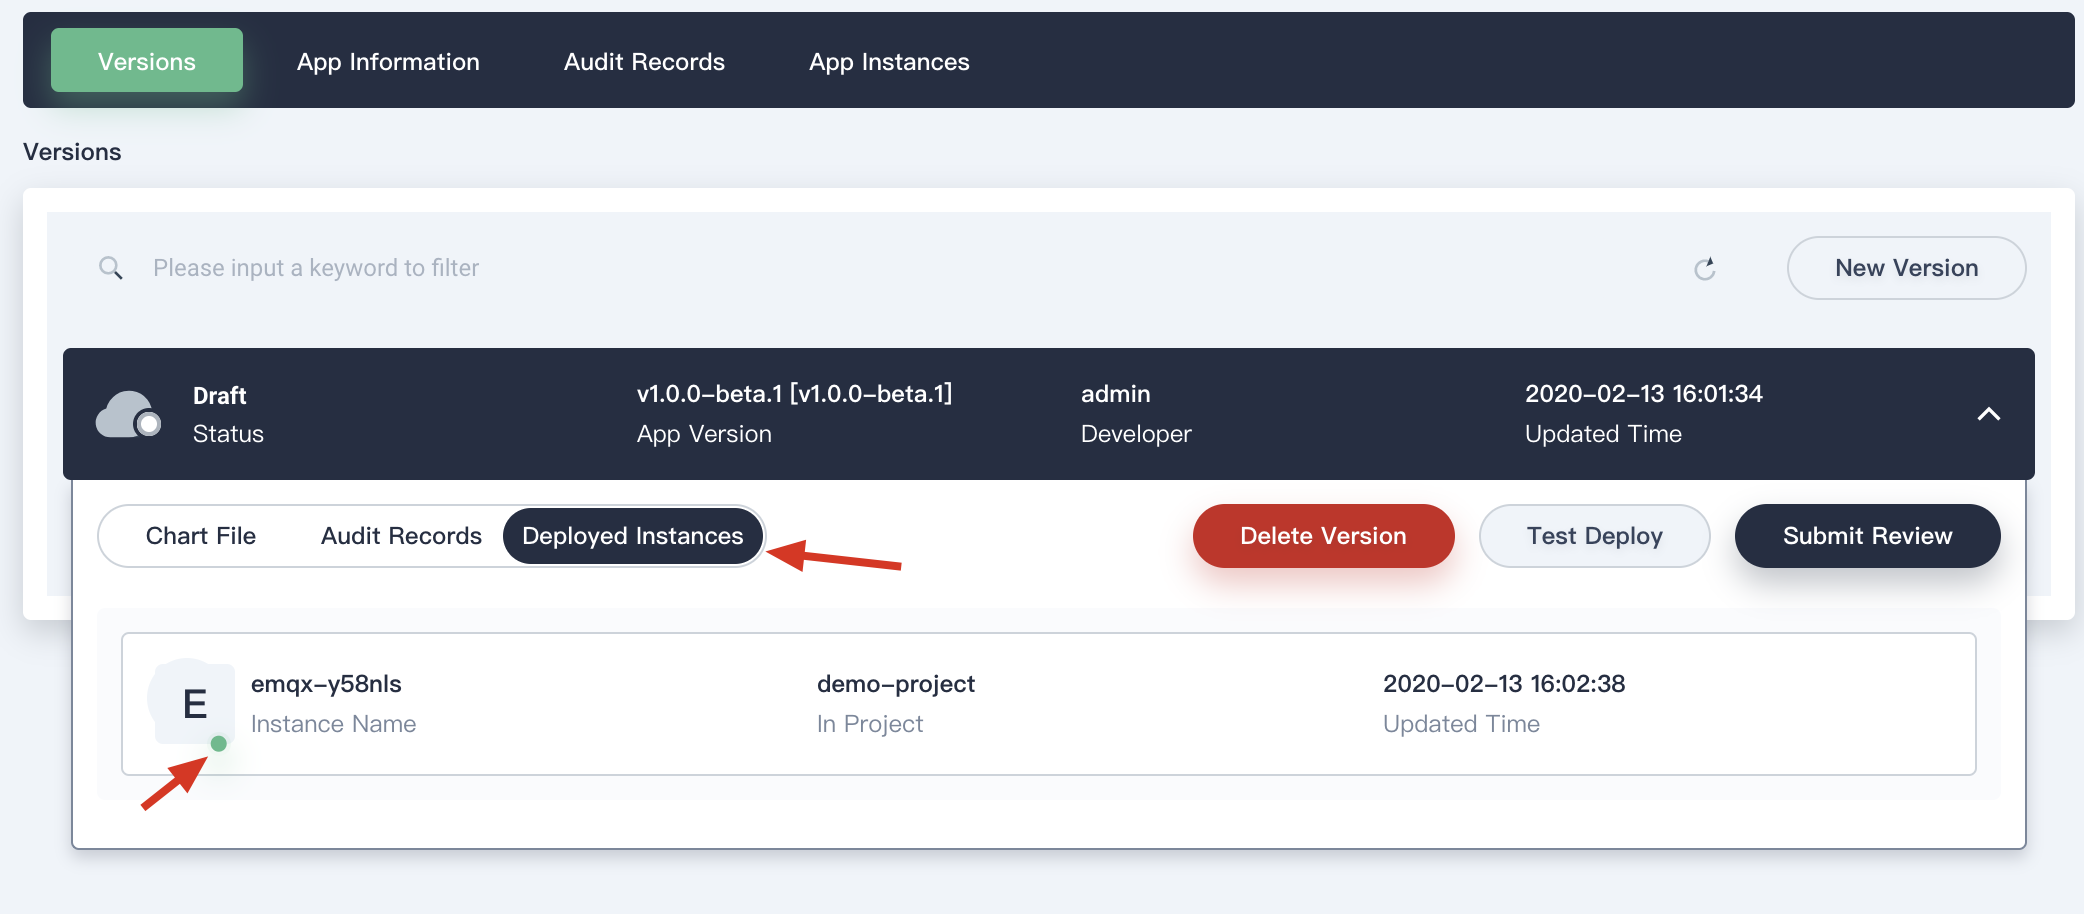
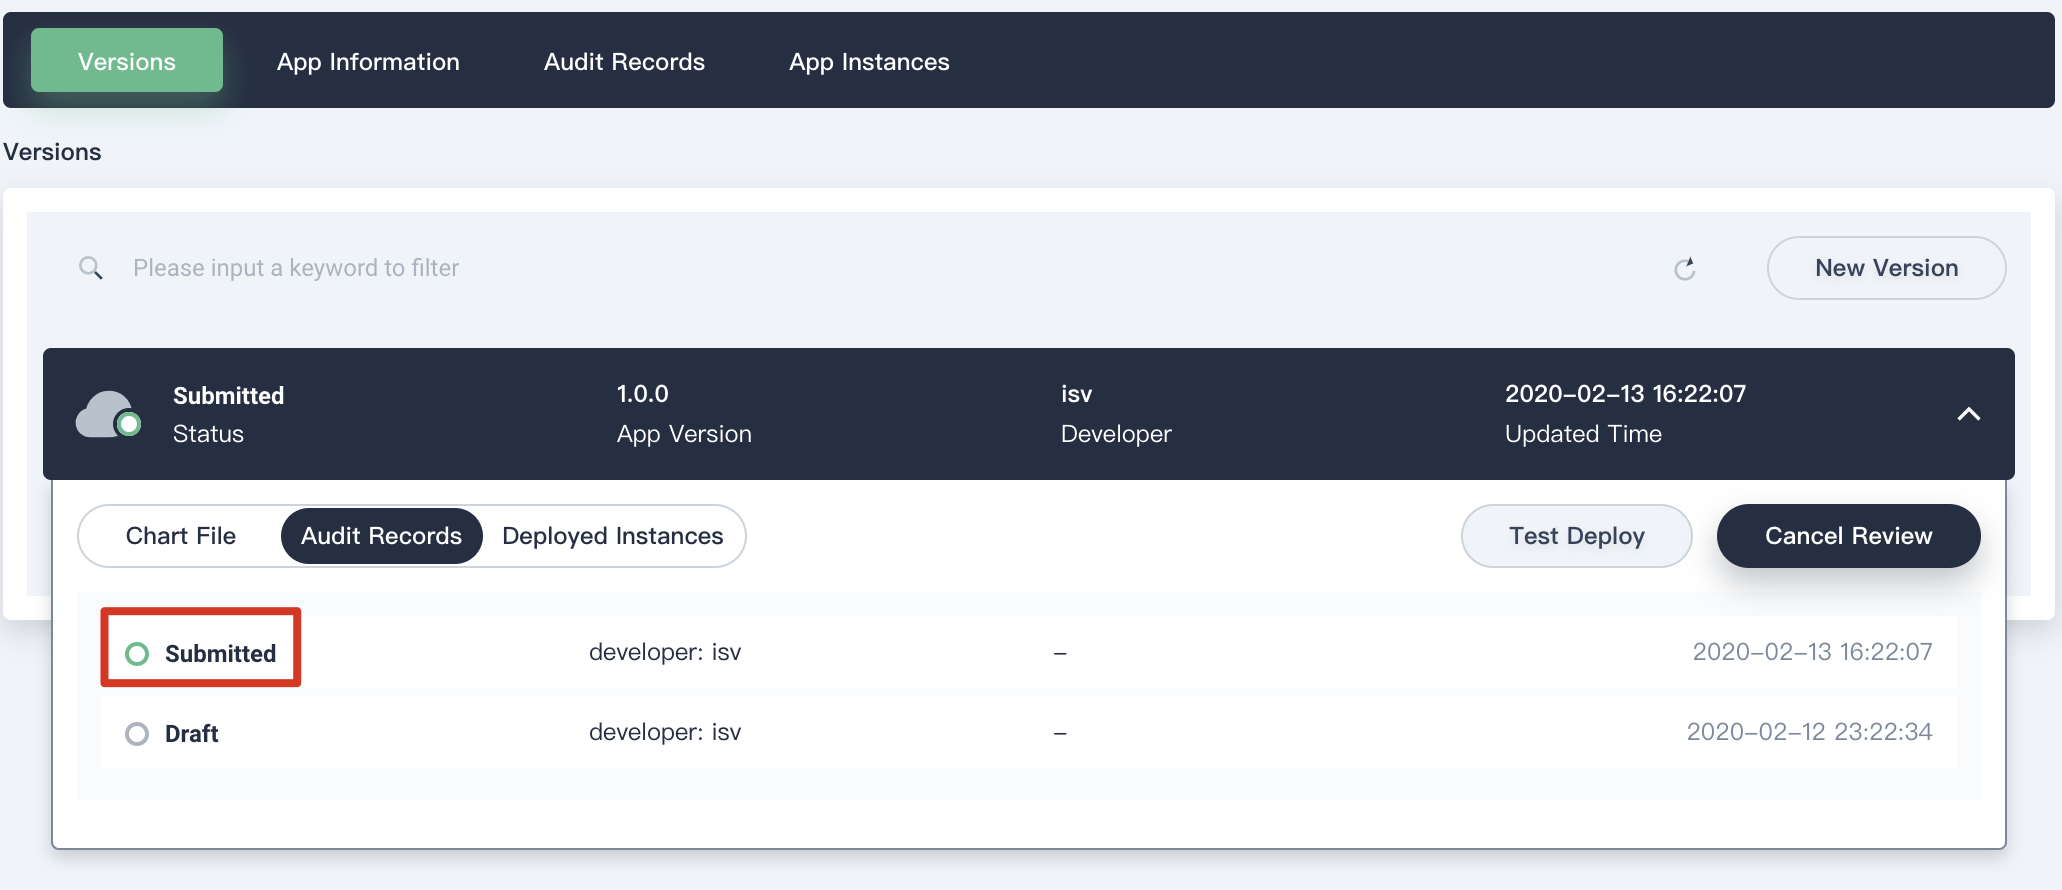
2.10. At this point, you can click Submit Review to submit this application to reviewer.
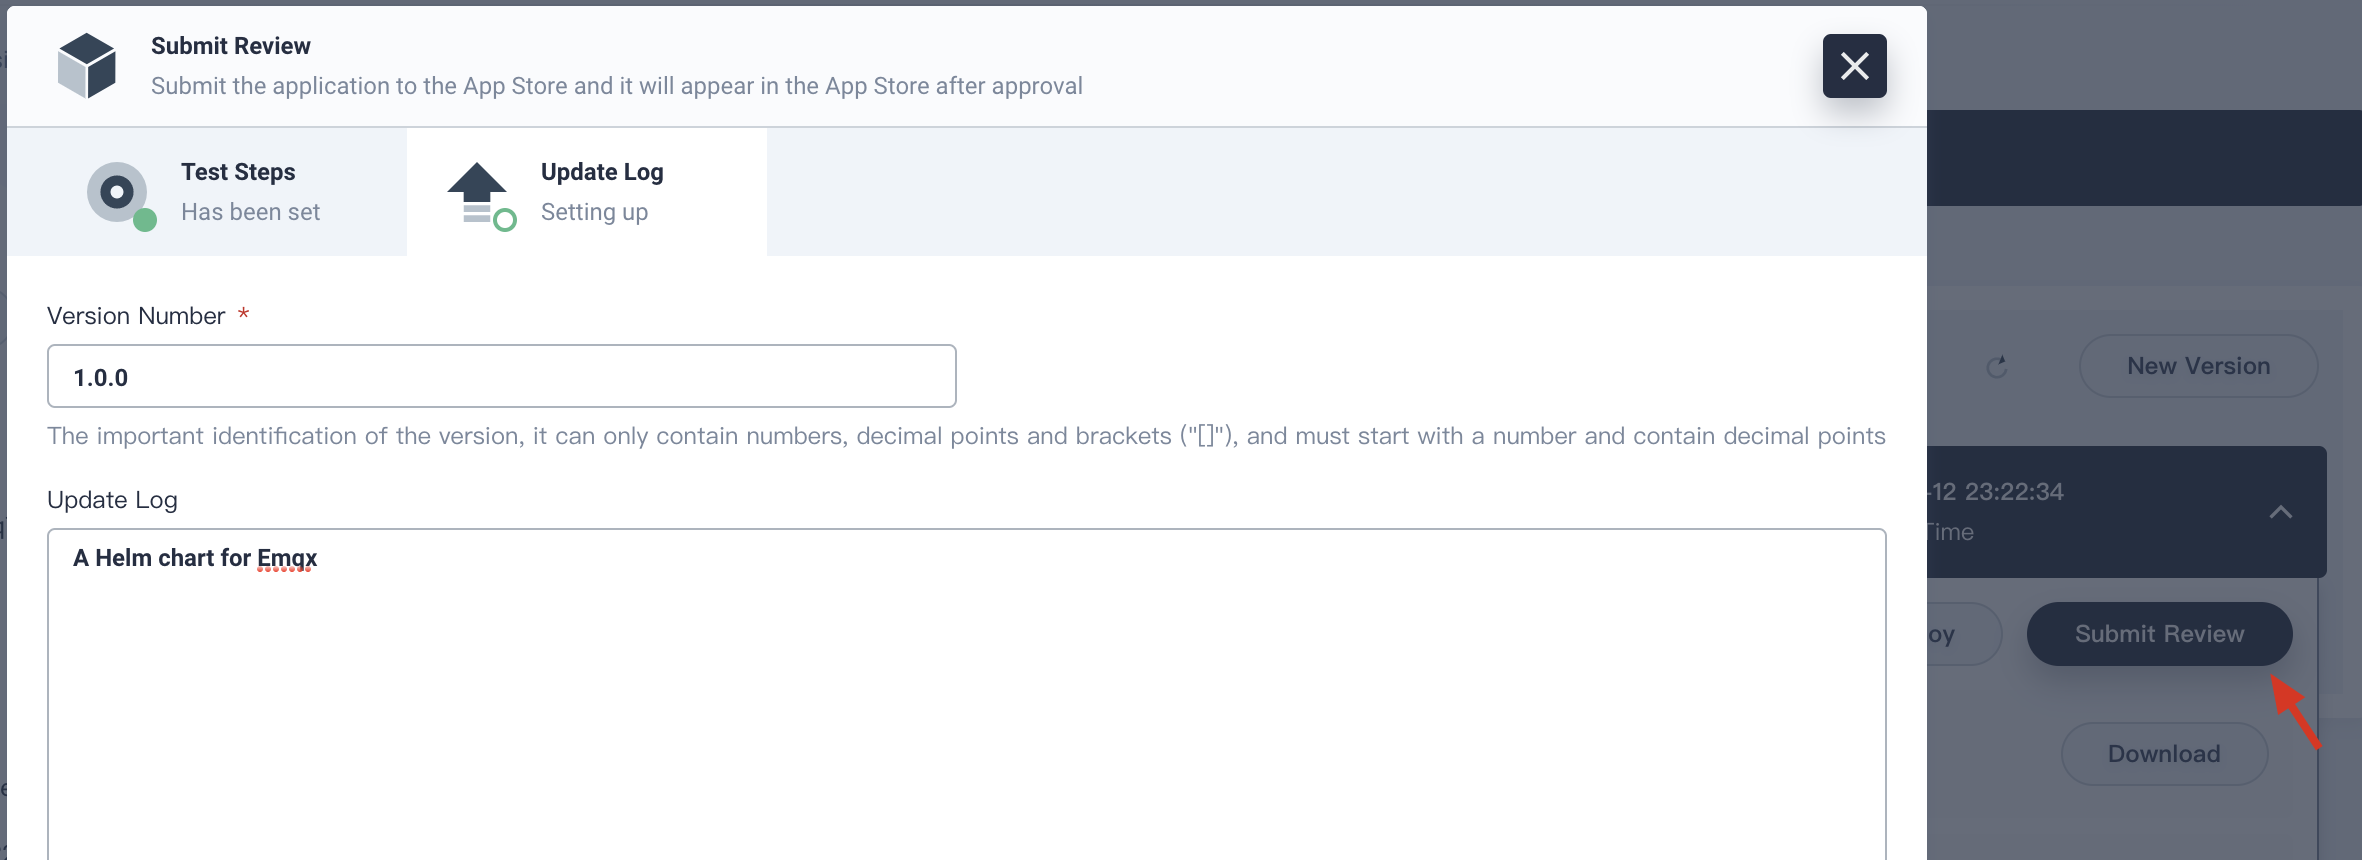
2.11. As shown in the following graph, the app status has been changed to Submitted. Now app reviewer can review it.
Step 3: Review Application
3.1. Log out, then use reviewer account to log in KubeSphere. Navigate to Platform → App Management → App Review.

3.2. Click Review by clicking the vertical three dots at the end of app item in the list, then you start to review the app's basic information, introduction, chart file and updated logs from the pop-up windows.
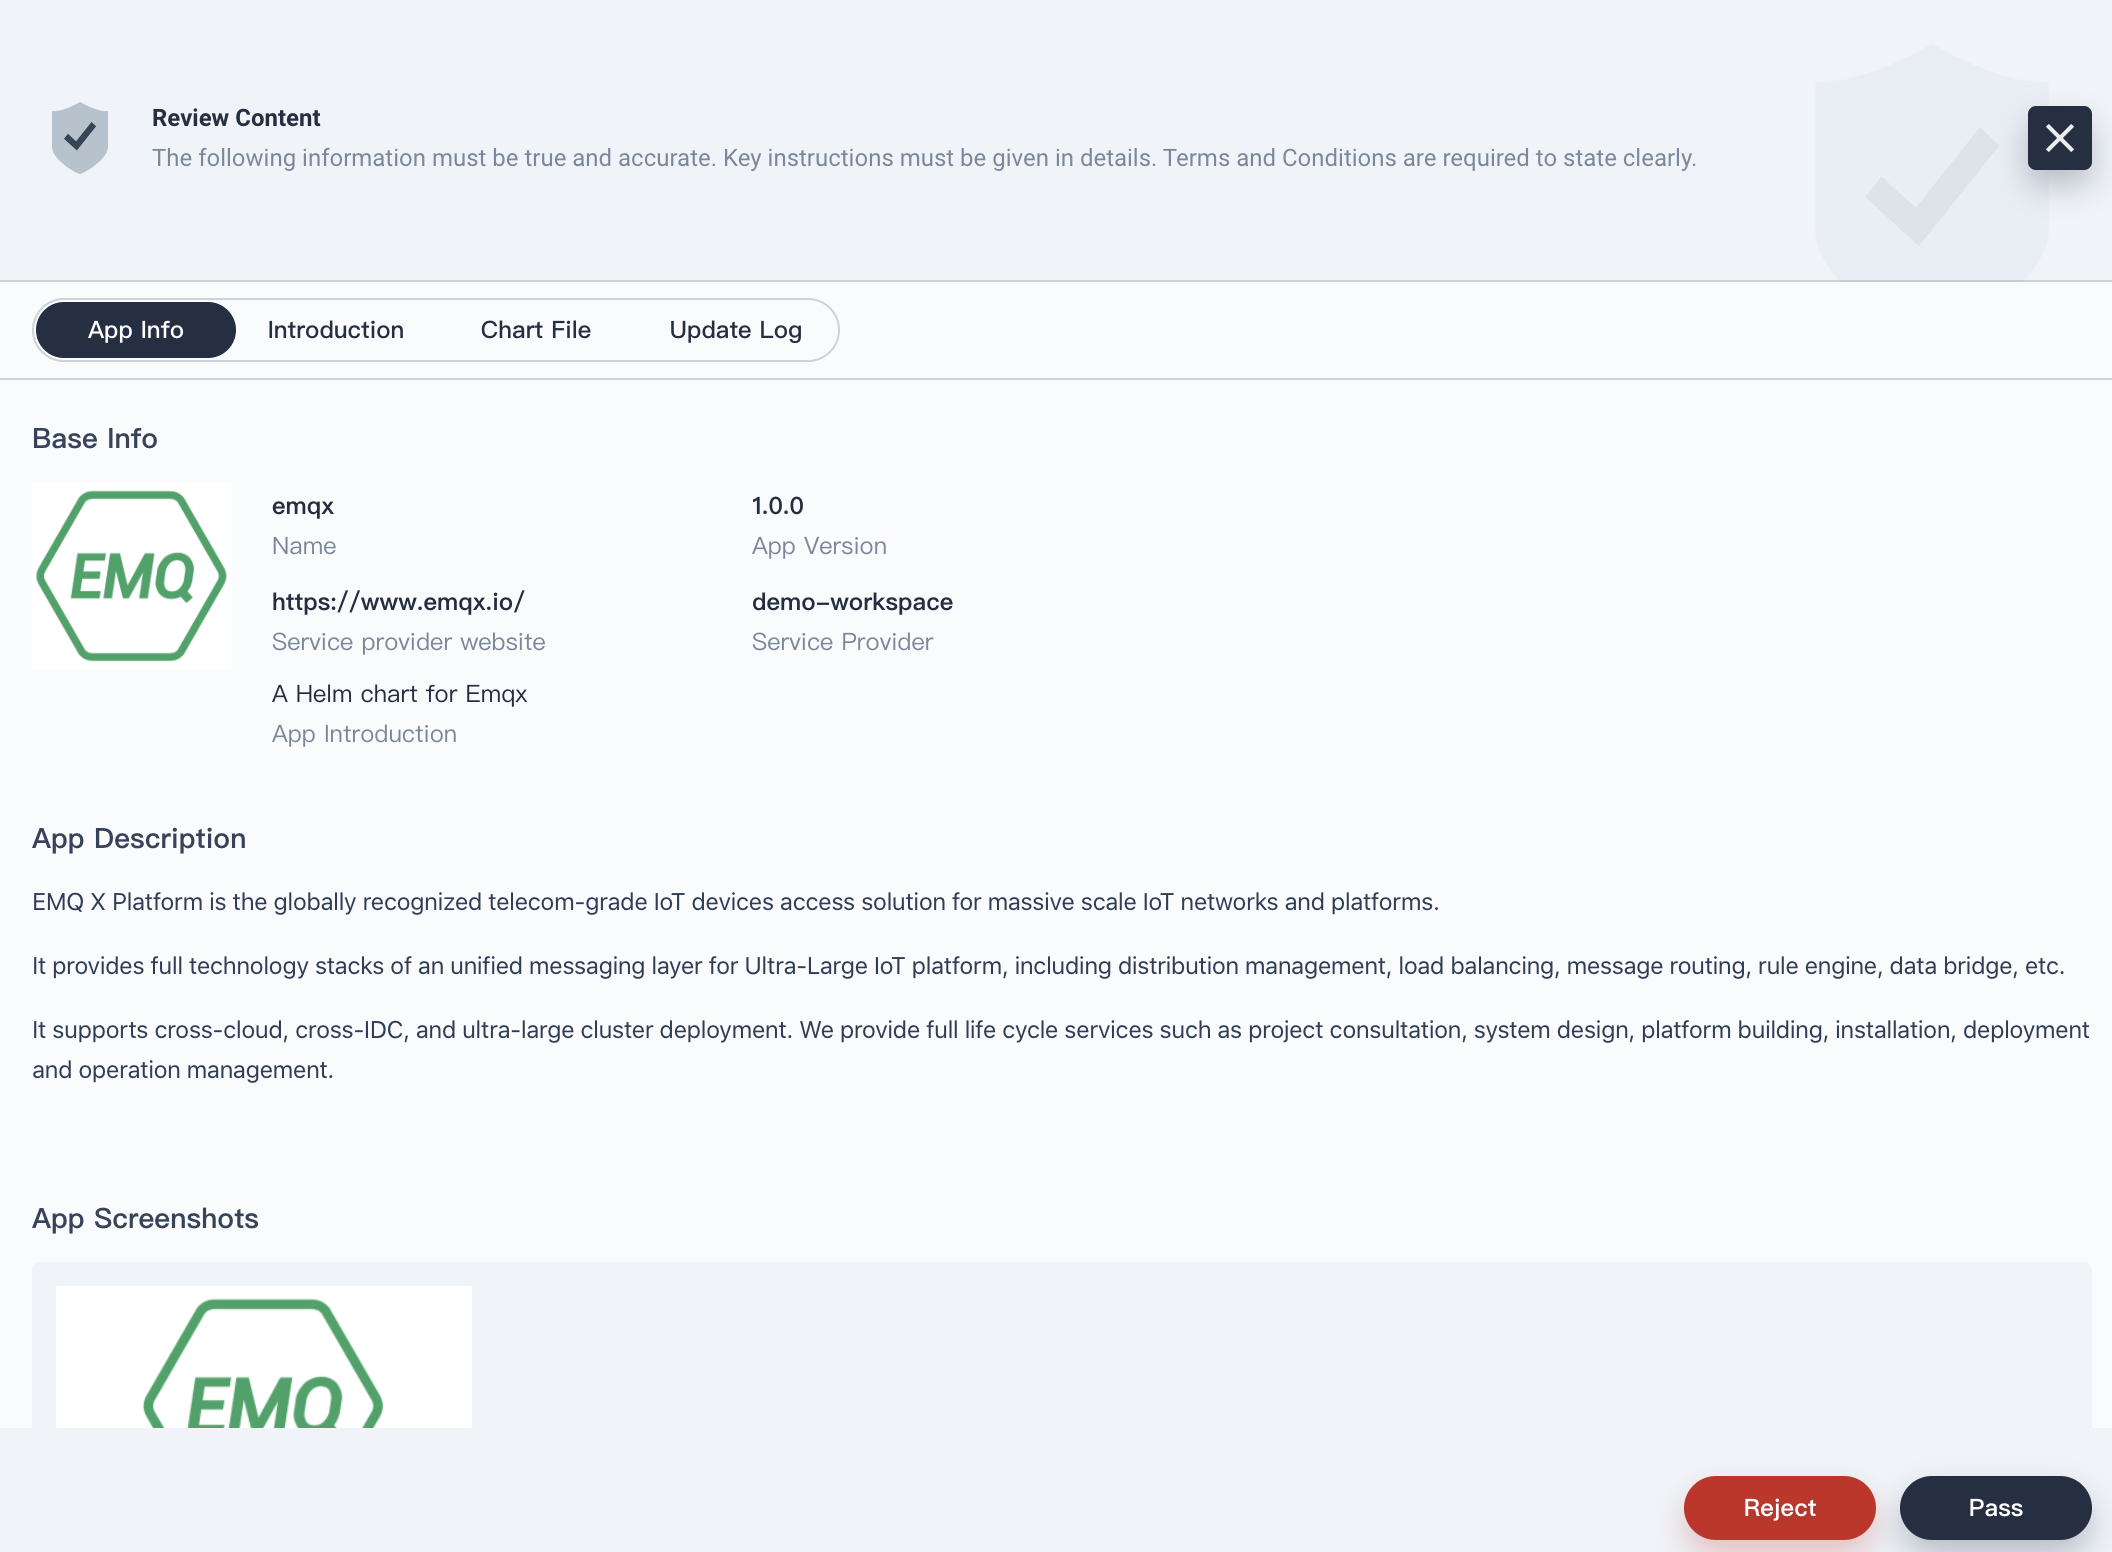
3.3. It is the reviewer's responsibility to judge if the app satisfies the criteria of the Global App Store or not, if yes, then click Pass; otherwise, Reject it.
Step 4: Release Application to Store
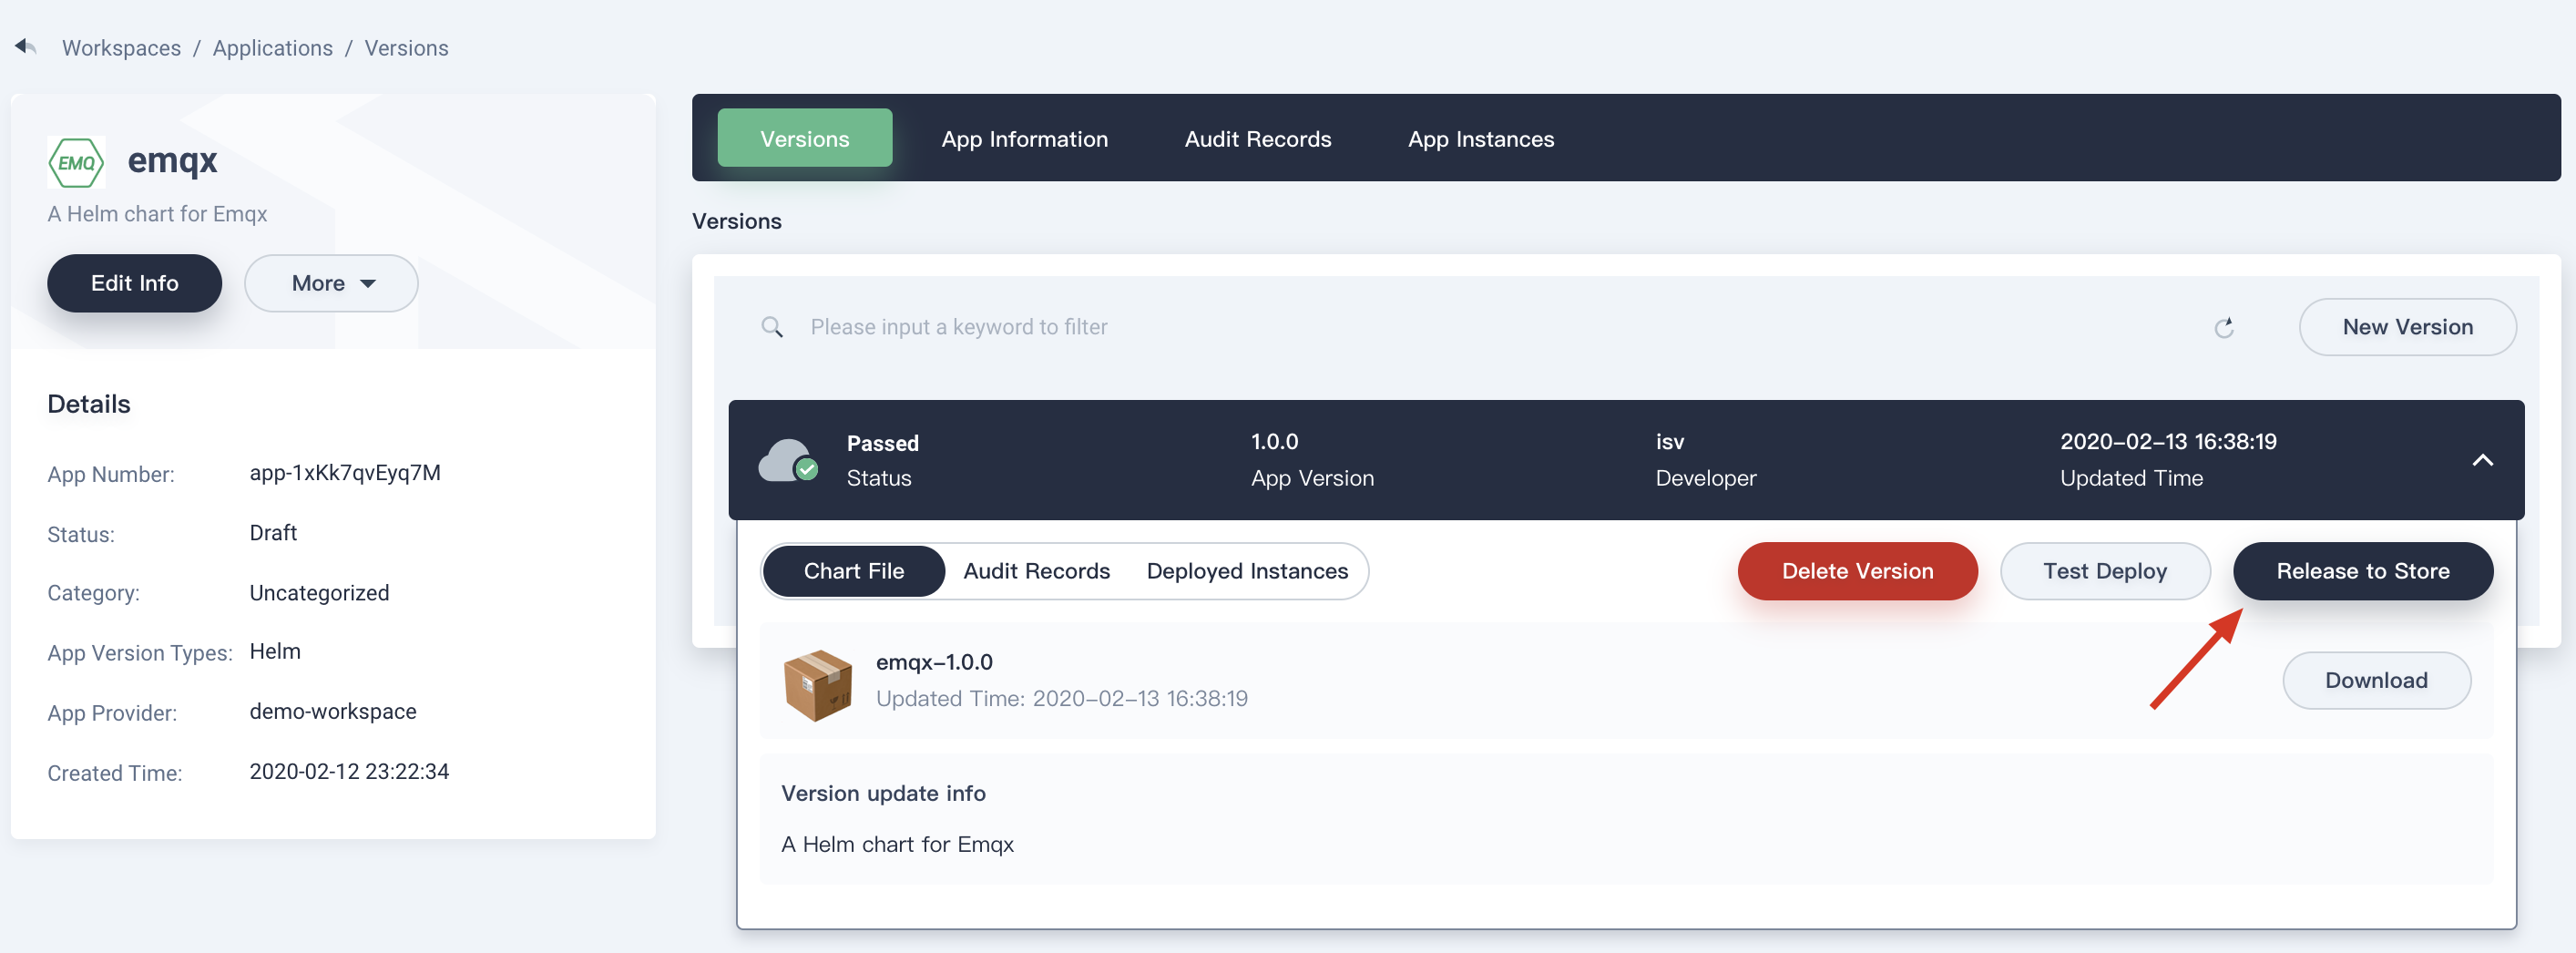
4.1. Log out and switch to use isv to log in KubeSphere. Now isv can release the EMQ X application to the global application store which means all users in this platform can find and deploy this application.
4.2. Enter the demo workspace and navigate to the EMQ X app from the template list. Enter the detailed page and expand the version list, then click Release to Store, choose OK in the pop-up windows.
4.3. At this point, EMQ X has been released to application store.
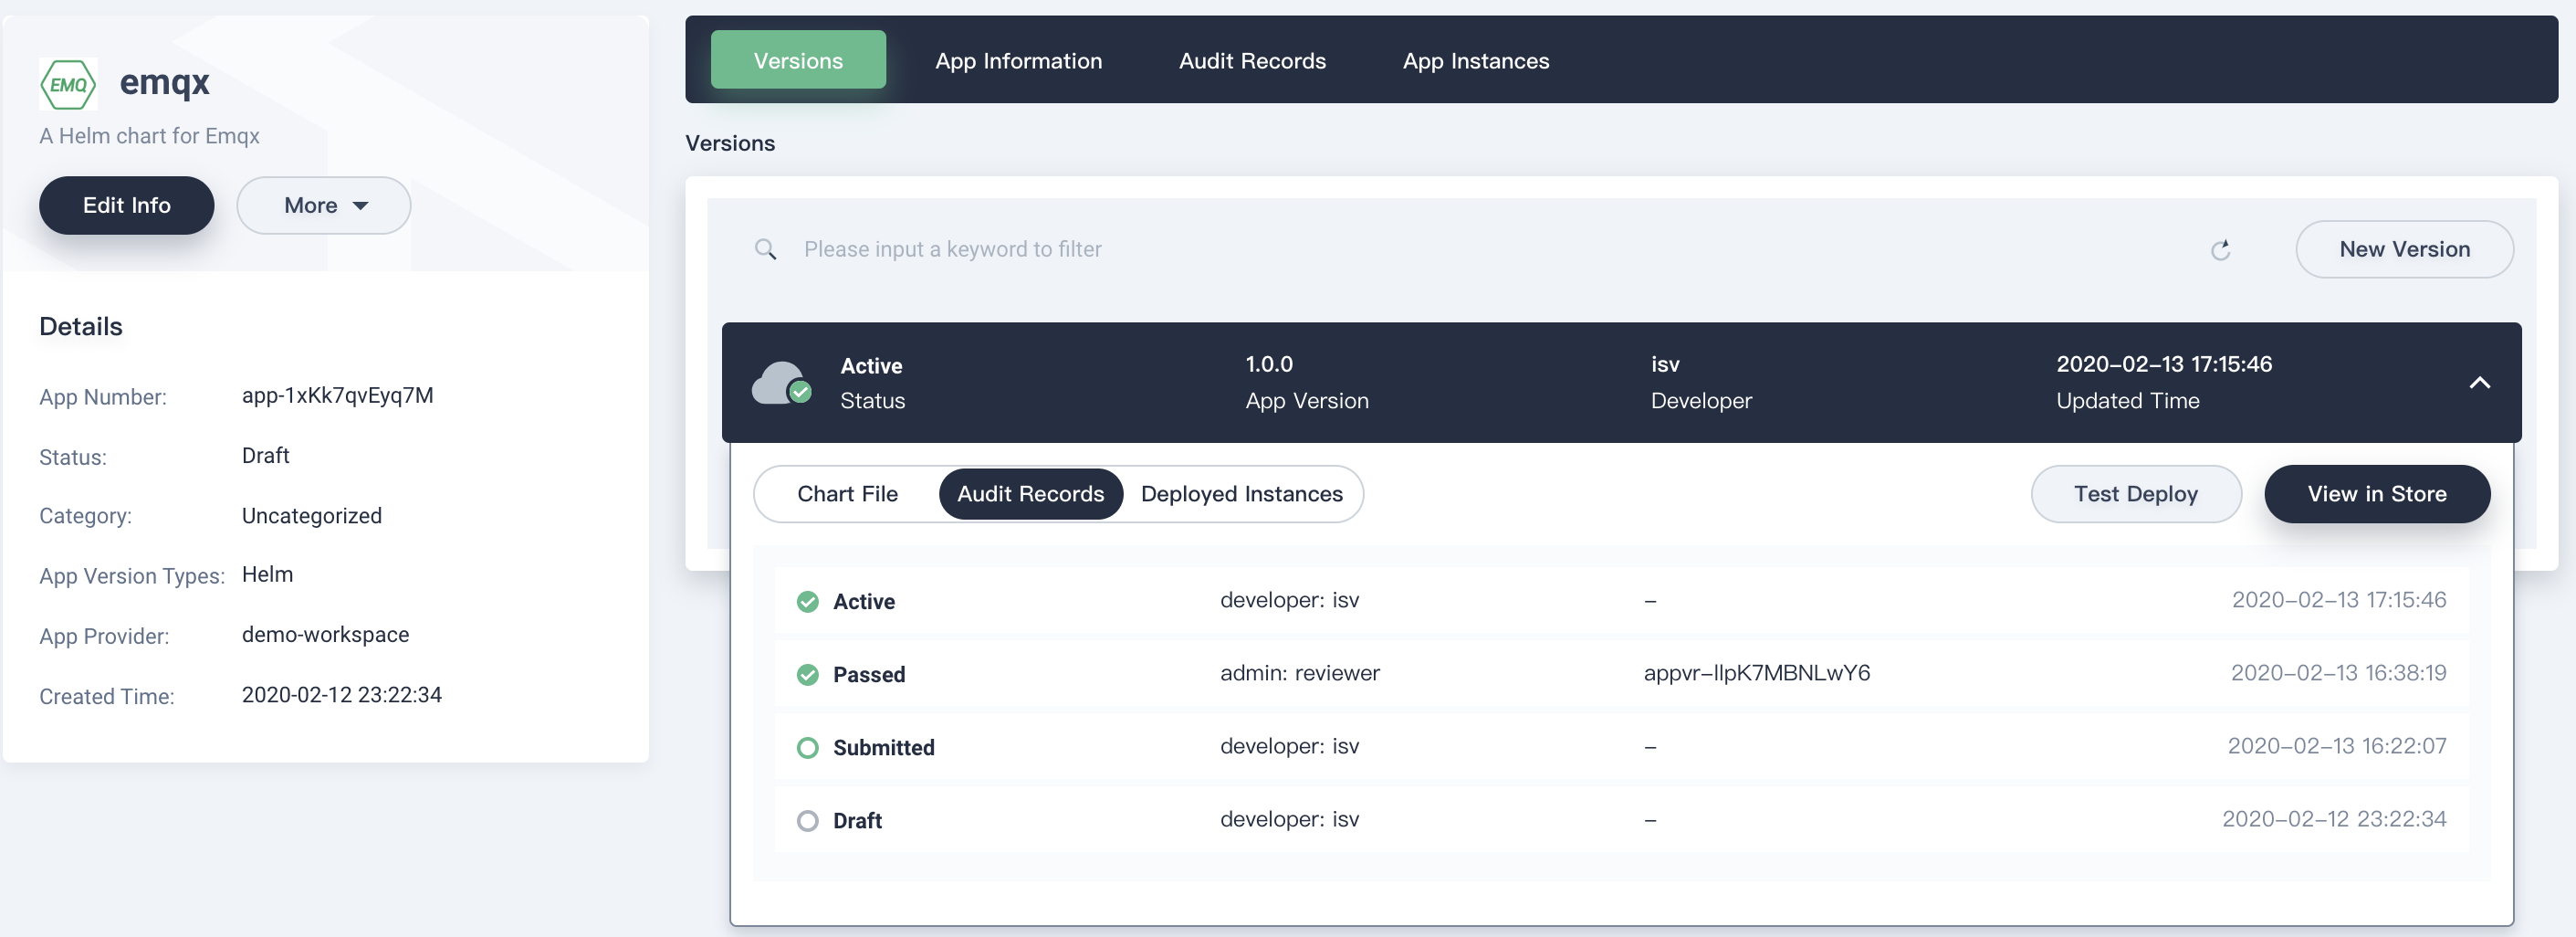
4.4. Go to App Store in the top menu, you will see the app in the list.
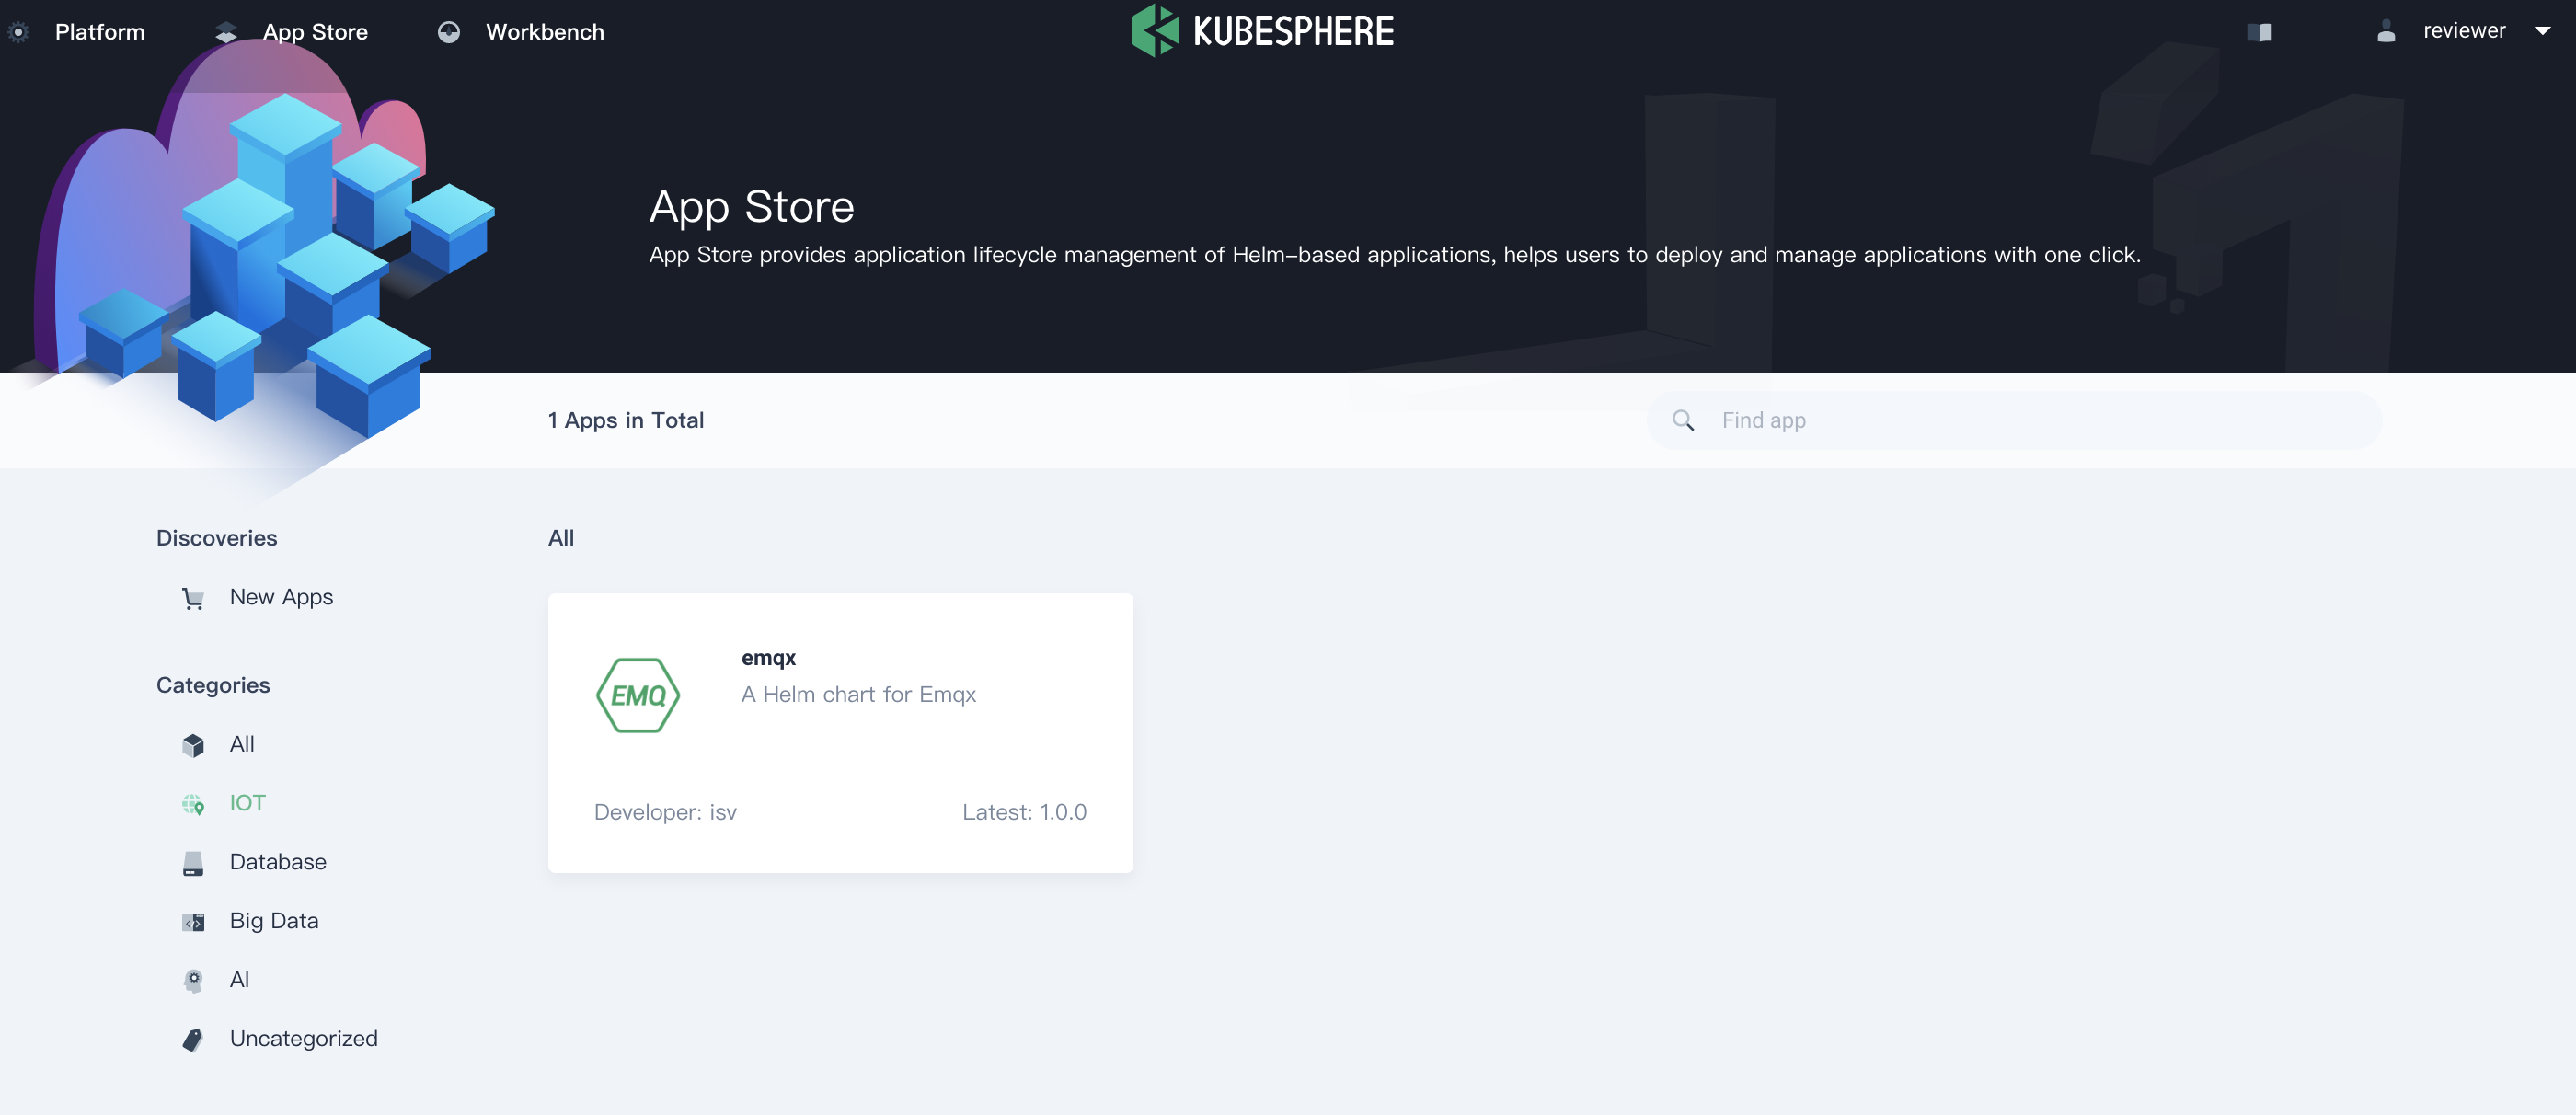
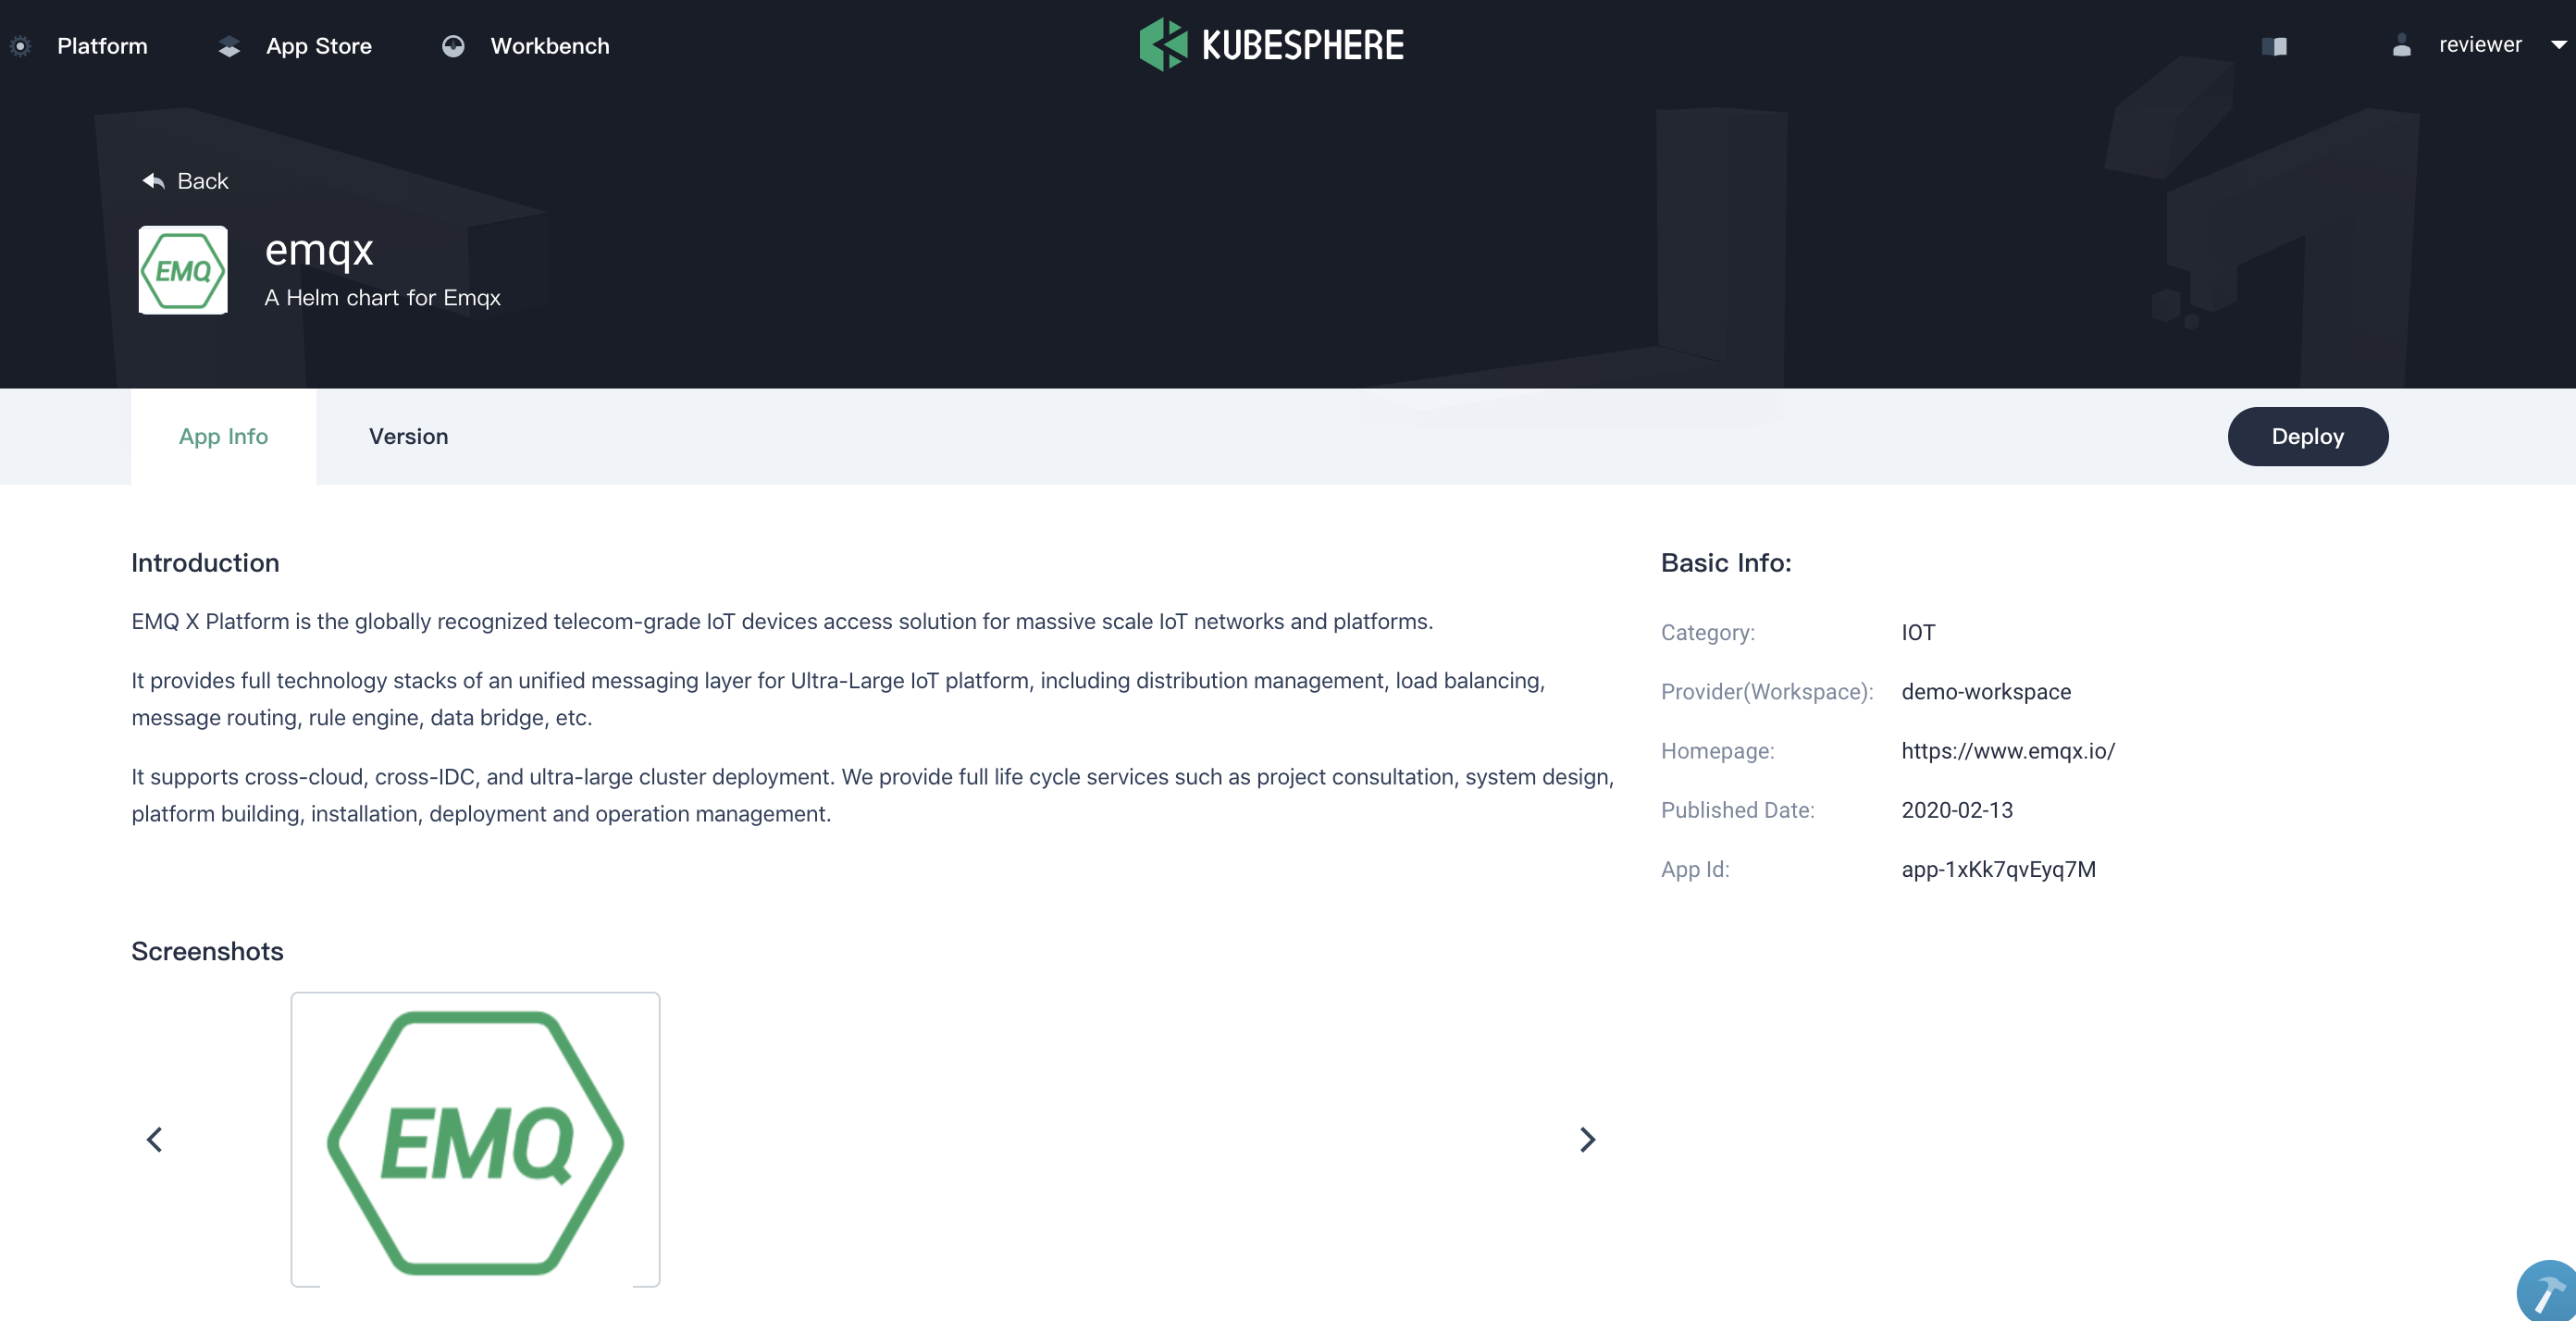
4.5. At this point, we can use any role of users to access EMQ X application. Click into the application detailed page to go through its basic information. You can click Deploy button to deploy the application to Kubernetes.
Step 5: Create Application Category
Depending on the business needs, Reviewer can create multiple categories for different types of applications. It is similar as tag and can be used in application store to filter applications, e.g. Big data, Middleware, IoT, etc.
As for EMQ X application, we can create a category and name it IOT. First switch back to the user Reviewer, go to Platform → App Management → App Categories
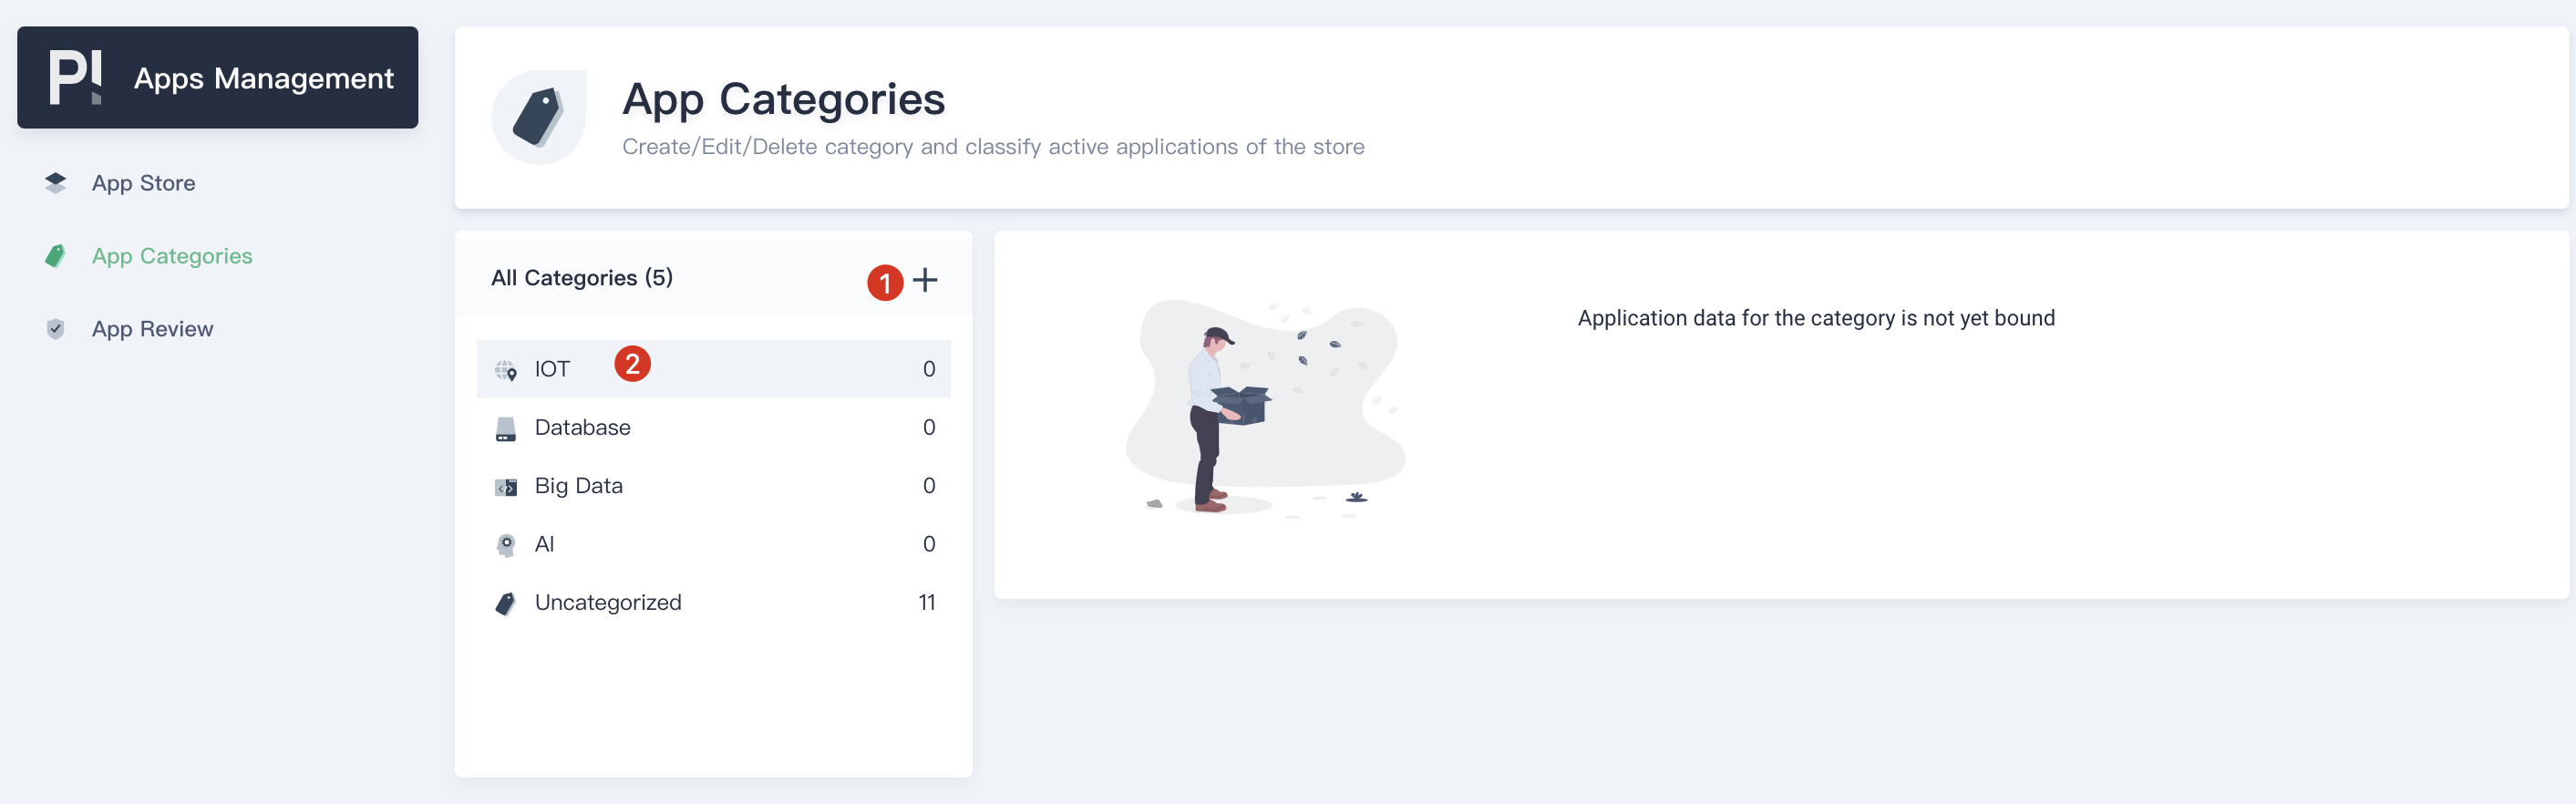
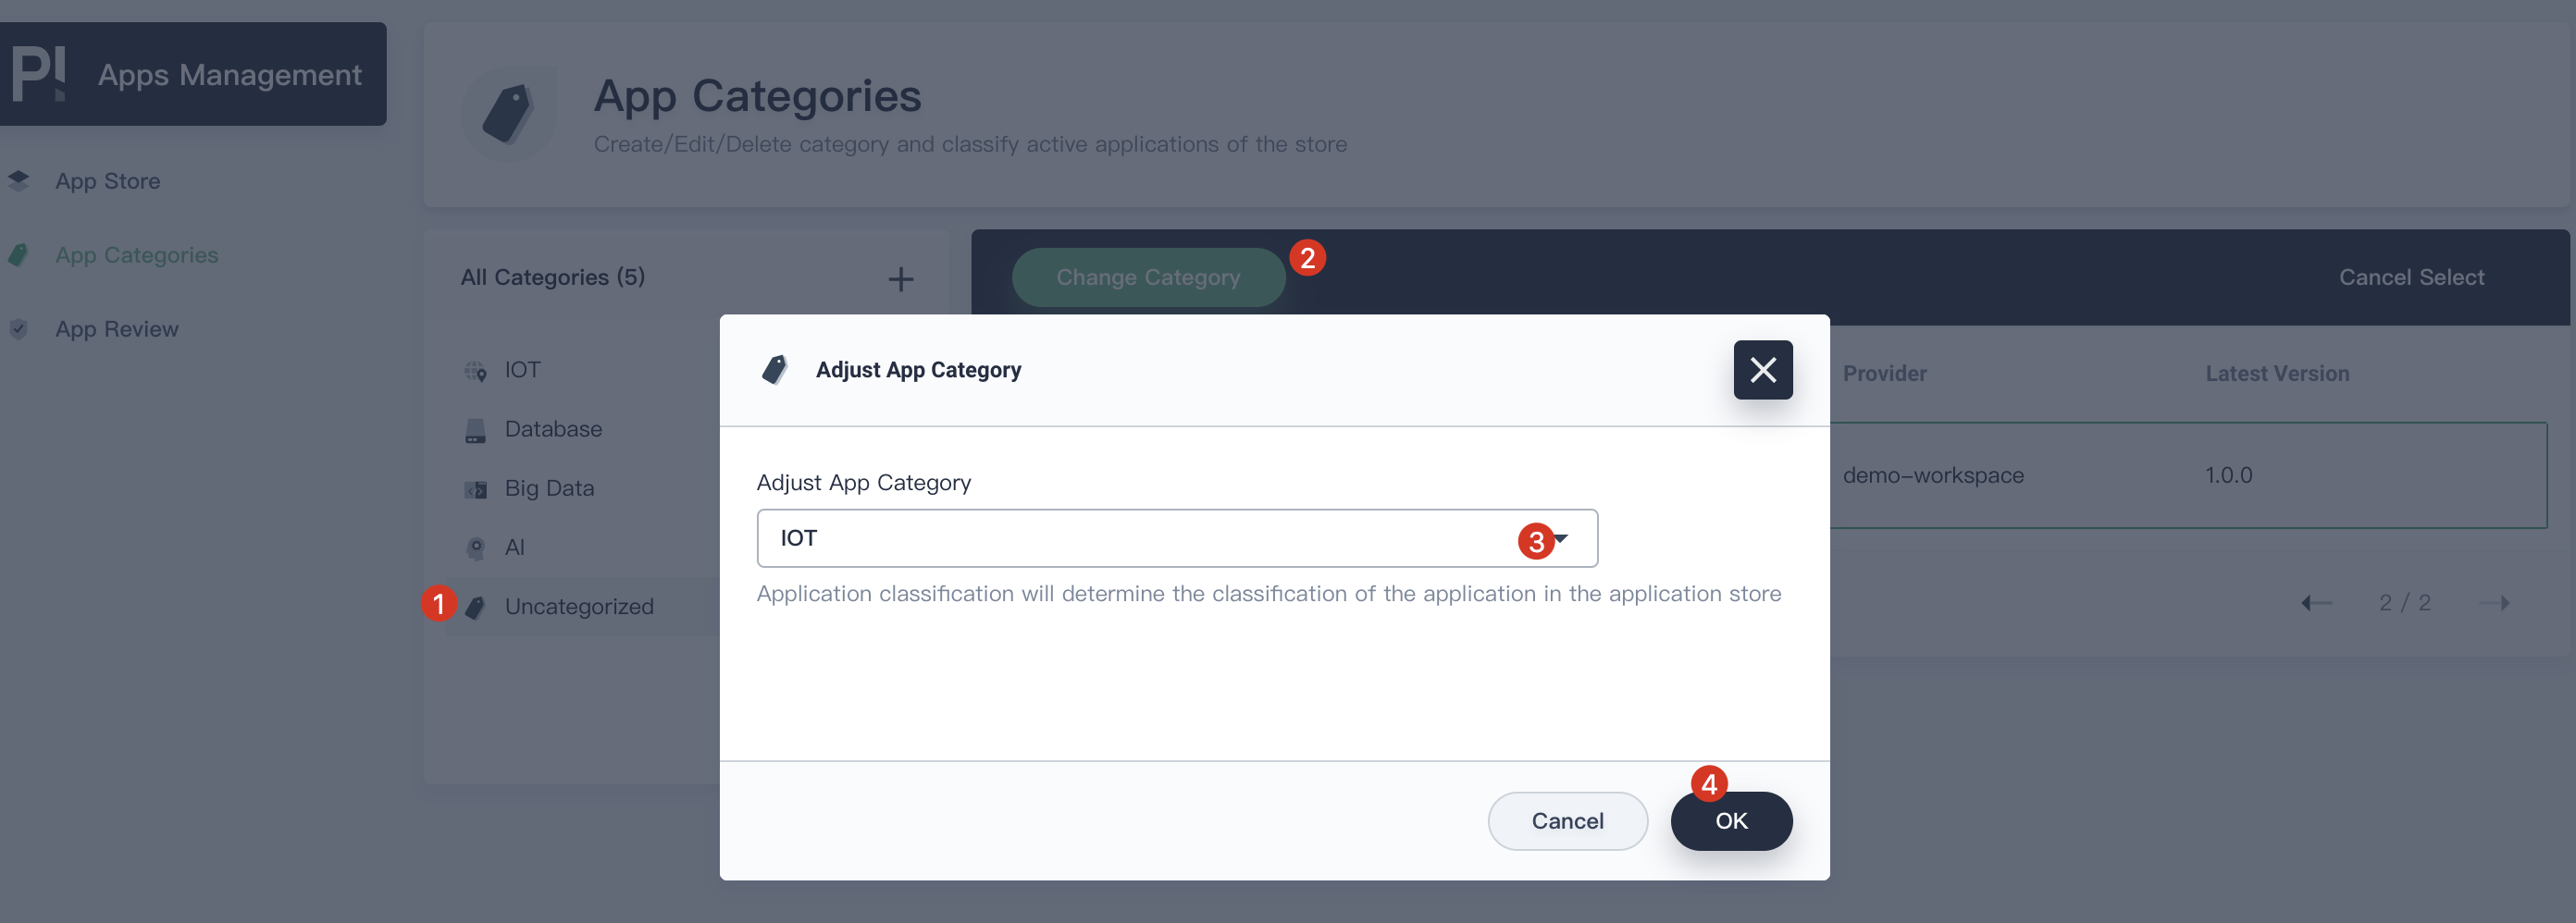
Then click Uncategorized and find EMQ X, change its category to IOT and save it.
Note usually reviewer should create necessary categories in advance according to the requirements of the store. Then ISVs categorize their applications as appropriate before submitting for review.
Step 6: Add New Version
6.1. KubeSphere supports adding new versions of existing applications for users to quickly upgrade. Let's continue to use isv account and enter the EMQ X template page in the workspace.
6.2. Download EMQ X v4.0.2, then click on the New Version on the right, upload the package that you just downloaded.
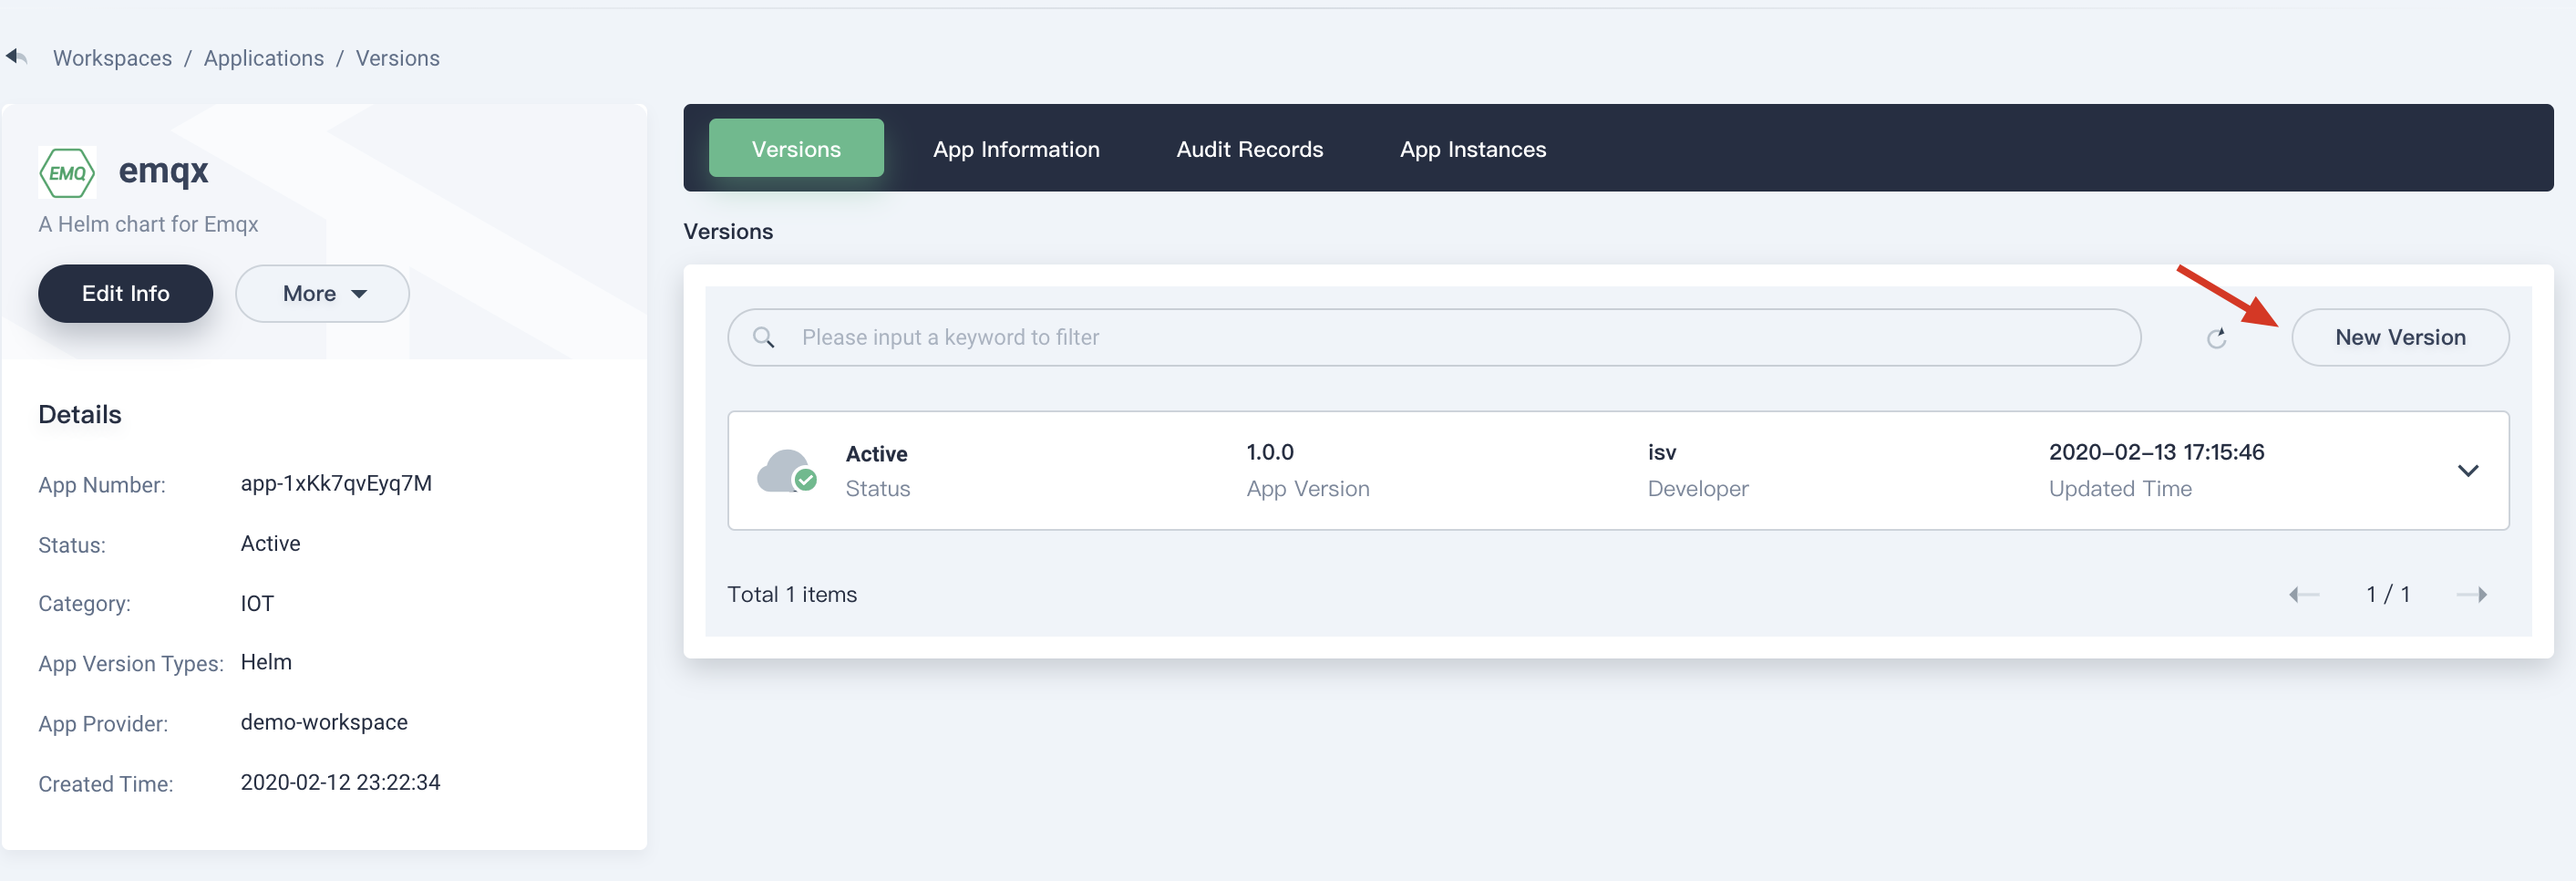
6.3. Click OK when you upload successfully.
6.4. At this point, you can test the new version and submit it to Reviewer. This process is similar to the one for the first version.
6.5. After you submit the new version, the rest of process regarding review and release are also similar to the first version that we demonstrated above.
Step 7: Upgrade
After the new version has been released to application store, all users can upgrade from this application.