Release Notes
Installation
Install on Linux
Install on Kubernetes
Pluggable Components
Upgrade
Third-Party Tools
Authentication Integration
Cluster Operations
Quick Start
DevOps
User Guide
Configration Center
Logging
Developer Guide
API Documentation
Troubleshooting
FAQ
Getting Started with Multi-tenant Management
EditObjective
This is the first lab exercise of KubeSphere. We strongly suggest you to learn it with your hands. This guide shows how to create workspace, role and user account which are required for next lab exercises. Moreover, you will learn how to create project and DevOps project within your workspace where is the place your workloads are running. After this lab, you will get familiar with KubeSphere multi-tenant management system.
Prerequisites
You need to have a KubeSphere installed.
Estimated Time
About 15 minutes
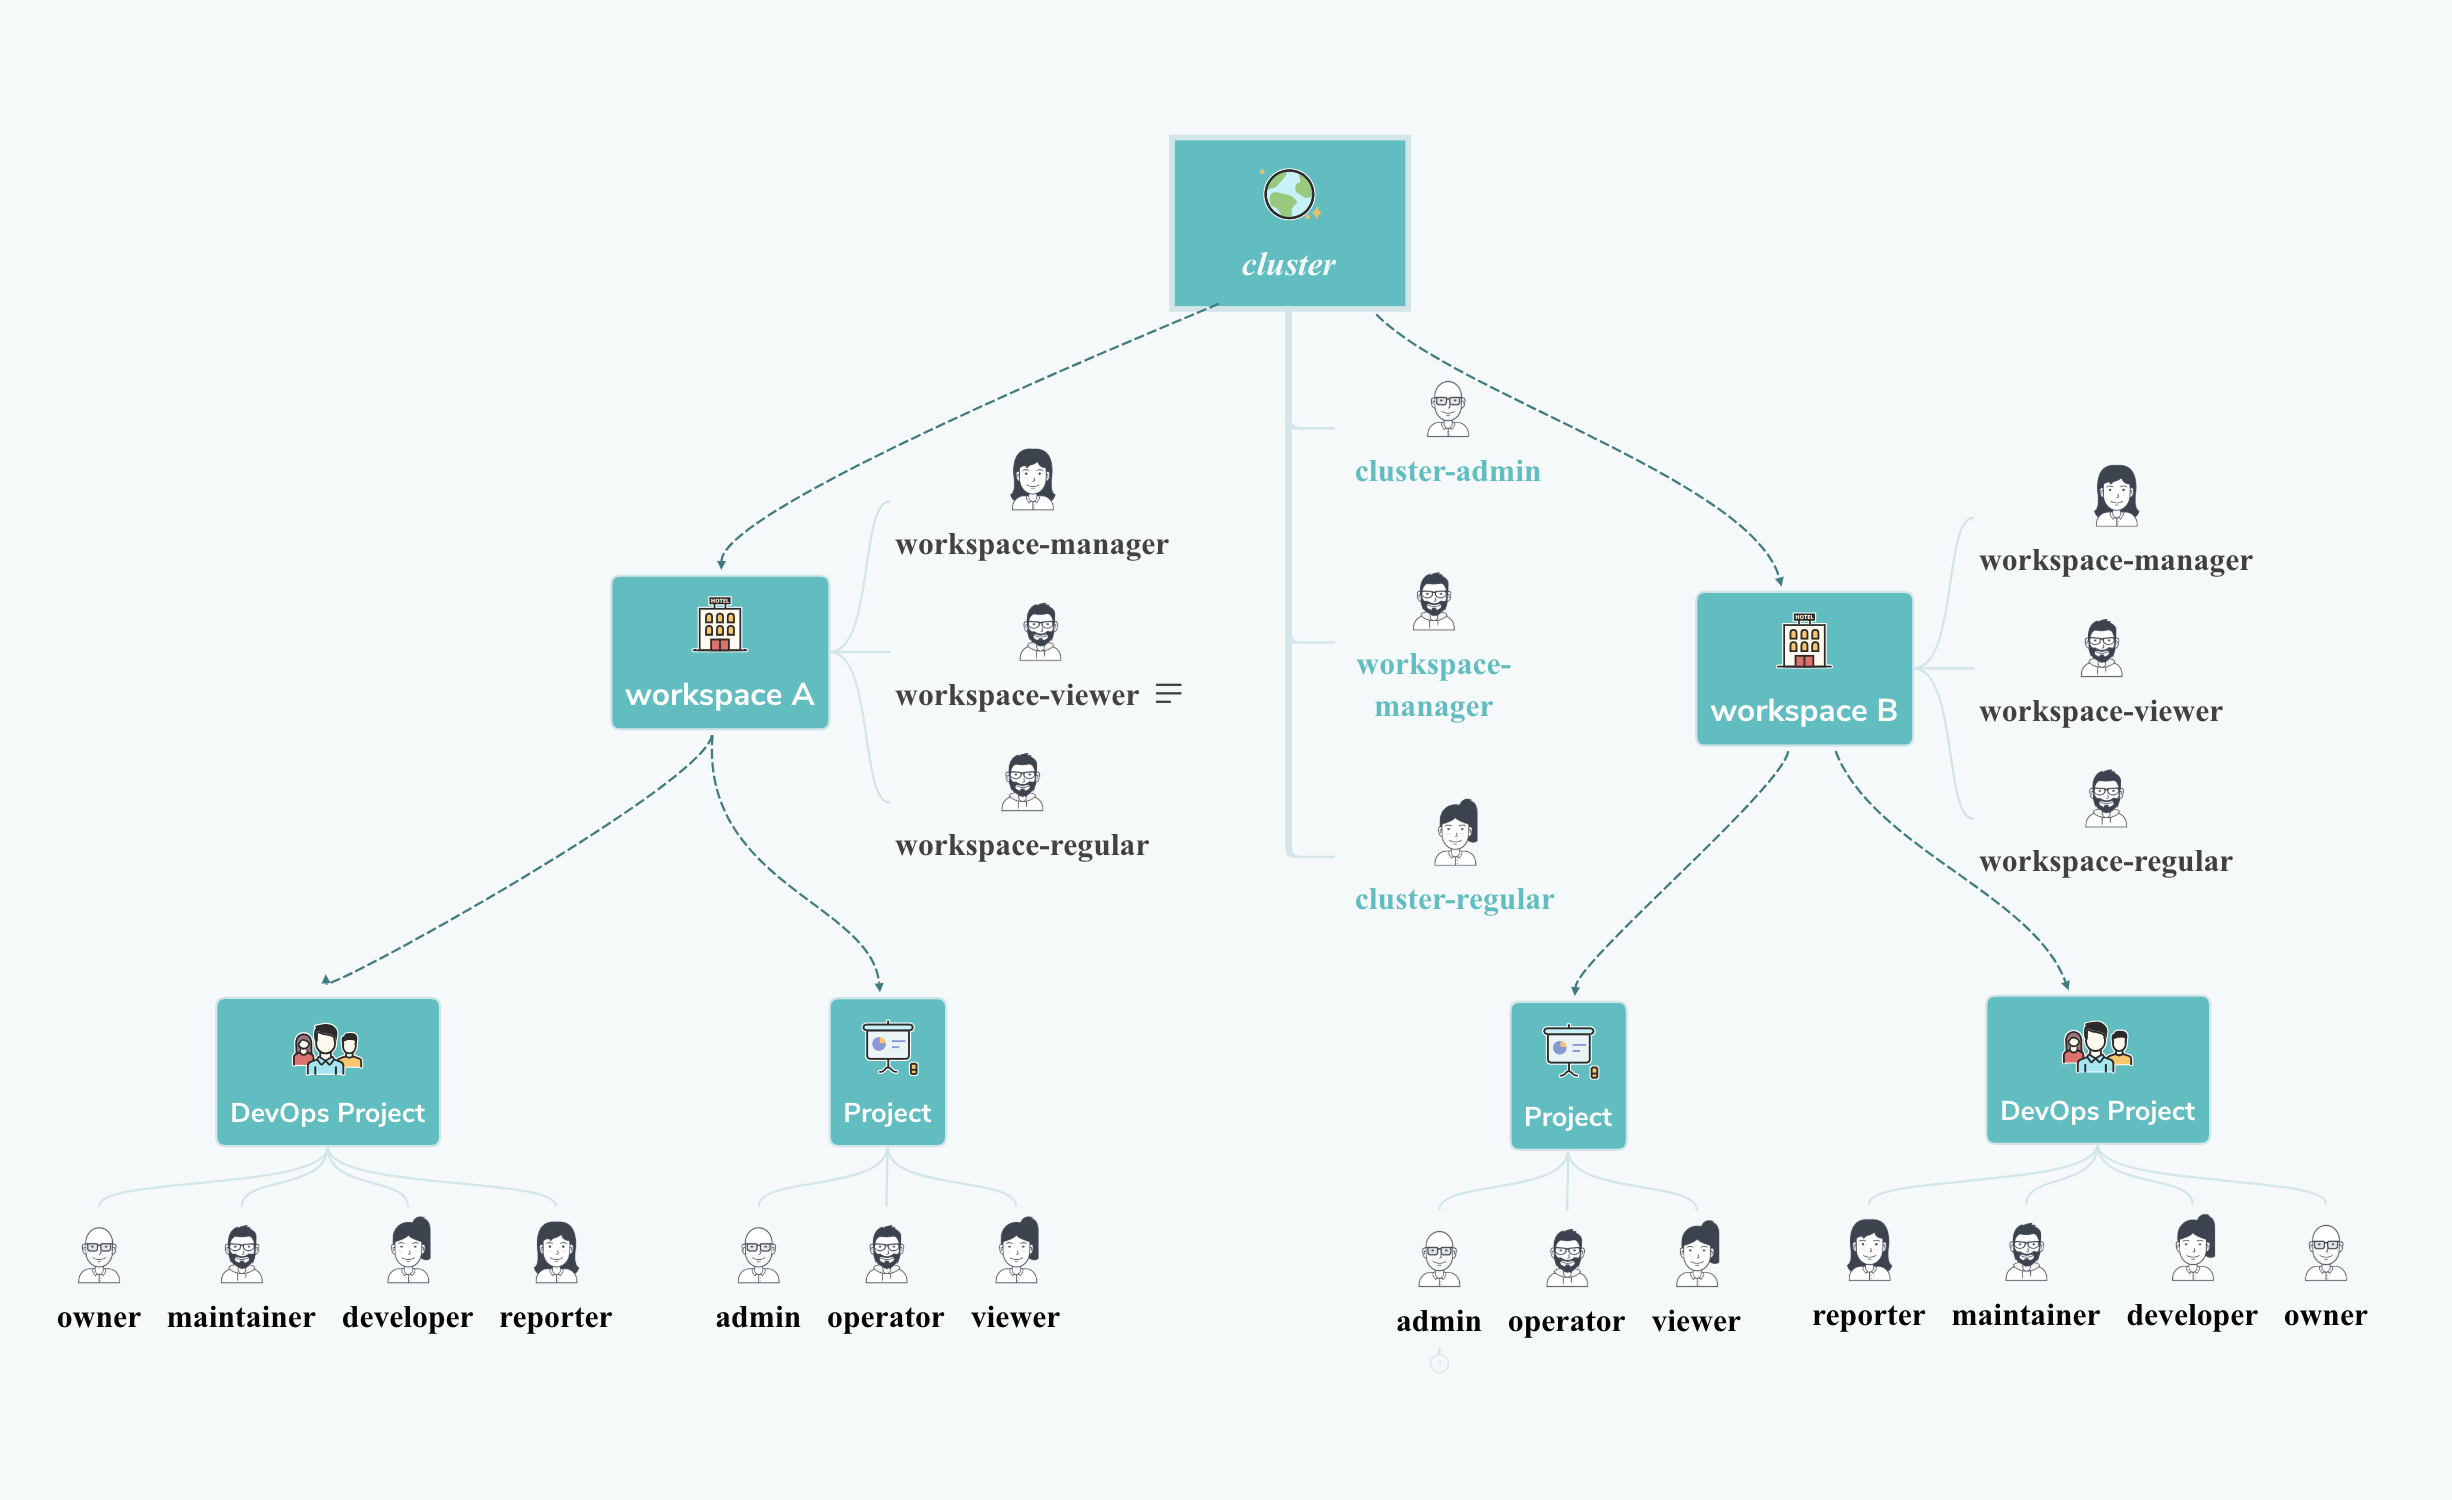
Architecture
KubeSphere system is organized into three hierarchical structures of tenants which are cluster, workspace and project. Here a project is a Kubernetes namespace.
As shown below, you can create multiple workspaces within a Kubernetes cluster. Under each workspace you can also create multiple projects.
For each level, there are multiple built-in roles. and it allows you to create role with customized authorization as well. This hierarchy list is appropriate for enterprise users who have different teams or groups, and different roles within each team.
Hands-on Lab
Task 1: Create Roles and Accounts
The first task is going to create an account and a role, and assign the role to the user. This task must be done using the built-in user admin with the role cluster-admin.
There are three built-in roles in the cluster level as shown below.
| Built-in Roles | Description |
|---|---|
| cluster-admin | It has the privilege to manage any resources in the cluster. |
| workspaces-manager | It is able to manage workspaces including creating, deleting and managing the users of a workspace. |
| cluster-regular | Regular users have no authorization to manage resources before being invited to a workspaces. The access right is decided by the assigned role to the specific workspace or project. |
Here is an example showing you how to create a new role named users-manager, grant account management and role management capabilities to the role, then create a new account named user-manager and grant it the users-manager role.
| Account Name | Cluster Role | Responsibility |
|---|---|---|
| user-manager | users-manager | Manage cluster accounts and roles |
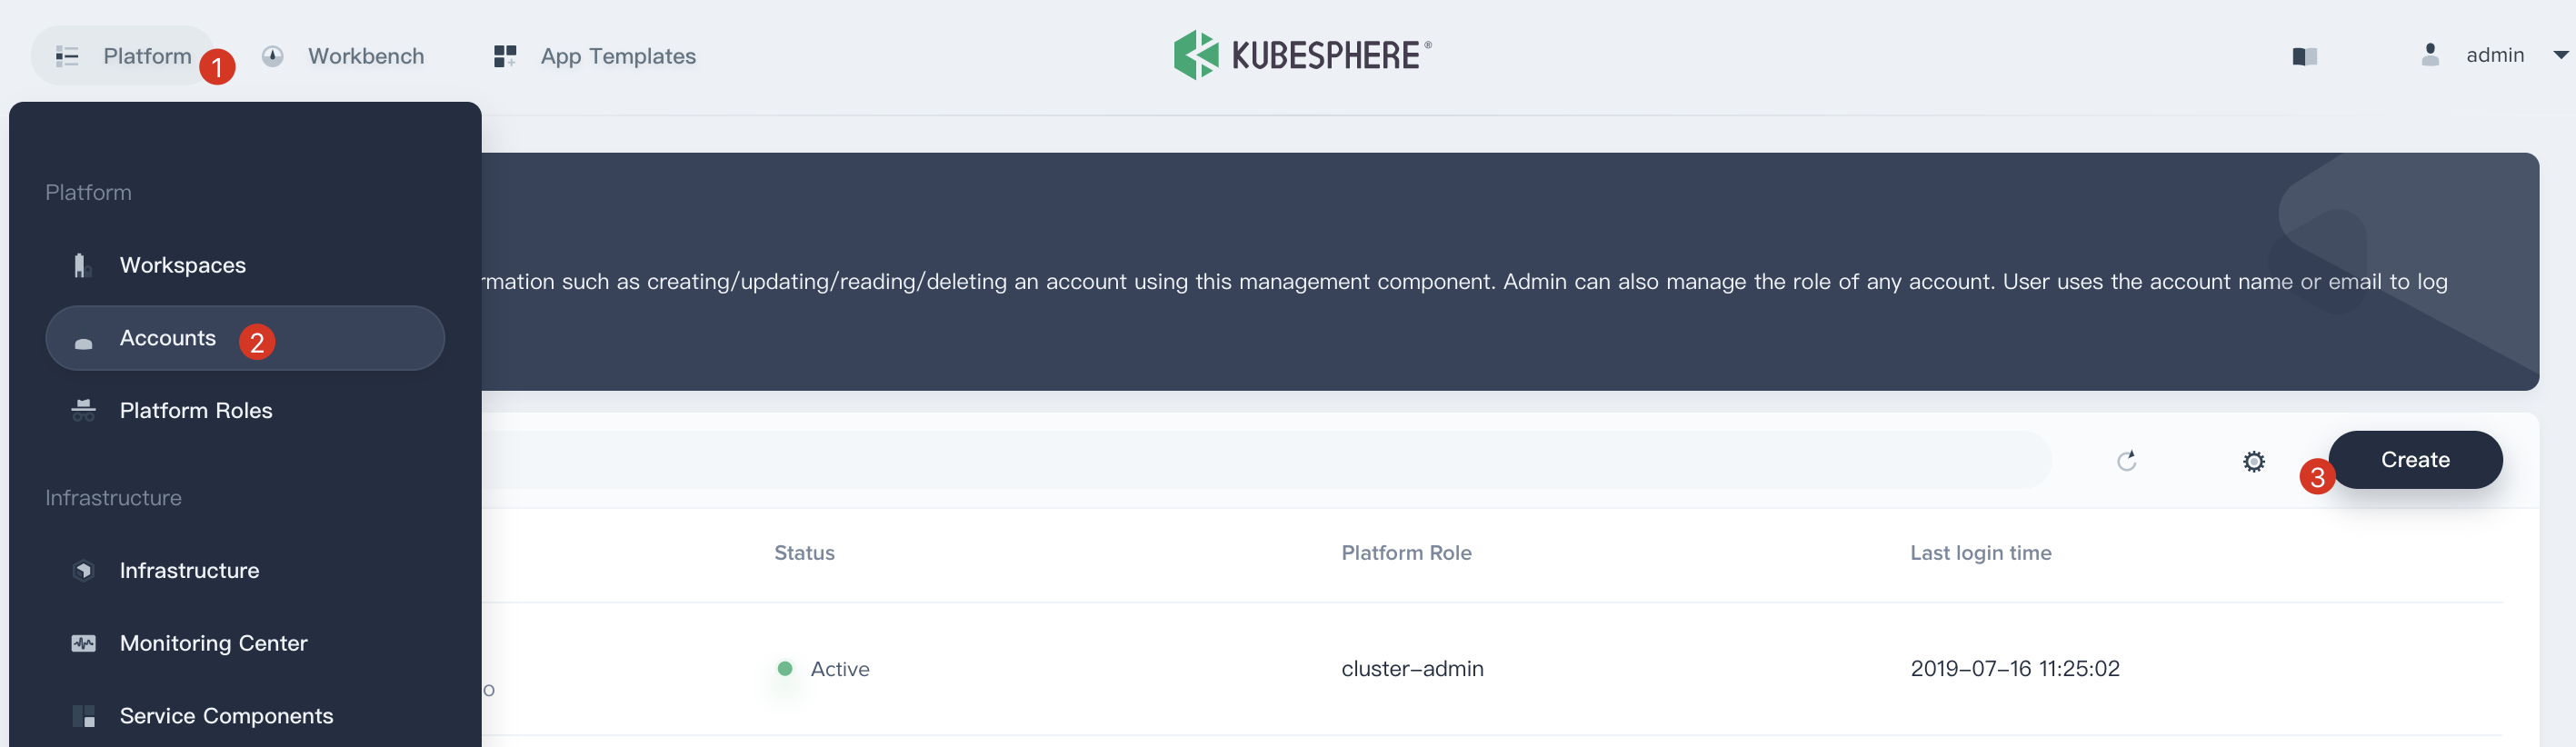
1.1 Log in with the built-in user admin, click Platform → Platform Roles. You can see the role list as follows. Click Create to create a role which is used to manage all accounts and roles.

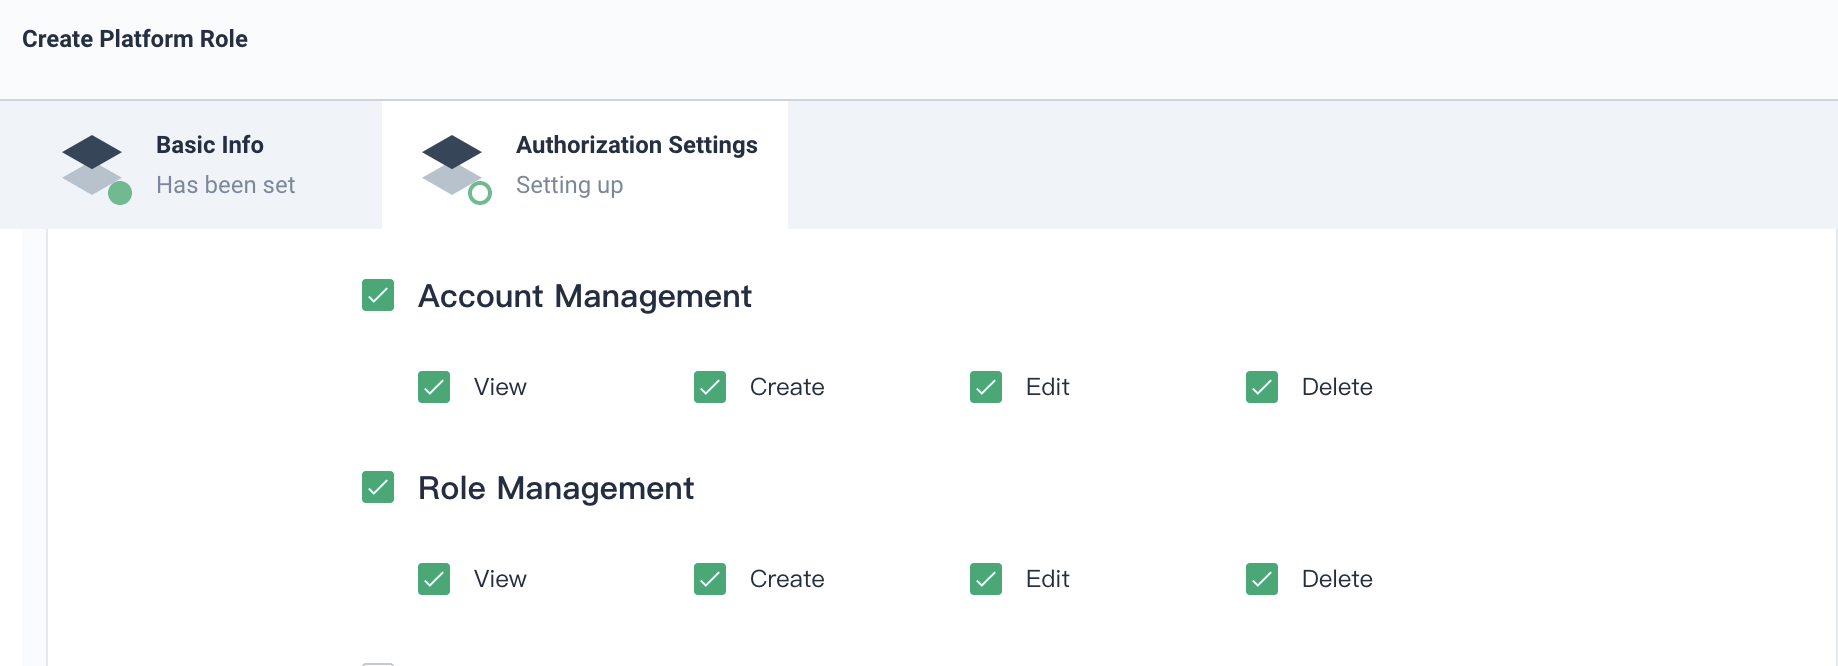
1.2. Fill in the basic information and authorization settings of the role.
- Name:
users-manager - Description: Describe the role's responsibilities, here we type
Manage accounts and roles
1.3. Check all the access rights on the options of Account Management and Role Management; then click Create.
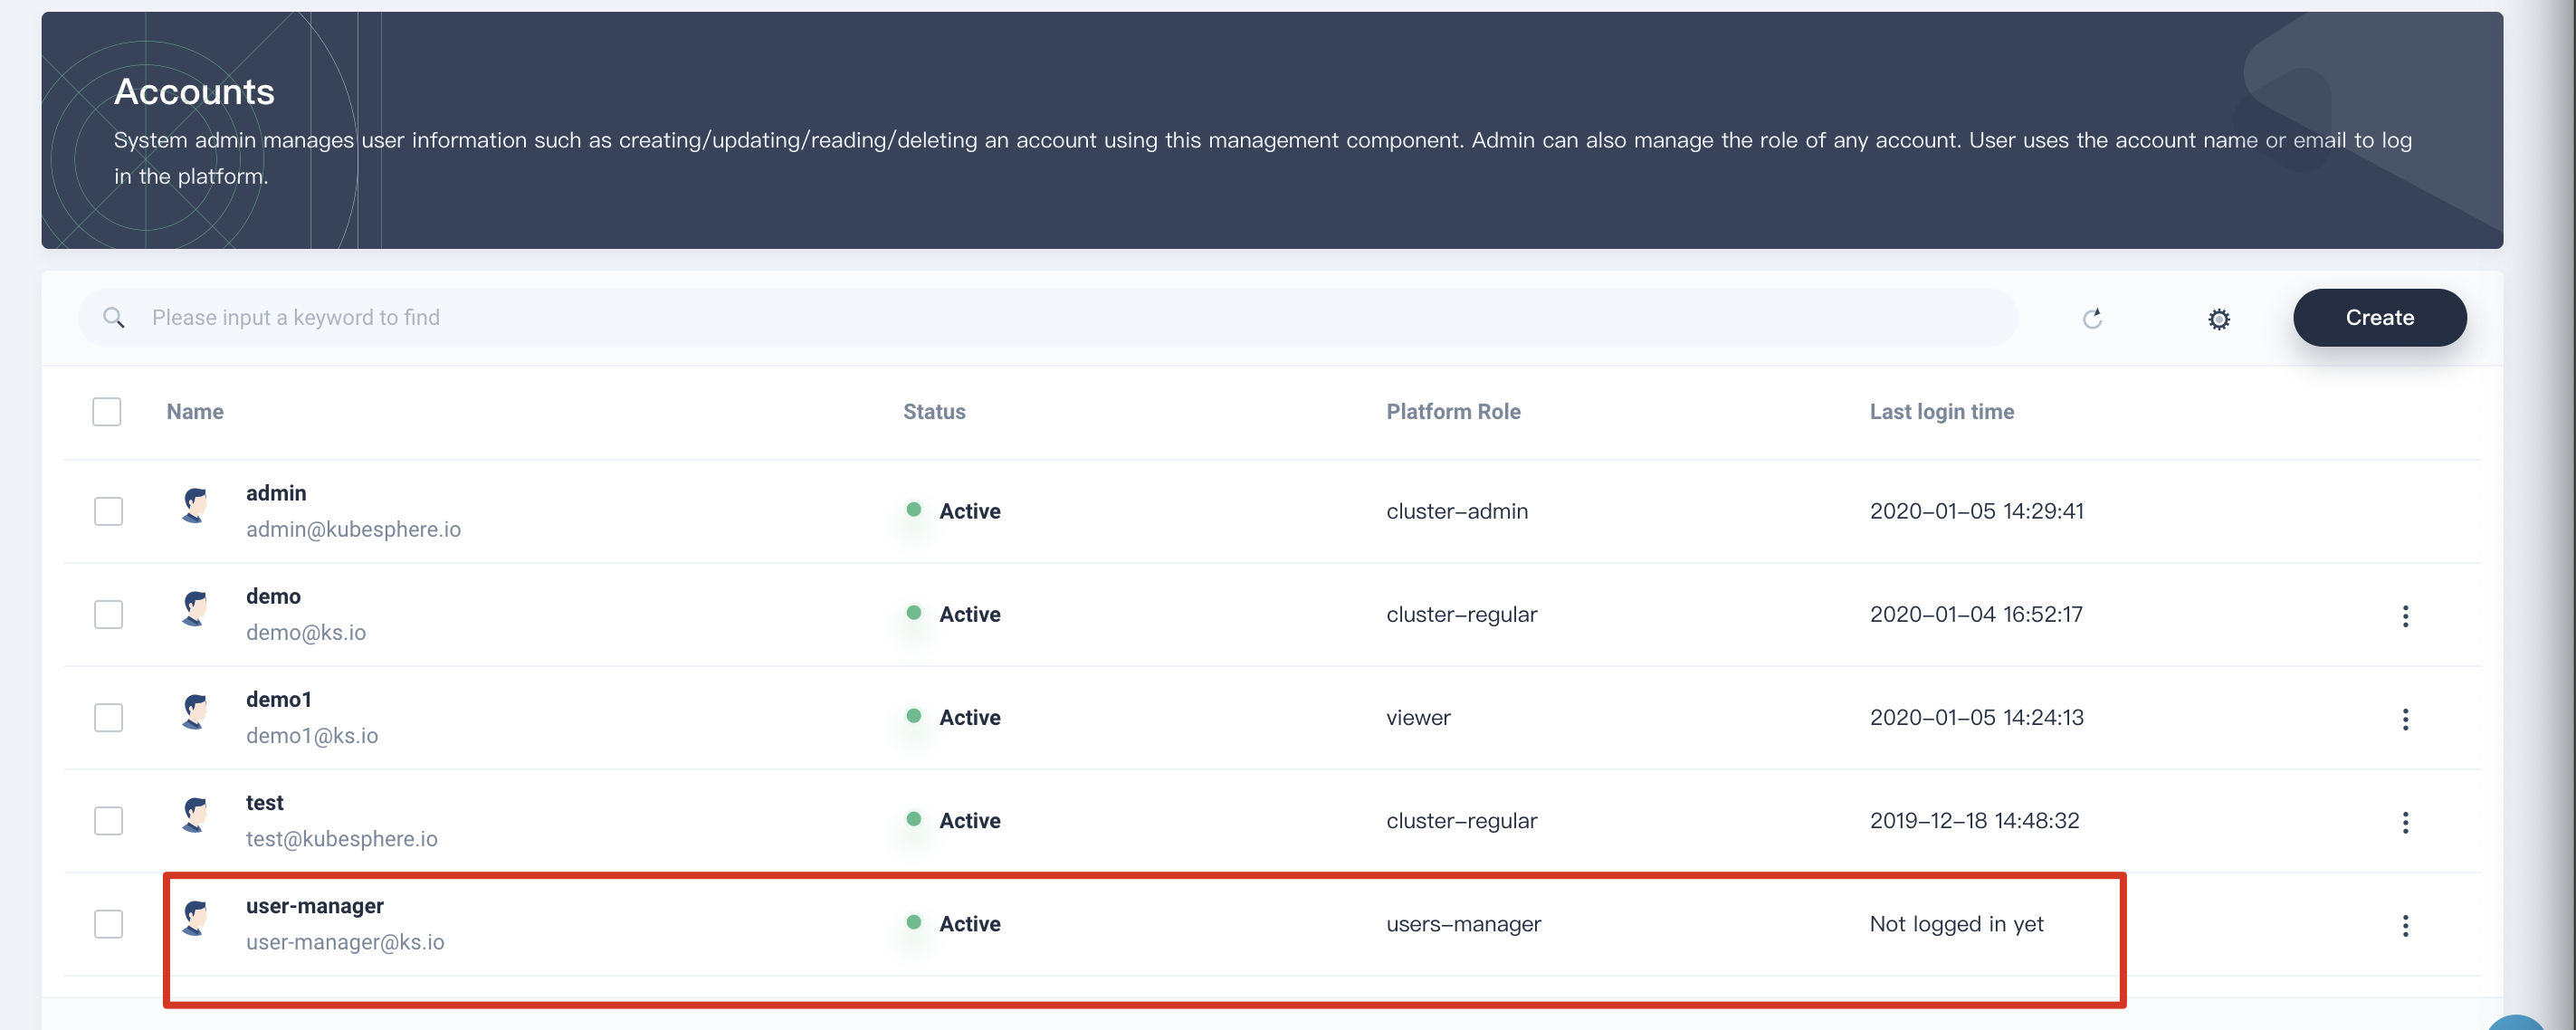
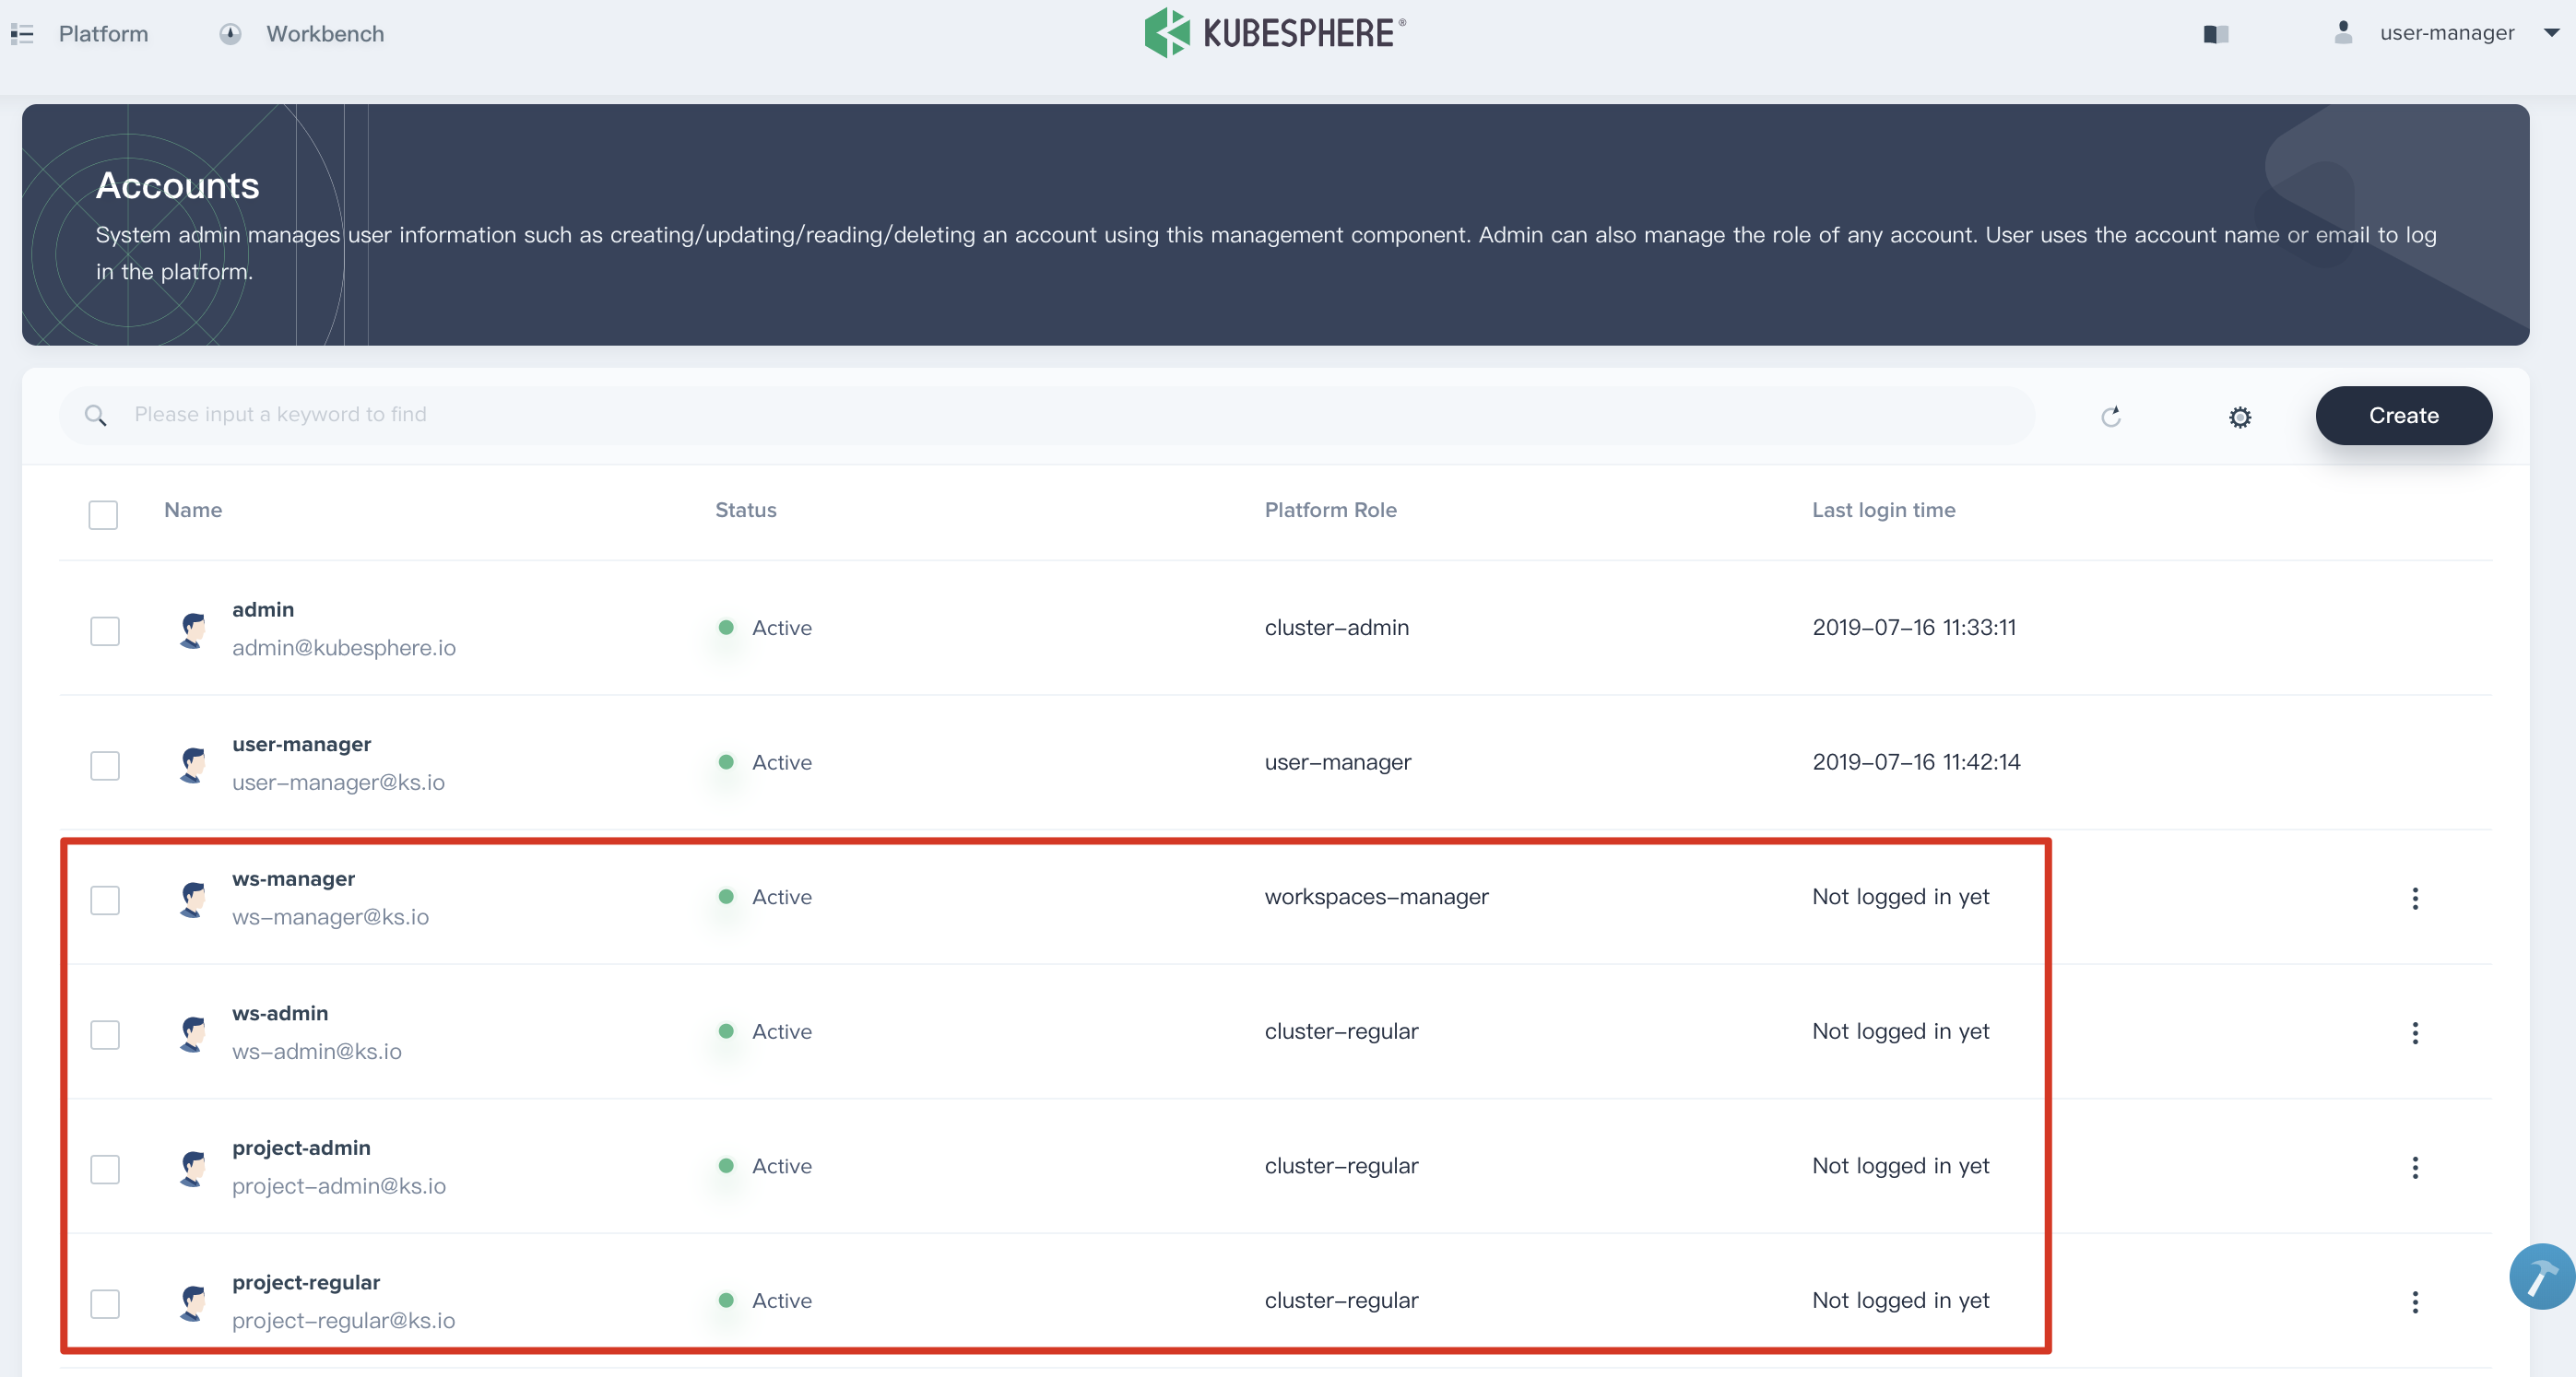
1.4. Click Platform → Accounts. You can see the account list in the current cluster. Then click Create.
1.5. Fill in the new user's basic information. Set the username as user-manager; select the role users-manager and fill other items as required. Then click OK to create this account.
1.6. Then log out and log in with the user user-manager to create four accounts that are going to be used in next lab exercises. Once login, enter Platform → Accounts, then create the four accounts in the following table.
| Account Name | Cluster Role | Responsibility |
|---|---|---|
| ws-manager | workspaces-manager | Create and manage all workspaces |
| ws-admin | cluster-regular | Manage all resources under a specific workspace (This example is used to invite new members to join a workspace.) |
| project-admin | cluster-regular | Create and manage projects, DevOps projects and invite new members into the projects |
| project-regular | cluster-regular | The regular user will be invited to the project and DevOps project by the project-admin. We use this account to create workloads, pipelines and other resources under the specified project. |
1.7. Verify the four accounts that we have created.
Task 2: Create a Workspace
The second task is going to create a workspace using the user ws-manager created in the previous task. As we know, it is a workspace admin.
Workspace is the base for KubeSphere multi-tenant management. It is also the basic logic unit for projects, DevOps projects and organization members.
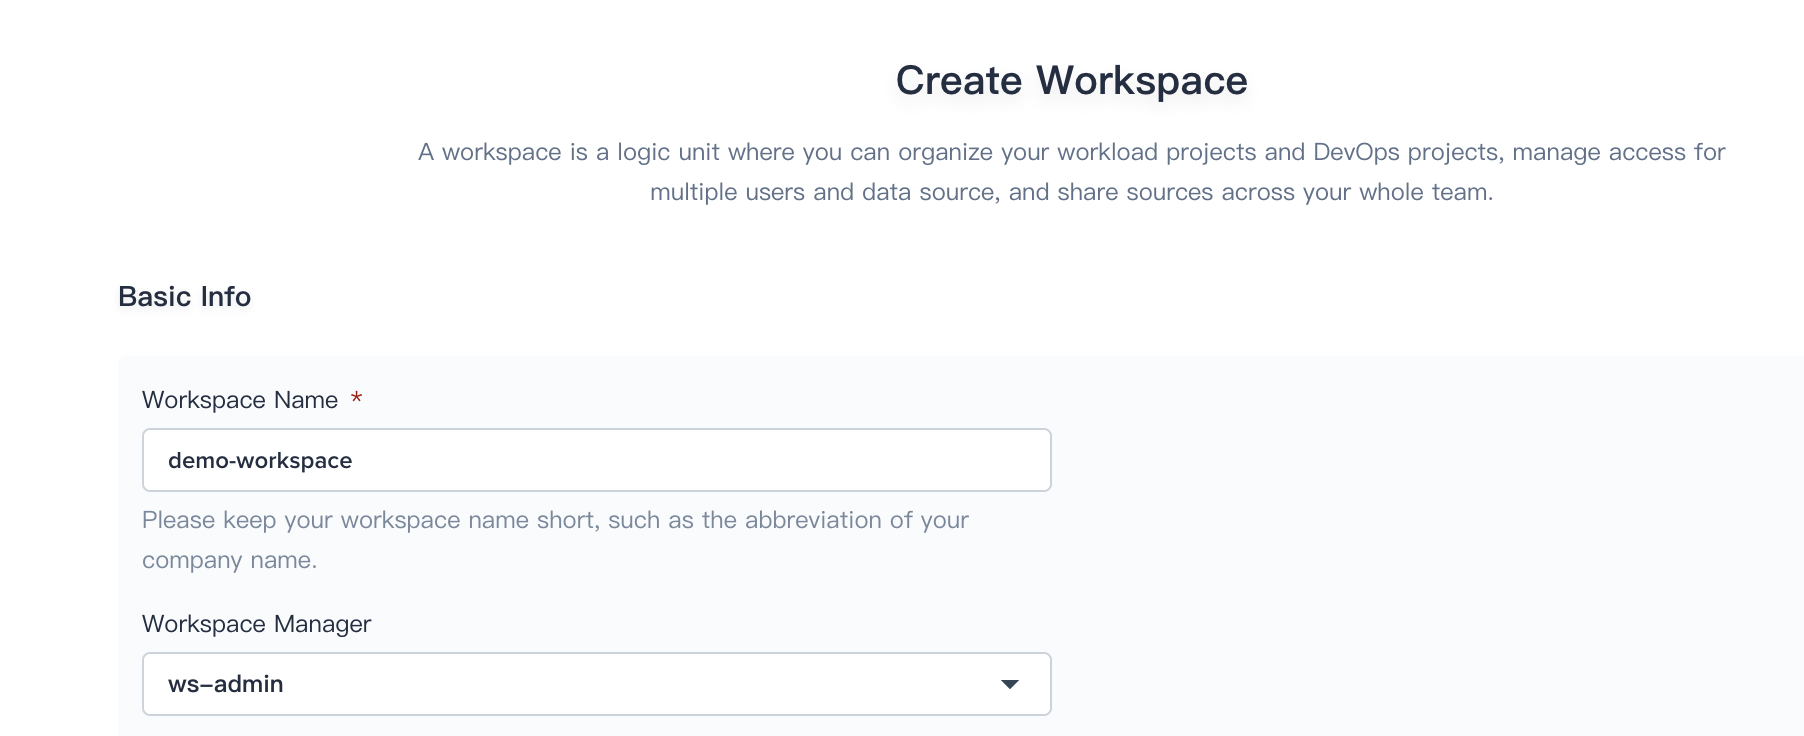
2.1. Log in KubeSphere with ws-manager which has the authorization to manage all workspaces on the platform.
Click Platform → Workspace on the left top corner. You can see there is only one default workspace system-workspace listed in the page, which is for running system related components and services. You are not allowed to delete this workspace.
Click Create in the workspace list page, name the new workspace demo-workspace and assign the user ws-admin as the workspace admin as the screenshot shown below:
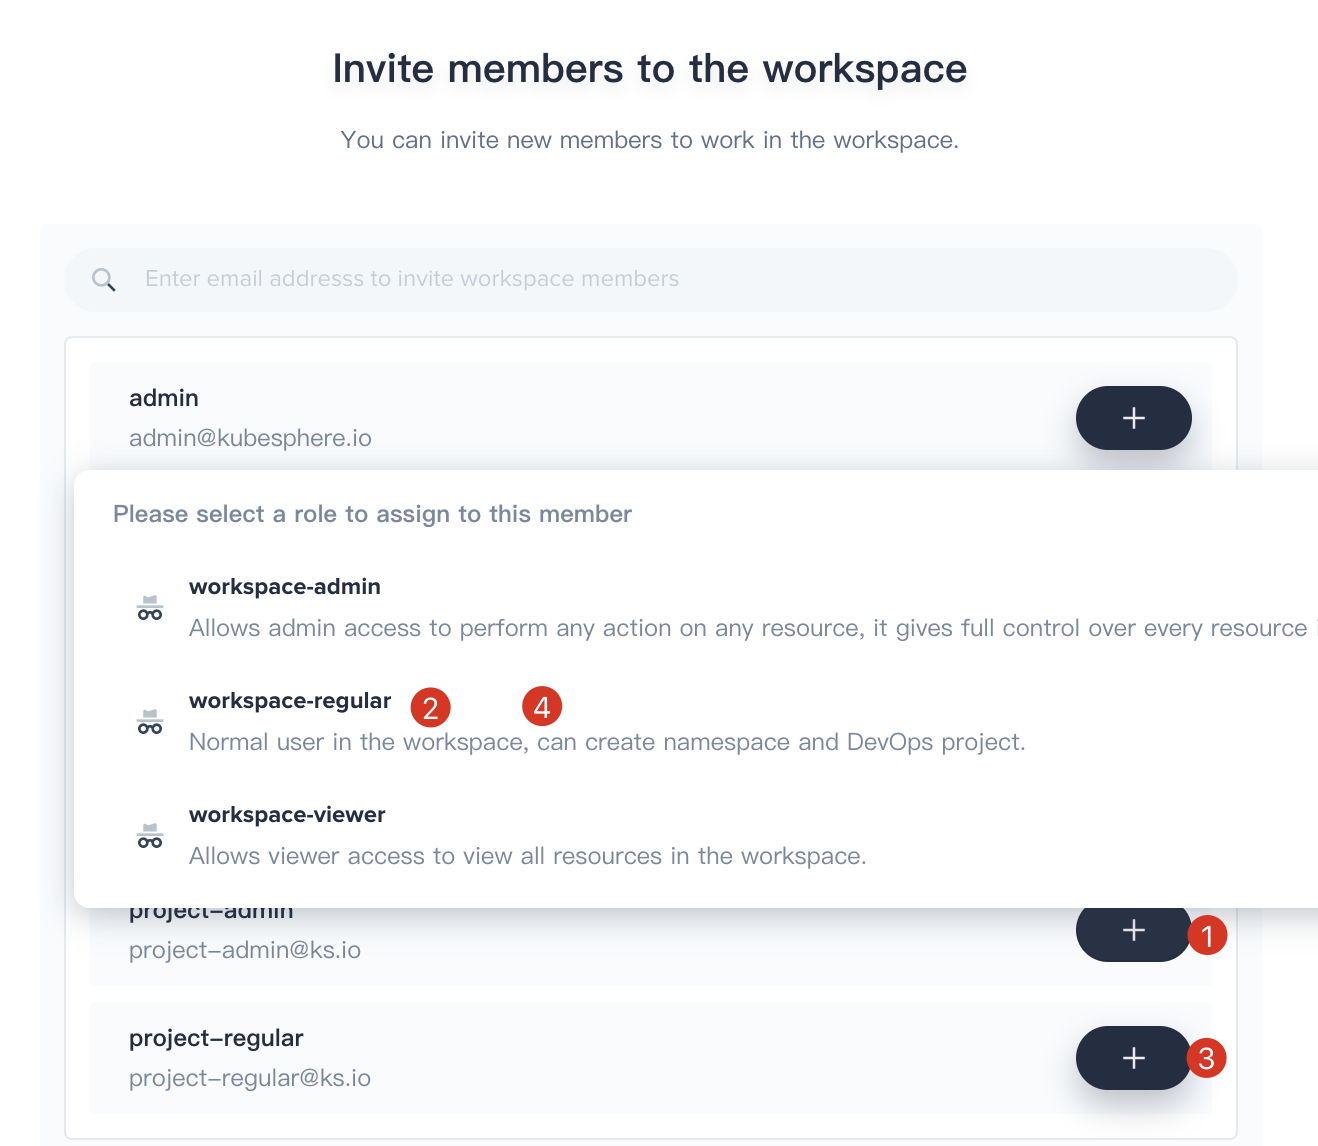
2.2. Logout and sign in with ws-admin after demo-workspace is created. Then click View Workspace, select Workspace Settings → Workspace Members and click Invite Member.
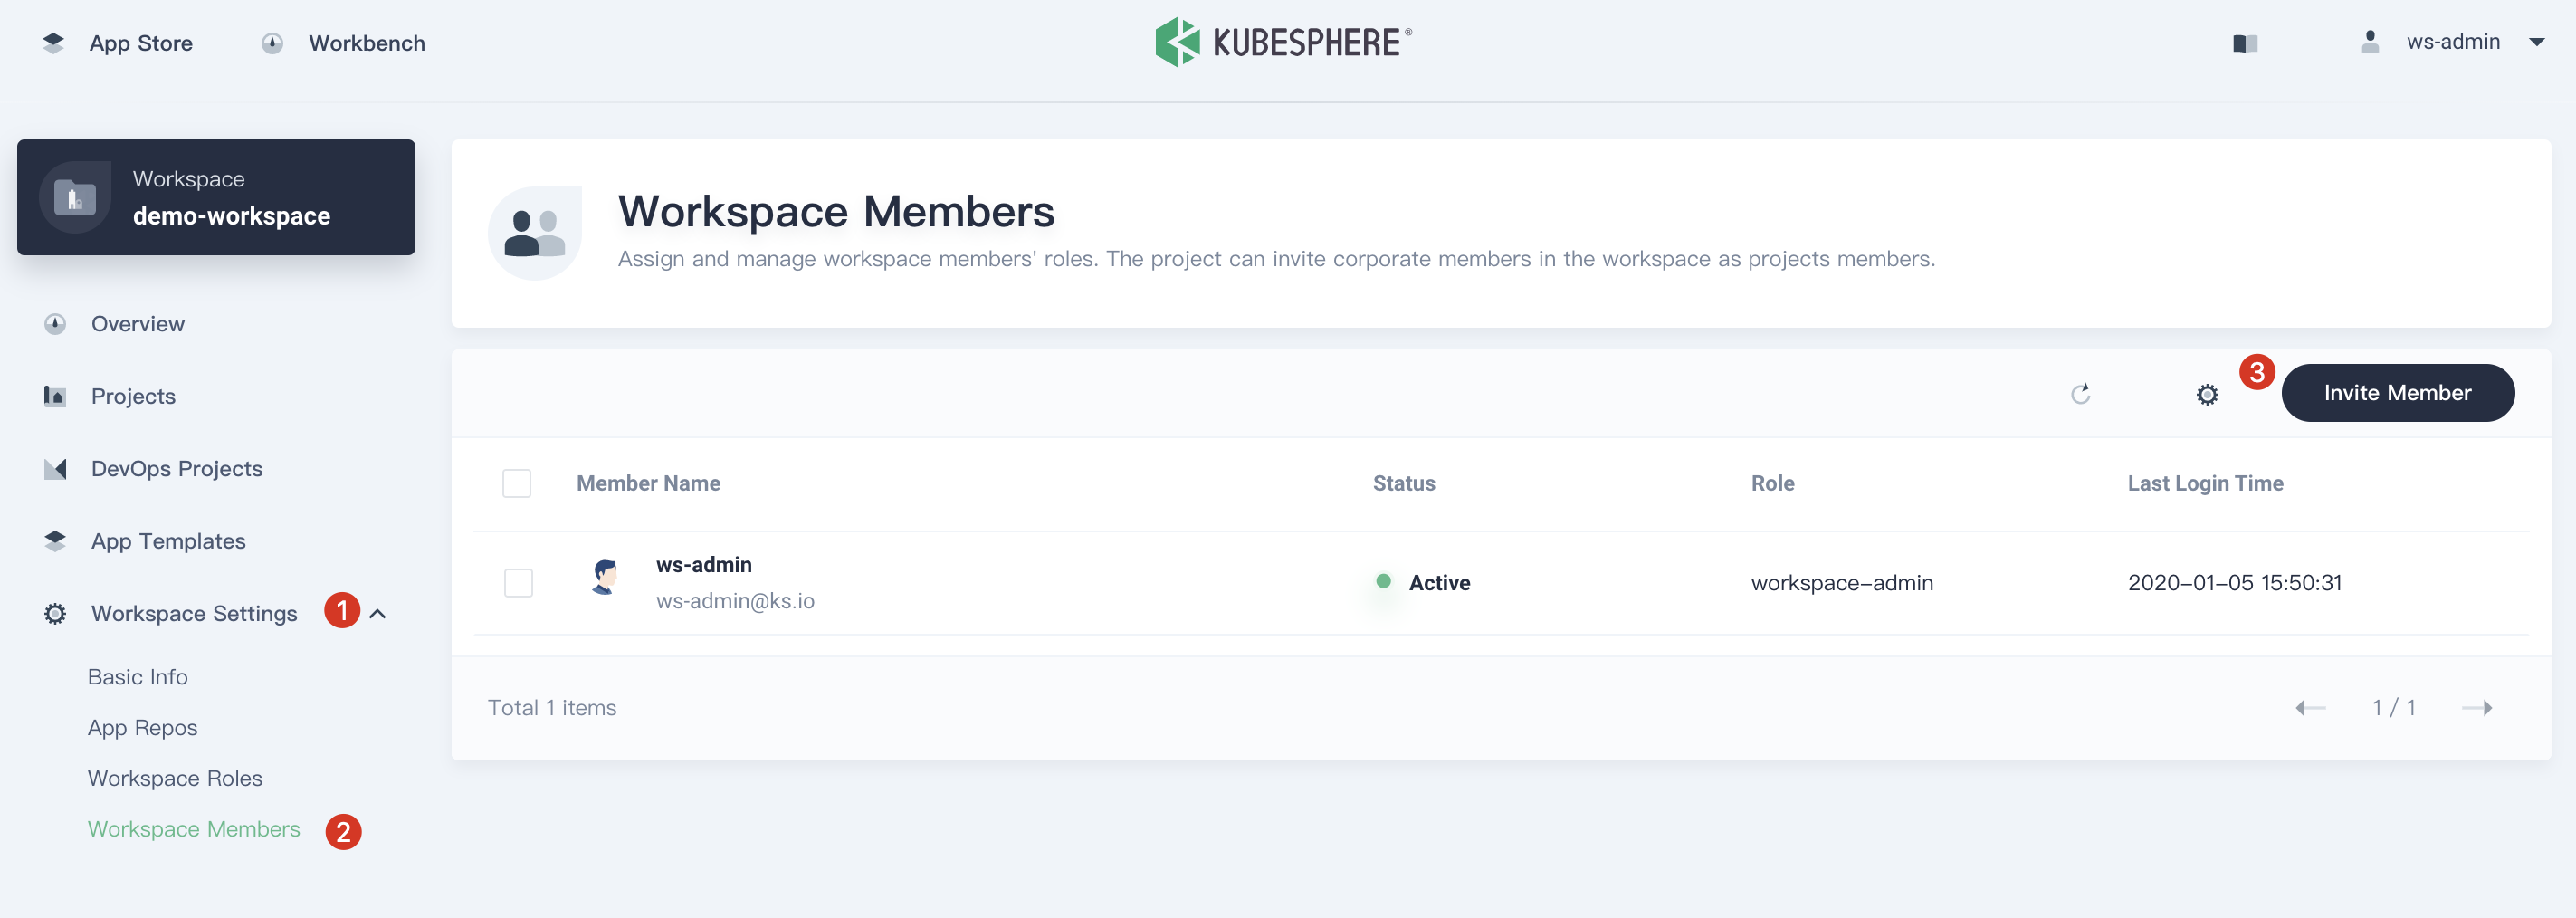
2.3. Invite both project-admin and project-regular and grant them workspace-regular accordingly, click OK to save it. Now there are three members in the demo-workspace.
| User Name | Role in the Workspace | Responsibility |
|---|---|---|
| ws-admin | workspace-admin | Manage all resources under the workspace (We use this account to invite new members into the workspace). |
| project-admin | workspace-regular | Create and manage projects, DevOps projects, and invite new members to join. |
| project-regular | workspace-viewer | Will be invited by project-admin to join the project and DevOps project. We use this account to create workloads, pipelines, etc. |
Task 3: Create a Project
This task is going to show how to create a project and some related operations in the project using Project Admin.
3.1. Sign in with project-admin created in the first task, then click Create and select Create a resource project.

3.2. Name it demo-project, then set the CPU limit to 1 Core and memory limit to 1000 Mi in the Advanced Settings, then click Create.
3.3. Choose Project Settings → Project Members and click Invite Member.
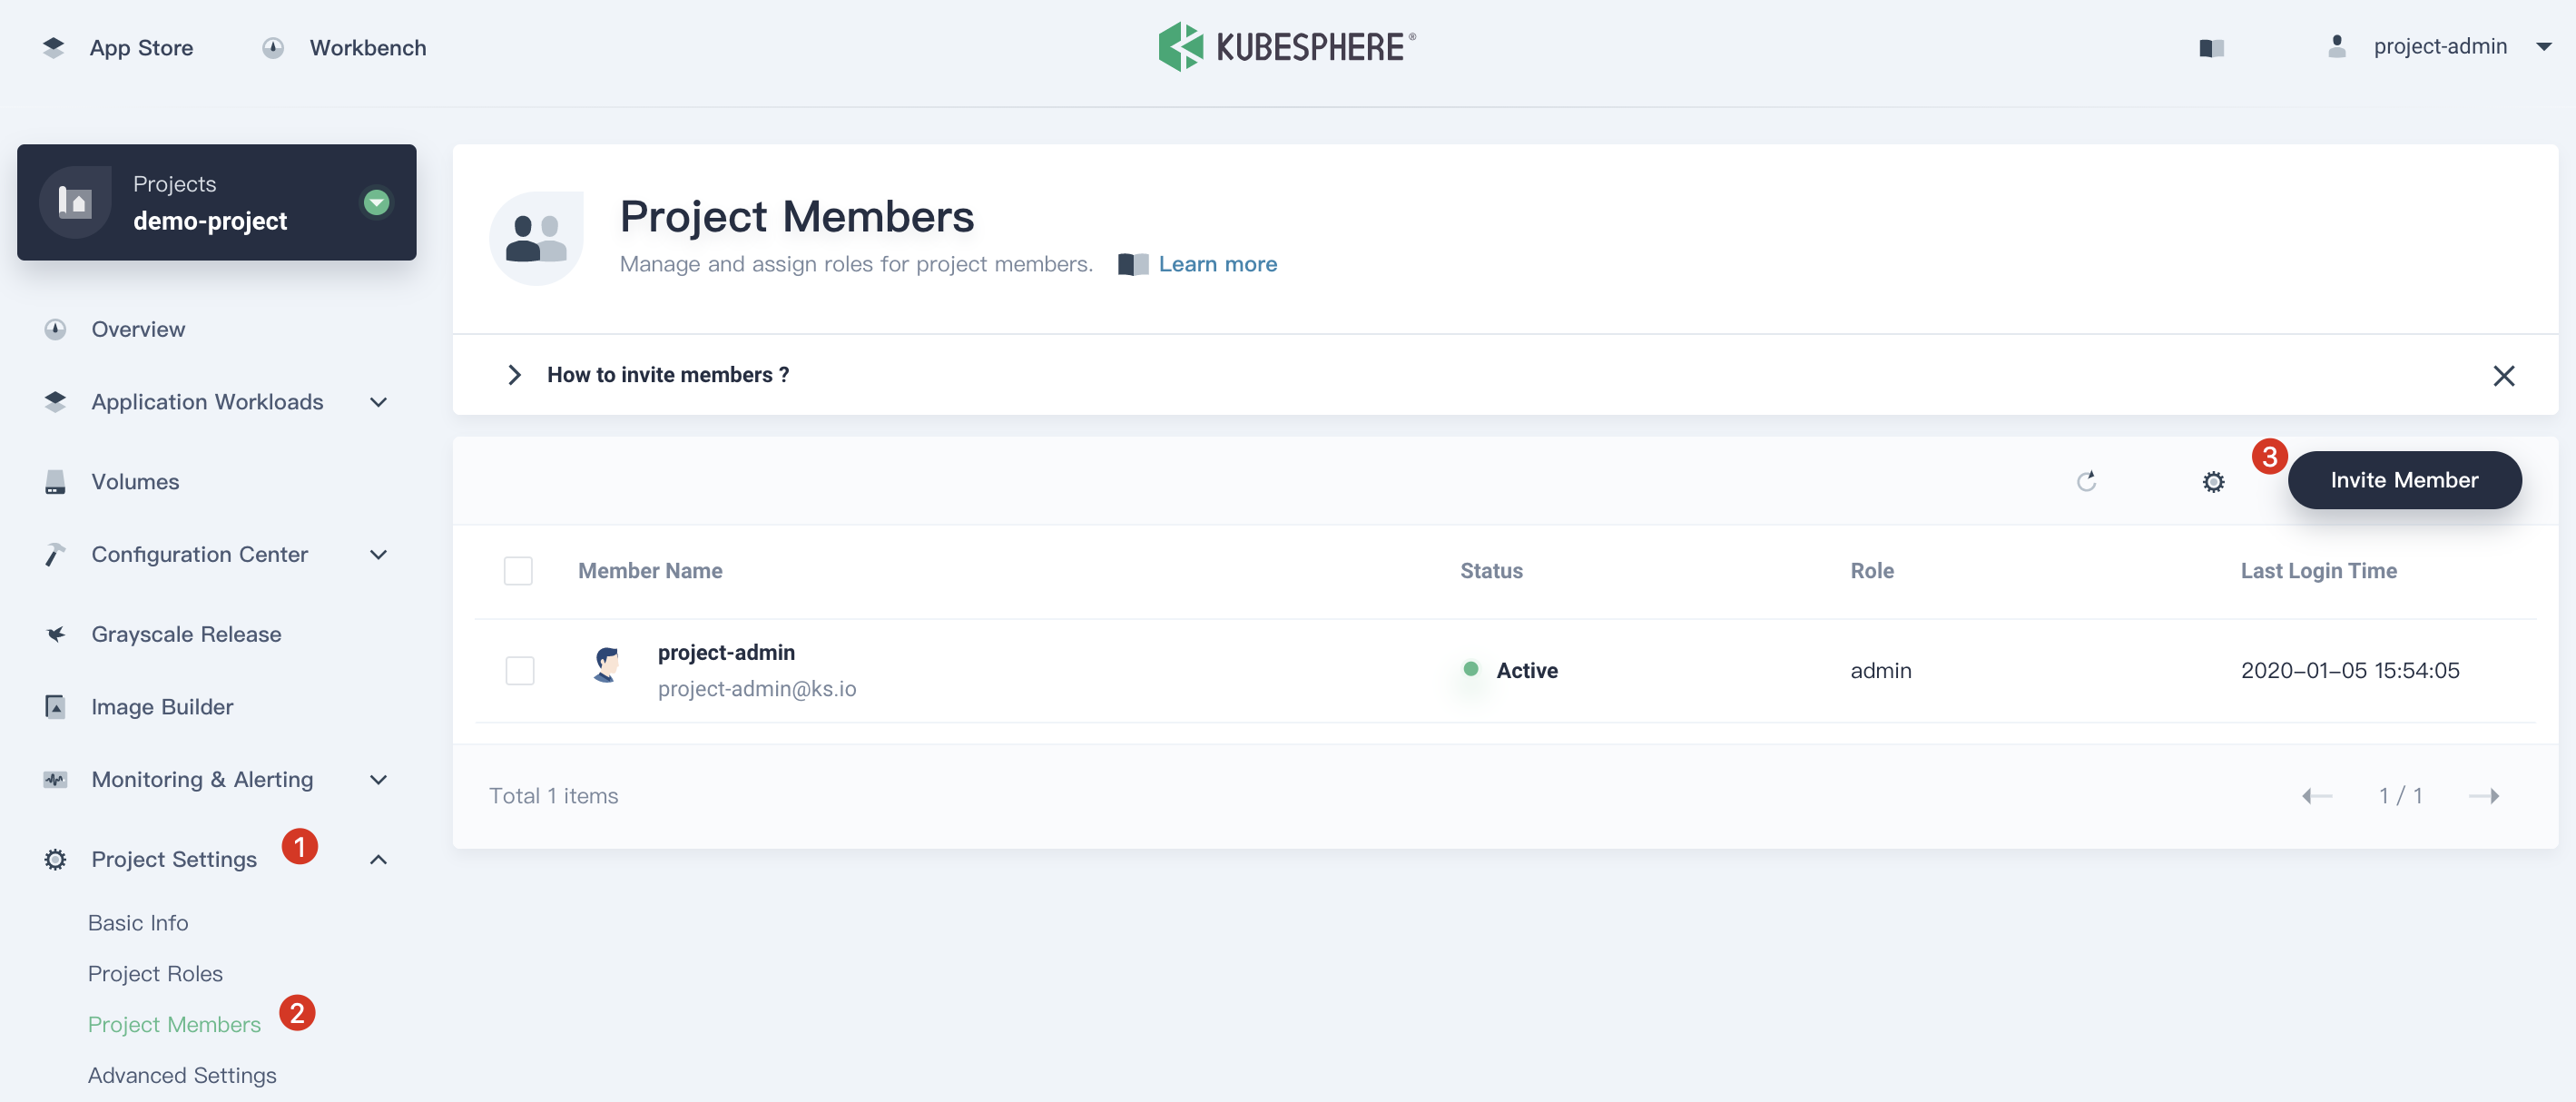
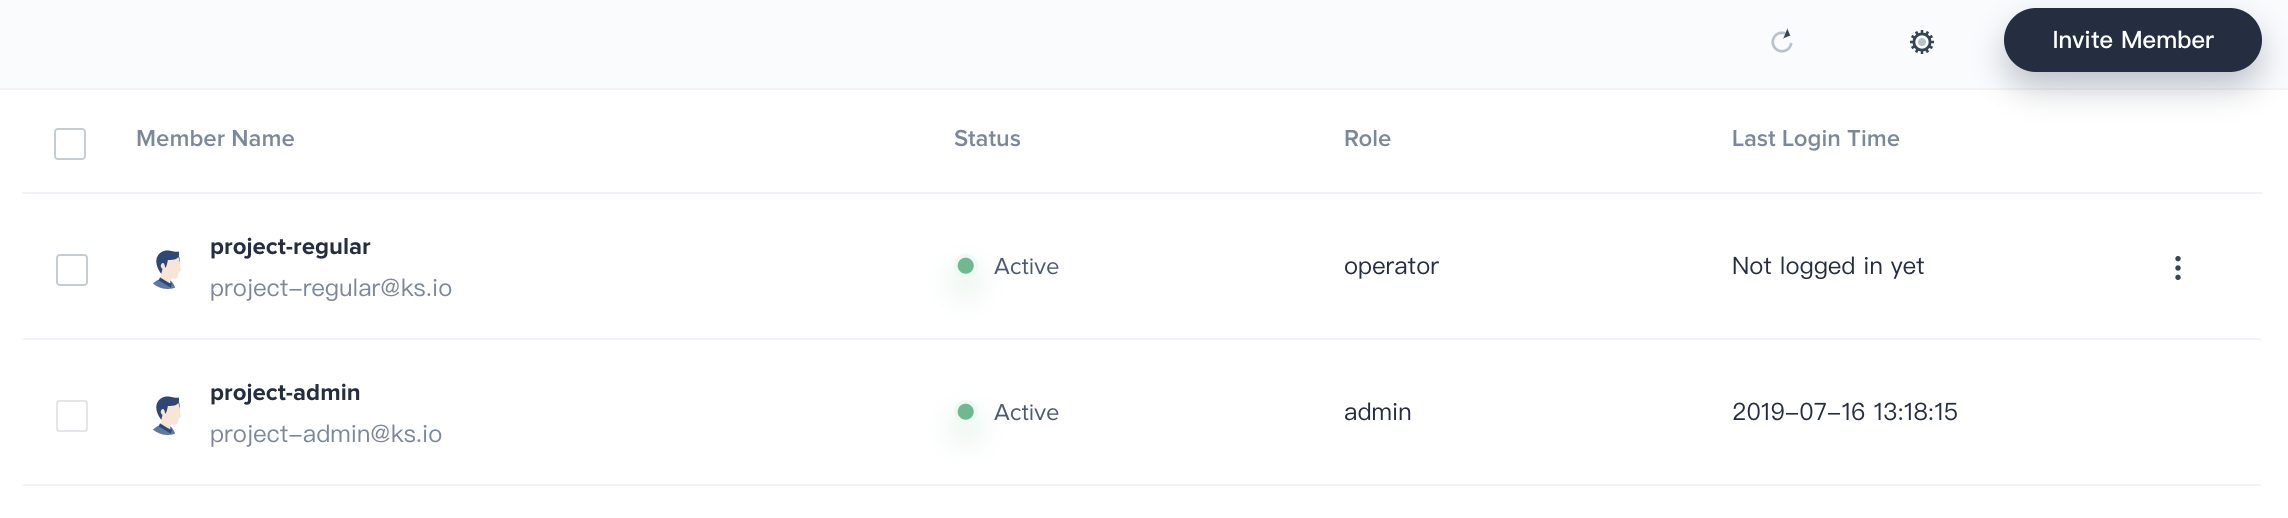
3.4. Invite project-regular to this project and grant this user the role operator.

Set Gateway
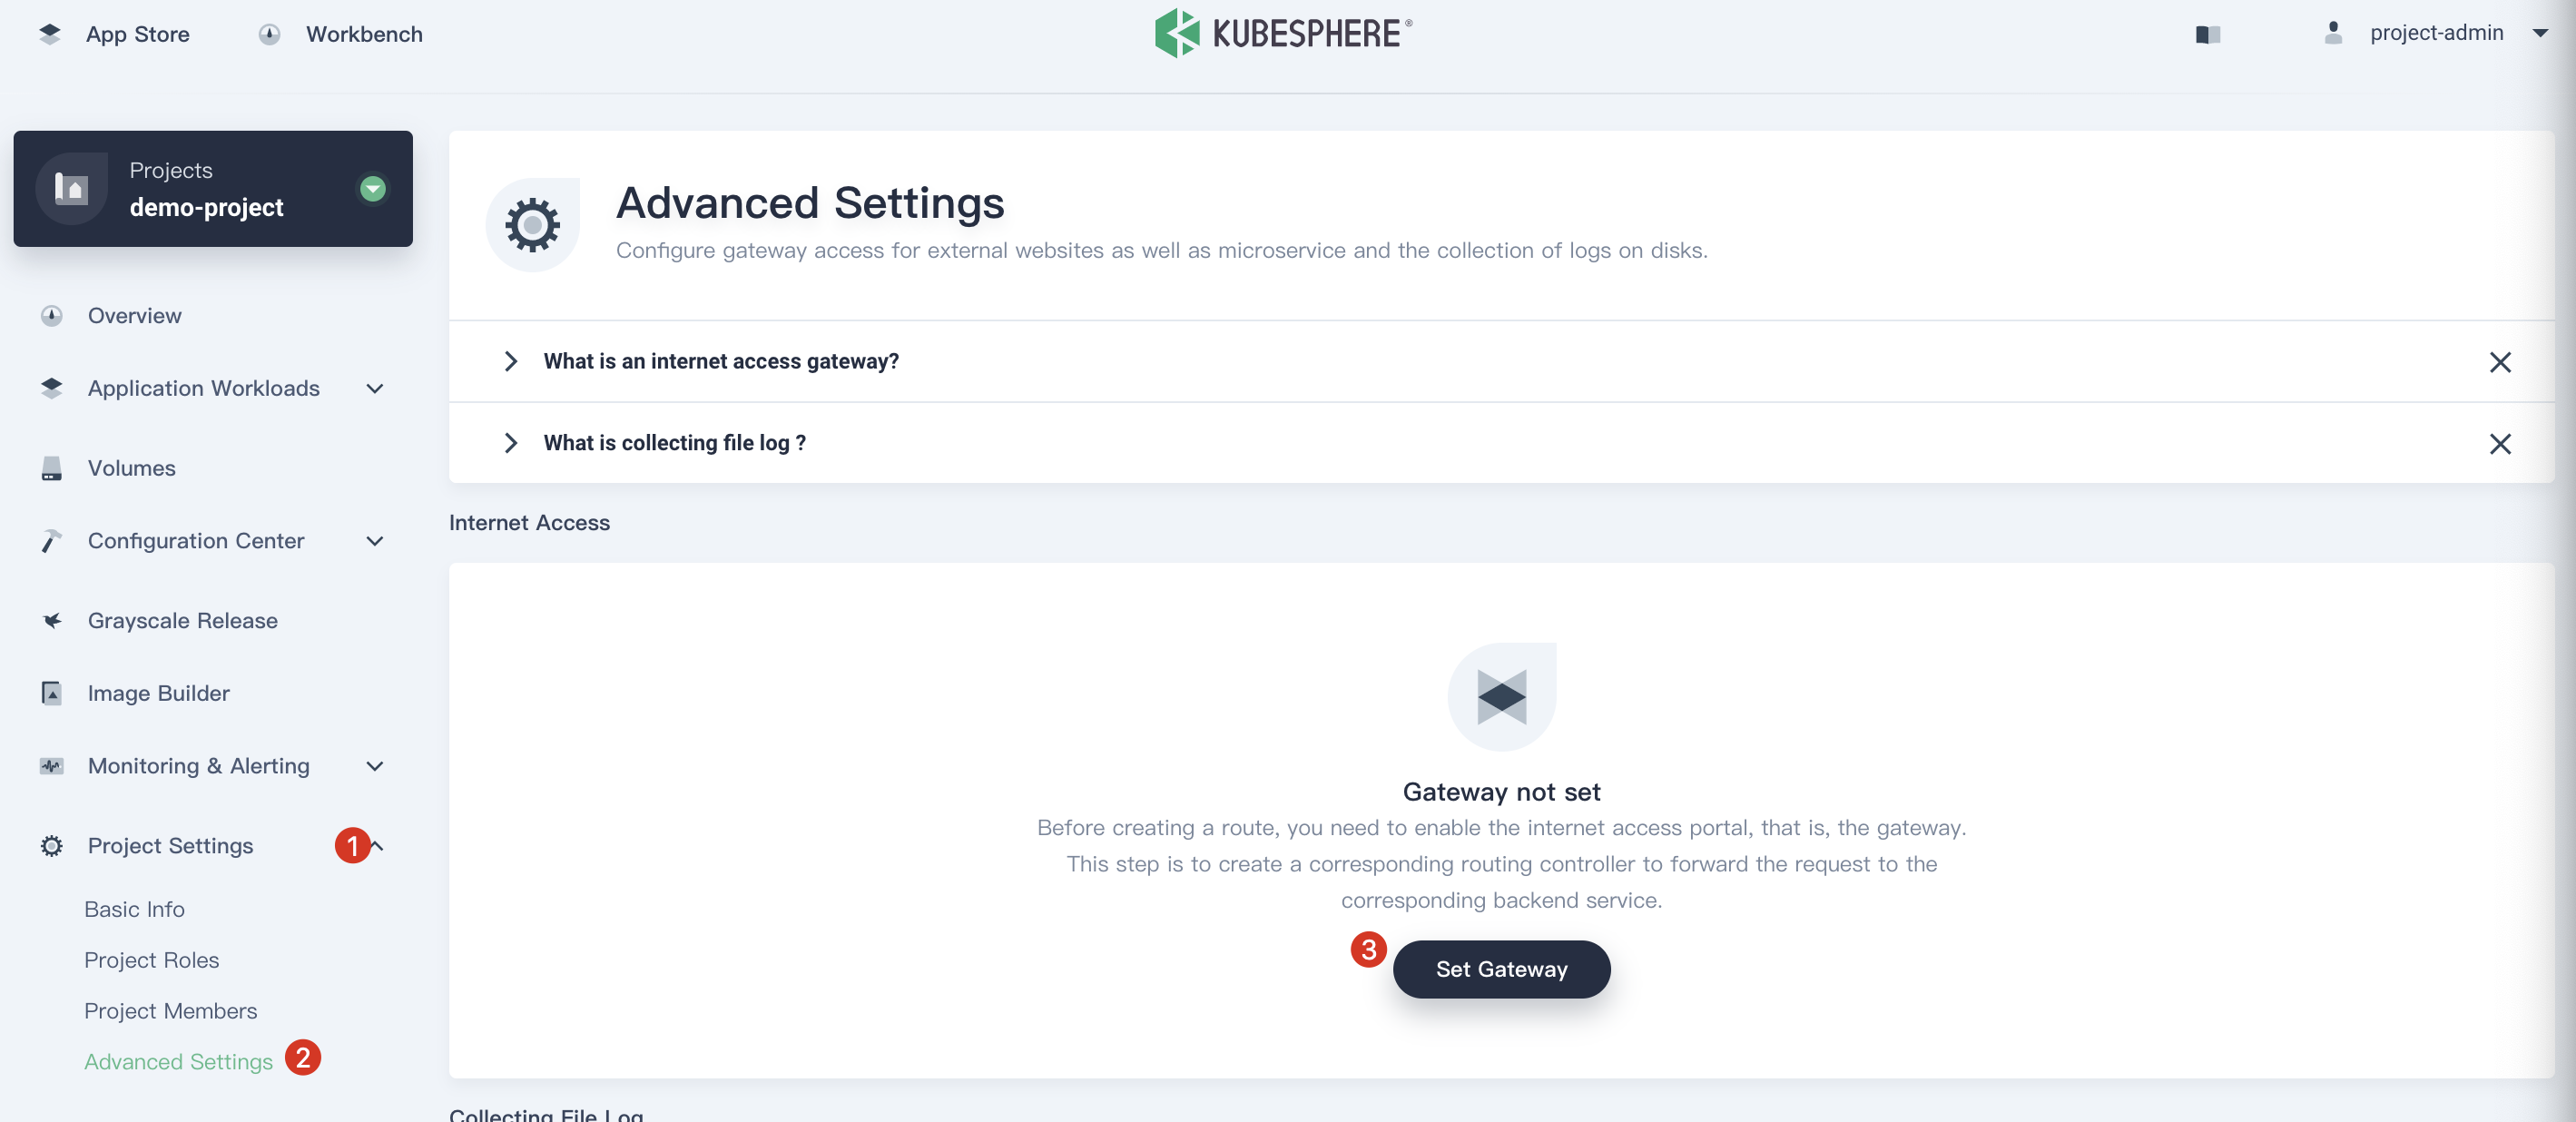
Before creating a route which is the Kubernetes Ingress, you need to enable a gateway for this project. The gateway is an Nginx ingress controller running in the project.
3.5. We continue to use project-admin. Choose Project Settings → Advanced Settings and click Set Gateway.
3.6. Choose the access method NodePort and click Save.
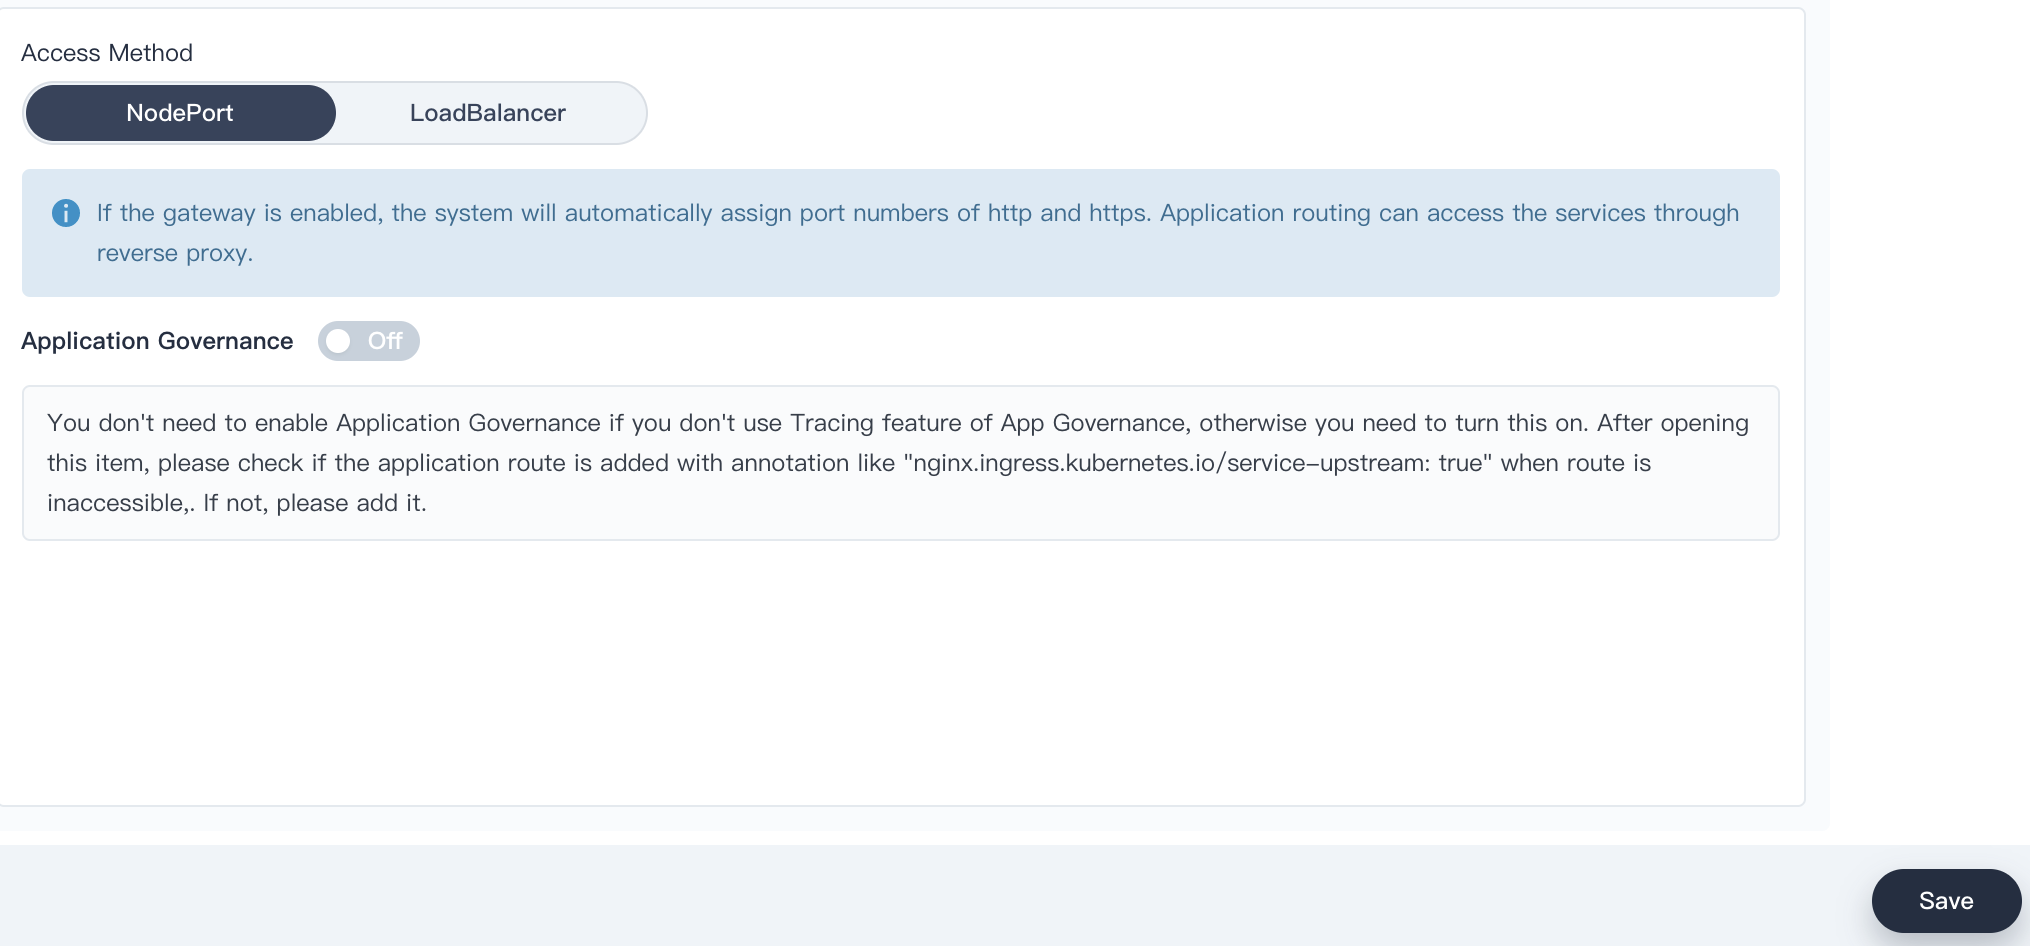
3.7. Now we are able to see the Gateway Address, the NodePort of http and https appeared in the page.
Note: If you want to expose services using LoadBalancer type, you need to use the LoadBalancer plugin of cloud provider. If your Kubernetes cluster is running on bare metal environment, we recommend you to use Porter as the LoadBalancer plugin.

Task 4: Create DevOps Project (Optional)
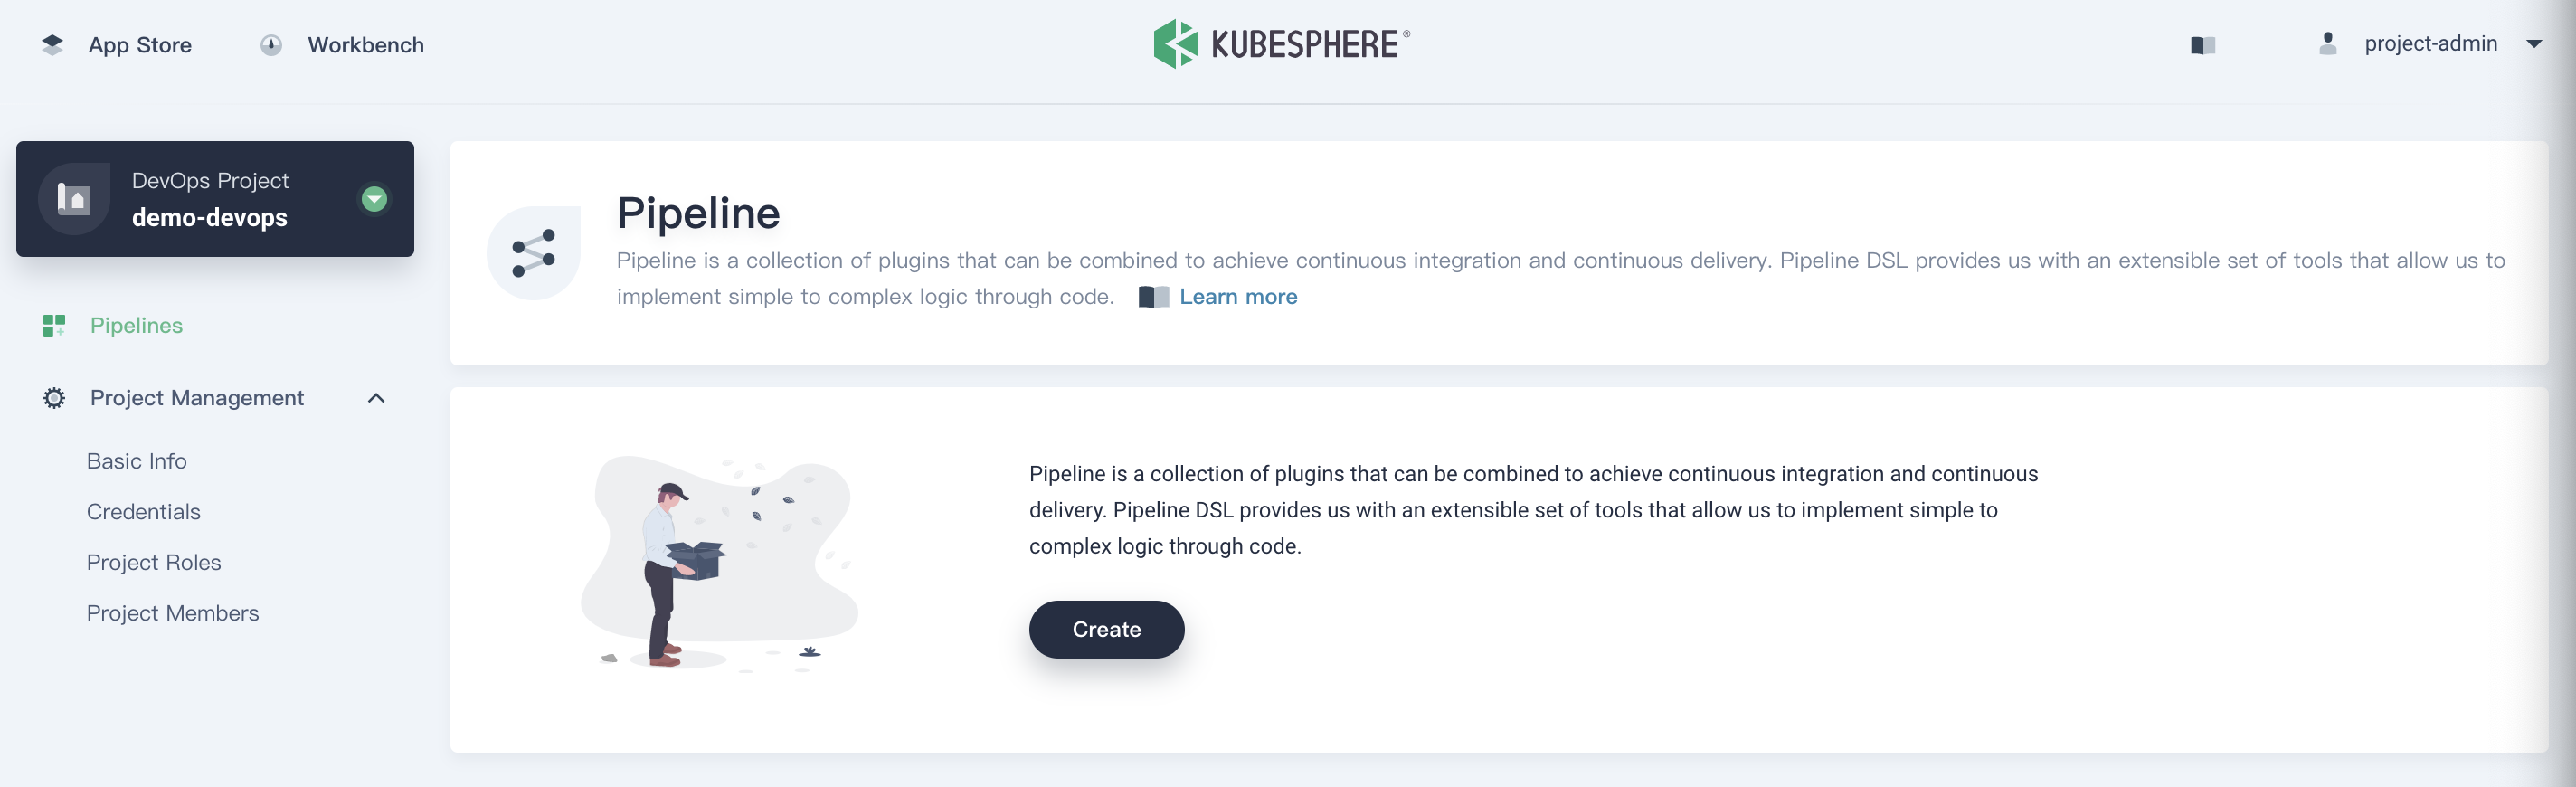
Prerequisite: You need to install KubeSphere DevOps system, which is a pluggable component providing CI/CD pipeline, Binary-to-image and Source-to-image features.
4.1. We still use the account project-admin to demonstrate this task. Click Workbench and click Create button, then select Create a DevOps project.
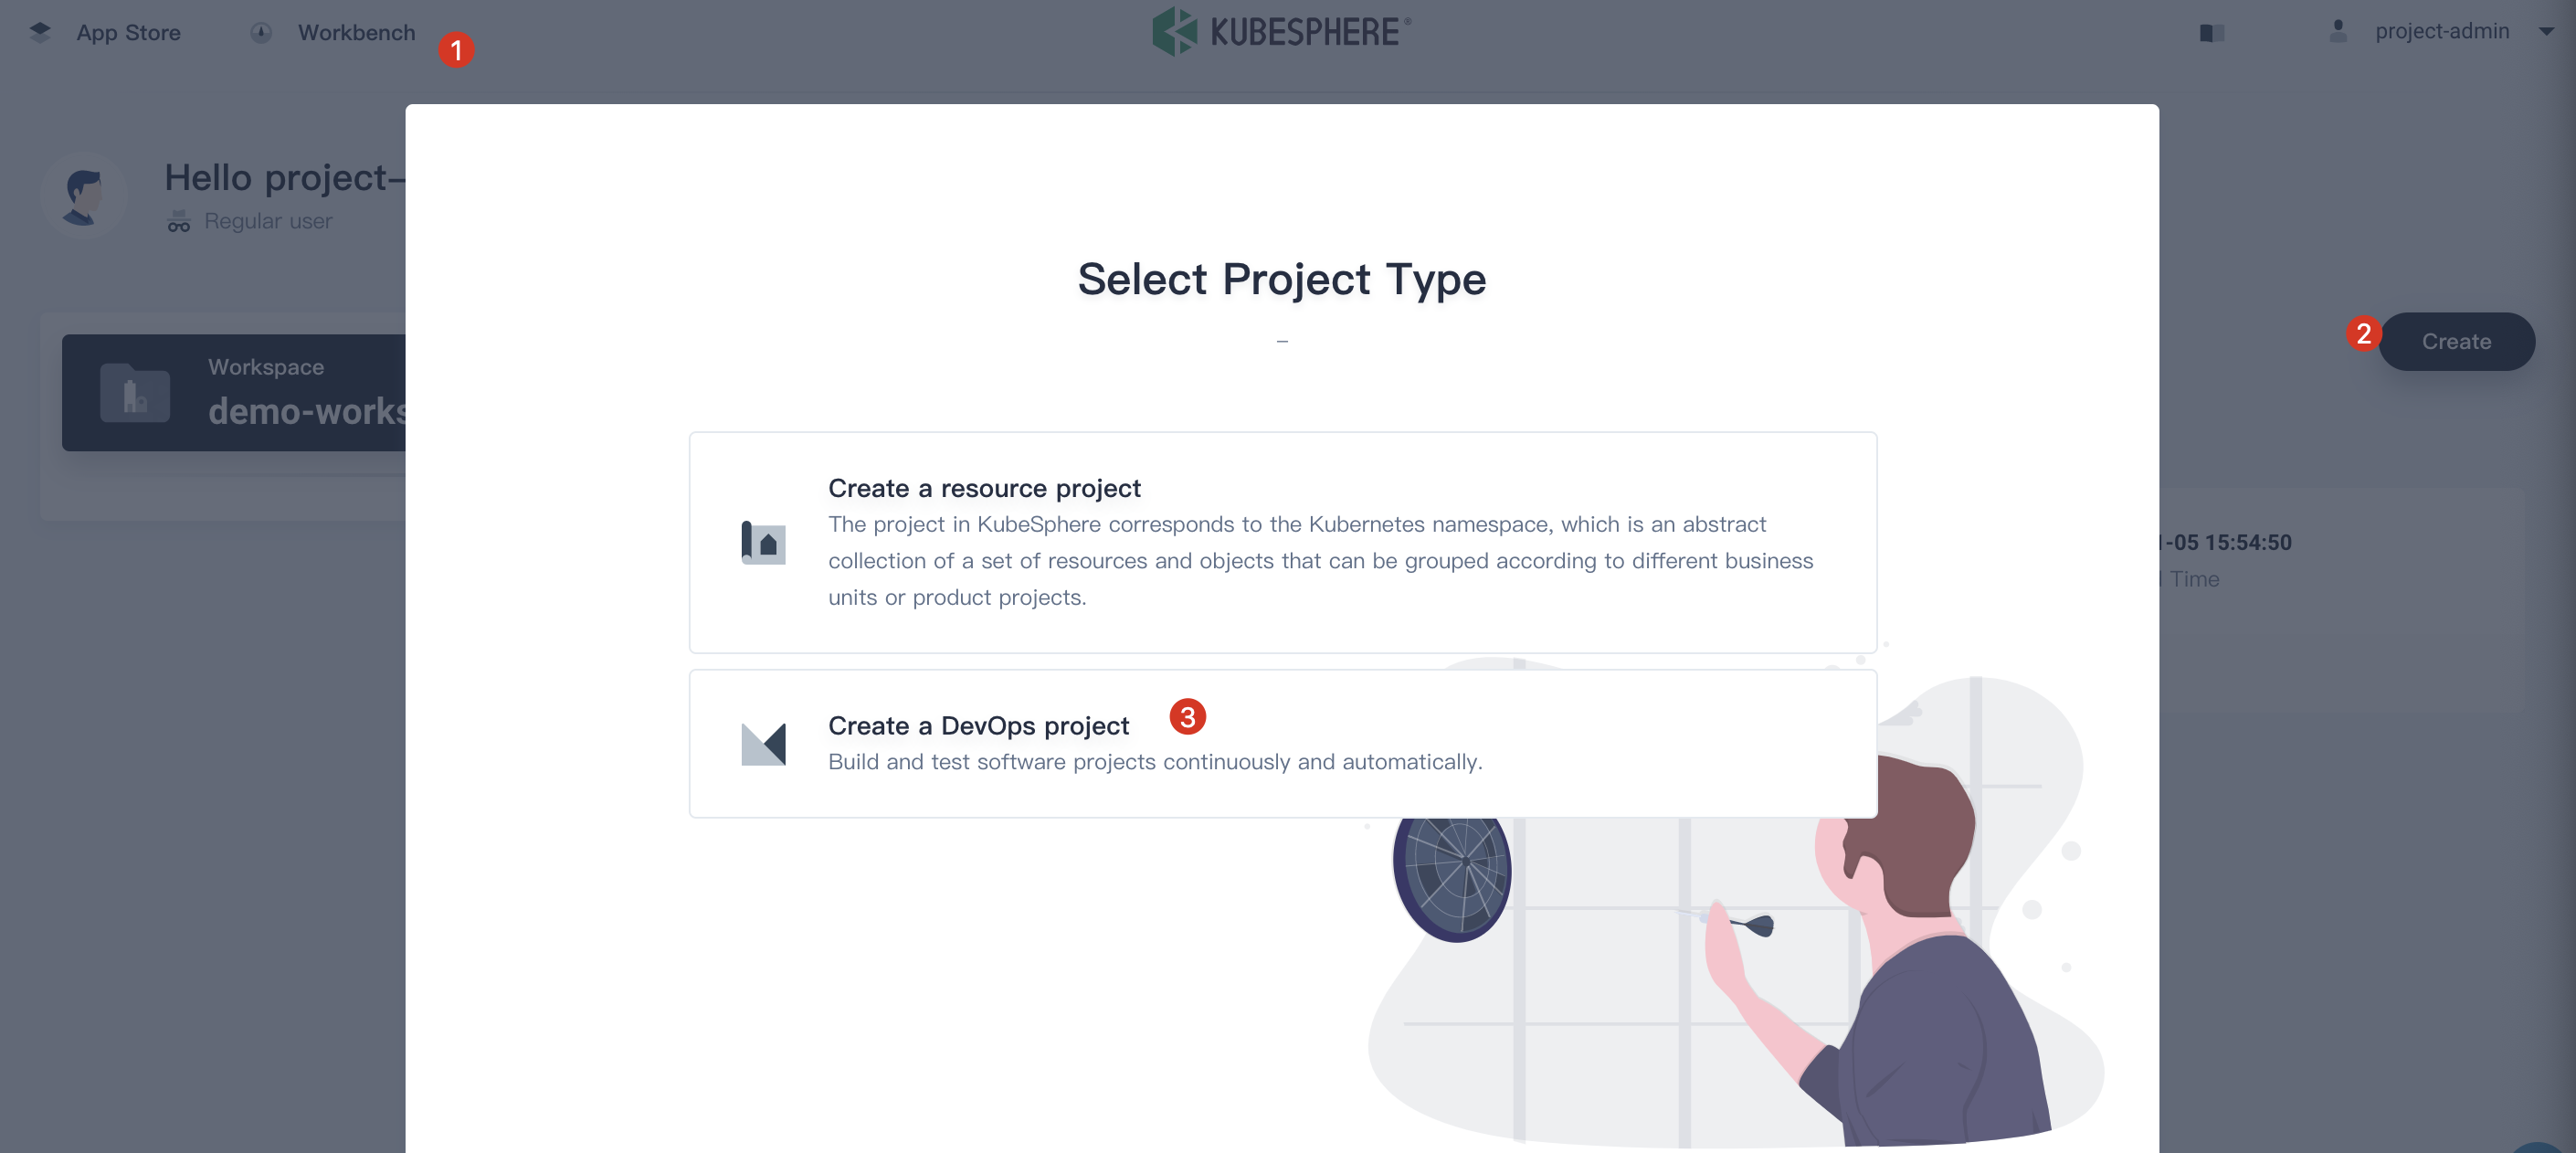
4.2. Fill in the basic information, e.g. name it demo-devops, then click Create button. It will take a while to initialize before switching to demo-devops page.
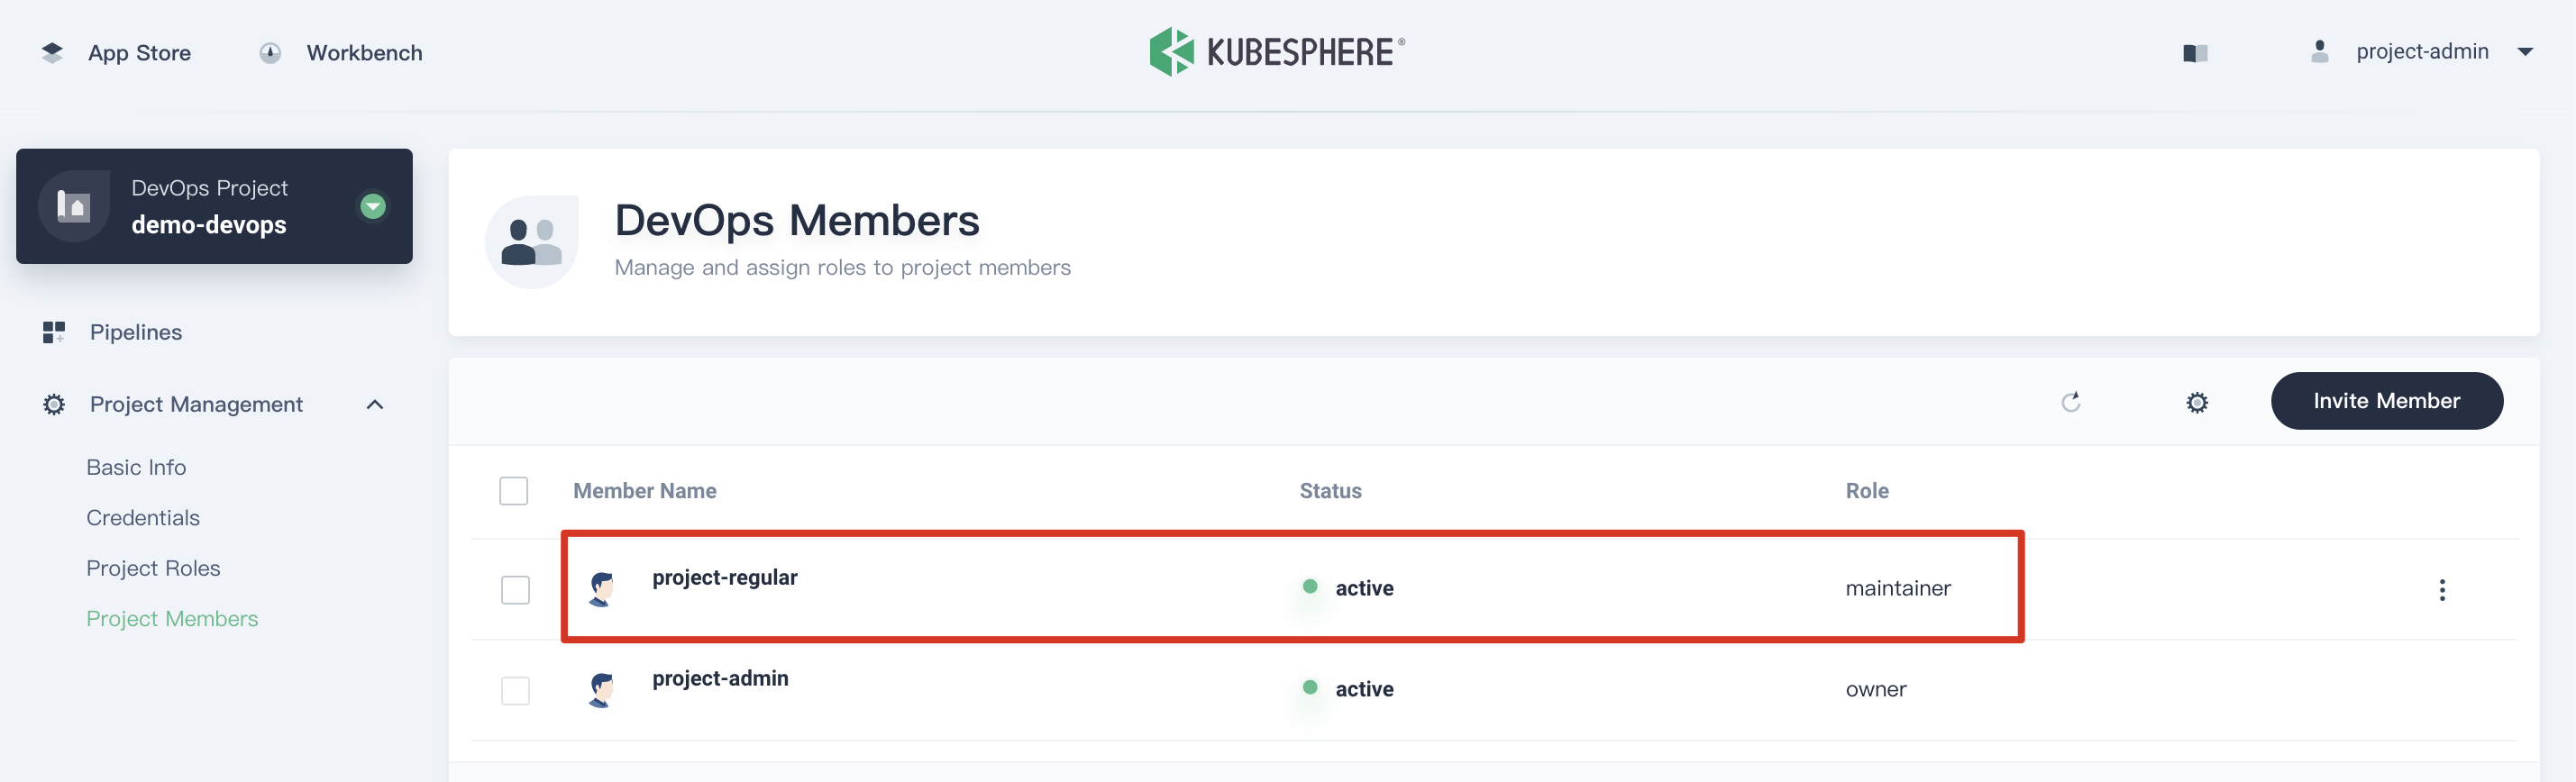
4.3. Similarly, navigate to Project Management → Project Members, then click Invite Member and grant project-regular the role of maintainer, which is allowed to create pipeline, credentials, etc.
Congratulations! You've been familiar with KubeSphere multi-tenant management mechanism. In the next few tutorials, we will use the account project-regular to demonstrate how to create applications and resources under the project and the DevOps project.