Release Notes
Installation
Install on Linux
Install on Kubernetes
Pluggable Components
Upgrade
Third-Party Tools
Authentication Integration
Cluster Operations
Quick Start
DevOps
User Guide
Configration Center
Logging
Developer Guide
API Documentation
Troubleshooting
FAQ
Multi-node Installation
EditMulti-Node installation enables installing KubeSphere on multiple nodes. Typically, use any one node as taskbox to run the installation task. Please note ssh communication is required to be established between taskbox and other nodes.
- The following instructions are for the default installation without enabling any optional components as we have made them pluggable since v2.1.0. If you want to enable any one, please read Enable Pluggable Components.
- If your machines in total have >= 8 cores and >= 16G memory, we recommend you to install the full package of KubeSphere by Enabling Optional Components.
- The installation time depends on your network bandwidth, your computer configuration, the number of nodes, etc.
Prerequisites
If your machine is behind a firewall, you need to open the ports by following the document Ports Requirements for more information.
Step 1: Prepare Linux Hosts
The following describes the requirements of hardware and operating system. To get started with multi-node installation, you need to prepare at least three hosts according to the following requirements.
- Time synchronization is required across all nodes, otherwise the installation may not succeed;
- For
Ubuntu 16.04OS, it is recommended to select16.04.5; - If you are using
Ubuntu 18.04, you need to use the userroot; - If the Debian system does not have the sudo command installed, you need to execute
apt update && apt install sudocommand using root before installation.
Hardware Recommendation
- KubeSphere can be installed on any cloud platform.
- The installation speed can be accelerated by increasing network bandwidth.
- If you choose air-gapped installation, ensure your disk of each node is at least 100G.
| System | Minimum Requirements (Each node) |
|---|---|
| CentOS 7.4 ~ 7.7 (64 bit) | CPU:2 Core, Memory:4 G, Disk Space:40 G |
| Ubuntu 16.04/18.04 LTS (64 bit) | CPU:2 Core, Memory:4 G, Disk Space:40 G |
| Red Hat Enterprise Linux Server 7.4 (64 bit) | CPU:2 Core, Memory:4 G, Disk Space:40 G |
| Debian Stretch 9.5 (64 bit) | CPU:2 Core, Memory:4 G, Disk Space:40 G |
The following section describes an example to introduce multi-node installation. This example shows three hosts installation by taking the master serving as the taskbox to execute the installation. The following cluster consists of one Master and two Nodes.
Note: KubeSphere supports the high-availability configuration of the Masters and Etcd nodes. Please refer to Creating High Availability KubeSphere Cluster for guide.
| Host IP | Host Name | Role |
|---|---|---|
| 192.168.0.1 | master | master, etcd |
| 192.168.0.2 | node1 | node |
| 192.168.0.3 | node2 | node |
Cluster Architecture
Single Master, Single Etcd, Two Nodes

Step 2: Download Installer Package
1. Download KubeSphere 2.1.1 to your taskbox machine, then unpack it and go to the folder conf.
curl -L https://kubesphere.io/download/stable/latest > installer.tar.gz \
&& tar -zxf installer.tar.gz && cd kubesphere-all-v2.1.1/conf
2. Please refer to the following sample to configure all hosts in hosts.ini. It is recommended to install KubeSphere using root user. The following is an example configuration for CentOS 7.5 using root user. Note do not manually wrap any line in the file.
Note:
- If you use non-root user with sudo access to install KubeSphere, you need to refer to the example block that is commented out in
conf/hosts.ini.- If the
rootuser of that taskbox machine cannot establish SSH connection with the rest of machines, you need to refer to thenon-rootuser example at the top of theconf/hosts.ini, but it is recommended to switchrootuser when executinginstall.sh.- master, node1 and node2 are the host names of each node and all host names should be in lowercase.
hosts.ini
[all]
master ansible_connection=local  ip=192.168.0.1
node1  ansible_host=192.168.0.2  ip=192.168.0.2  ansible_ssh_pass=PASSWORD
node2  ansible_host=192.168.0.3  ip=192.168.0.3  ansible_ssh_pass=PASSWORD

[kube-master]
master

[kube-node]
node1
node2

[etcd]
master

[k8s-cluster:children]
kube-node
kube-master
Note:
- You need to replace each node information such as IP, password with real values in the group
[all]. The master node is the taskbox so you do not need to add password field here.- The "master" node also takes the role of master and etcd, so "master" is filled under the group
[kube-master]and the group[etcd]respectively.- "node1" and "node2" both serve the role of
Node, so they are filled under the group[kube-node].Parameters Specification:
ansible_connection: Connection type to the host, "local" in the example above means local connection.ansible_host: The name of the host to be connected.ip: The ip of the host to be connected.ansible_user: The default ssh user name to use.ansible_become_pass: Allows you to set the privilege escalation password.ansible_ssh_pass: The password of the host to be connected using root.
Step 3: Install KubeSphere to Linux Machines
Note:
- Generally, you can install KubeSphere without any modification, it will start with minimal installation by default.
- If you want to enable pluggable feature components installation, modify common.yaml and refer to Enable Pluggable Components Installation for instructions.
- Installer uses Local volume based on openEBS to provide storage service with dynamic provisioning. For production environment, please configure supported persistent storage service before installation.
- Since the default subnet for Cluster IPs is 10.233.0.0/18, and the default subnet for Pod IPs is 10.233.64.0/18, the node IPs must not use the two IP range. You can modify the default subnets
kube_service_addressesorkube_pods_subnetin the fileconf/common.yamlto avoid conflicts.
1. Enter scripts folder, and execute install.sh using root user:
cd ../cripts
./install.sh
2. Type 2 to select multi-node mode to start the installation. The installer will ask you if you have set up persistent storage service or not. Just type yes since we are going to use local volume.
################################################
         KubeSphere Installer Menu
################################################
*   1) All-in-one
*   2) Multi-node
*   3) Quit
################################################
https://kubesphere.io/               2020-02-24
################################################
Please input an option: 2
3. Verify the multi-node installation:
(1). If "Successful" it returned after install.sh process completed, then congratulation! you are ready to go.
successsful!
#####################################################
###              Welcome to KubeSphere!           ###
#####################################################

Console: http://192.168.0.1:30880
Account: admin
Password: P@88w0rd

NOTE:Please modify the default password after login.
#####################################################
Note: The information above is saved in a log file that you can view by following the guide.
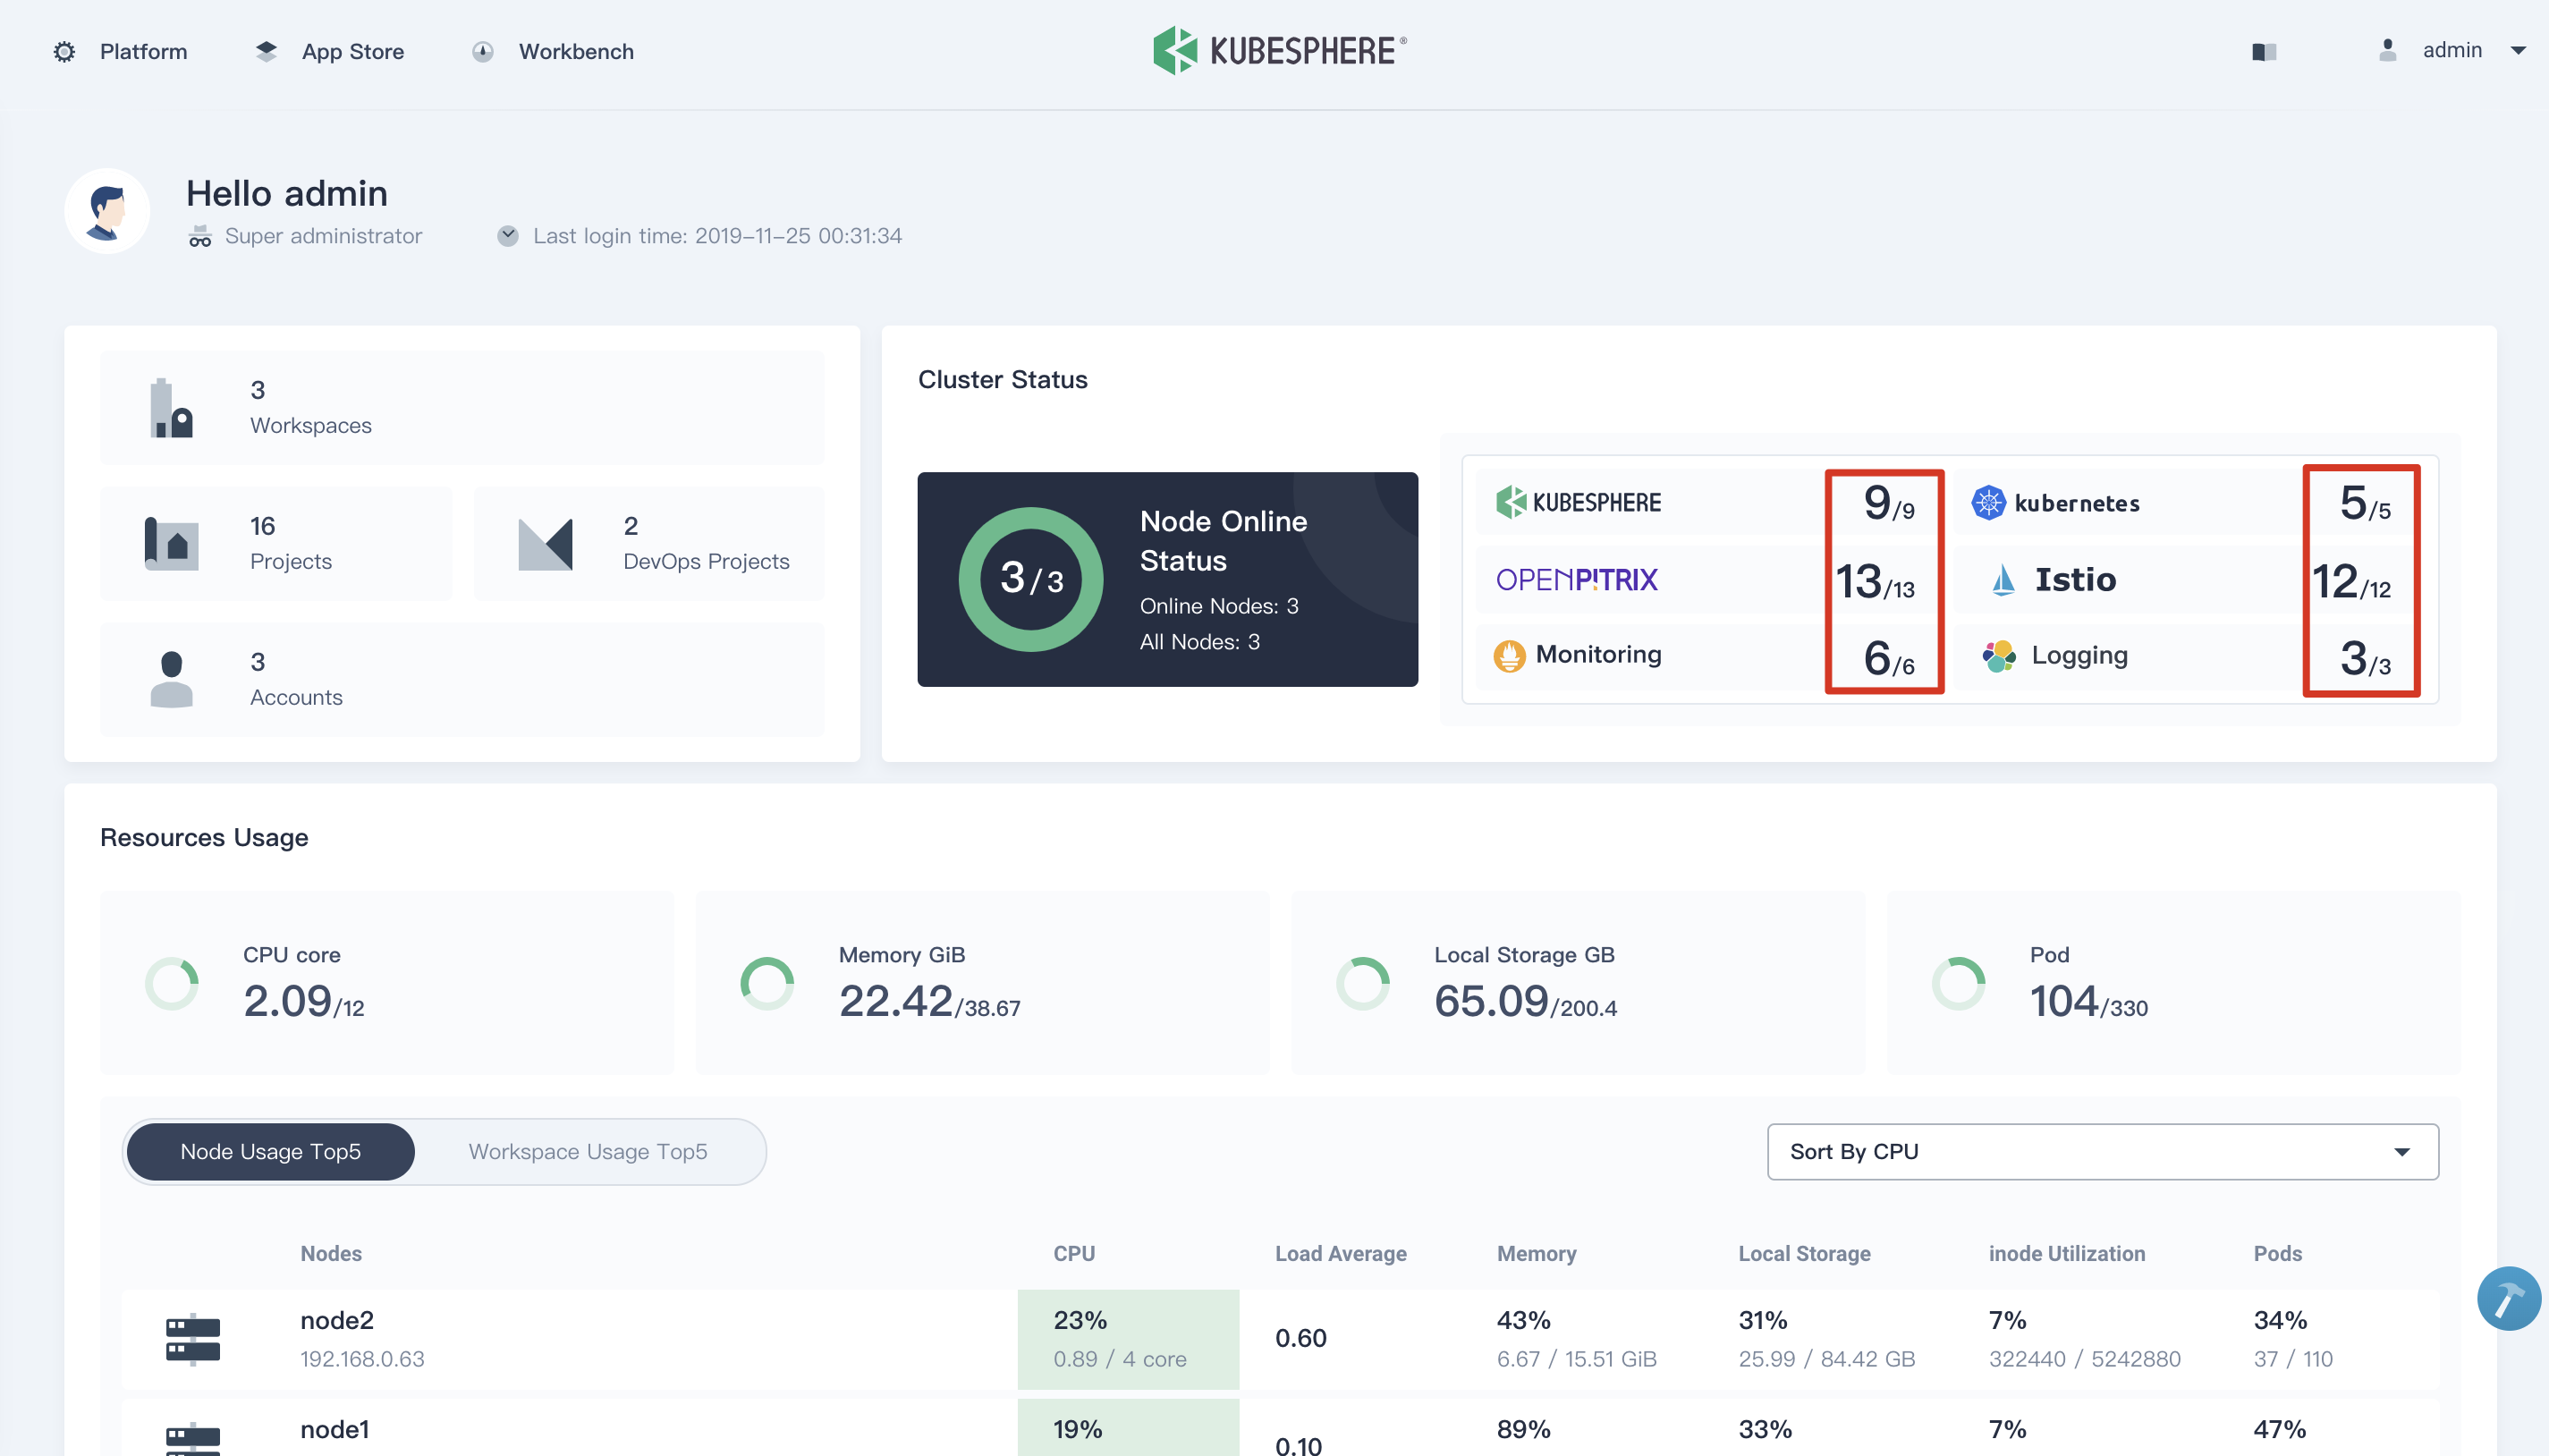
(2). You will be able to use default account and password admin / P@88w0rd to log in the console http://{$IP}:30880 to take a tour of KubeSphere. Please change the default password after logging in.
Note: After log in console, please verify the monitoring status of service components in the "Cluster Status". If any service is not ready, please wait patiently untill all components get running up.
FAQ
The installer has been tested on Aliyun, AWS, Huawei Cloud, QingCloud, Tencent Cloud. Please check the results for details. Also please read the FAQ of installation.
If you have any further questions please do not hesitate to file issues on GitHub.