v2.1
v2.0
v1.0
Release Notes
Installation
Install on Linux
Install on Kubernetes
Pluggable Components
Upgrade
Third-Party Tools
Authentication Integration
Cluster Operations
Quick Start
DevOps
User Guide
Configration Center
Logging
Developer Guide
API Documentation
Troubleshooting
FAQ
KubeSphere®️ 2020 All Rights Reserved.
Access SonarQube Console and Create Token
EditFetch SonarQube NodePort
Execute the following command to get SonarQube NodePort. As you can see 31359 is returned in this example:
$ kubectl get svc -n kubesphere-devops-system | grep ks-sonarqube-sonarqube
ks-sonarqube-sonarqube               NodePort    10.233.20.169   <none>        9000:31359/TCP   48m
Access SonarQube Console
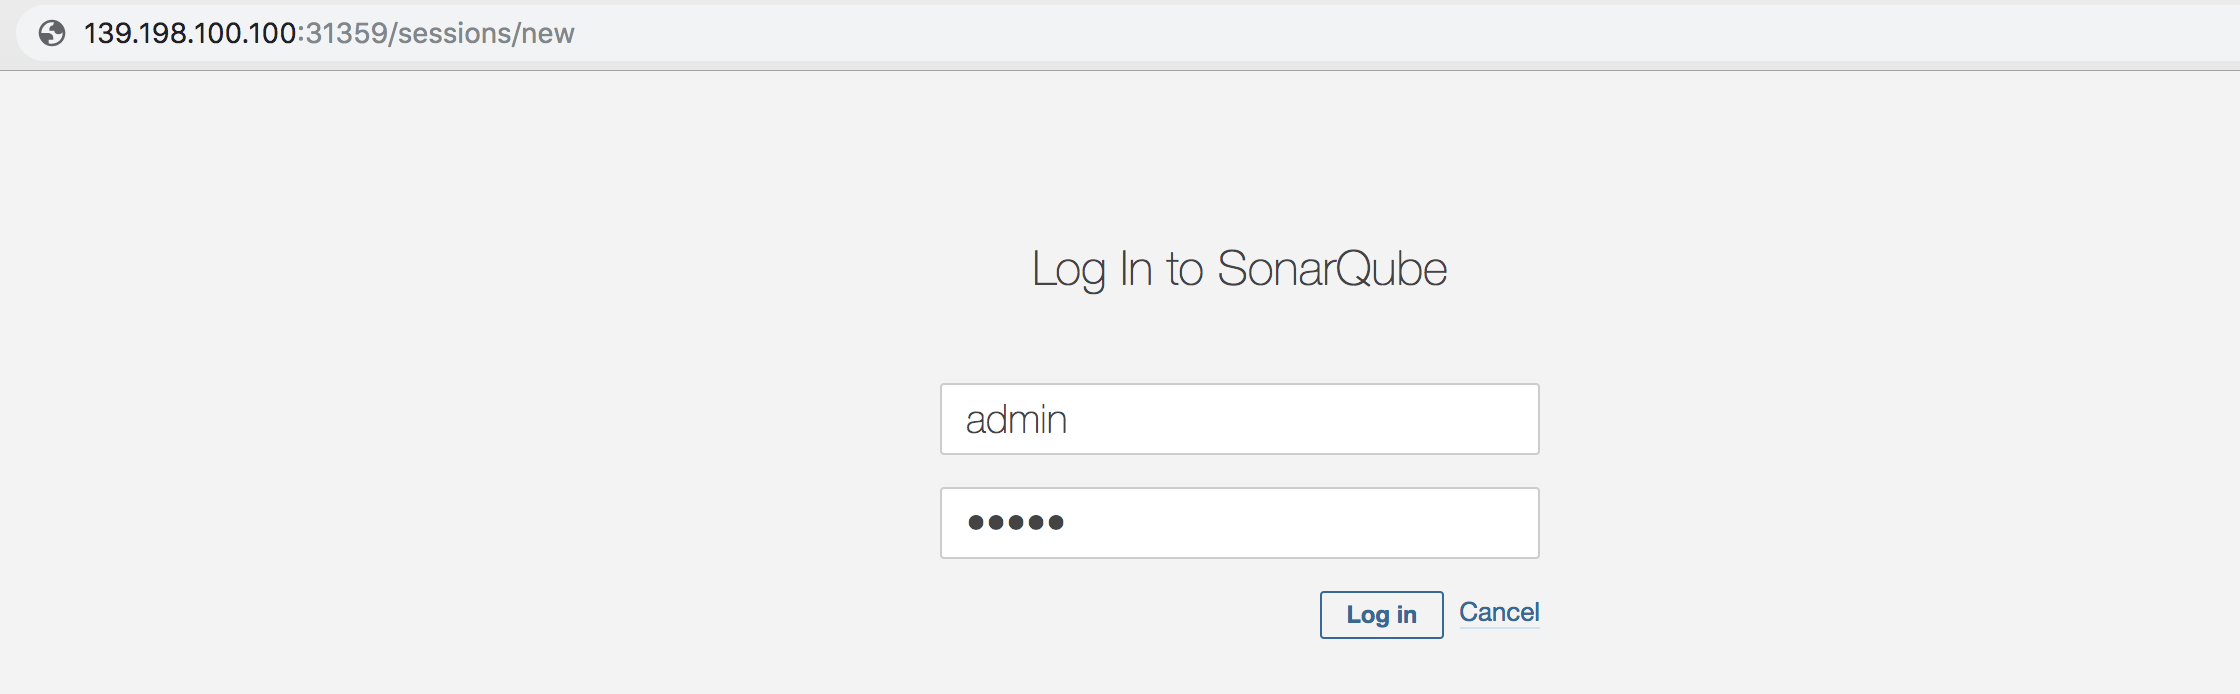
Now access SonarQube console http://{$Node IP}:{$NodePort} in your browser using the default account admin / admin.
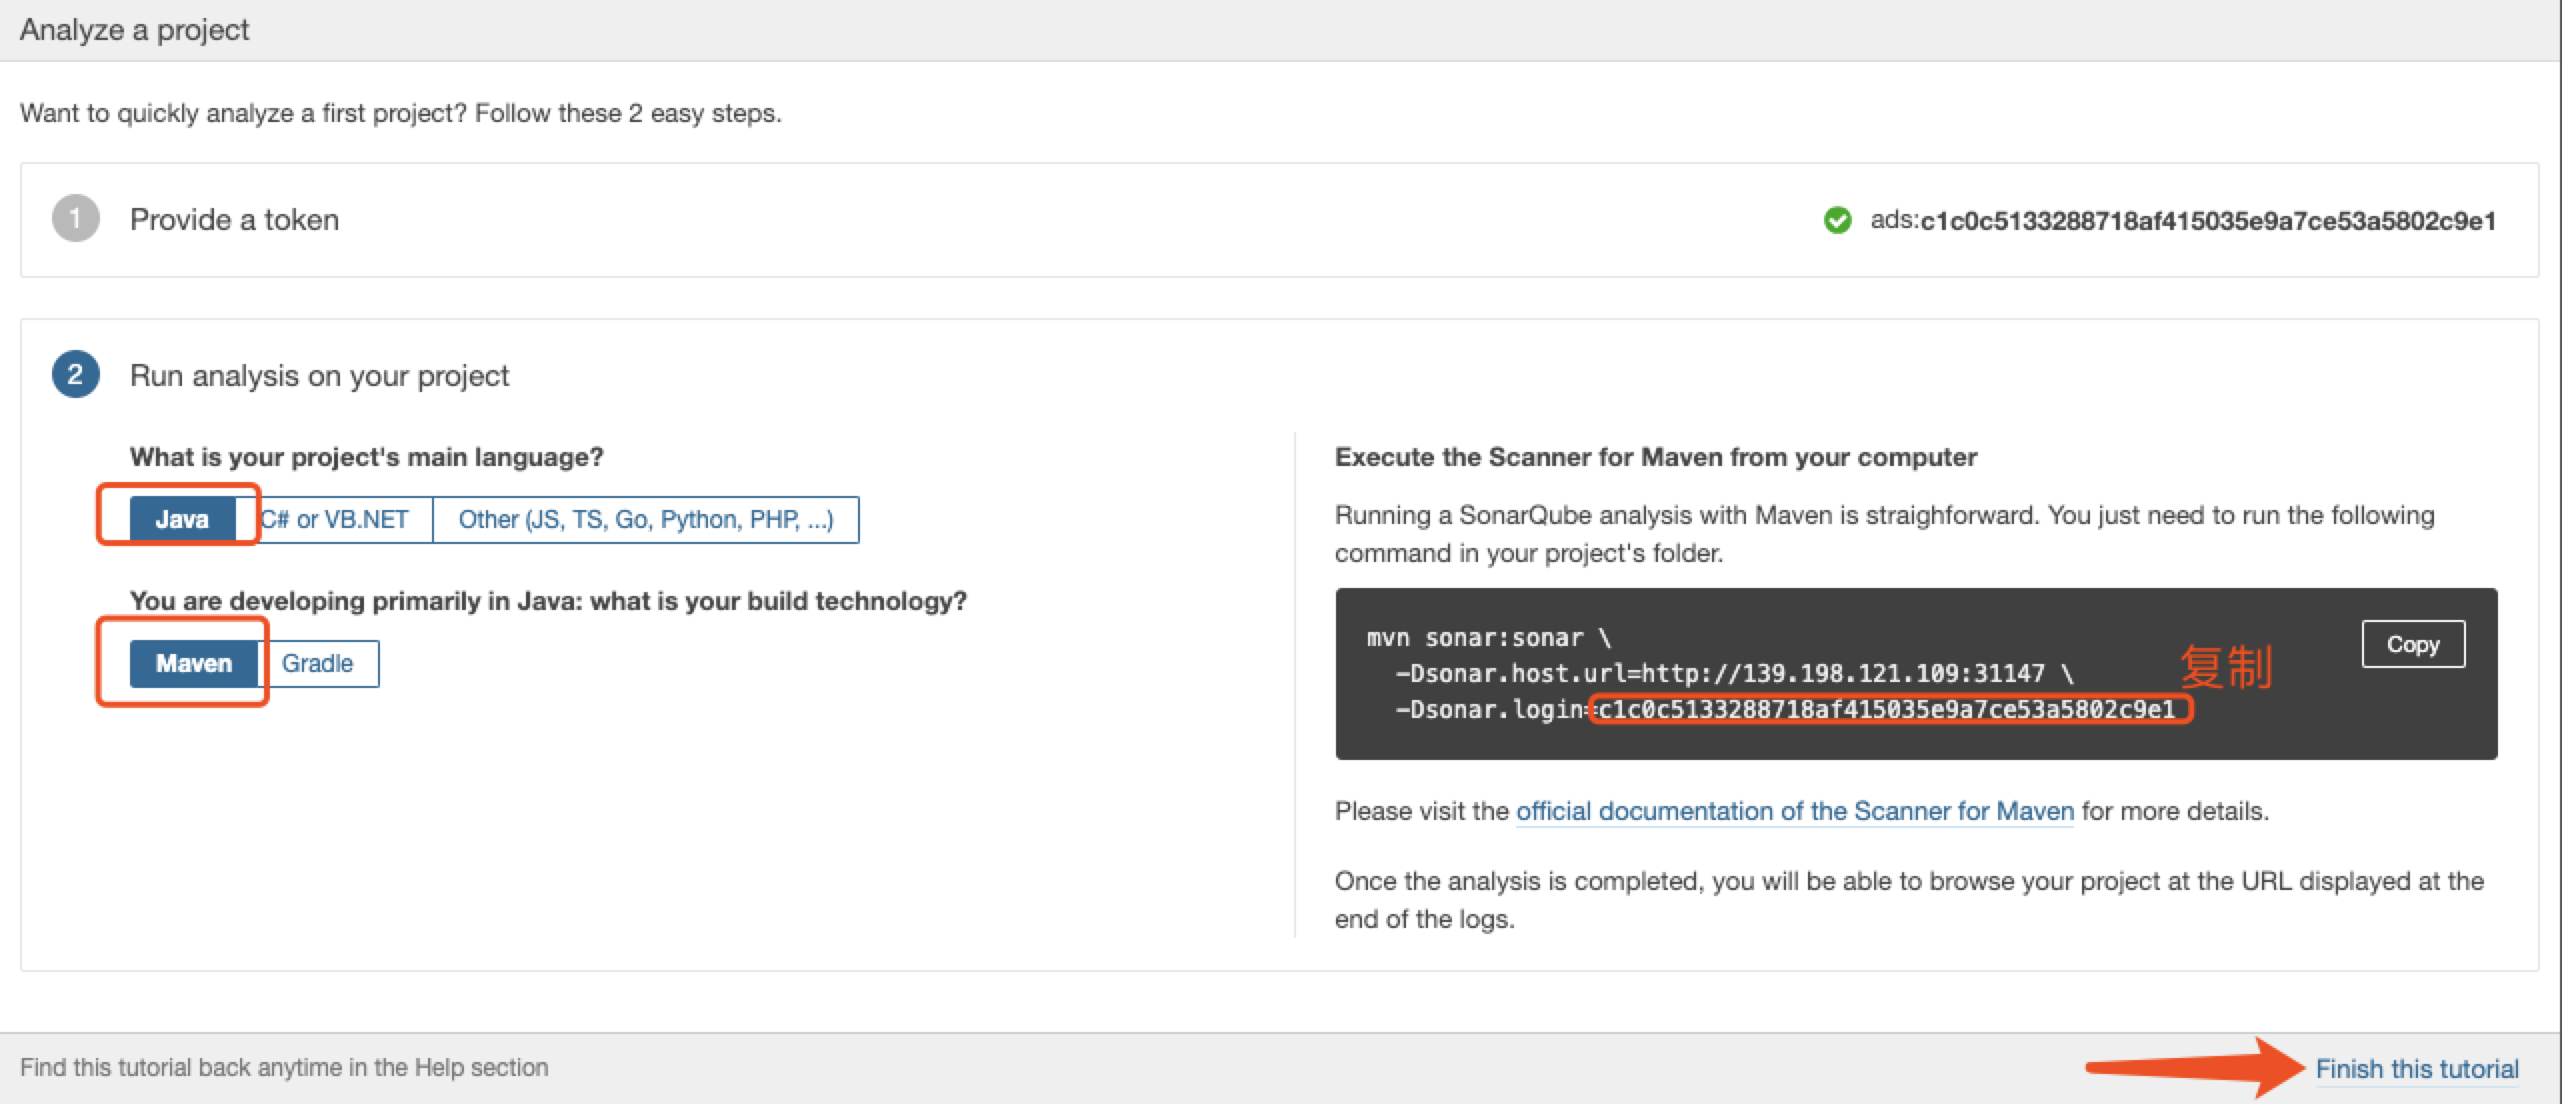
Create SonarQube Token
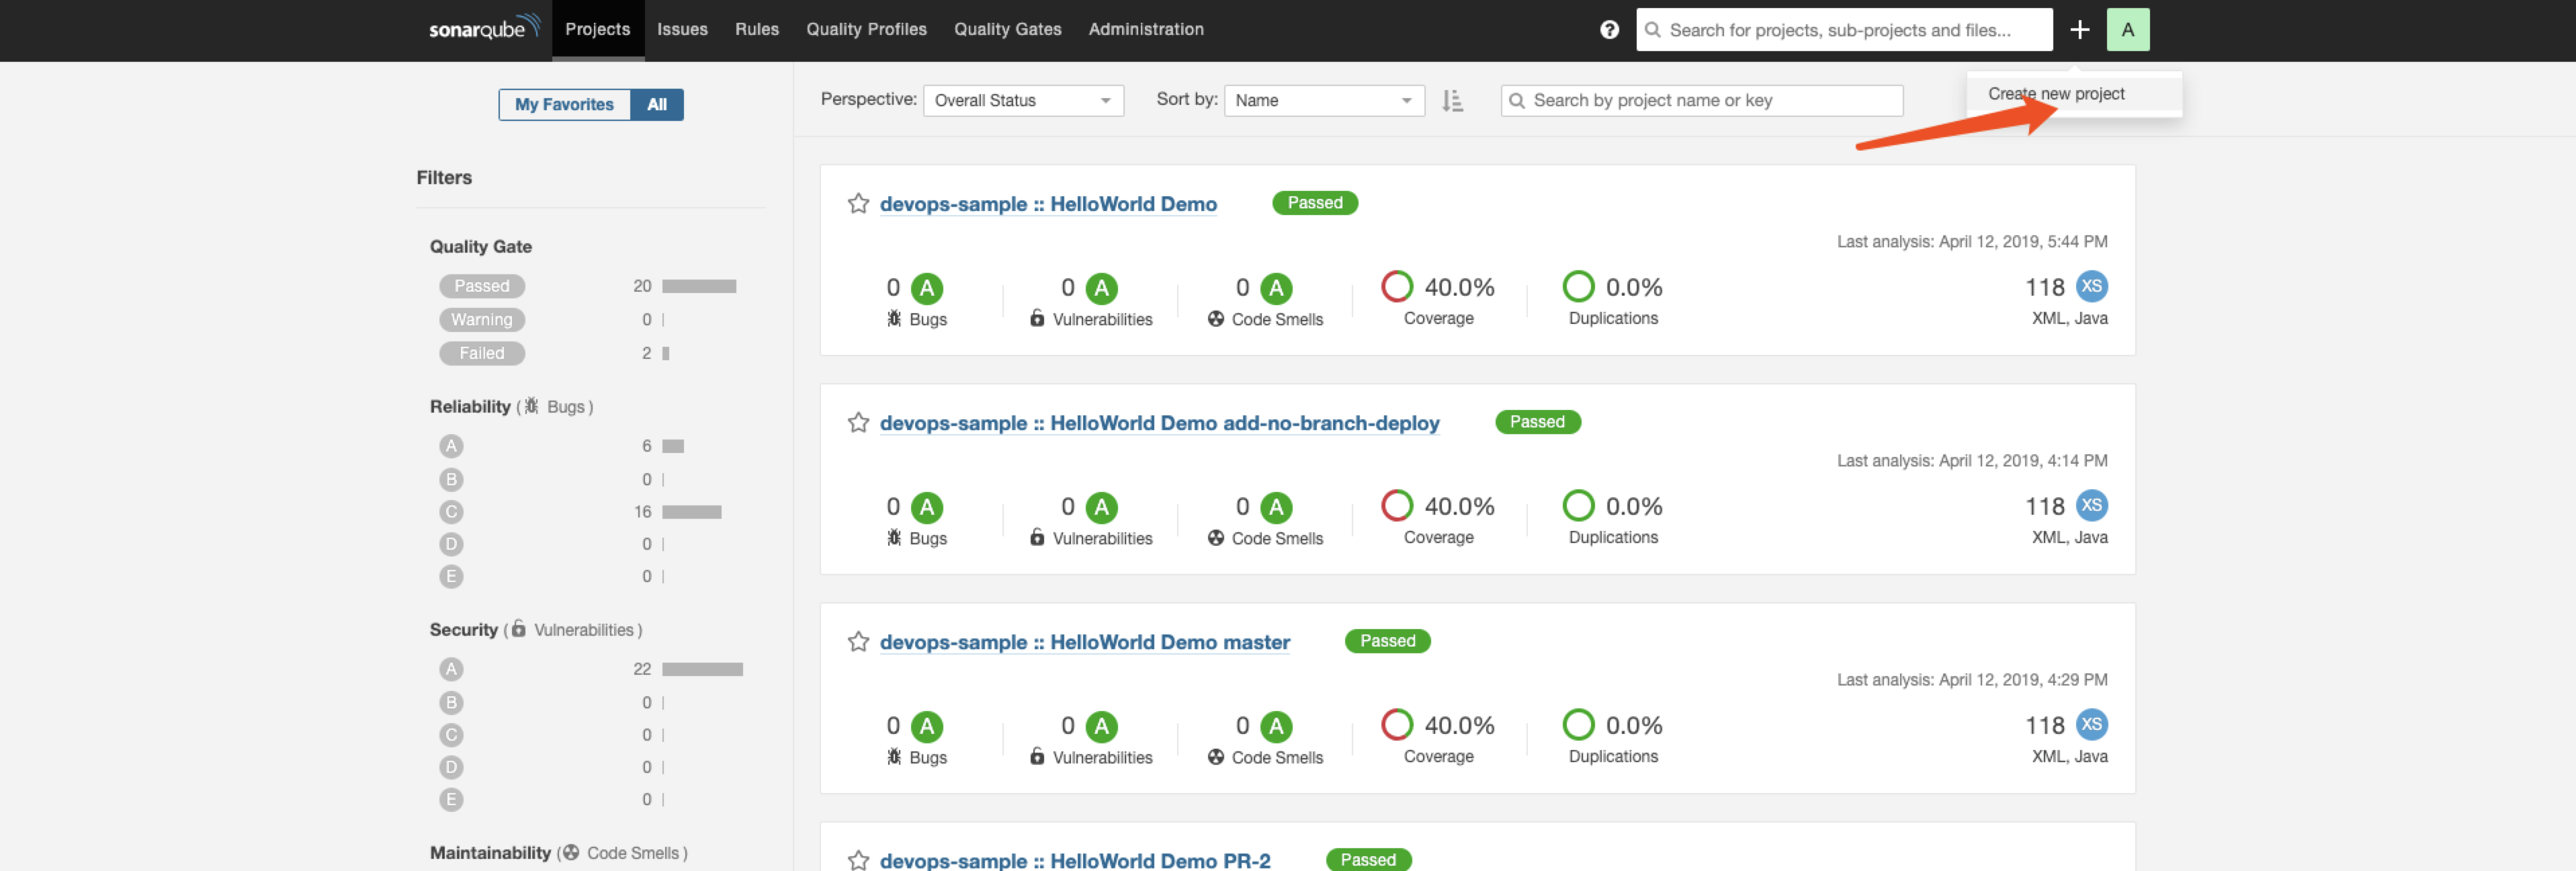
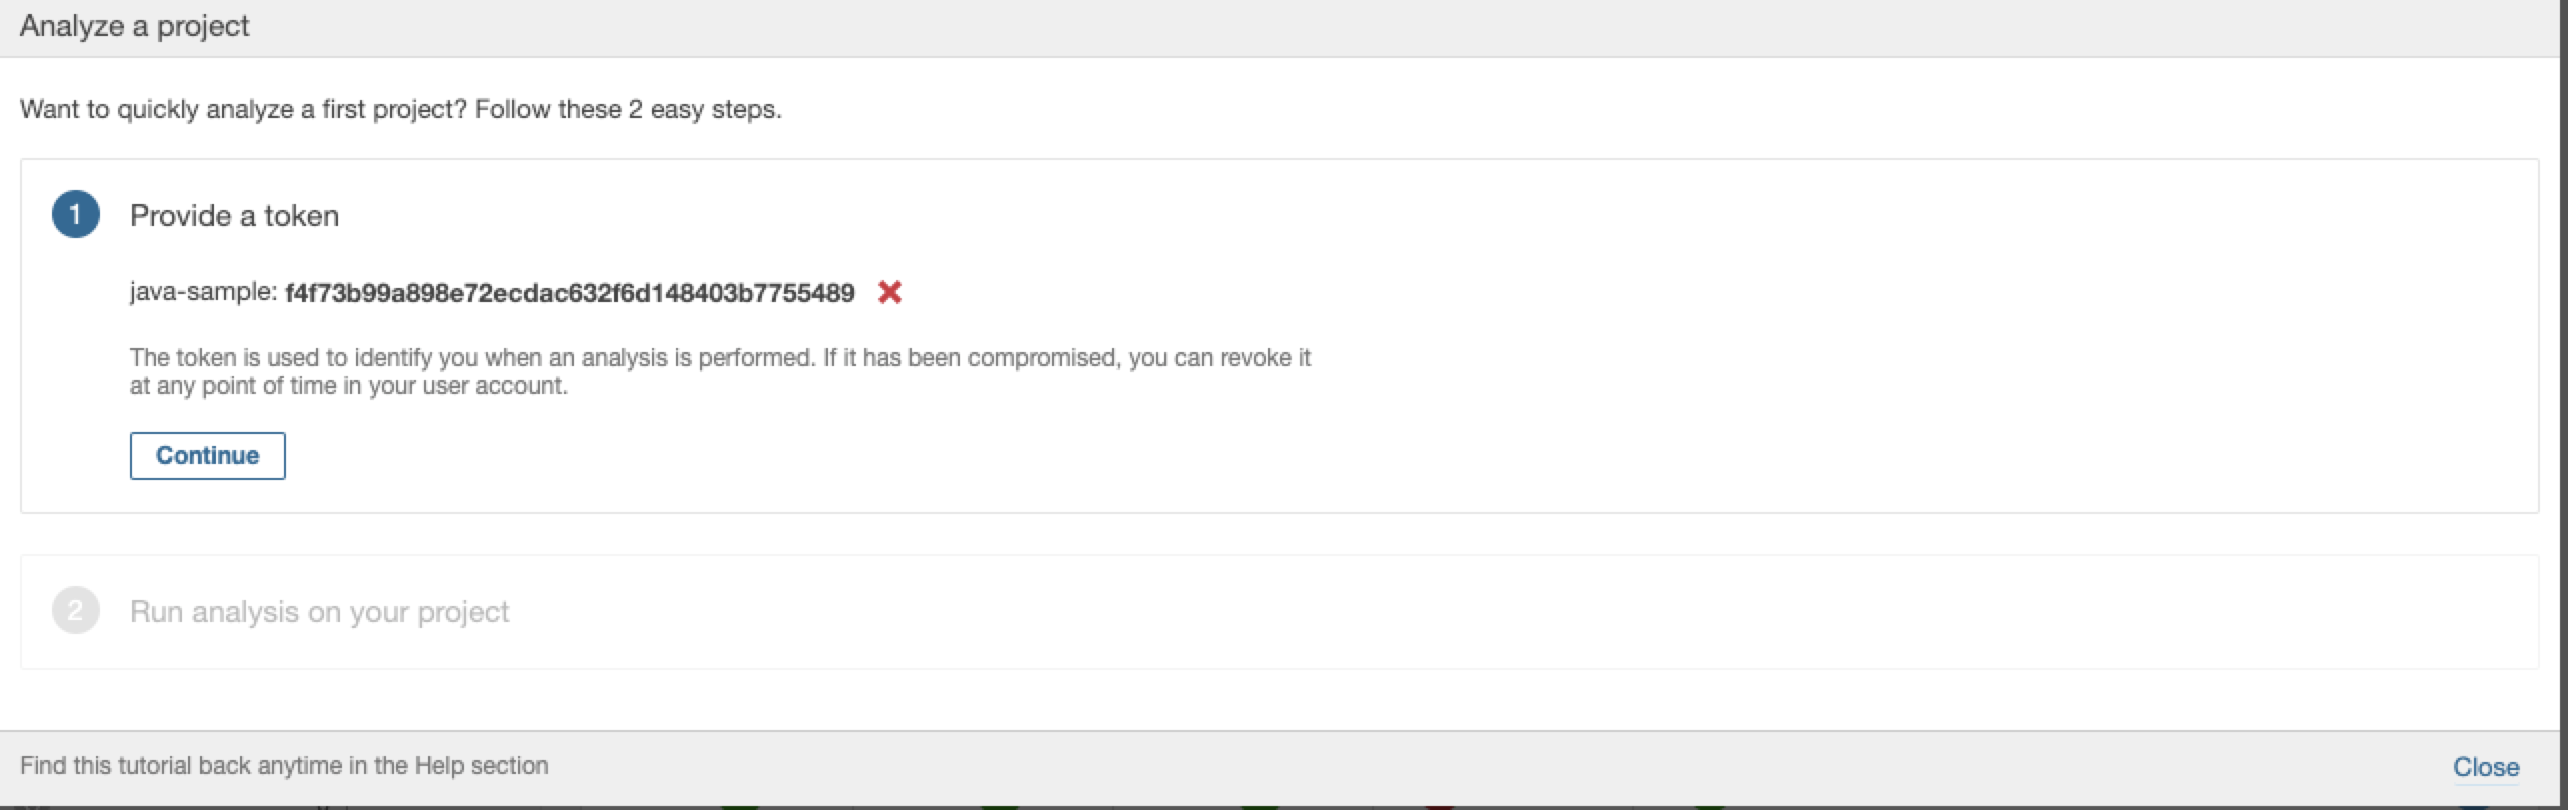
- Click Create new project then a pop-up page Analyze a project shows up.

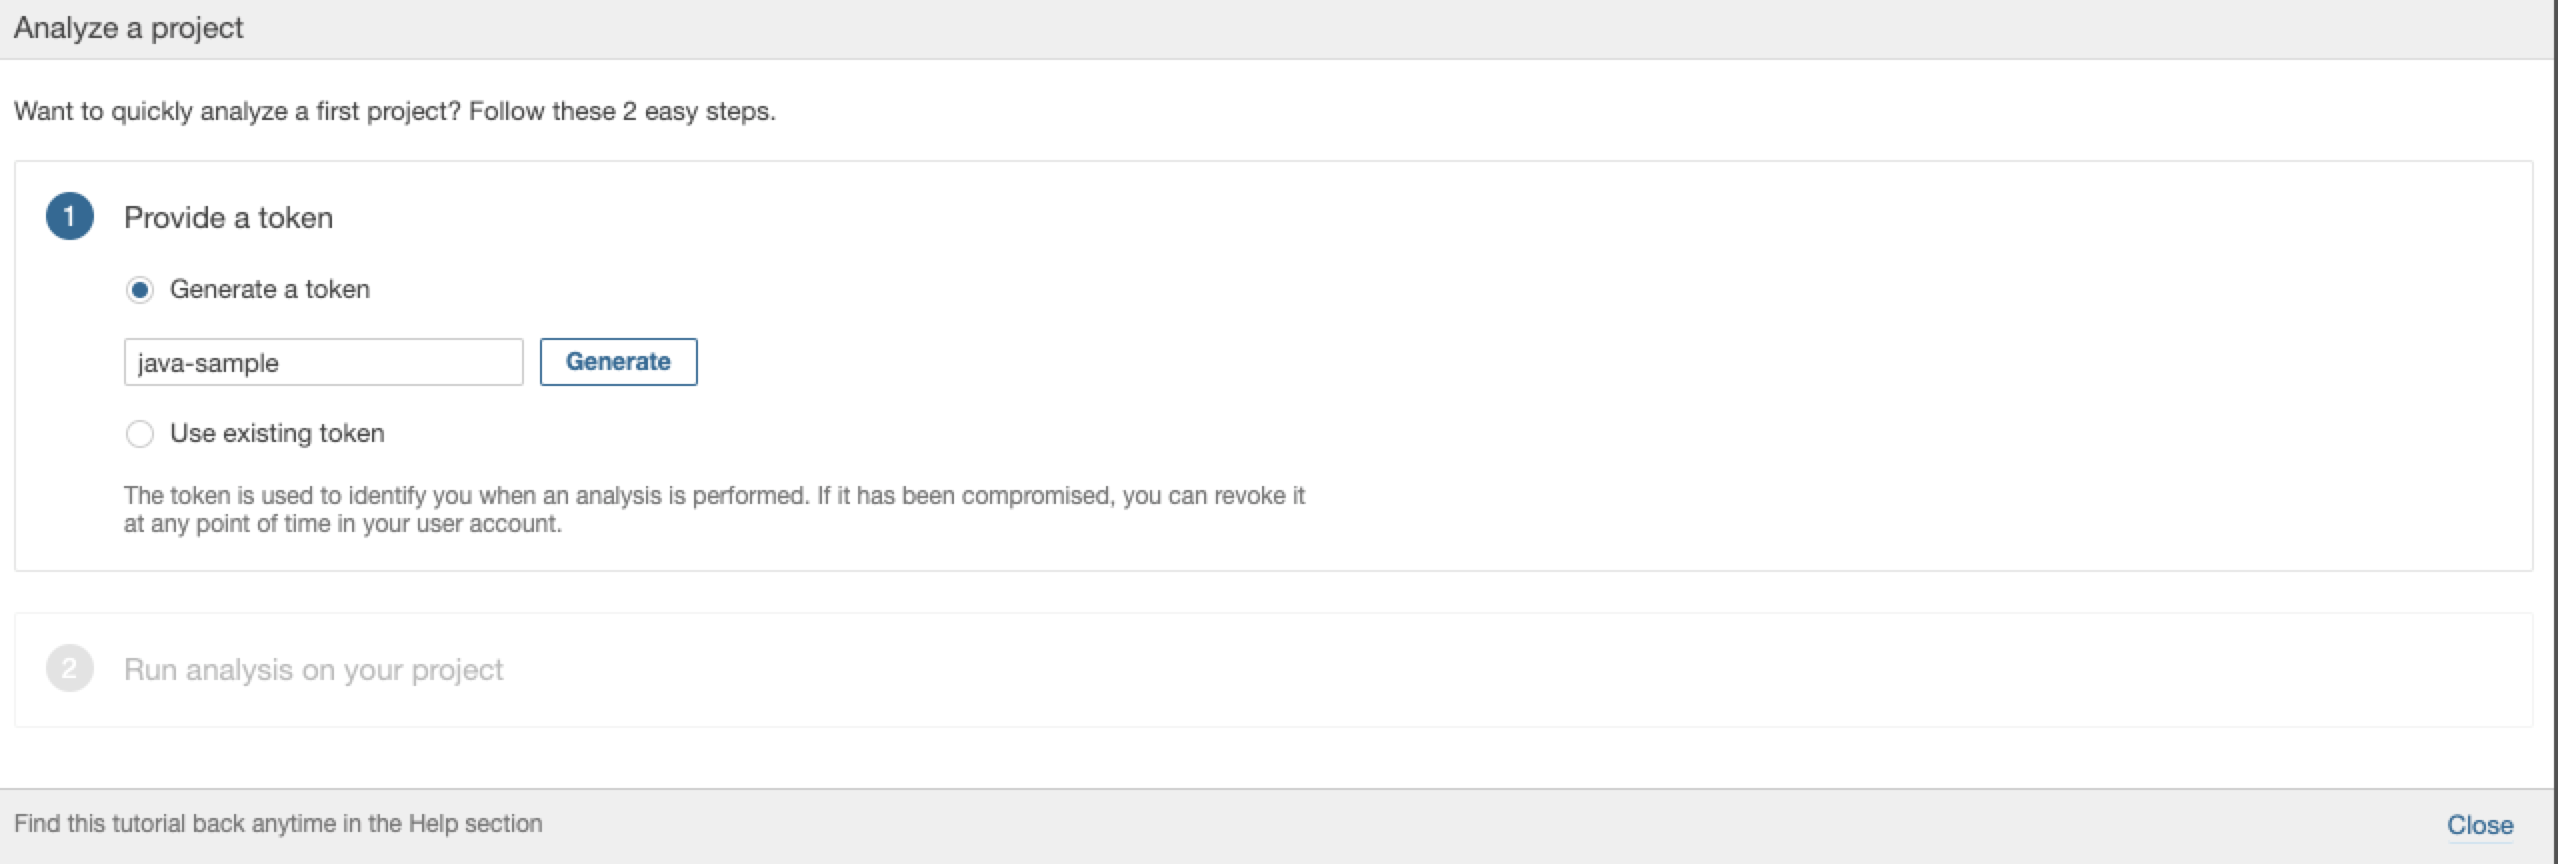
- Enter a project name like
java-sample,then click Generate.
- At this point, we have got token as follows. Click Continue.
- Select language Java and build technology Maven, then copy the string in the red rectangle of the black box and click Finish this tutorial. Then you can go back to the DevOps pipeline tutorial.