Release Notes
Installation
Install on Linux
Install on Kubernetes
Pluggable Components
Upgrade
Third-Party Tools
Authentication Integration
Cluster Operations
Quick Start
DevOps
User Guide
Configration Center
Logging
Developer Guide
API Documentation
Troubleshooting
FAQ
Credentials Management
EditA DevOps project user can configure credentials for Jenkins Pipeline. Once a user (e.g. Owner and Maintainer) adds/configures these credentials in DevOps project, the credentials can be used by DevOps projects to interact with these third-party applications.
Currently, it can store the following 4 types of credentials in DevOps project:
- Account credentials: Username and password - which could be handled as separate components or as a colon separated string in the format username:password, such as GitHub, GitLab, Docker Hub, etc.
- SSH: Username with private key - an SSH public/private key pair.
- Secret text: Secret content in a file.
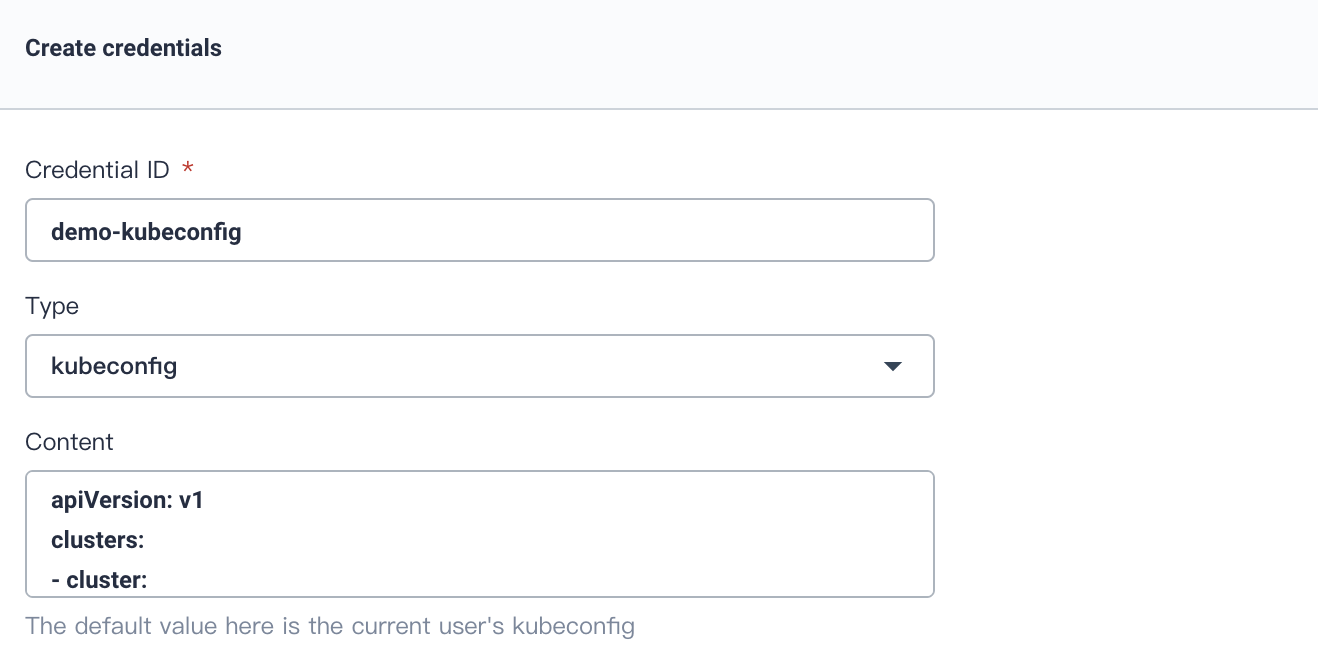
- kubeconfig: It's used to configure cross-cluster authentication, the page will automatically generate the contents of the kubeconfig file of the current Kubernetes cluster.
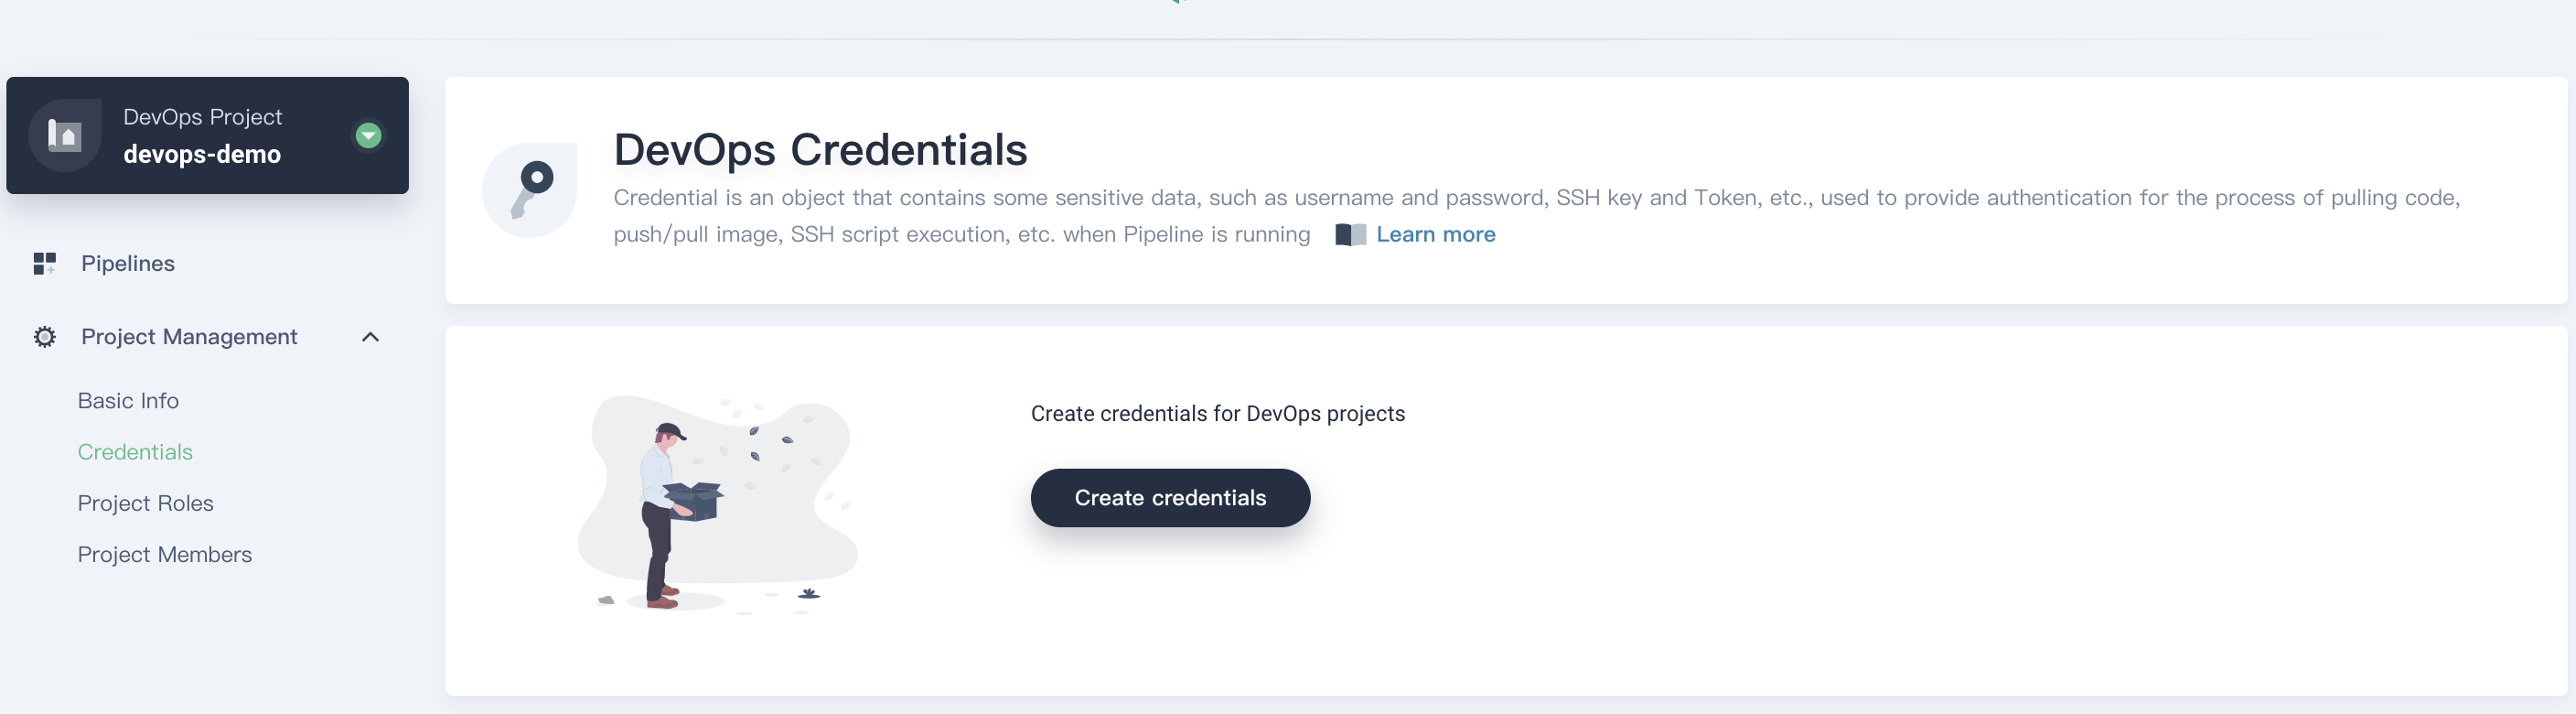
Create Credential
Sign in with project-regular, choose Credentials and click Create Credential.
Create Credential for DockerHub
-
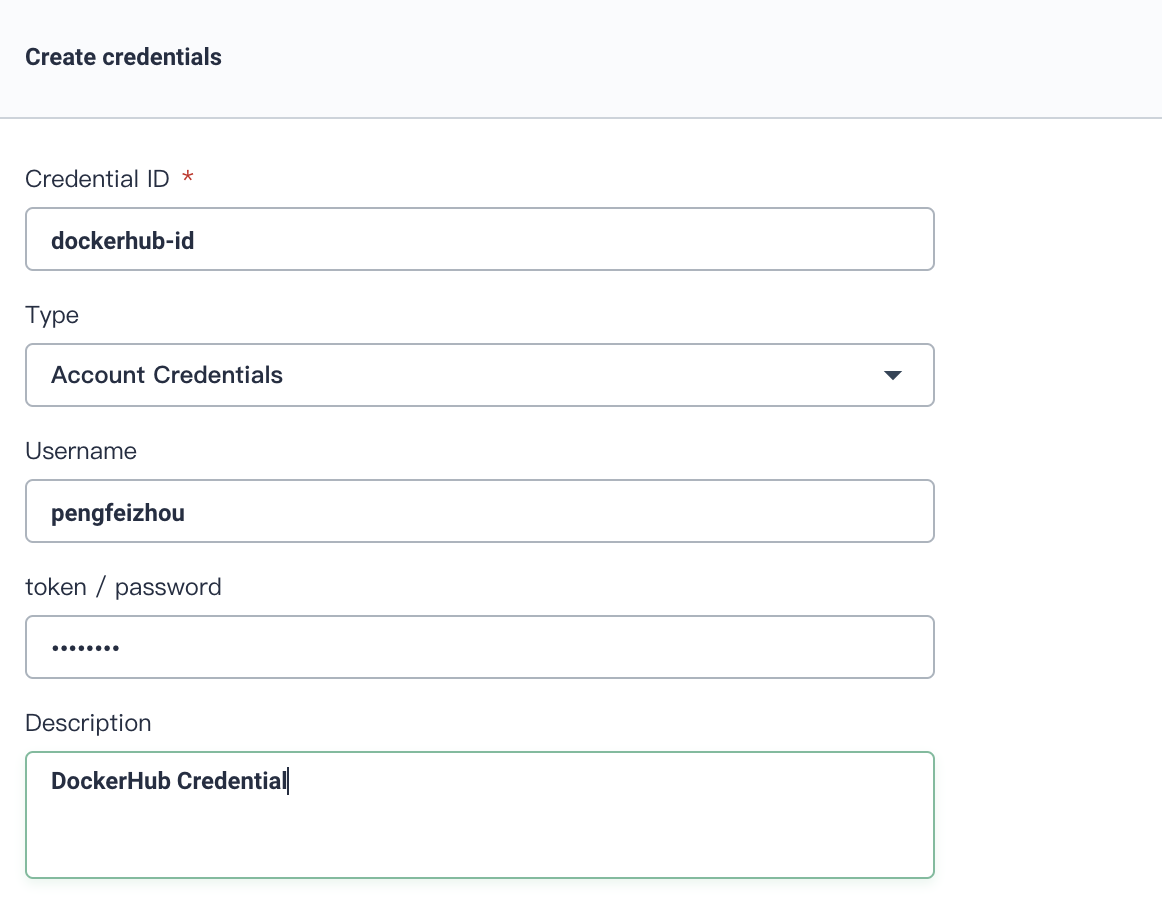
Click Create, fill in the basic information in the pop-up window.
-
Credential ID: it will be used in pipeline, name it dockerhub-id
-
Type: Choose
Account Credentials -
Username: Your DockerHub account
-
Token/password: Your DockerHub password
-
Description: A brief introduction to this credential.
Click OK when you've done.
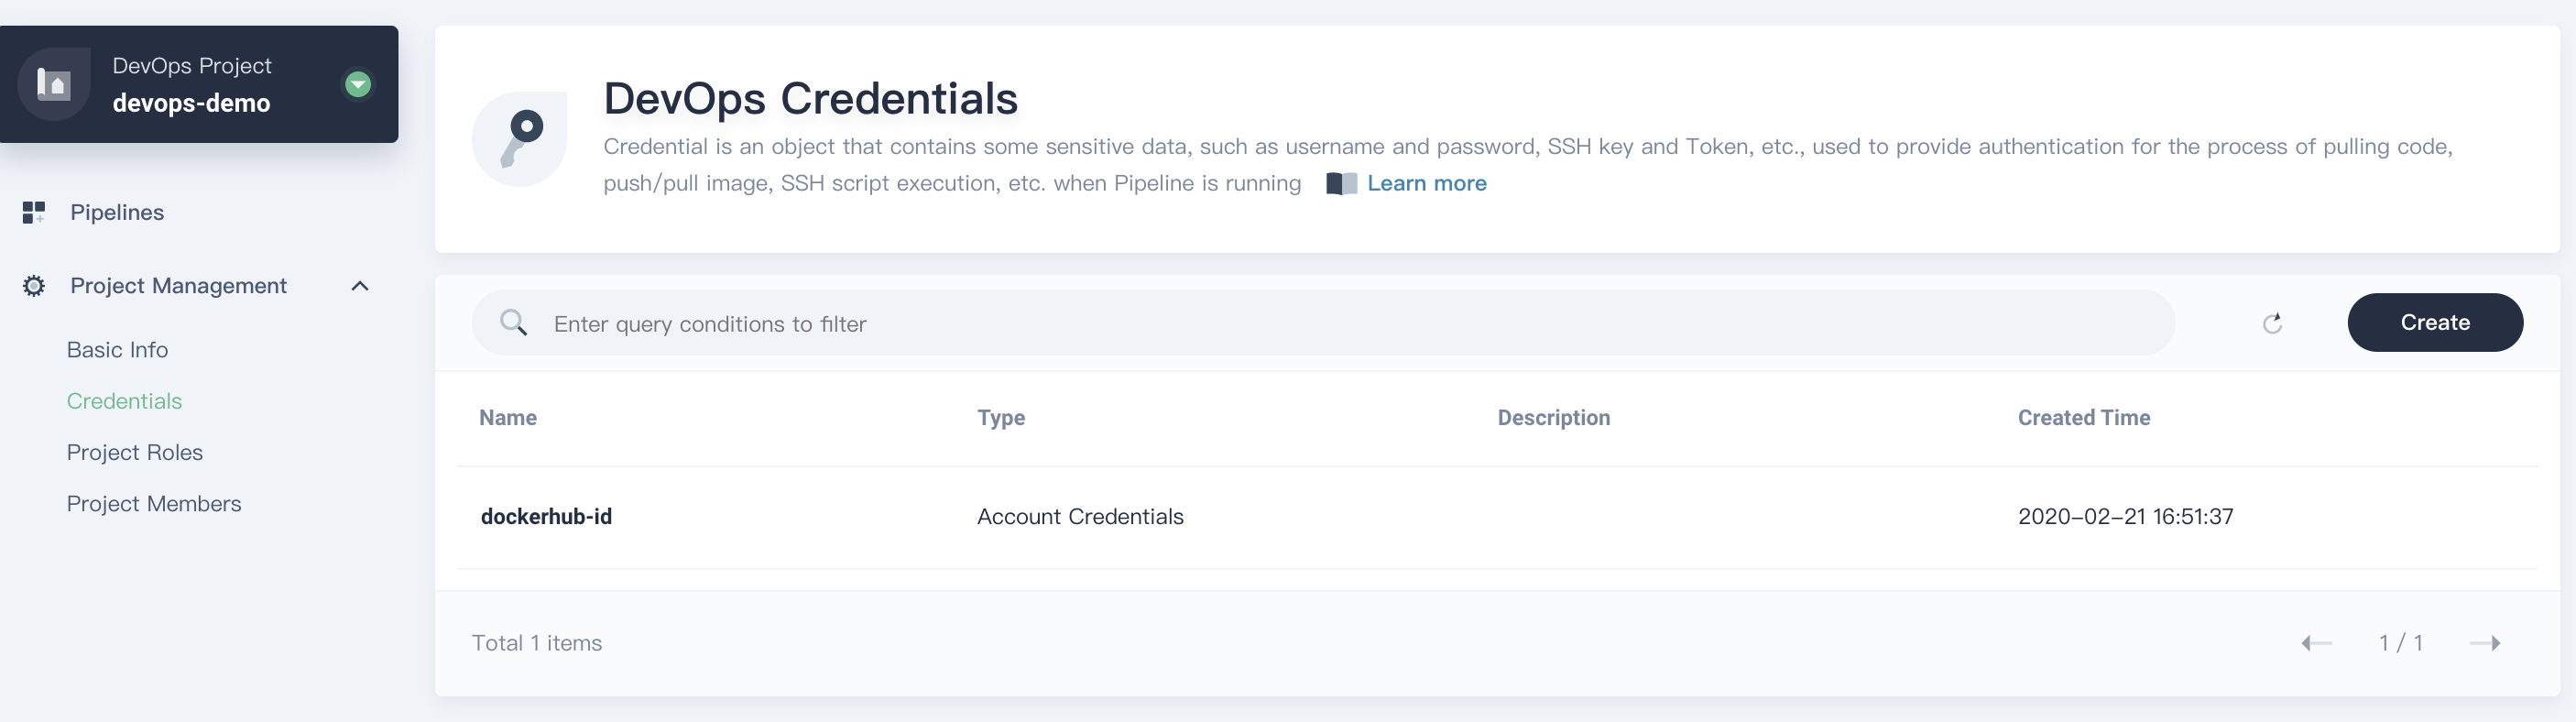
- Then you can see this credential has been created successully.
Create Credential for GitHub
Similarly, we create a GitHub Credential and name it github-id, choose Account Credentials, others are the same with above.
Note: If there is any special characters includes
@$, it may cause unrecognizable error. You need to encode your account or password through third-party website, e.g. urlencoder, please convert it and paste to KubeSphere console.
Create KubeConfig Credential
The same as above, create a Credential, name it demo-kubeconfig, choose kubeconfig, click Create to complete creation.
Note: A file that is used to configure access to clusters is called a kubeconfig file. Thus we create the kubeconfig credential to access the current Kubernetes cluster, which will be used in pipeline. You don't need to change the file since KubeSphere will automatically load the kubeconfig of the current Kubernetes cluster. On the contrary, you may need to change kubeconfig in KubeSphere when access other cluster.
At this point, you can return to the quick start guides to complete the rest steps.
Using the Credential
- When you creating a Pipeline, click on Code Repository.
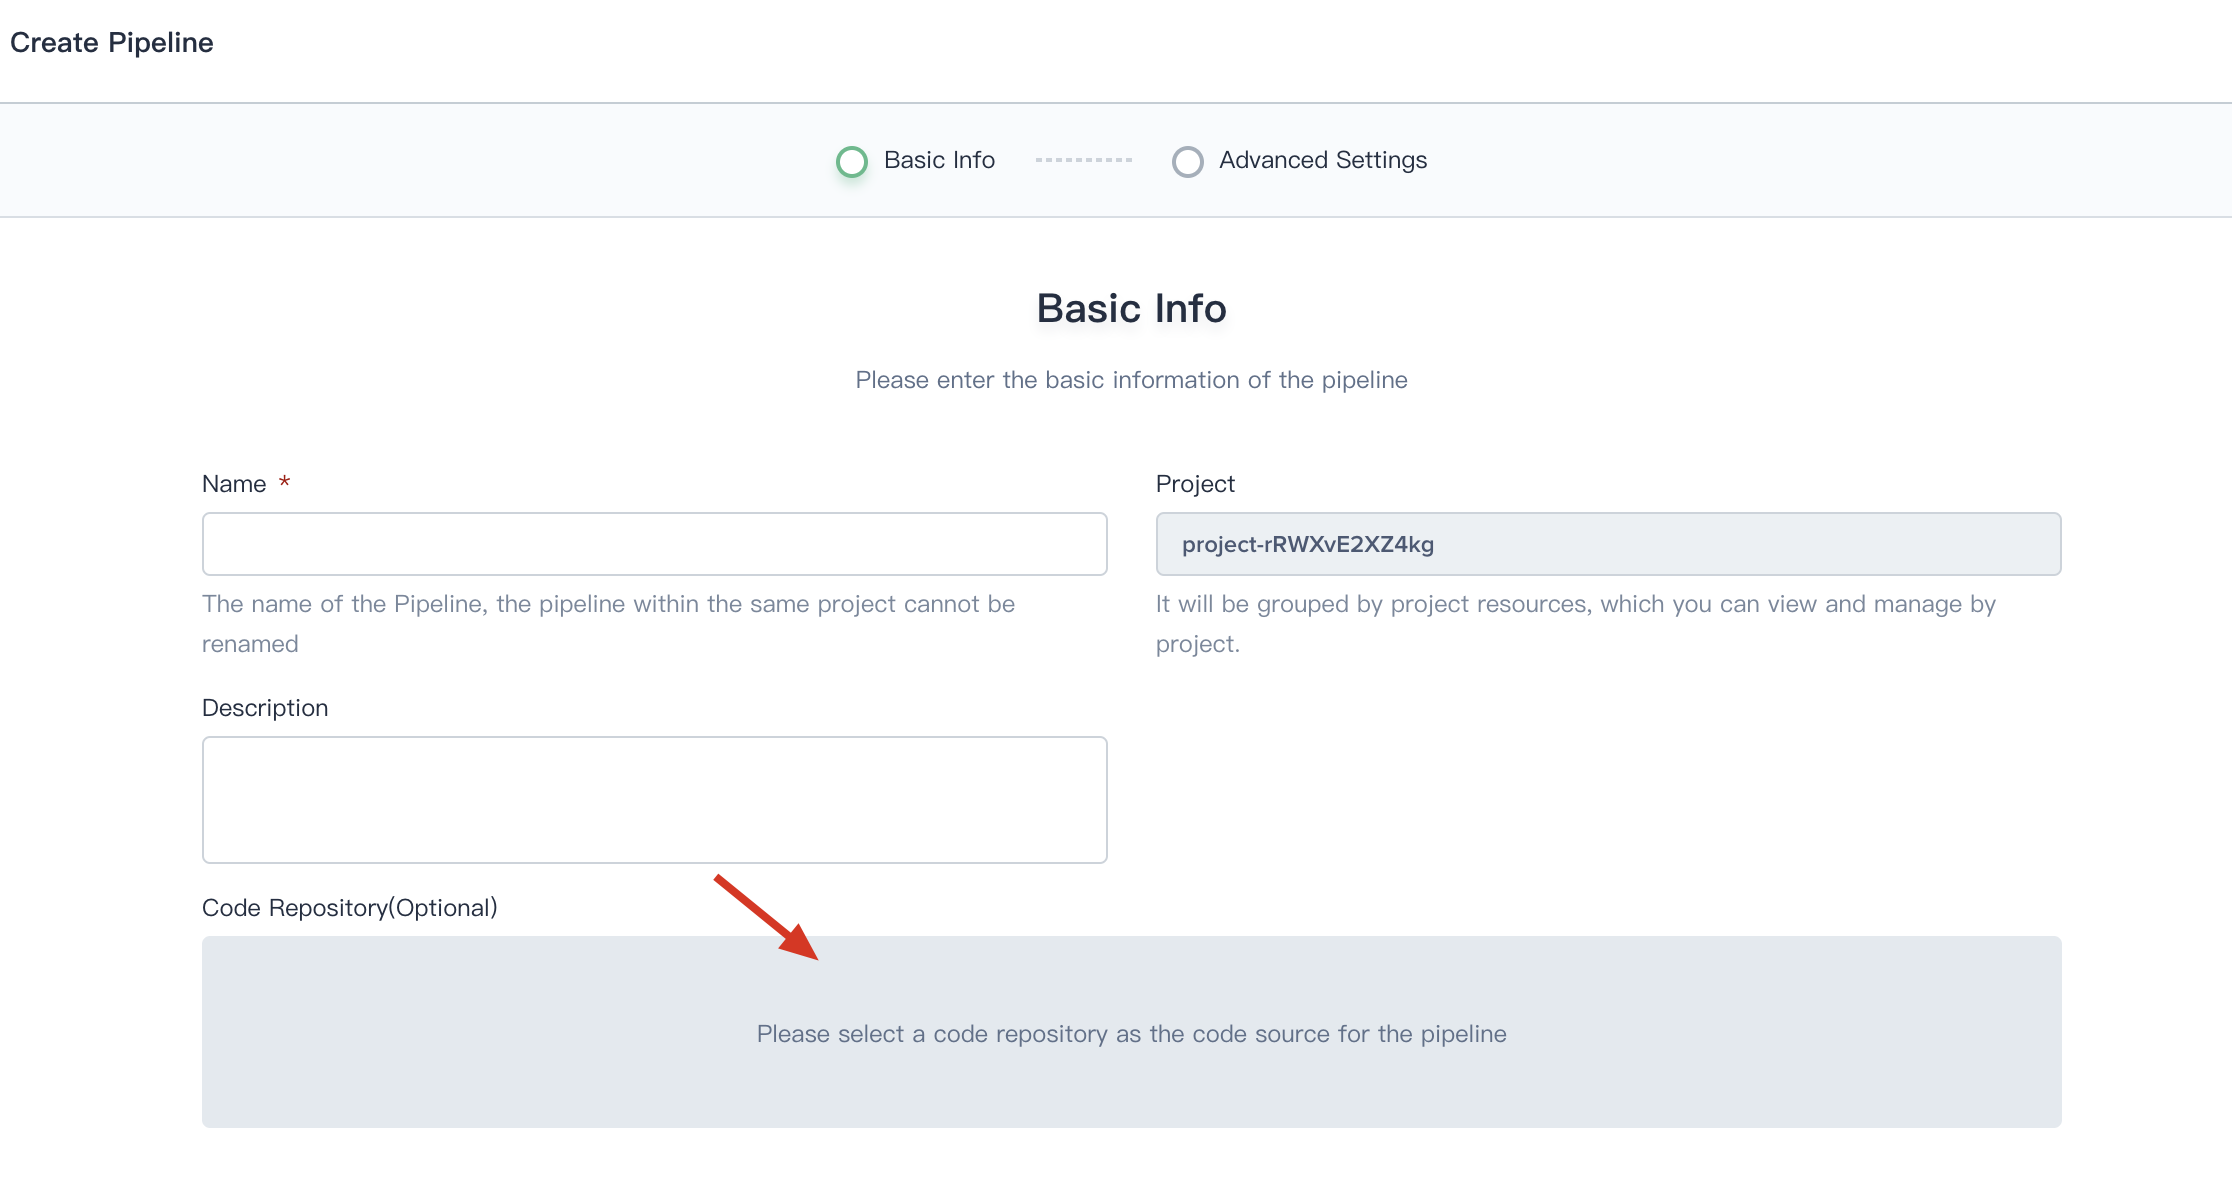
- Choose Git, then select gitlab-id that we created at the last step. Thus you can use it directly.
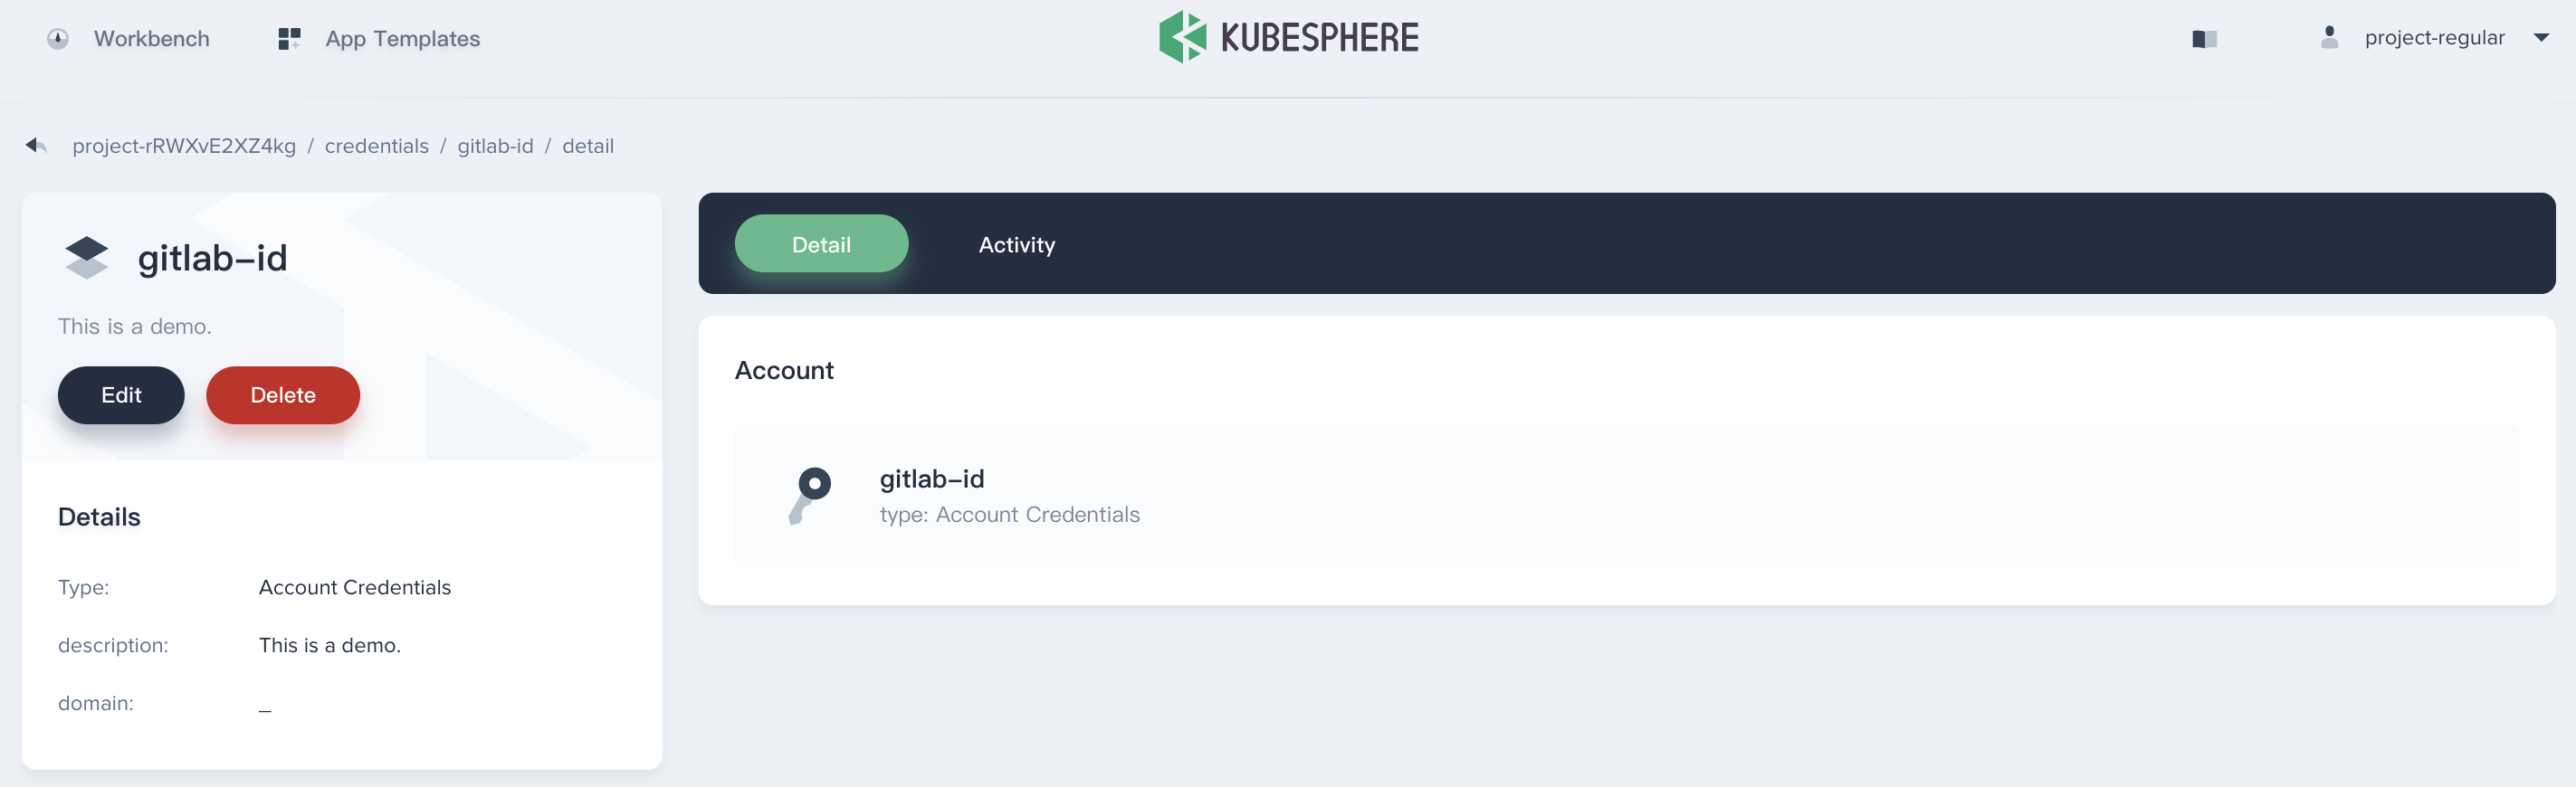
Manage the Credential
Enter this credential's details page, then you can edit its information or delete it.