Release Notes
Installation
Install on Linux
Install on Kubernetes
Pluggable Components
Upgrade
Third-Party Tools
Authentication Integration
Cluster Operations
Quick Start
DevOps
User Guide
Configration Center
Logging
Developer Guide
API Documentation
Troubleshooting
FAQ
Image Registry
EditA Docker image is a read-only template that can be used to deploy container services, each with a specific unique identifier (i.e. Image name:Tag). For example, an image can contain a full Ubuntu operating system environment with only Apache or other applications that users need. The image registry is used to store and distribute Docker images.
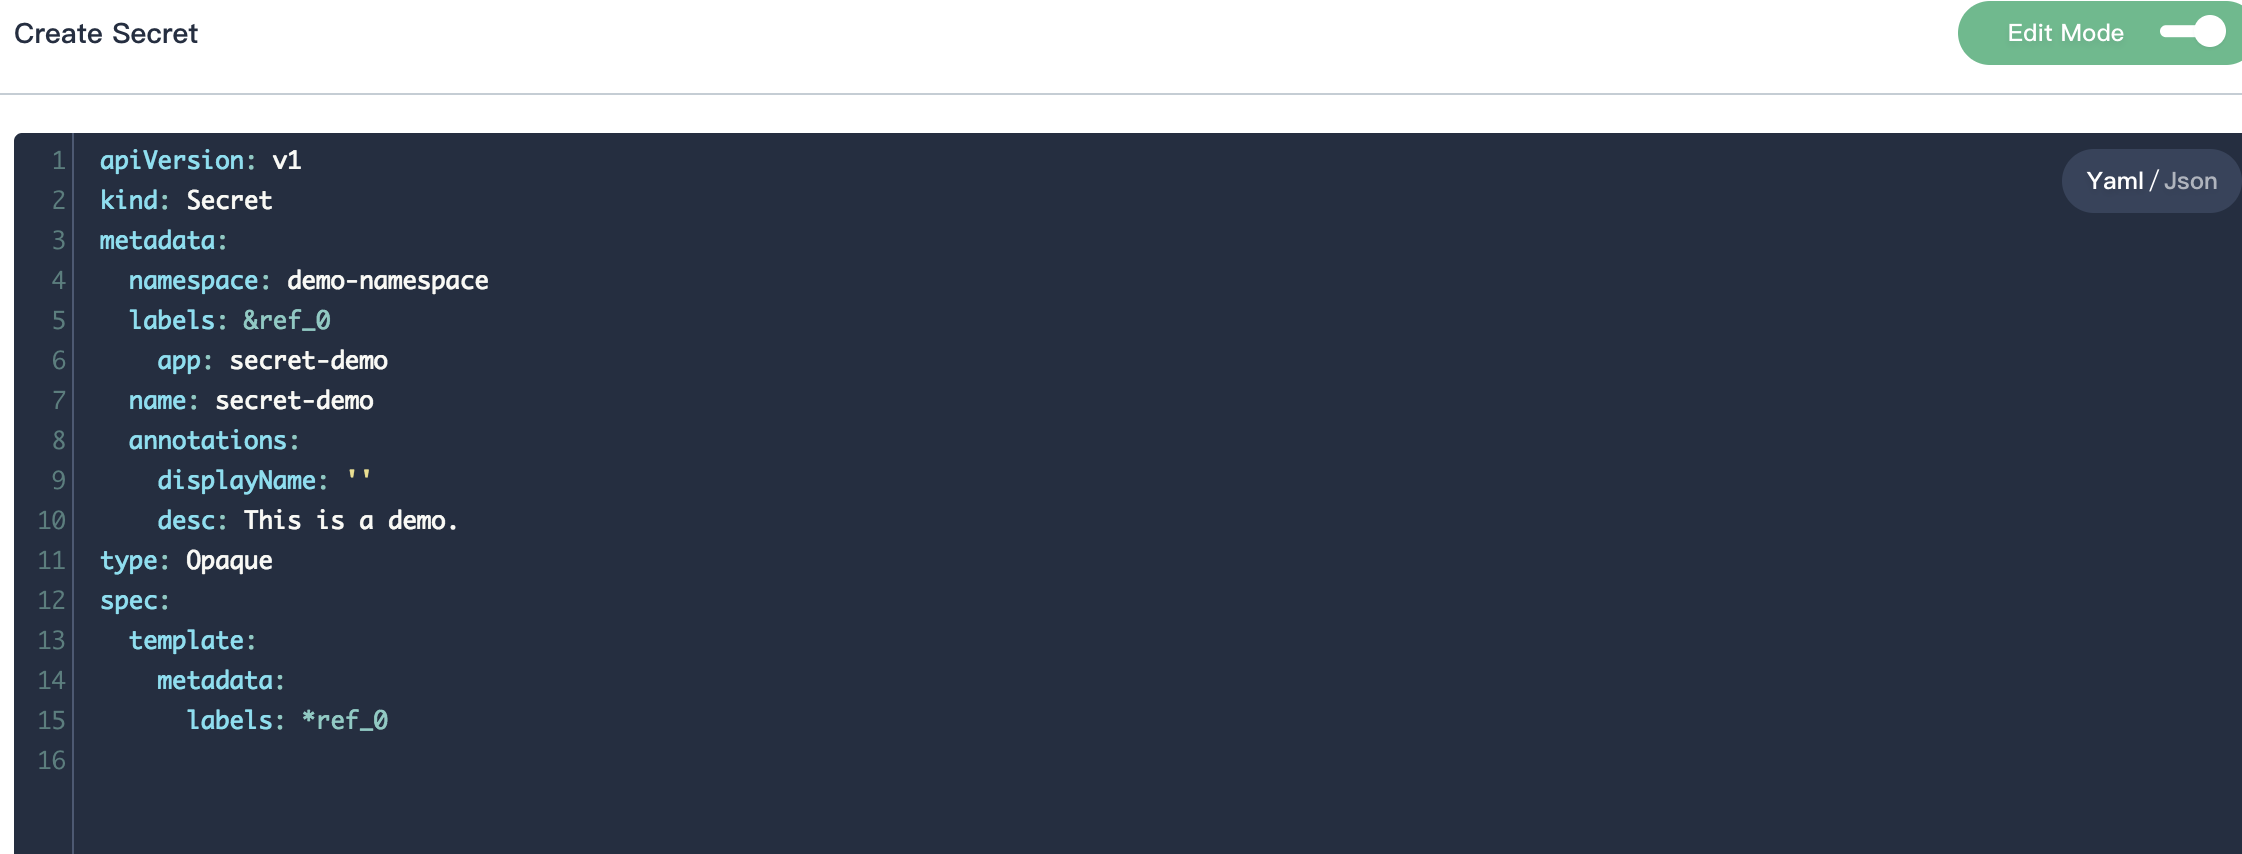
Create a Secret
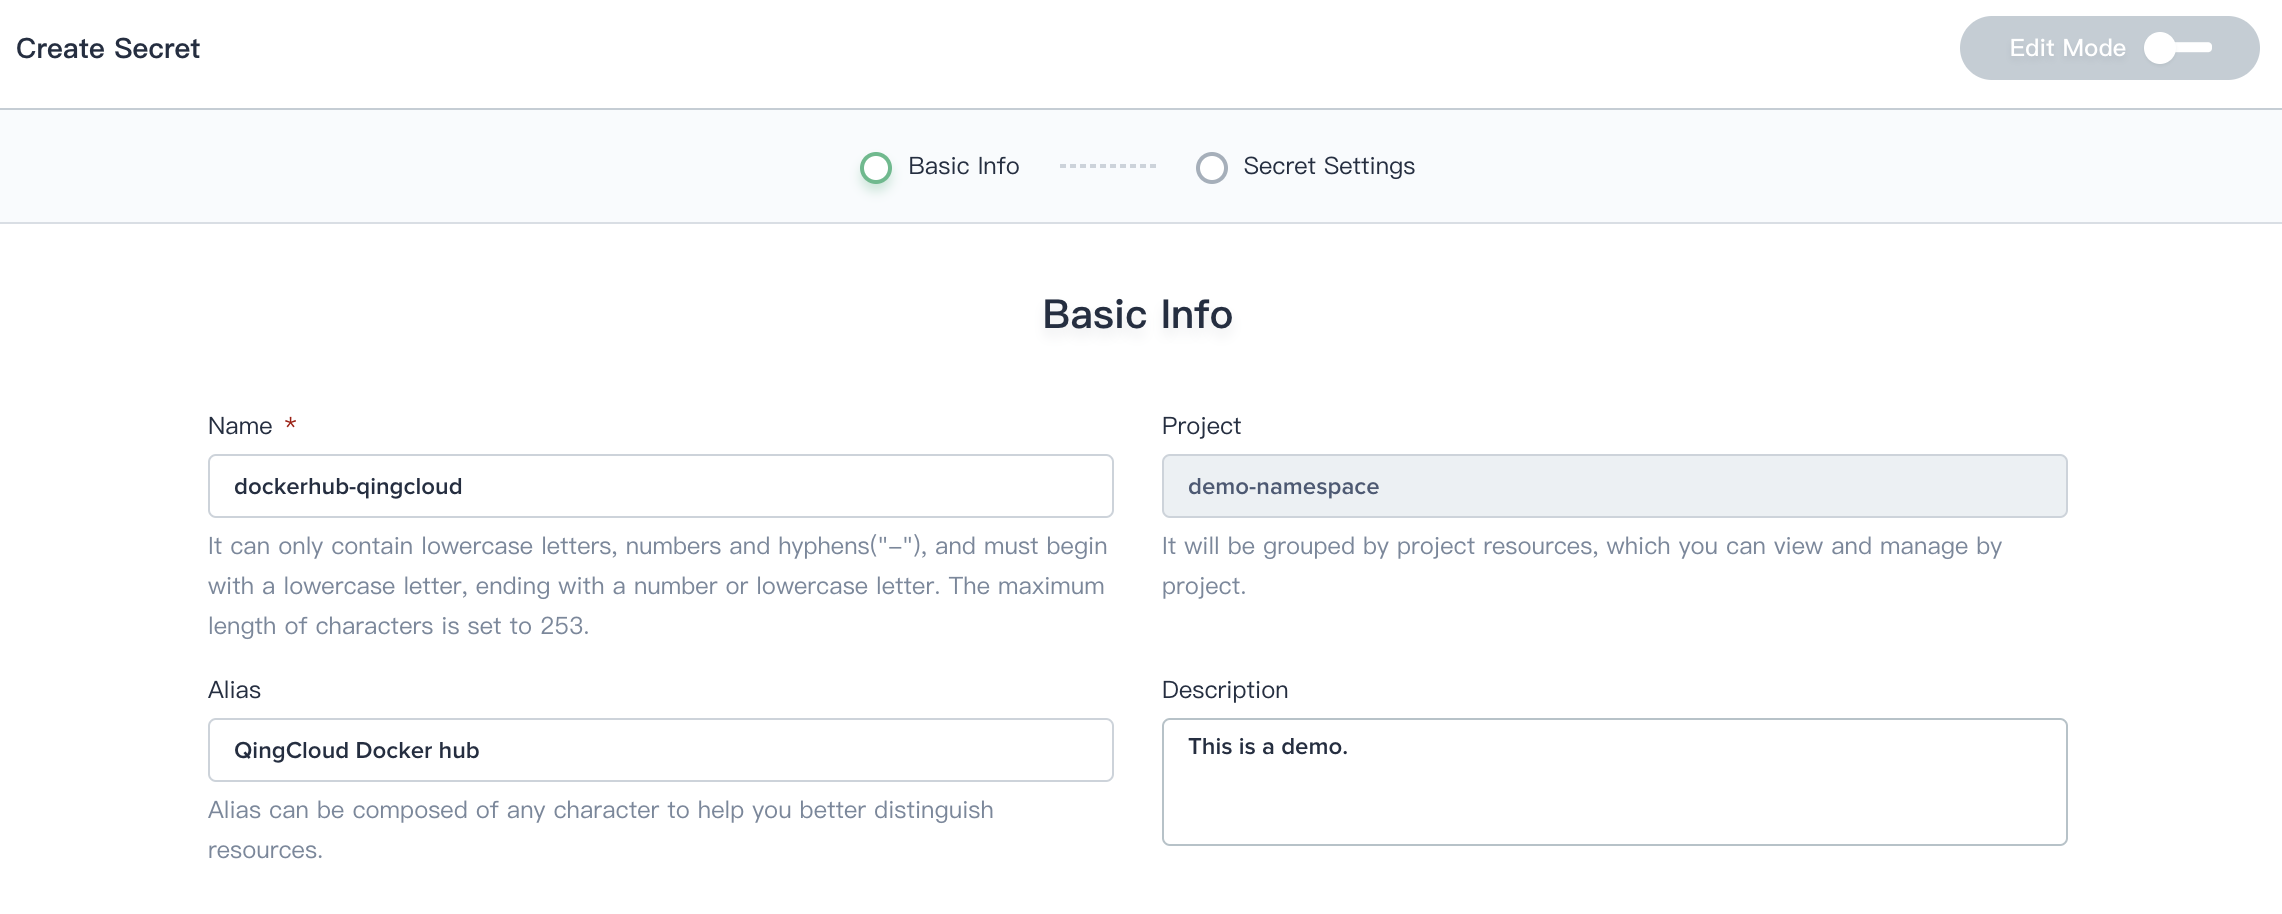
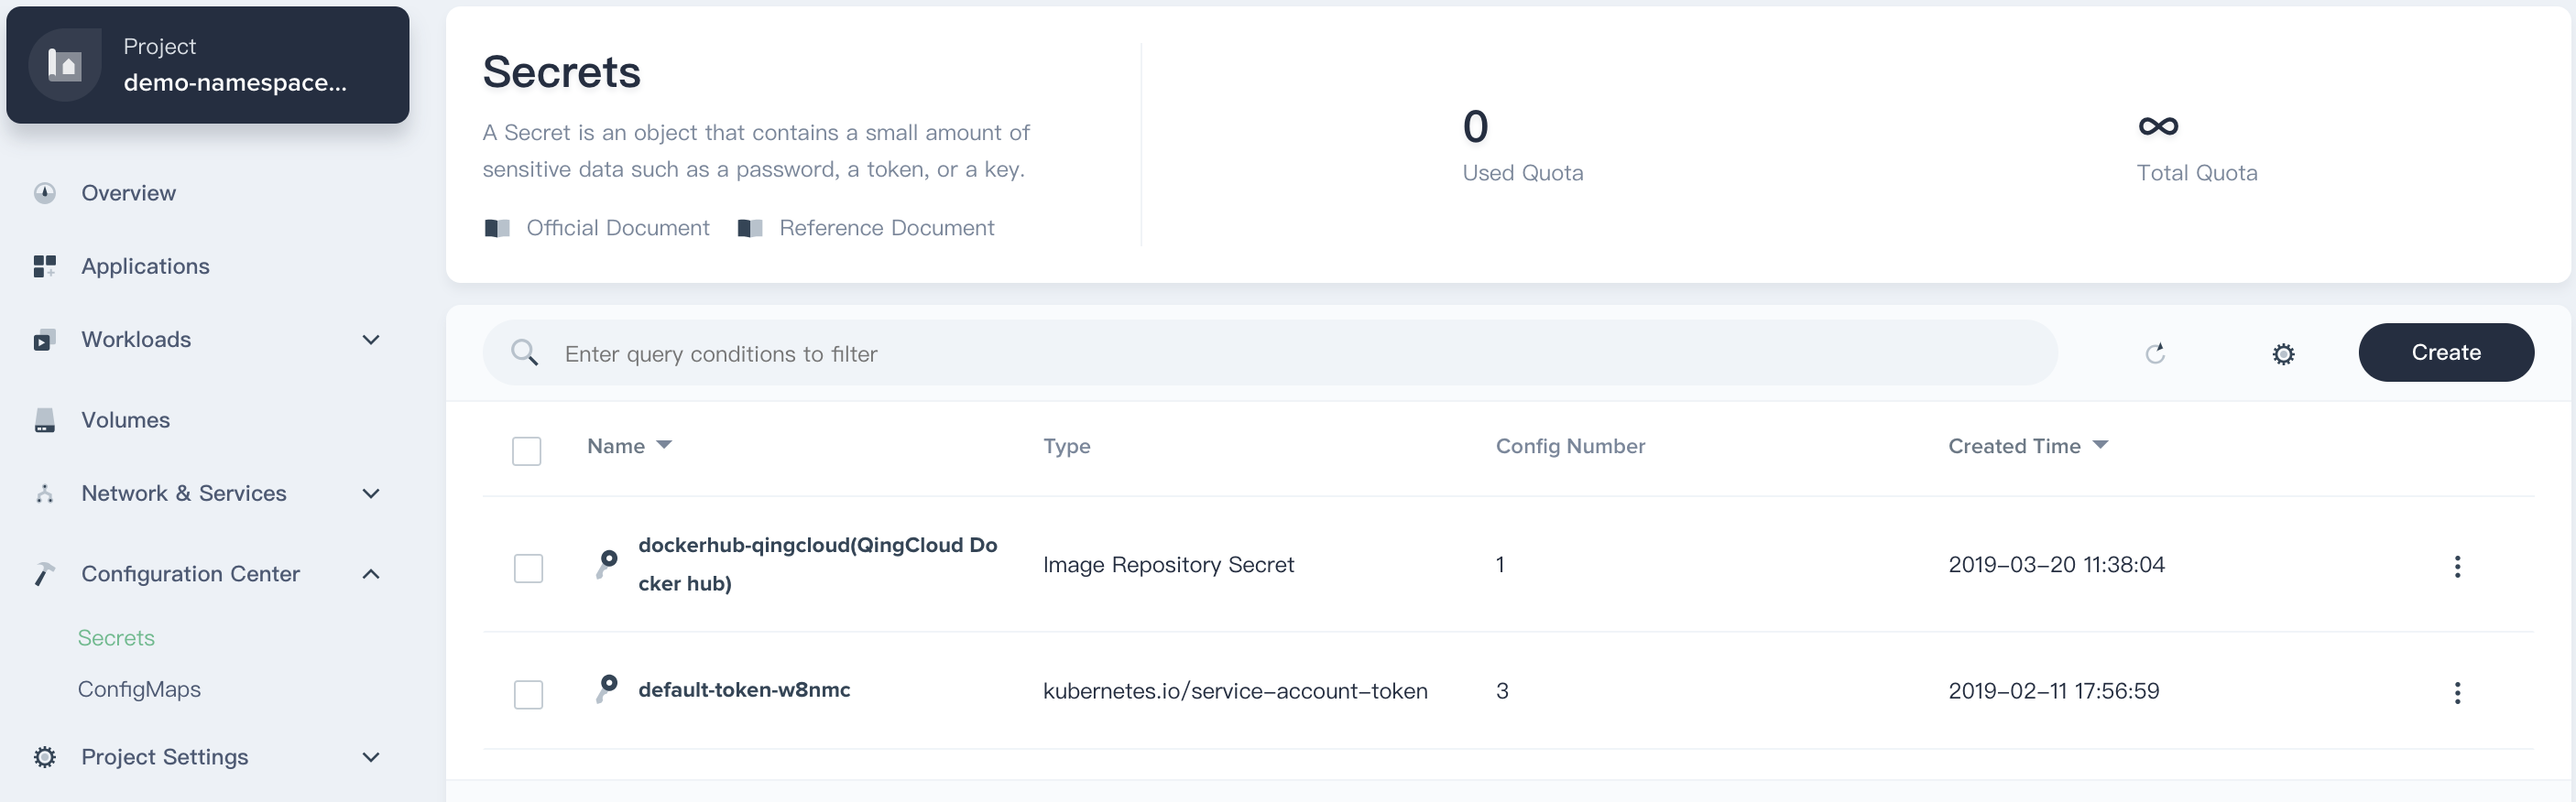
Sign in with project-regular, enter into one project (e.g. demo-namespace), then select Configuration Center → Secrets.
Click Create Secret button, then fill in the basic information in the pop-up window.
Add the QingCloud Docker Hub
- On the basic information page, enter the name of the QingCloud Docker Hub, you can also fill in the description as your needs.
- Name: A concise and clear name for this registry, which is convenient for users to browse and search, e.g.
dockerhub-qingcloud. - Alias: Helps you better distinguish resources and supports Chinese.
- Description: A brief introduction to registry.
Click Next when you're done.
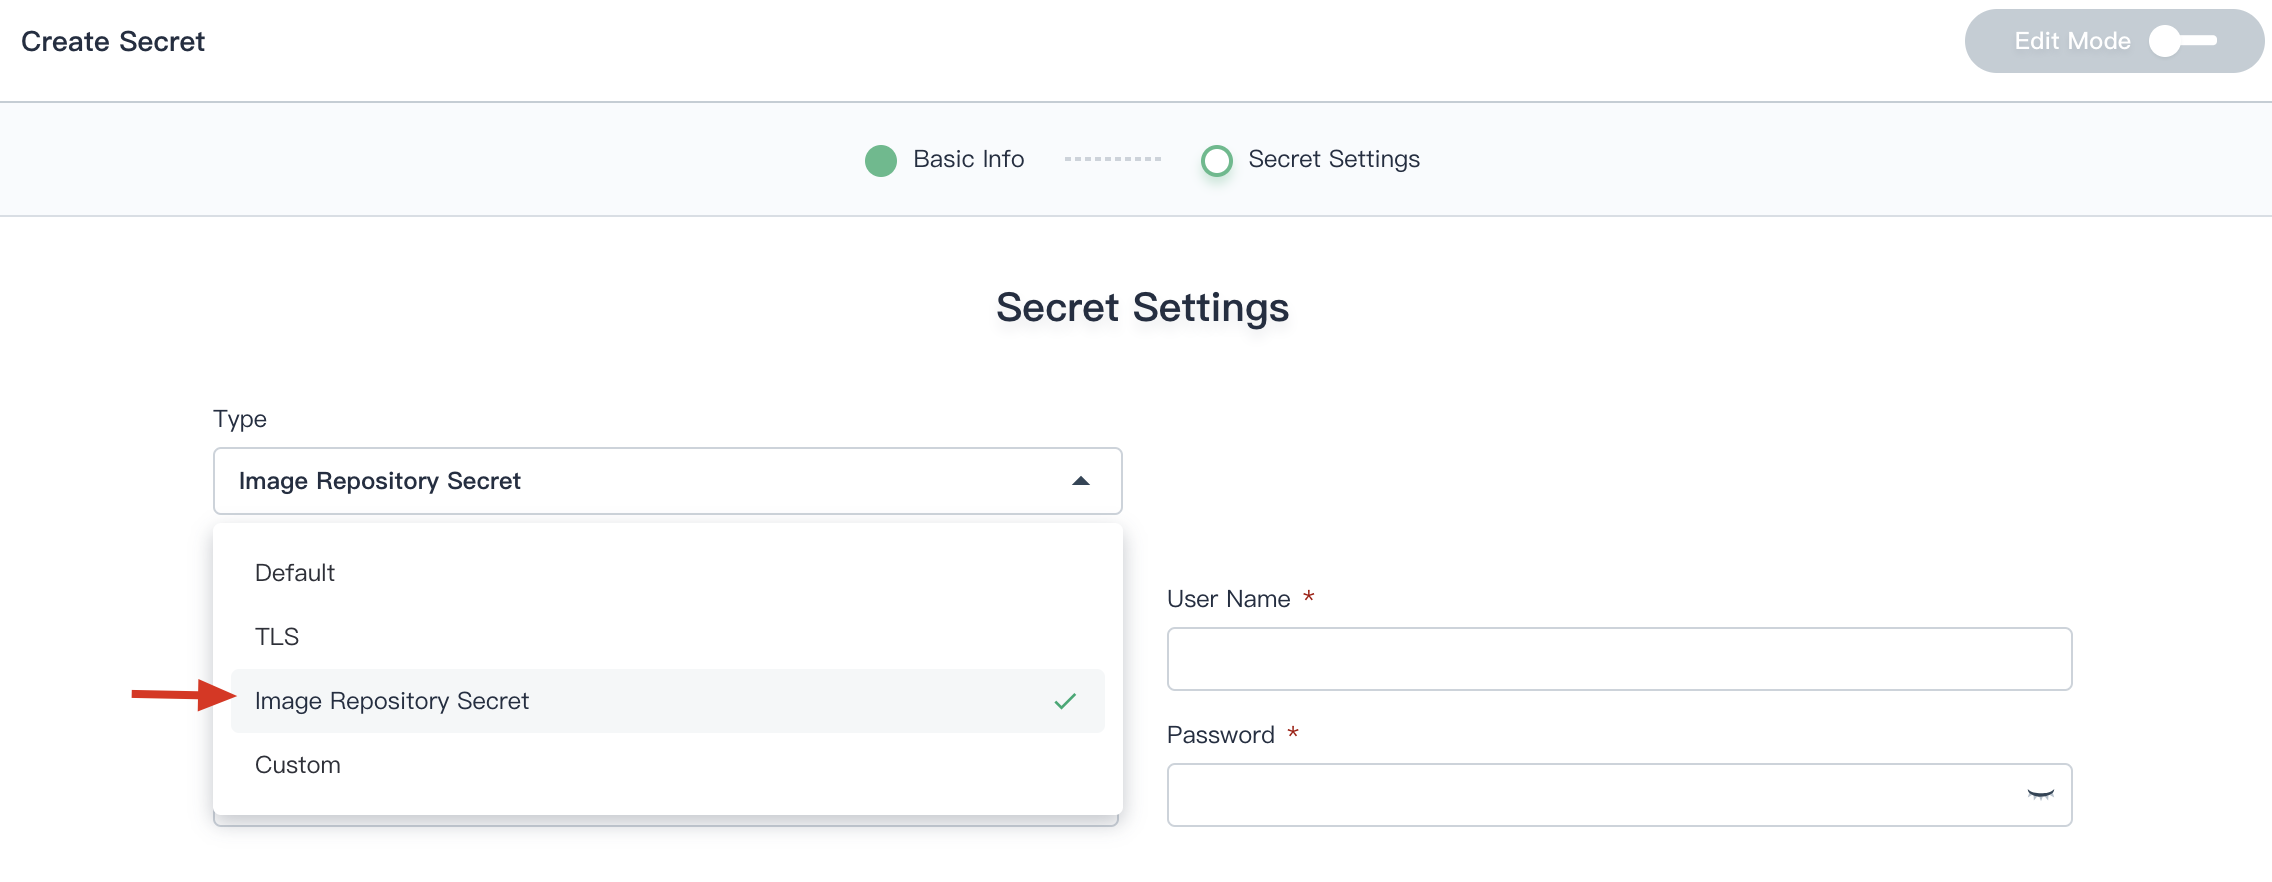
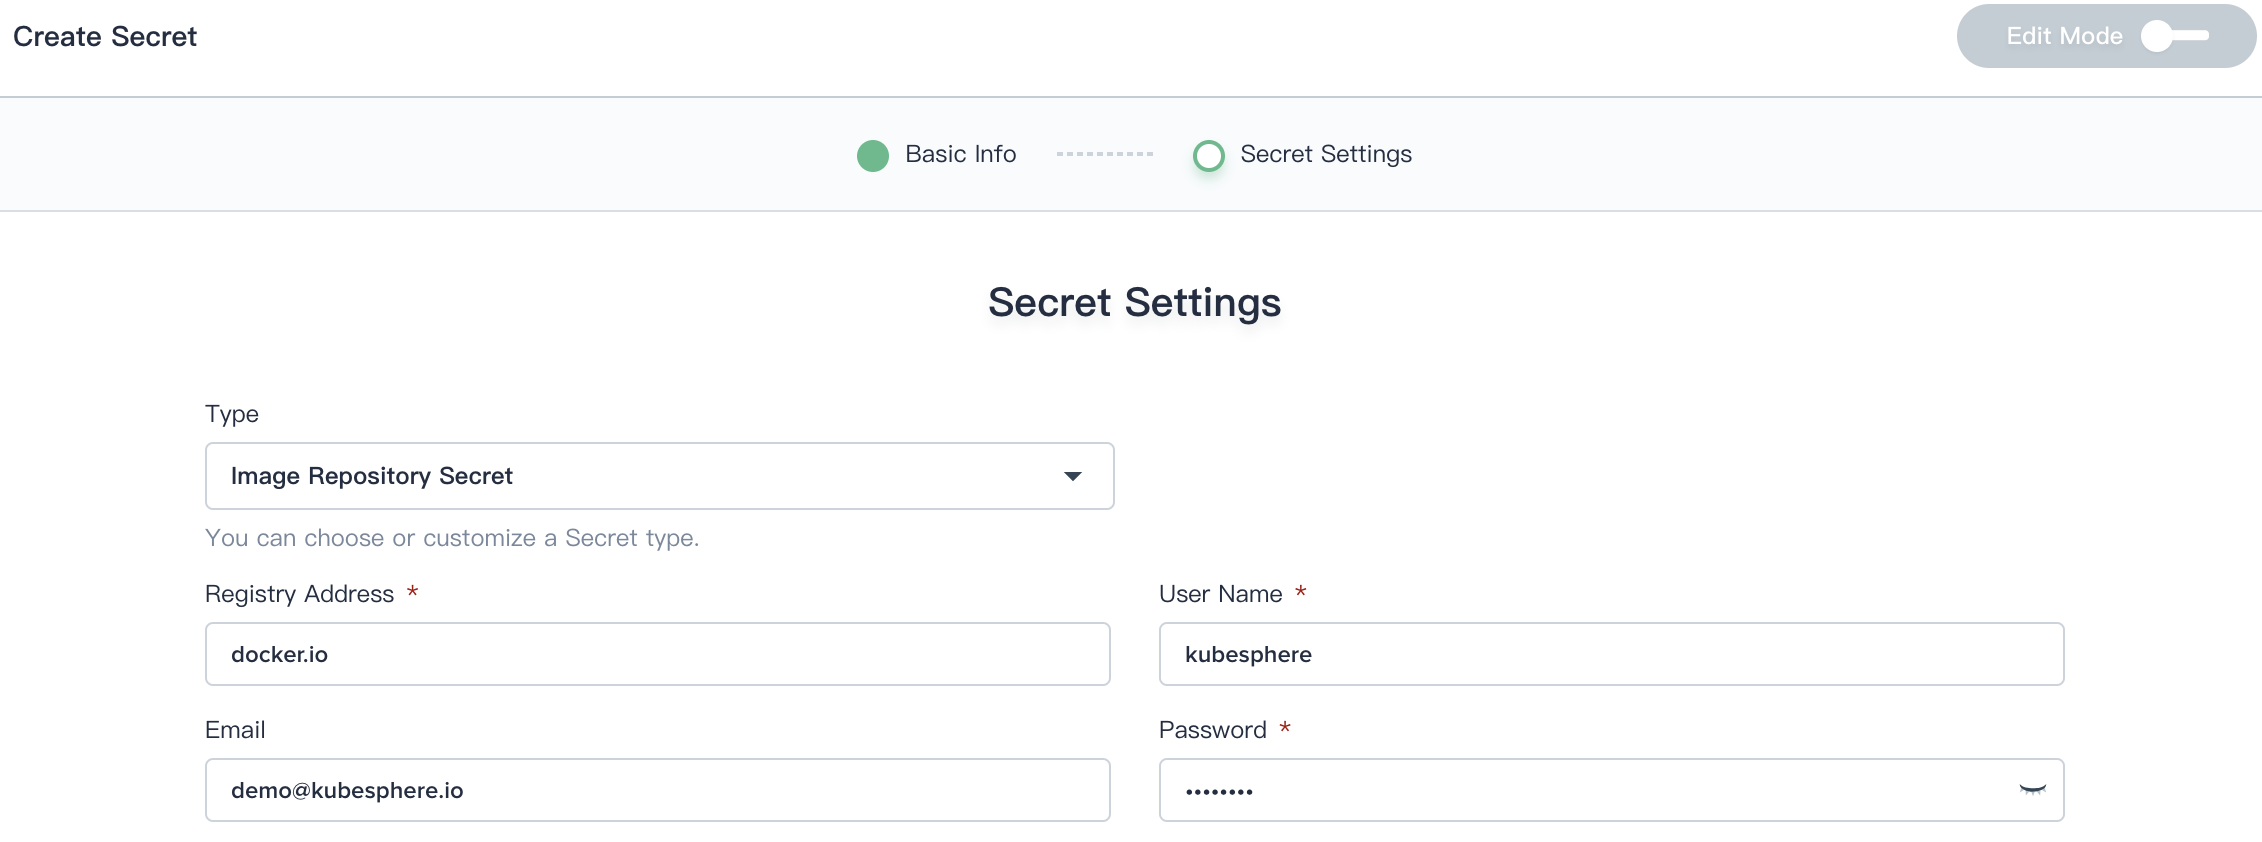
- In the Secret Settings table, select
Image Repository Secretas the type, then fill in the account authentication information of the image registry.
- Registry Address: Use QingCloud image registry address
dockerhub.qingcloud.comas an example. - Username/Password: Enter guest / guest
- Email: Fill in your personal email address
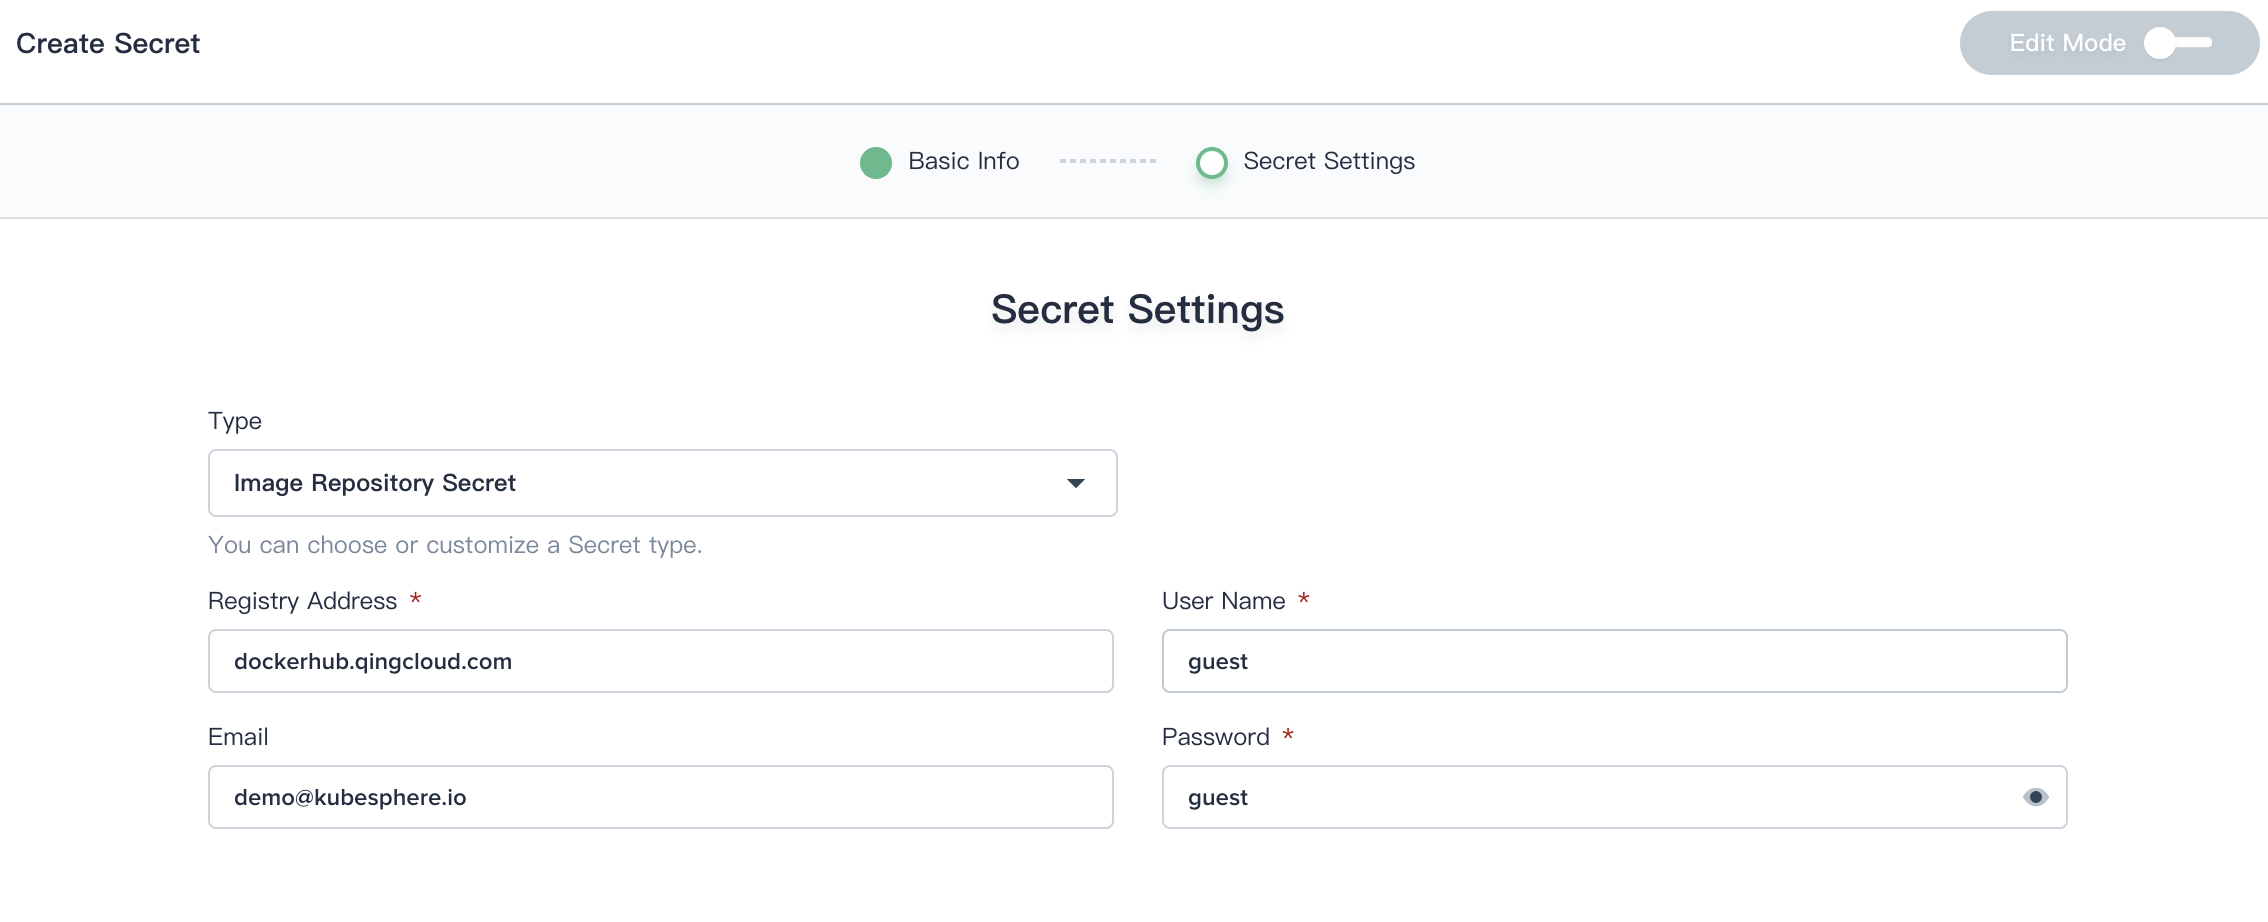
- Click Create, then redirect to the secrets list to view the creation results.
Add the Docker Hub
If you need to add Dokcer Hub as the image registry, first make sure you have already registered your account in Docker Hub. Then reference the same steps as above, fill in docker.io as the image registry address, and enter your personal DockerHub username and password.
Add the Harbor
Intro
Harbor is an an open source trusted cloud native registry project that stores, signs, and scans content. Harbor extends the open source Docker Distribution by adding the functionalities usually required by users such as security, identity and management.
Connect the External Harbor
According to the address type of the Harbor, you need to divide into http and https:
http
- You need to modify the Docker configuration in all nodes of the cluster. For example, if there is an external harbor registry and its IP is
http://192.168.0.99, then you need to add a field as--insecure-registry=192.168.0.99into/etc/systemd/system/docker.service.d/docker-options.conf.
Example
[Service]
Environment="DOCKER_OPTS=--registry-mirror=https://registry.docker-cn.com --insecure-registry=10.233.0.0/18 --data-root=/var/lib/docker --log-opt max-size=50m --log-opt max-file=5 \
--insecure-registry=192.168.0.99"
Here, the Environment string represents the dockerd options.
--insecure-registry: In order to communicate with an insecure registry, the Docker daemon requires --insecure-registry fields. Refer to the docker docs for its syntax.
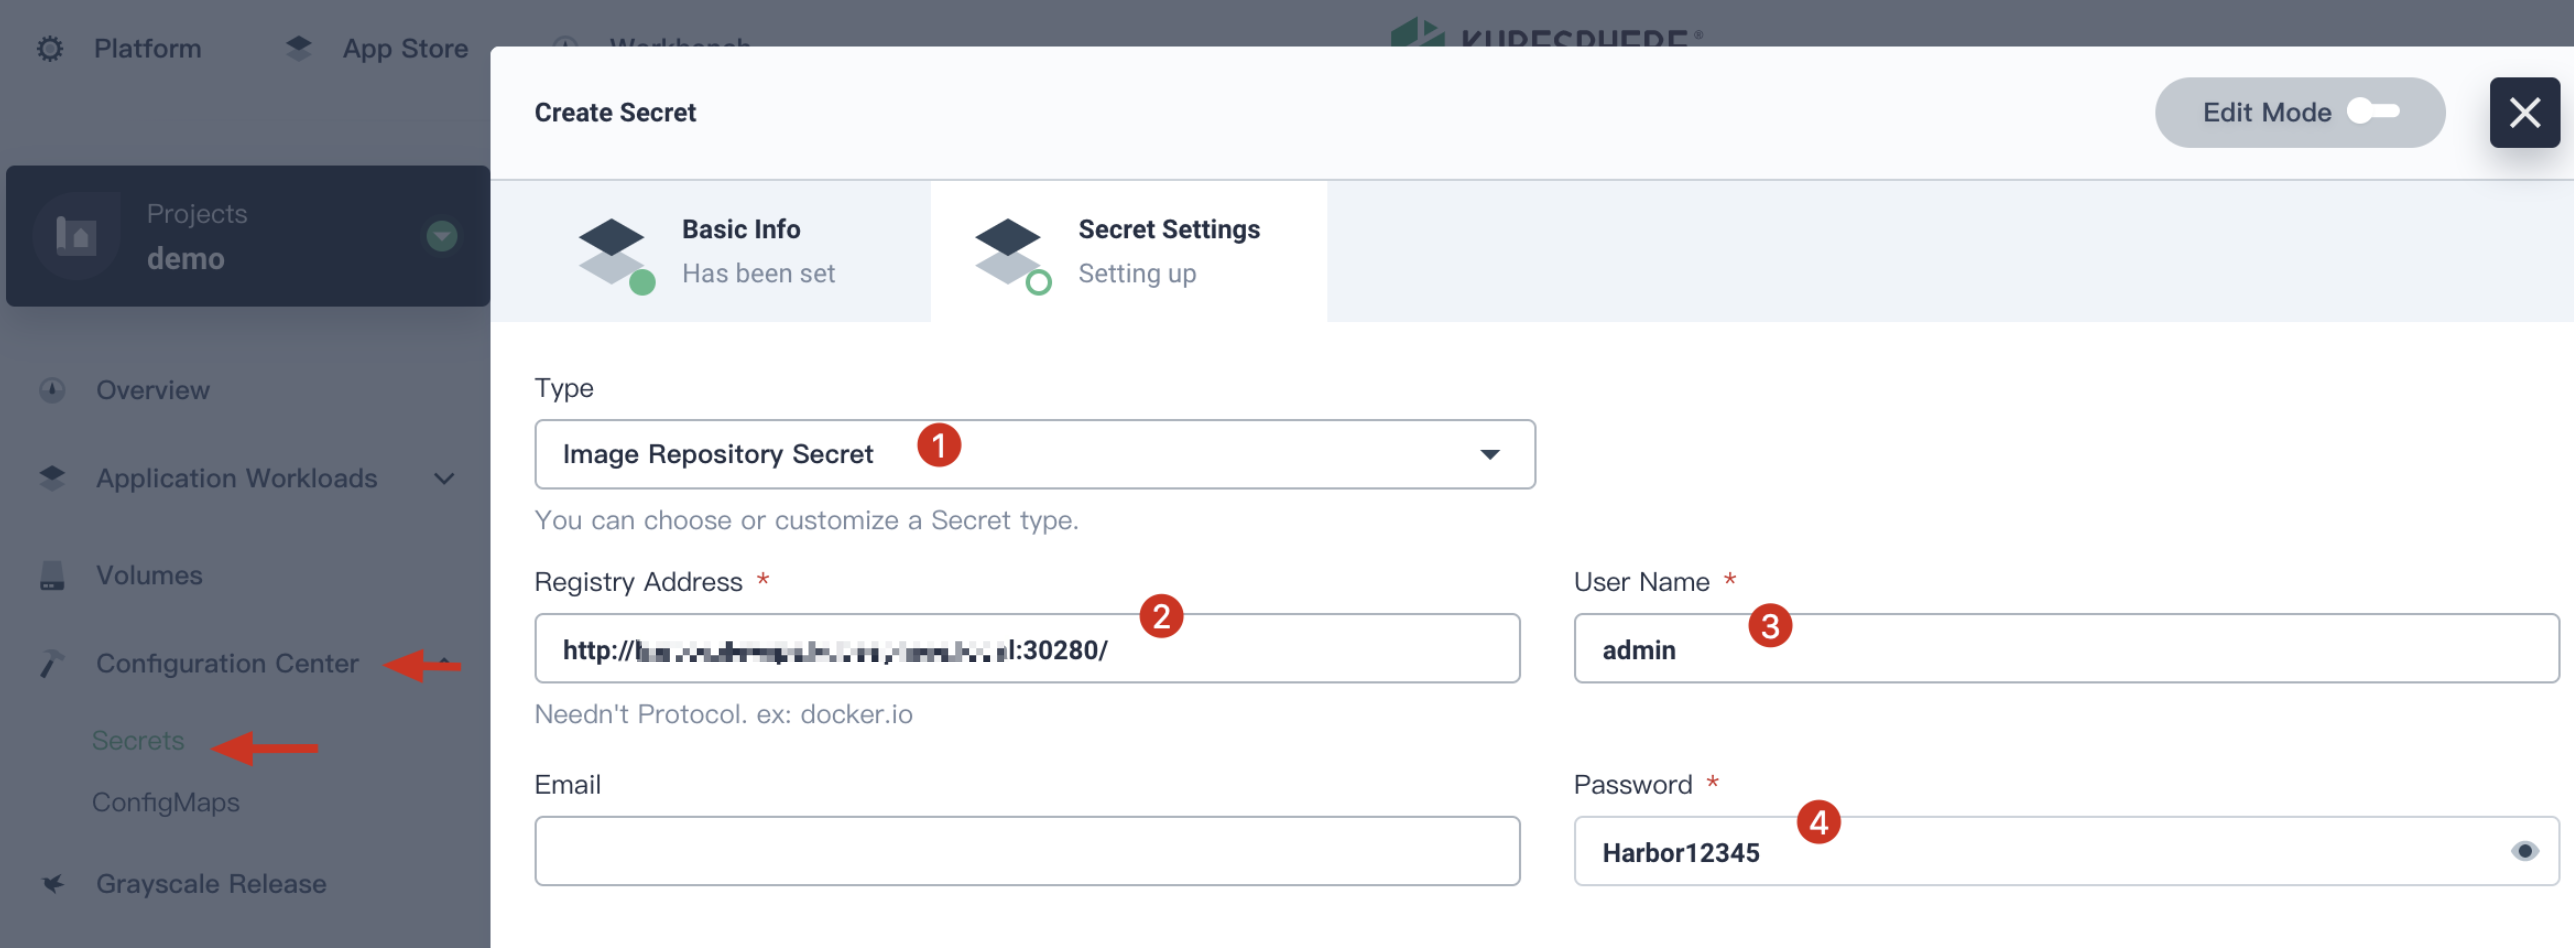
- Next, you need to reload the configuration file and restart Docker:
$ sudo systemctl daemon-reload$ sudo systemctl restart docker- Log in KubeSphere, enter a project, navigate to Configuration → Secret, create a secret by choosing
Image Repositry Secret, fill in theRegistry Addresswith your Harbor IP.
- If you want to use the domain name instead of IP with Harbor, you may need to configure the CoreDNS and nodelcaldns within the K8s cluster, then follow with the above to create a secret.
https
As for https type of Harbor registry, you can refer to Harbor Documentation, make sure you use docker login to connect with your Harbor.
Then you follow all the steps from the above http section to finish the configuration.
Using a Image Registry
Take the creation of a deployment as an example to demonstrate how to use the image registry and pull images from the registry. For example, there is a image mysql:5.6 in QingCloud image registry. When creating a Deployment, enter dockerhub.qingcloud.com/mysql:5.6 in the Pod template, the format is image registry address:tag, this image could be pulled from the pointed registry after the workload has been created.